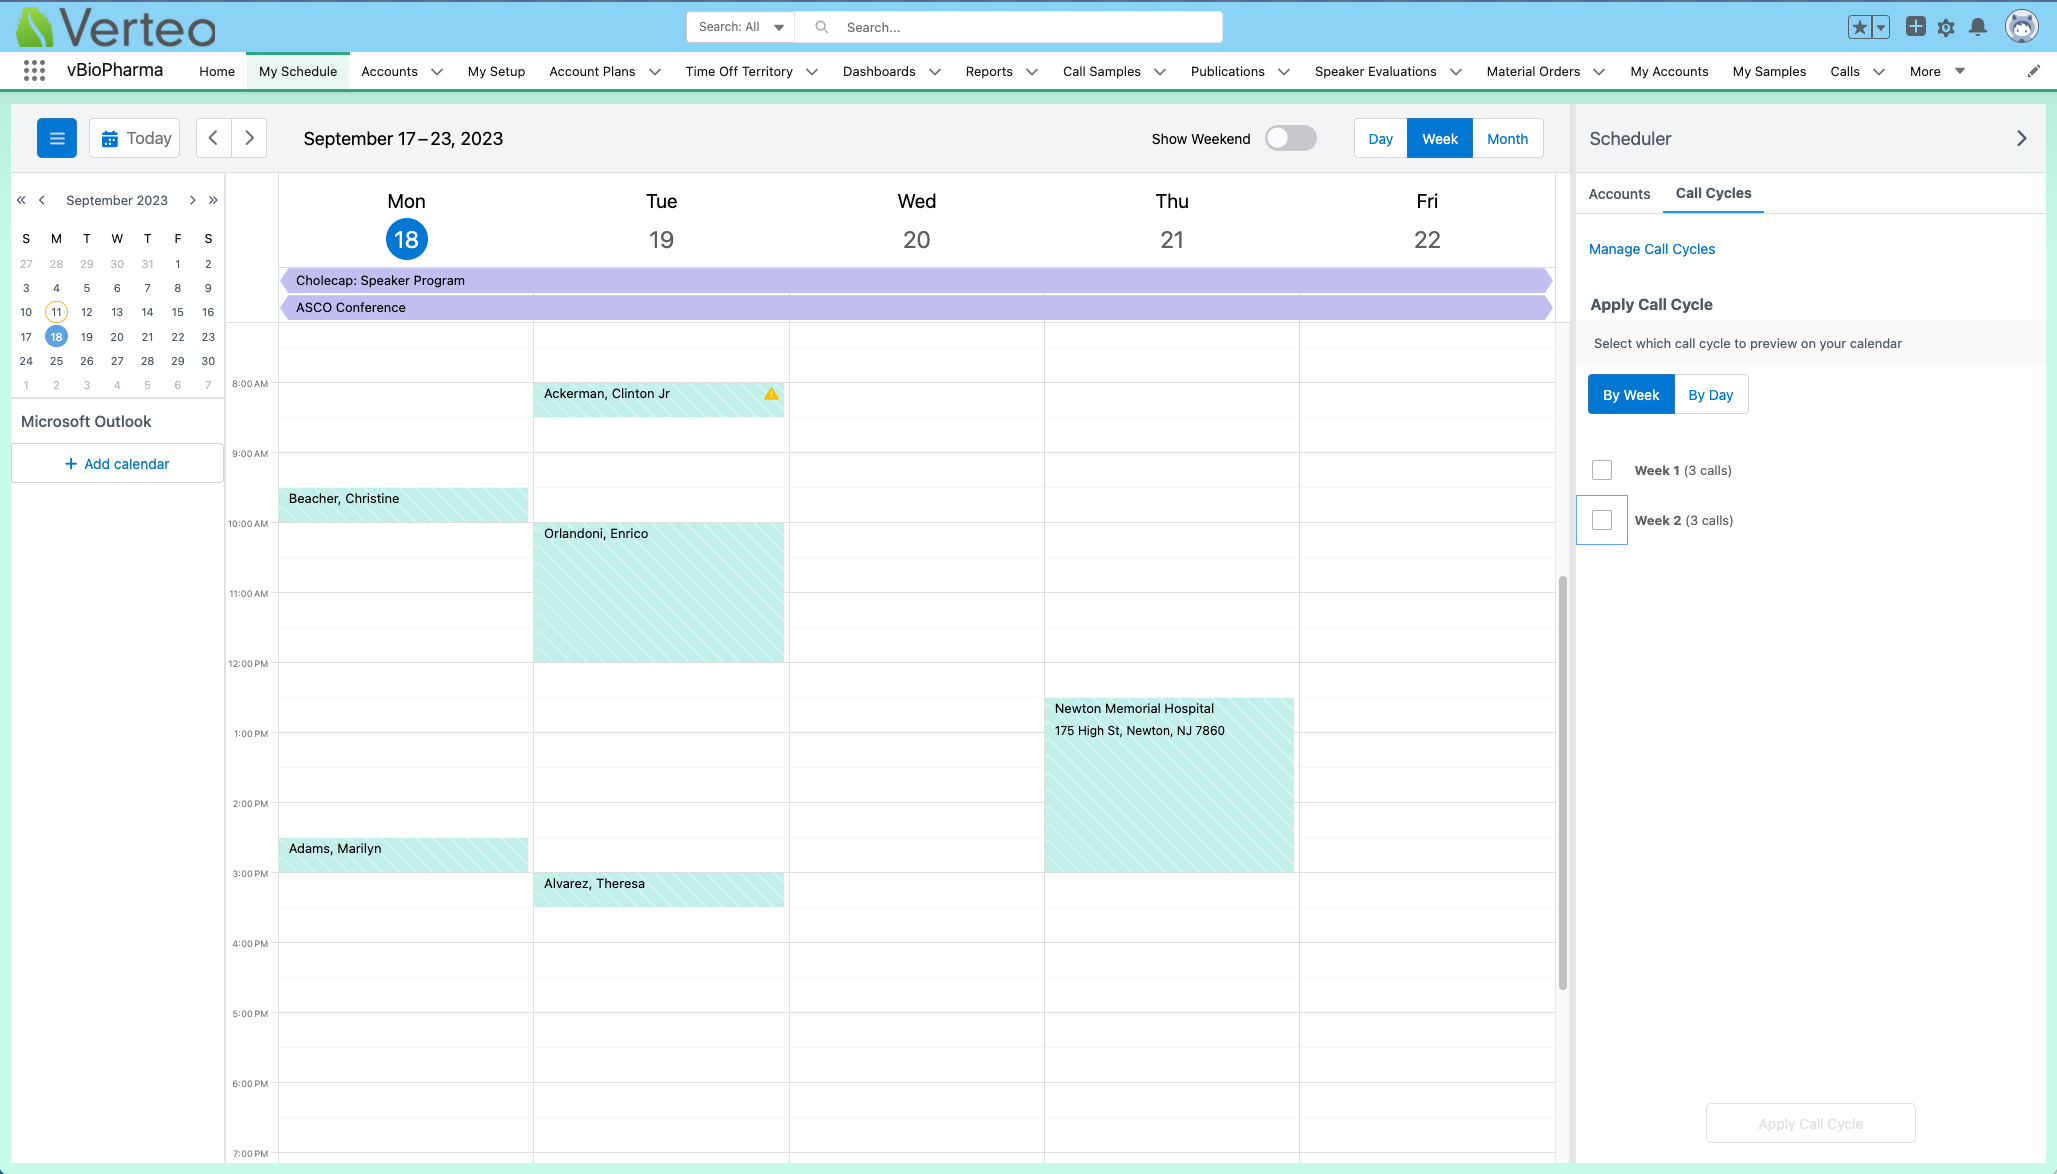
Lightning for My Schedule
- Browser
Lightning for My Schedule provides users with improved performance and an enhanced Lightning UI. Once configured, users can access the following core functionality in Lightning for My Schedule:
- Scheduling Calls
- Scheduling a Call from a Suggestion
- Displaying Call Conflict Warnings
- Viewing and Searching Accounts in My Schedule
- Using Classic Cycle Plans in My Schedule
- Viewing Users' Calendars with Manager View
- Creating Unavailable Time Slots in My Schedule
- Creating Time Off Territory in My Schedule
- Creating Unavailable Time Slots from Time Off Territory
- Including Weekend Days in Time Off Territory
- Managing Call Cycles
- Associating Accounts with Tracked CLM Activity
- Integrating My Schedule and Microsoft Outlook Calendars
- Users can view and edit the following entry types:
- Calls
- Calendar Entries
- Time Off Territory
- Medical Events
- Unavailable Time Slots - new with Lightning for My Schedule
- Users can view and action the following entry types:
- Unassigned Presentations - new with Lightning for My Schedule
- Meeting Requests - new with Lightning for My Schedule
- Users can view the following entry types:
- Events Management events
- Outlook Calendar entries - new with Lightning for My Schedule
For more details, see Functionality and Using Lightning for My Schedule.
Lightning Web Security for Lightning web components is not supported. To check whether Lightning Web Security is enabled, refer to the Session Settings found under Setup in your org.
Configuring Lightning for My Schedule
Ensure My Schedule is configured for Browser before enabling this functionality.
- Remove access to the CallPlanningLgtnVod Visualforce page and tab for users and admins.
- Grant users and admins access to the My_Schedule_vod Lightning Component Tab.
-
Add the My_Schedule_vod Lightning tab to the navigation menu for any Lightning Console Apps your organization configured, if your organization uses Lightning console mode.
-
Add the My_Schedule_vod Lightning tab to the navigation bar for any Lightning Business Apps your organization configured (optional).
Functionality
Users can access much of the same core functionality in Lightning for My Schedule as they did before. However, some existing My Schedule functionality is not supported in the current version of Lightning for My Schedule, and new functionality is available in Lightning.
For an overview of the differences in supported functionality between the existing My Schedule and Lightning for My Schedule, see the following table:
|
Functionality |
Supported in existing My Schedule |
Supported in Lightning for My Schedule |
|---|---|---|
|
|
|
|
|
Editing Entries Within My Schedule for:
|

|

|

|

|
|

|

|
|

|

|
|
|
Integrated Scheduling: Accepting and Declining Meeting Requests in My Schedule |

|

|
|
Creating, viewing, and editing Unavailable Time Slots |

|

|
|
|
|
|

|

|
|
|
|
|
|
|
|
|
|
|
Creating new calendar entries |

|
 * * |
|
Deleting calendar entries or Time Off Territory |

|
 * * |
|
Rescheduling calendar entries |

|

|
|
Custom filtering and display-by functionality:
|

|

|

|

|
|

|

|
|

|

|
|
|
Viewing Pre-Call and Next-Call Notes in Agenda View |

|

|

|

|
|
|
|
|
|
|
Additional options on the call context menu in My Schedule, for example:
|
|
|
*Partially supported depending on the configuration of your org. See Partially Supported Functionality for more information.
Using Lightning for My Schedule
Scheduling Calls in Lightning for My Schedule
To schedule a call, left select a time slot on the calendar.
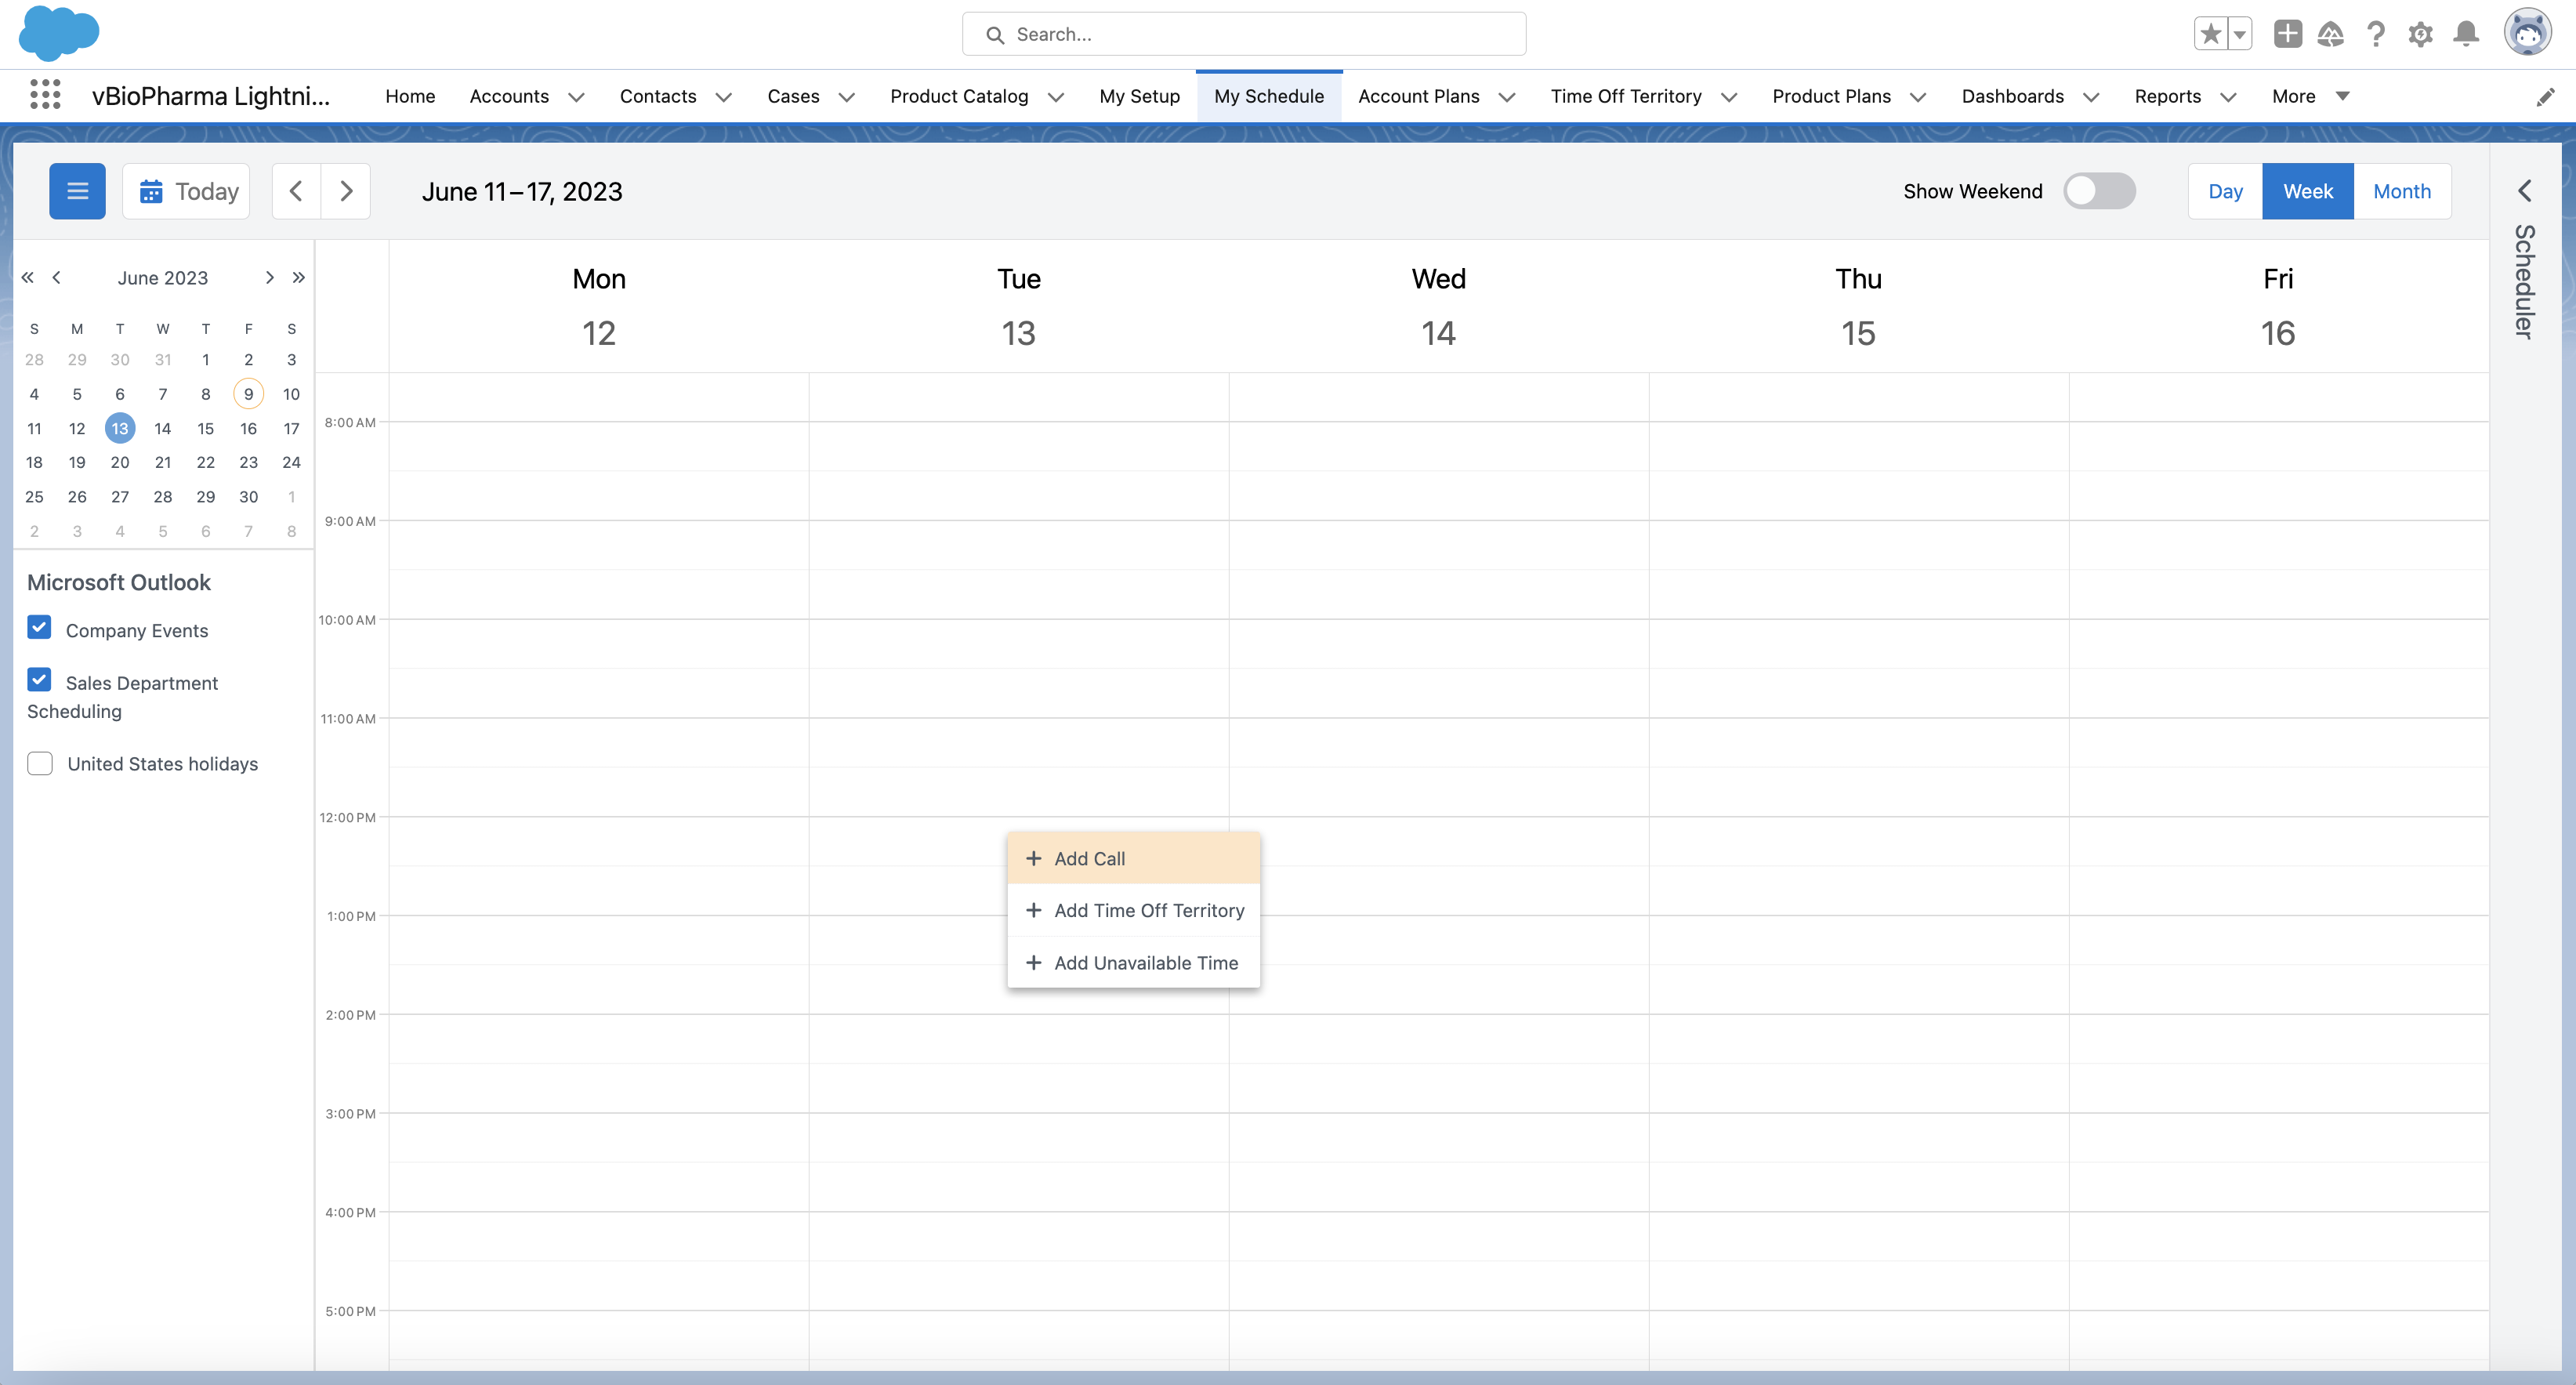
Select Add Call to display the account search modal.
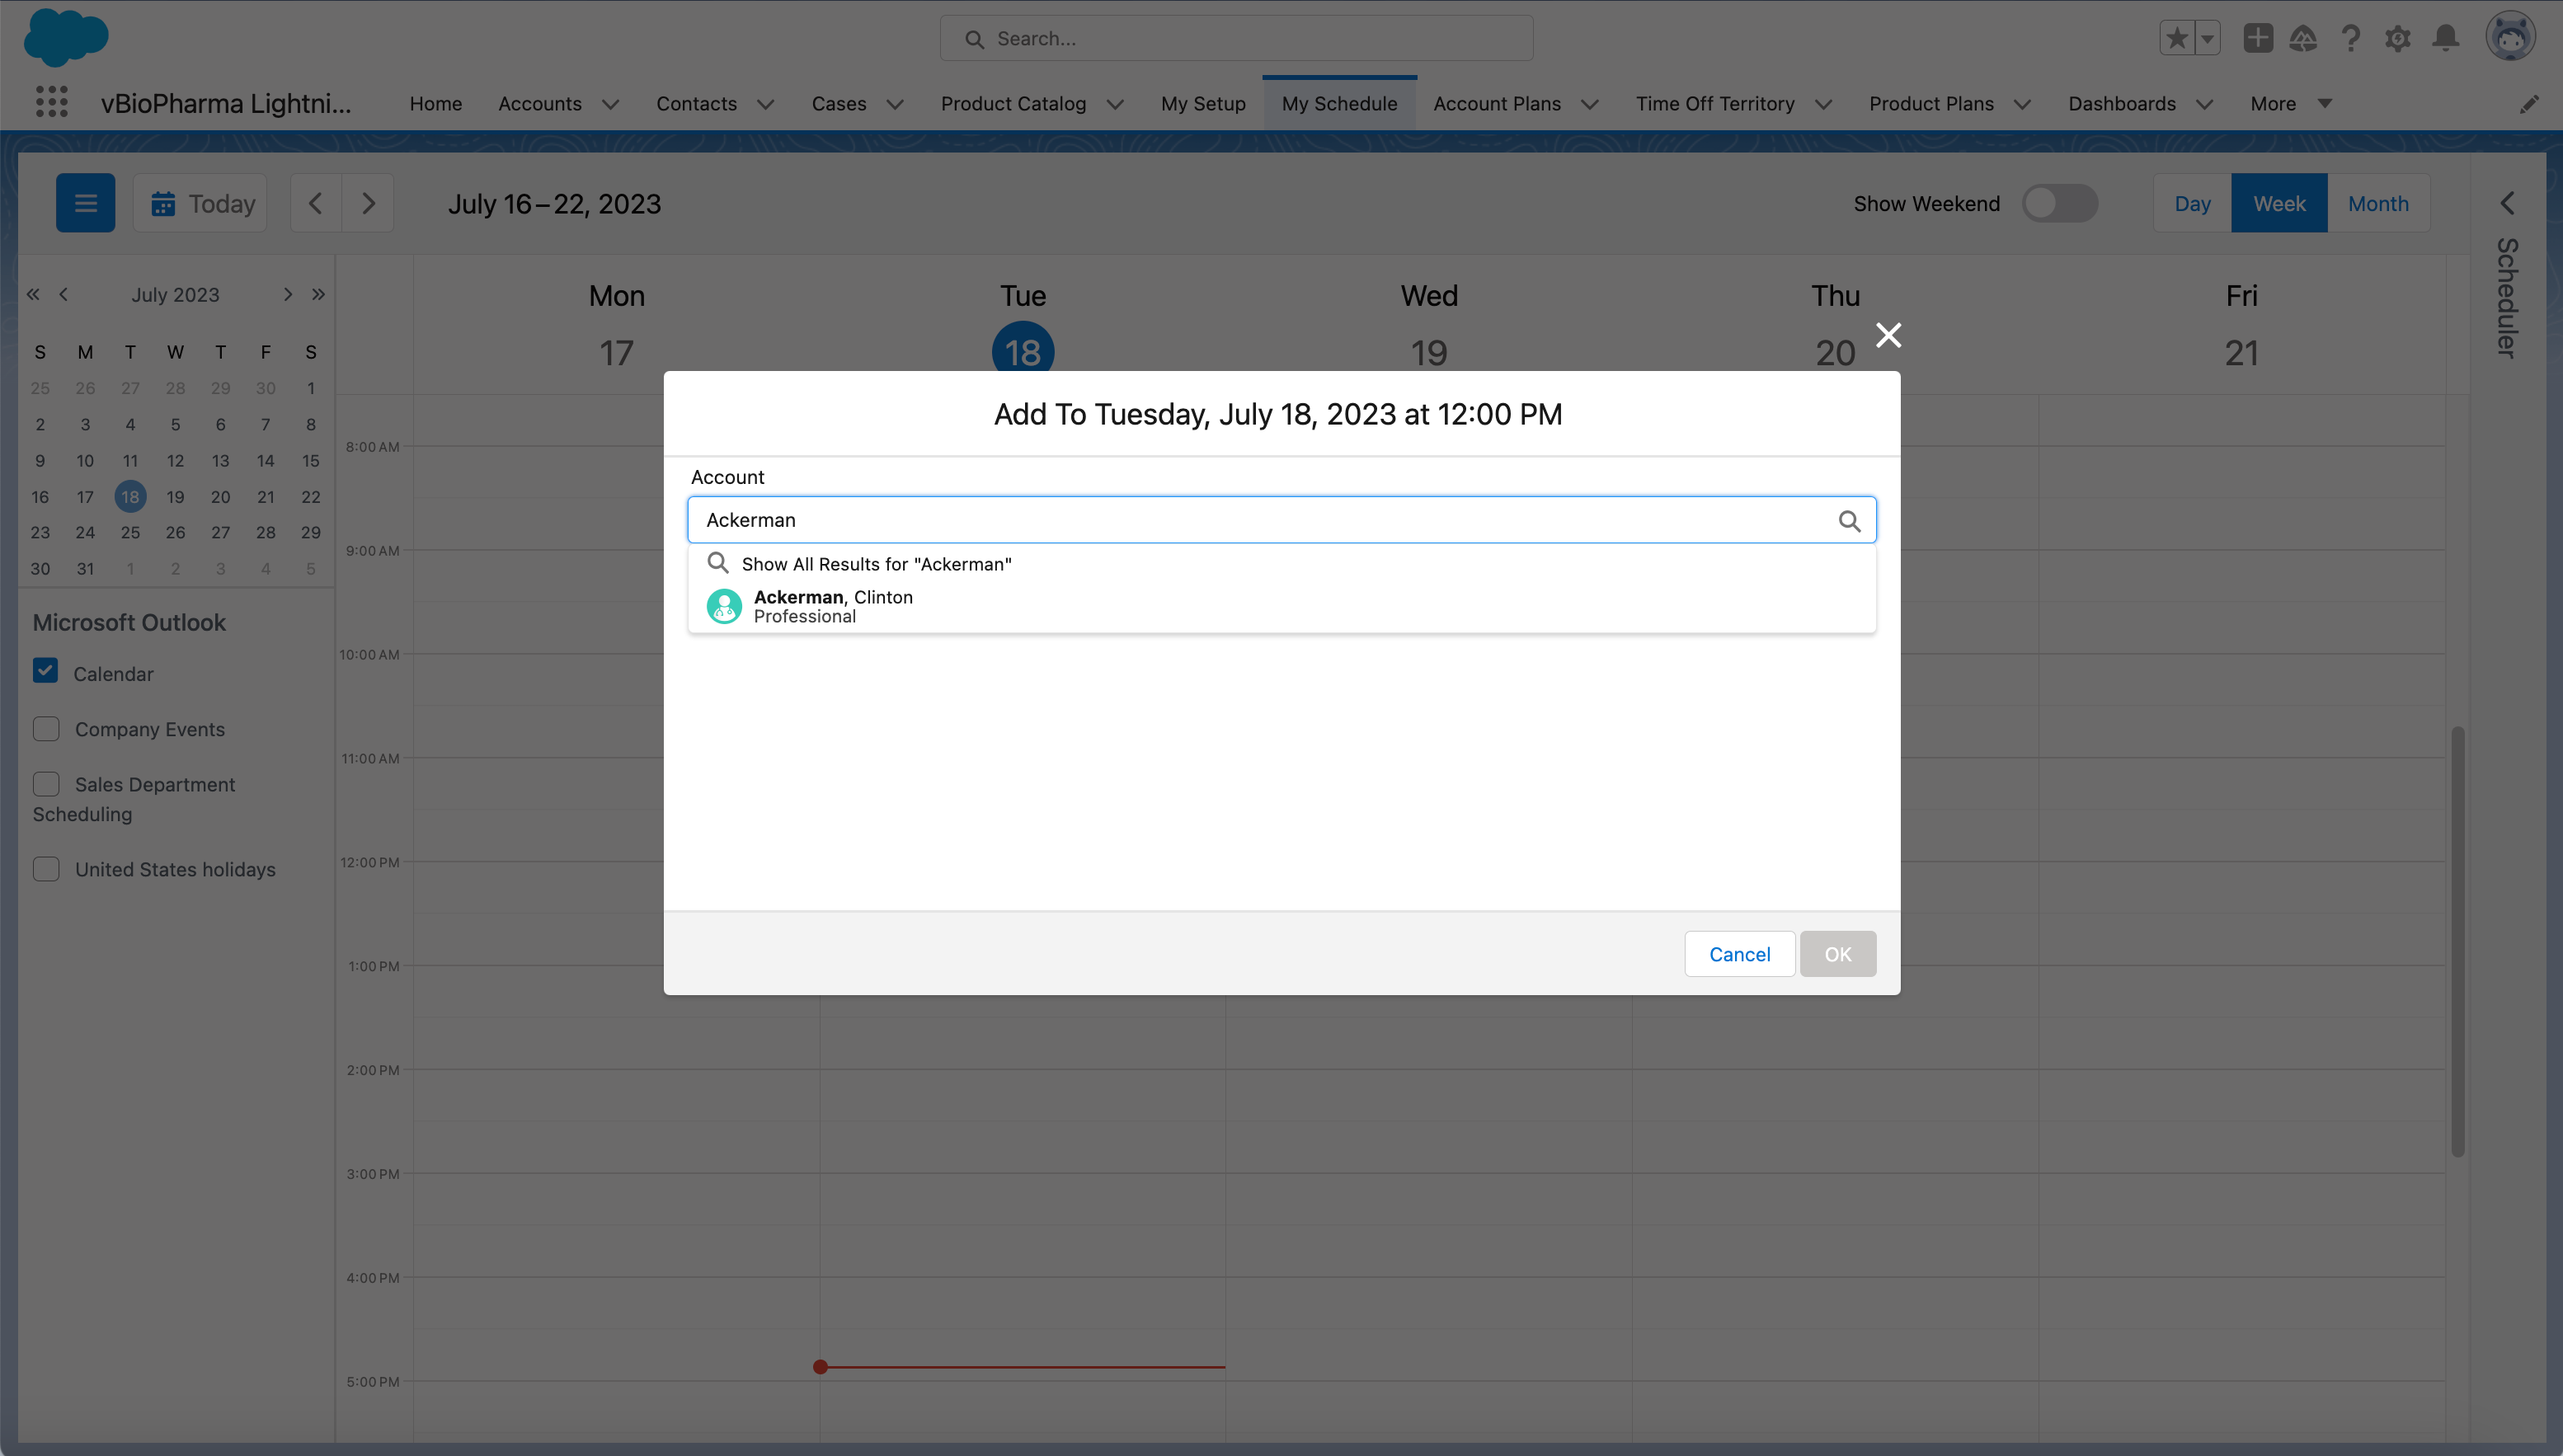
Enter keywords, then select the appropriate account. Select OK to create the call.
Alternatively, users can also create calls using the Scheduler panel.
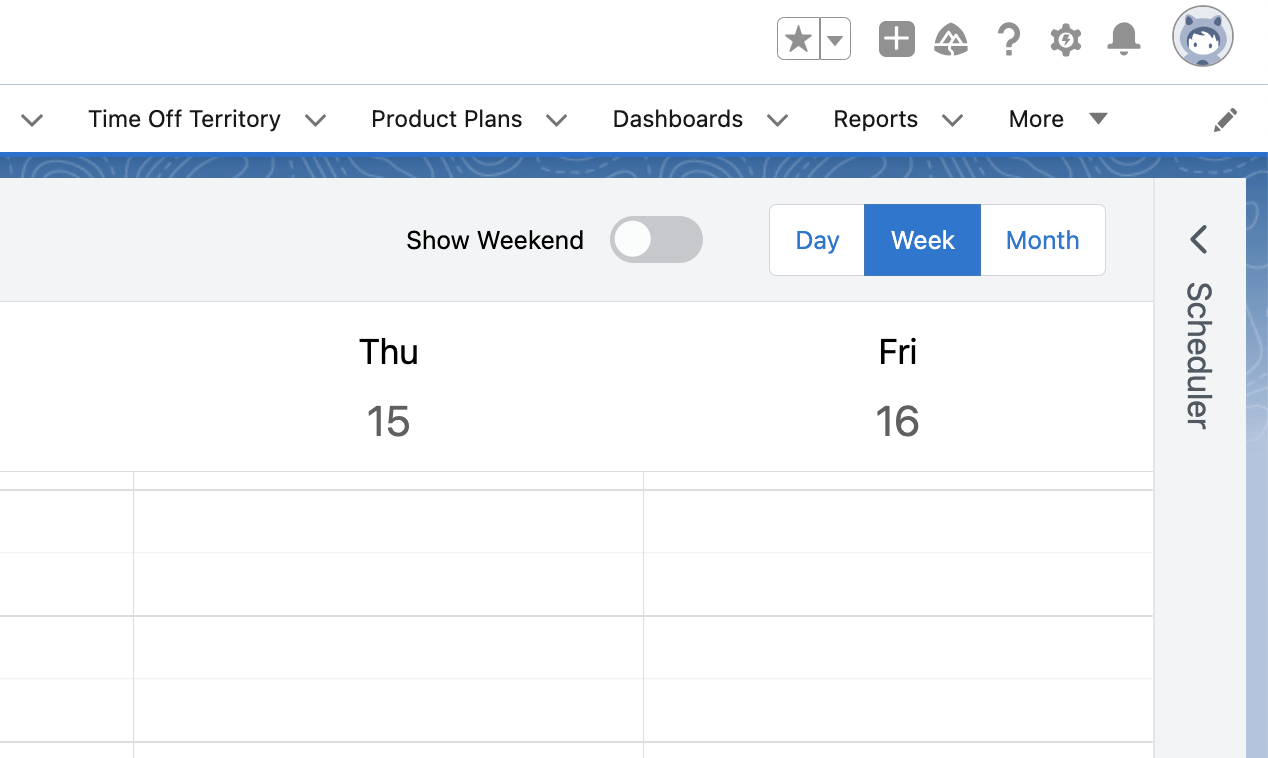
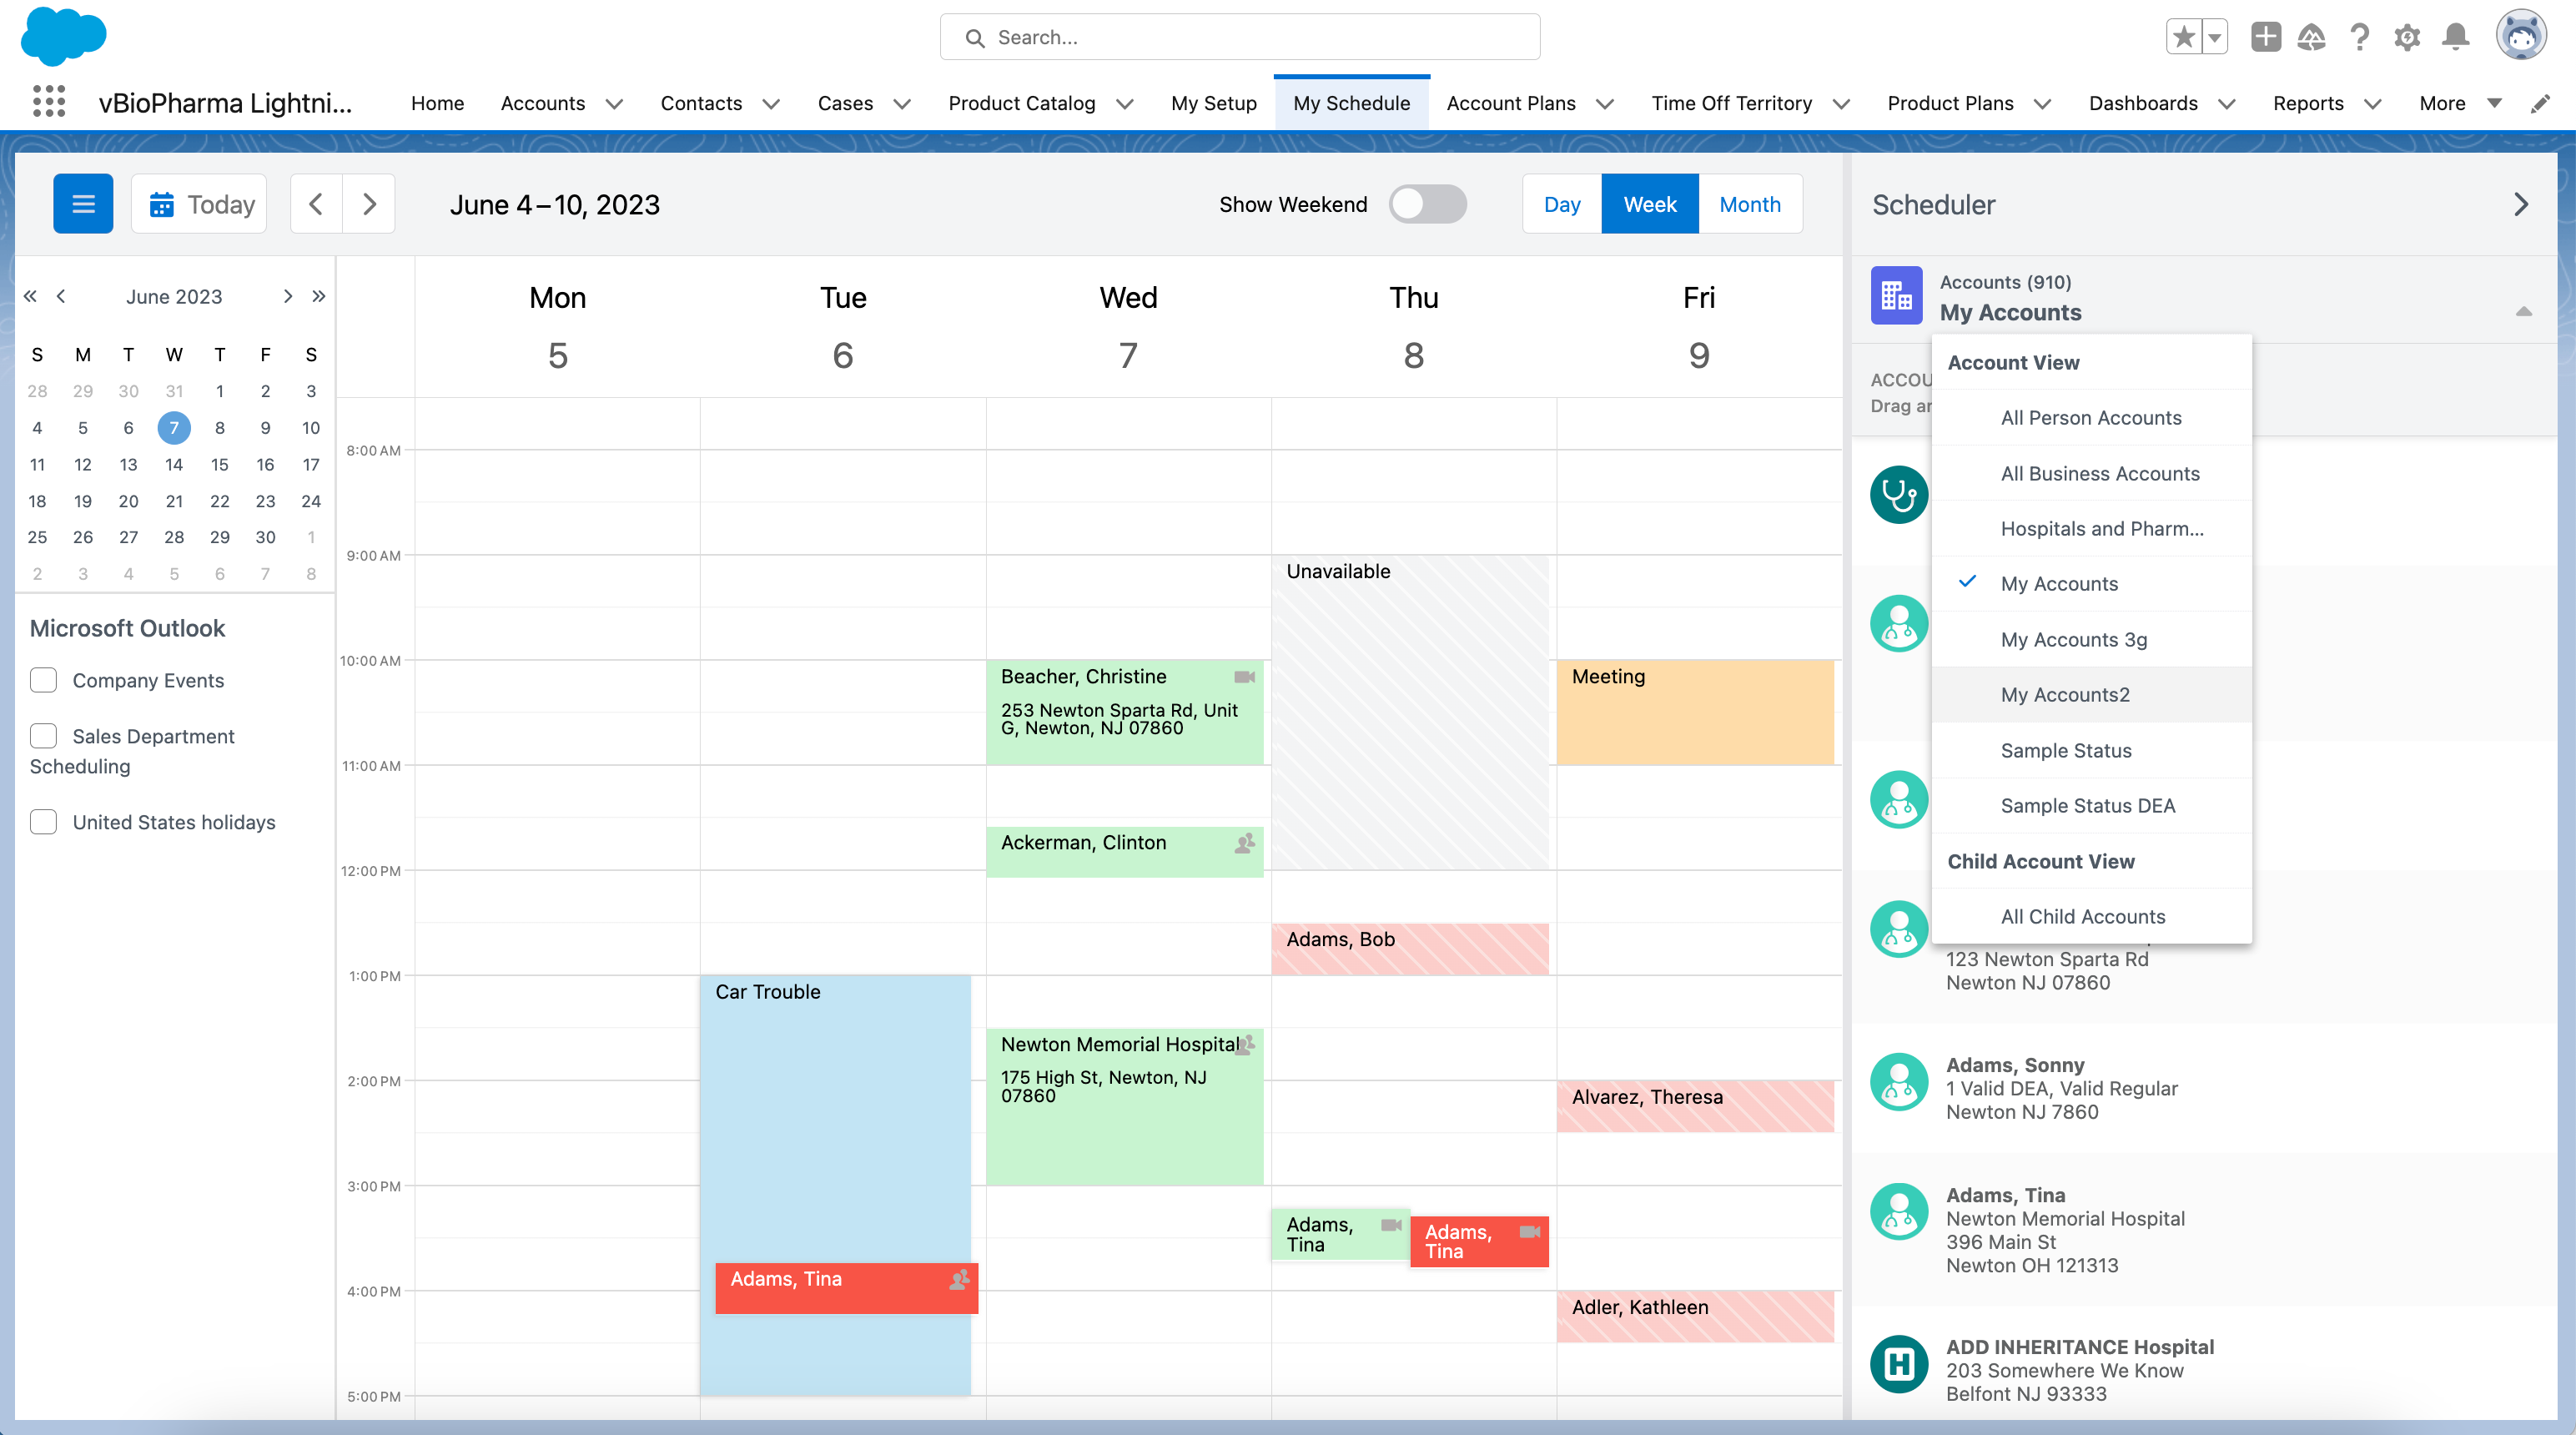
Select the Scheduler sidebar to display a panel with Account Lists and Views. When you select an account list or view, the account list is filtered according to that list or view. An account record type icon displays for each account.
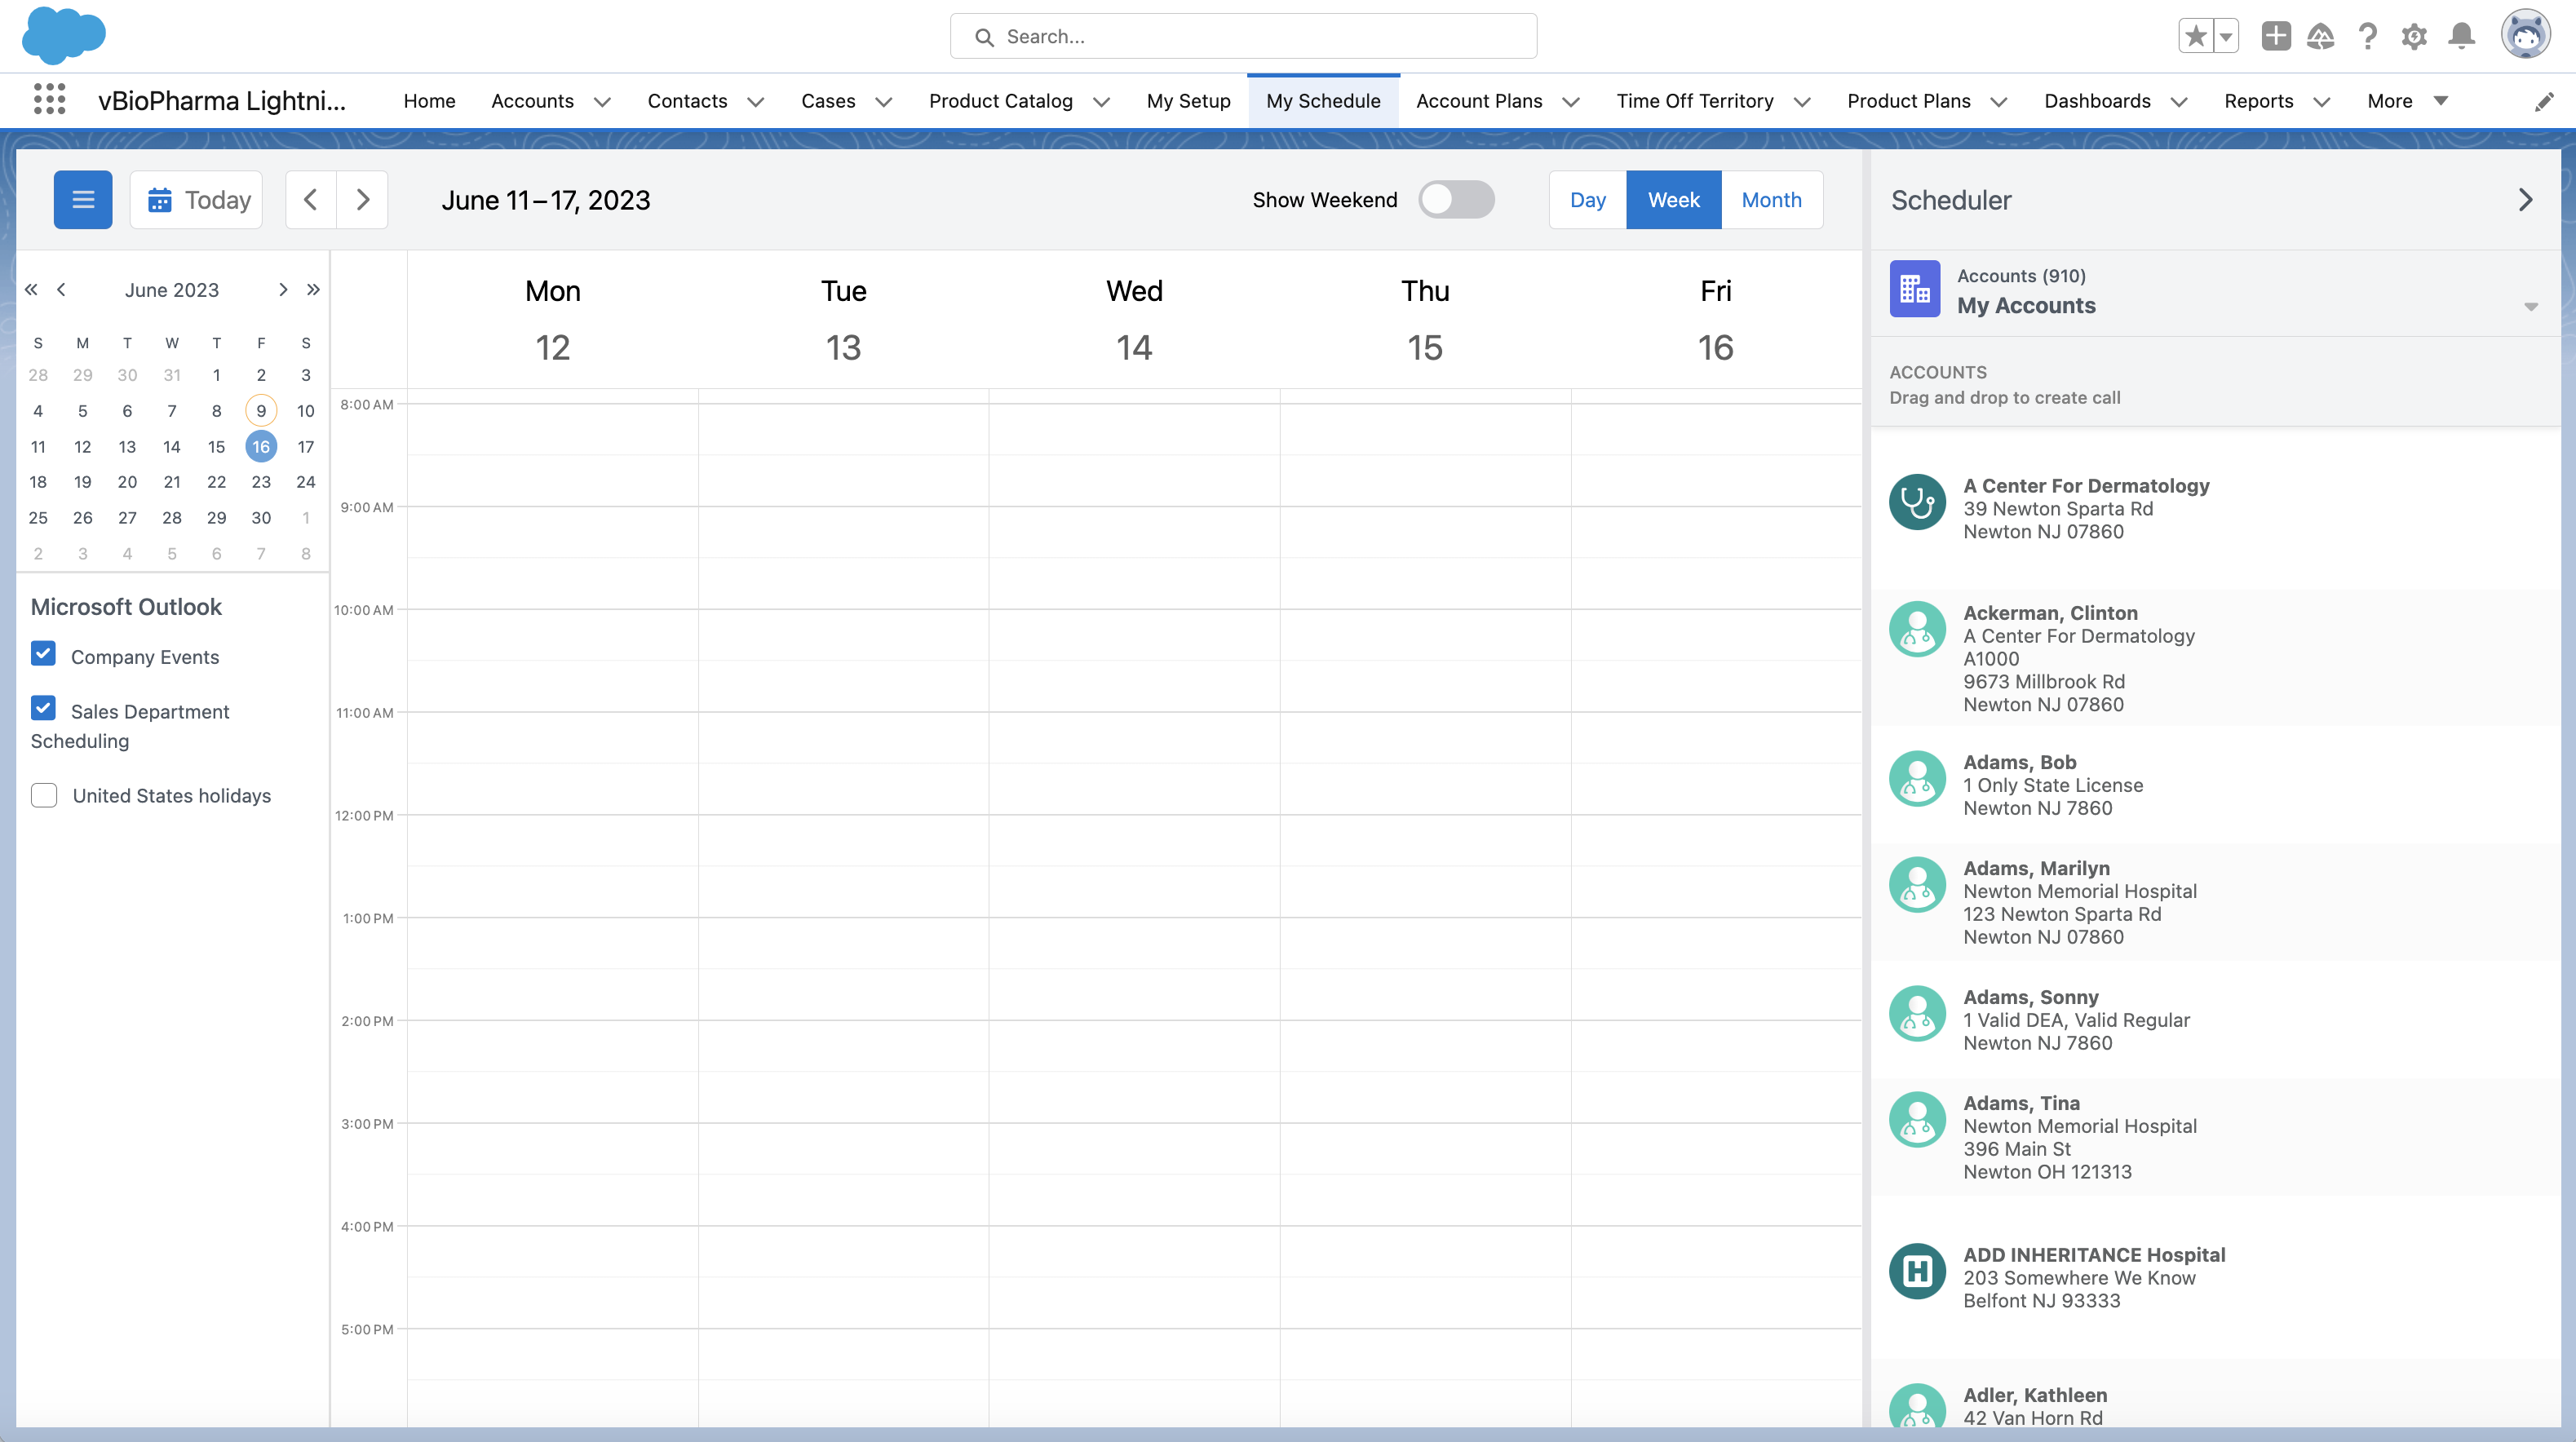
If Working with Child Accounts is enabled, child account views display under the Account Lists and Views dropdown, and child accounts display in the Scheduler pane’s account list.
For Japanese language users, ensure the Parent_Child_Furigana_vod field on the Account object is populated. This field is used to sort child accounts in the Scheduler pane.
To create a call, drag and drop the appropriate account from the panel to a time slot on the calendar.
When creating calls from the Scheduler pane, users can only schedule calls in the week they are currently viewing. Users cannot drag calls to the all-day header in day view or week view, unless Capturing the Call Date Only is enabled.
Creating Unavailable Time Slots and Time Off Territory Entries
To create an unavailable time slot or Time Off Territory entry:
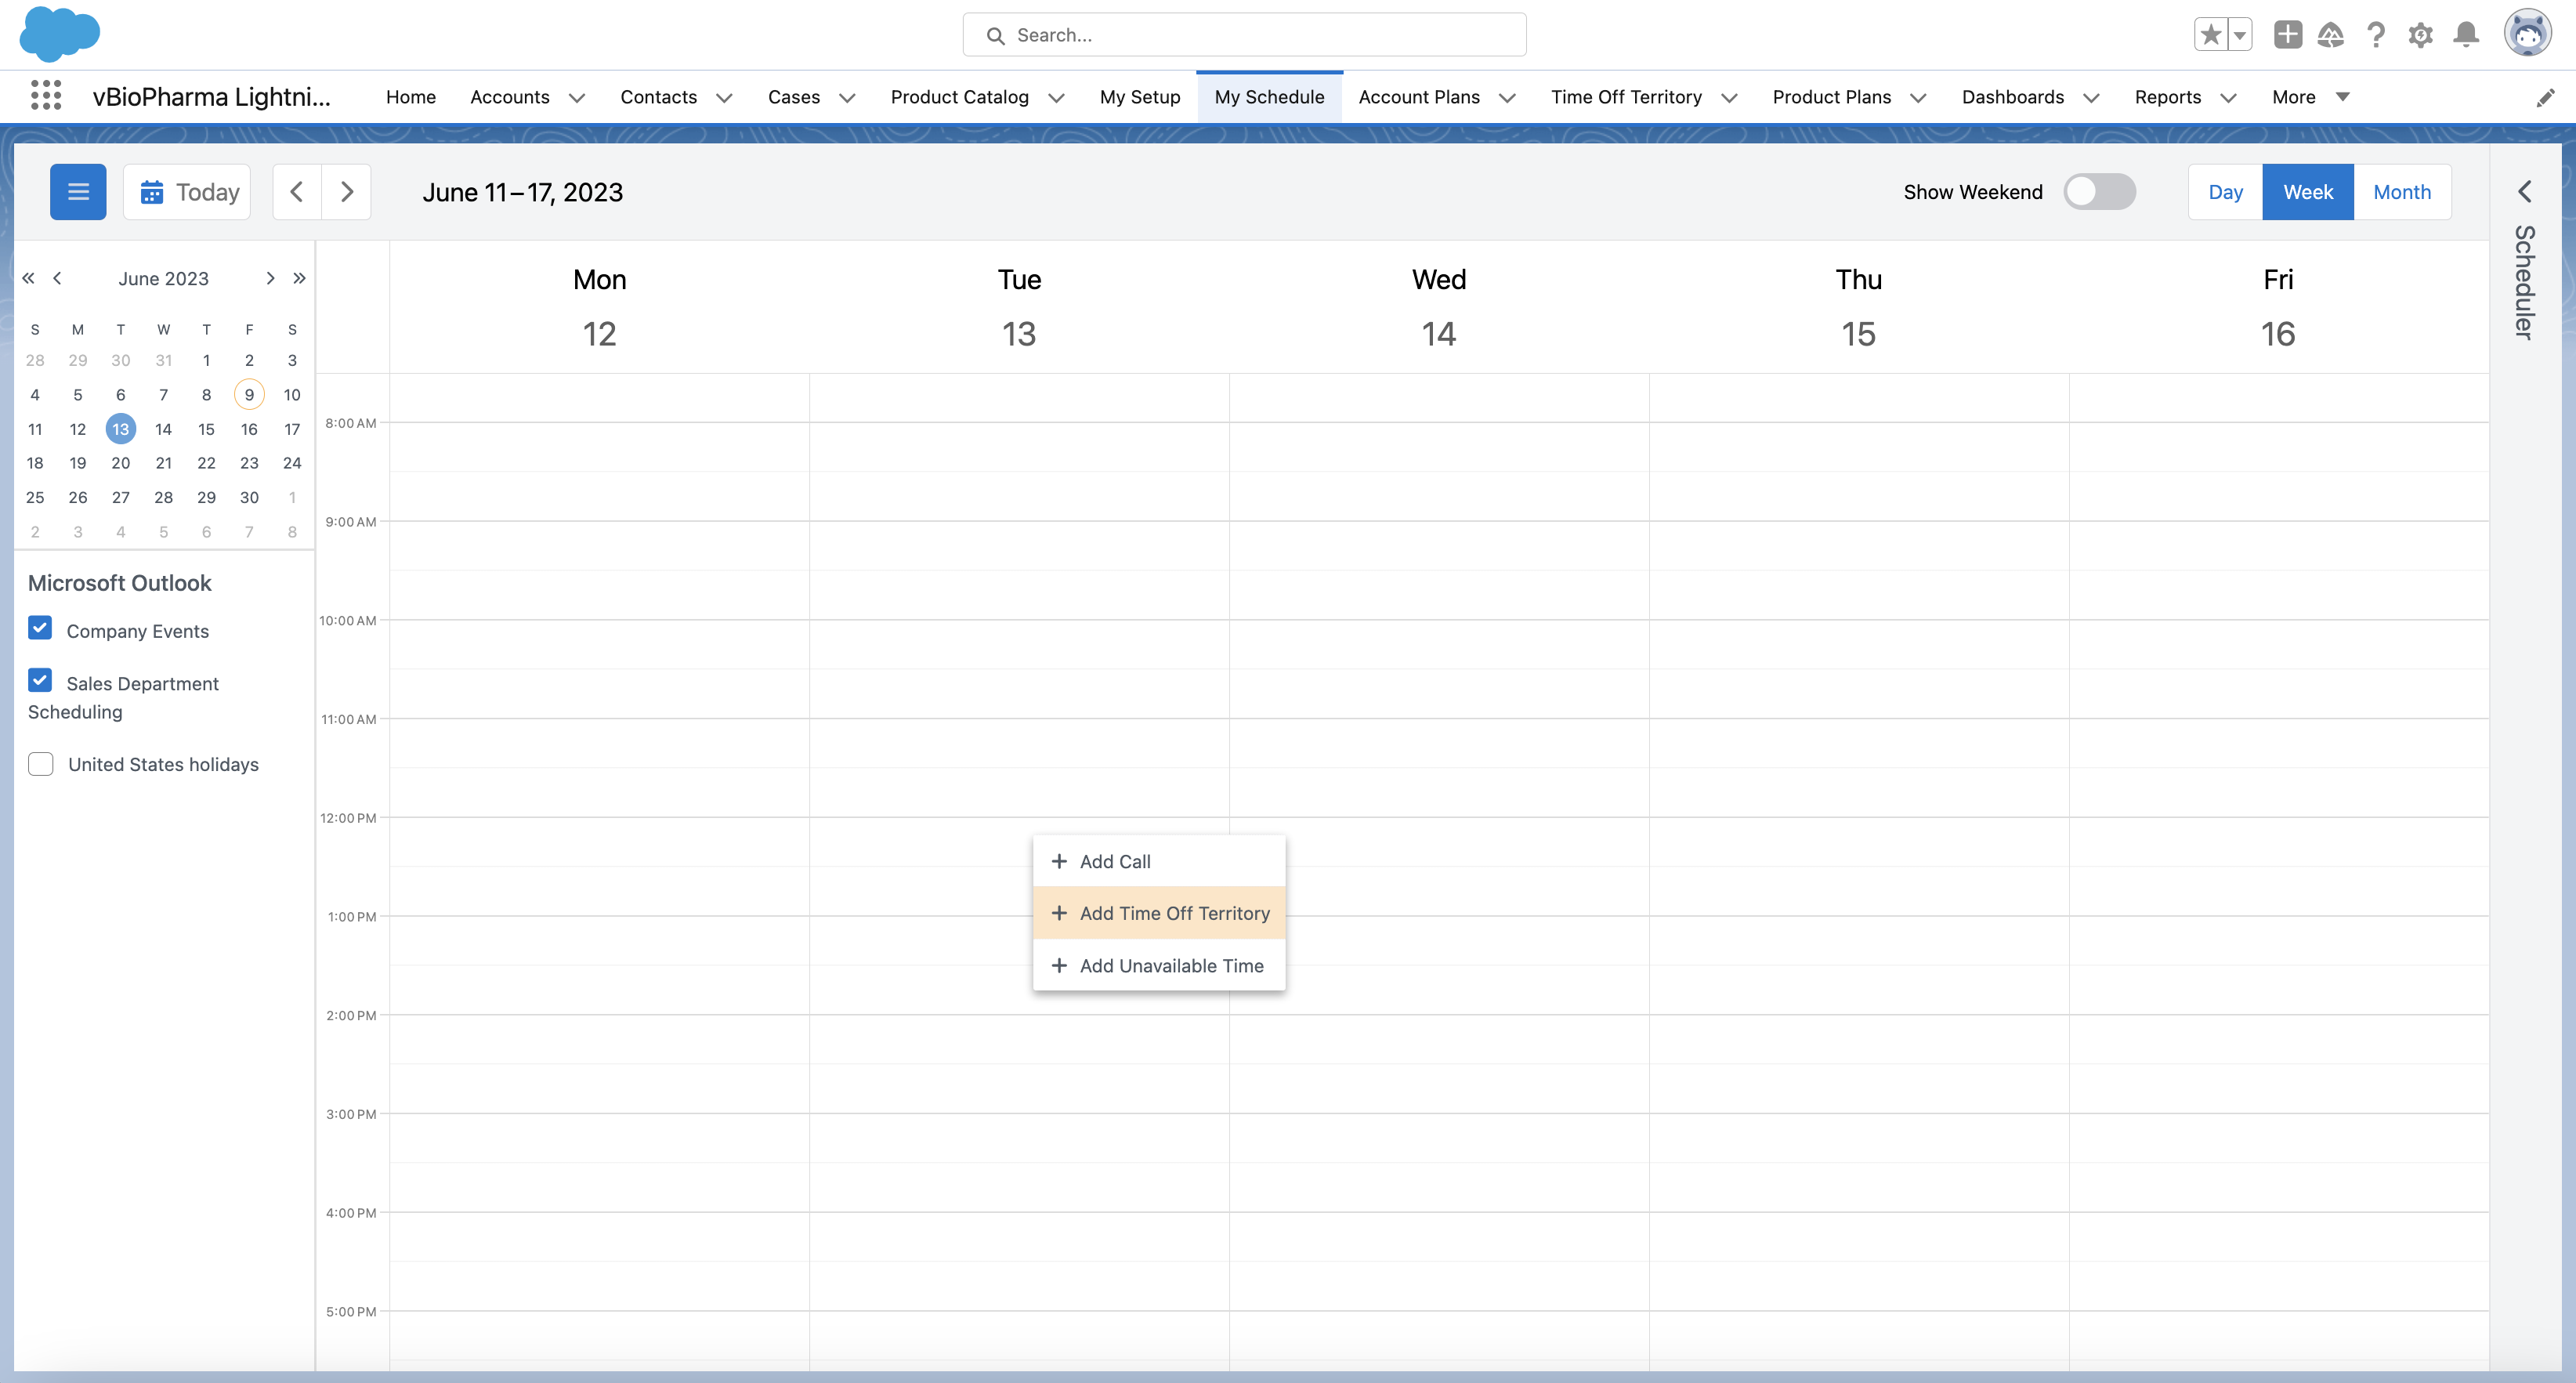
- Left select a time slot on the calendar, then select the appropriate option from the context menu.
- Complete the fields in the new record modal.
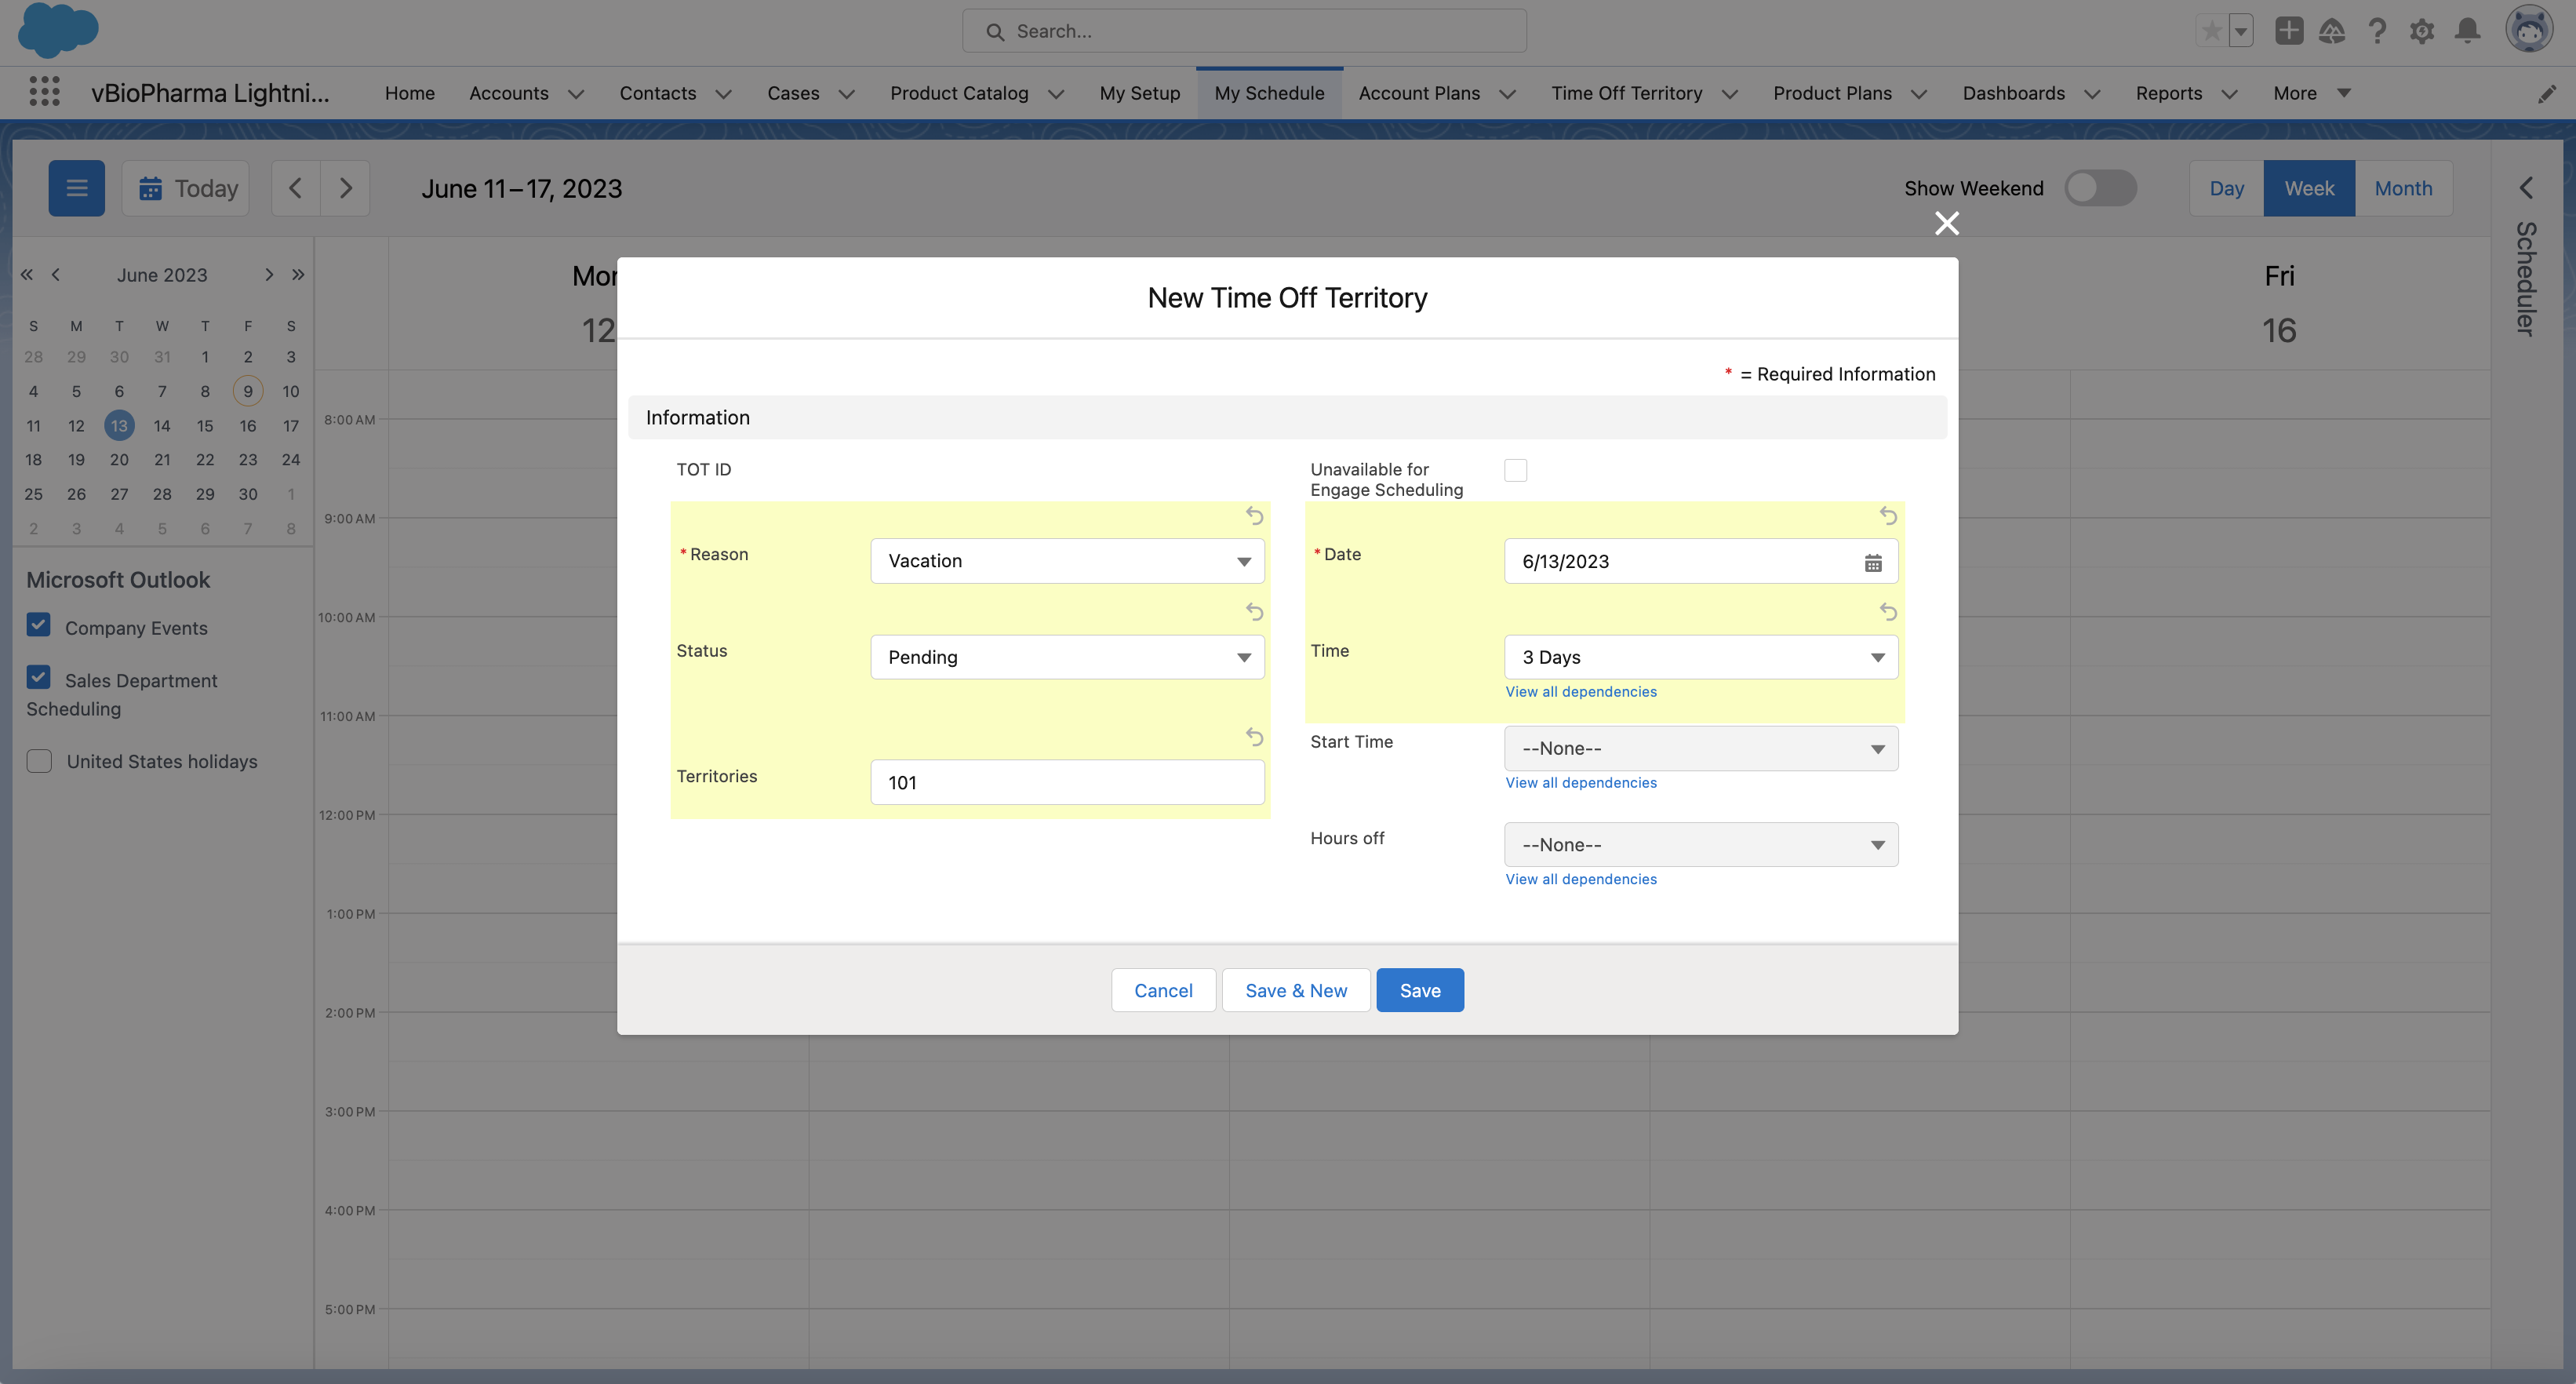
- Select Save. The new record immediately displays on the calendar.
To edit the label for an item in the context menu for Lightning My Schedule, for example, Time Off Territory, clone and edit the ADD_ITEM;;Common Veeva Message, then modify the appropriate label in Rename Tabs and Labels.
Rescheduling Calls and Calendar Entries
Users can reschedule calls and calendar entries in Lightning for My Schedule by dragging and dropping the call or calendar entry to the appropriate time, or by dragging the upper or lower edges of the entry.
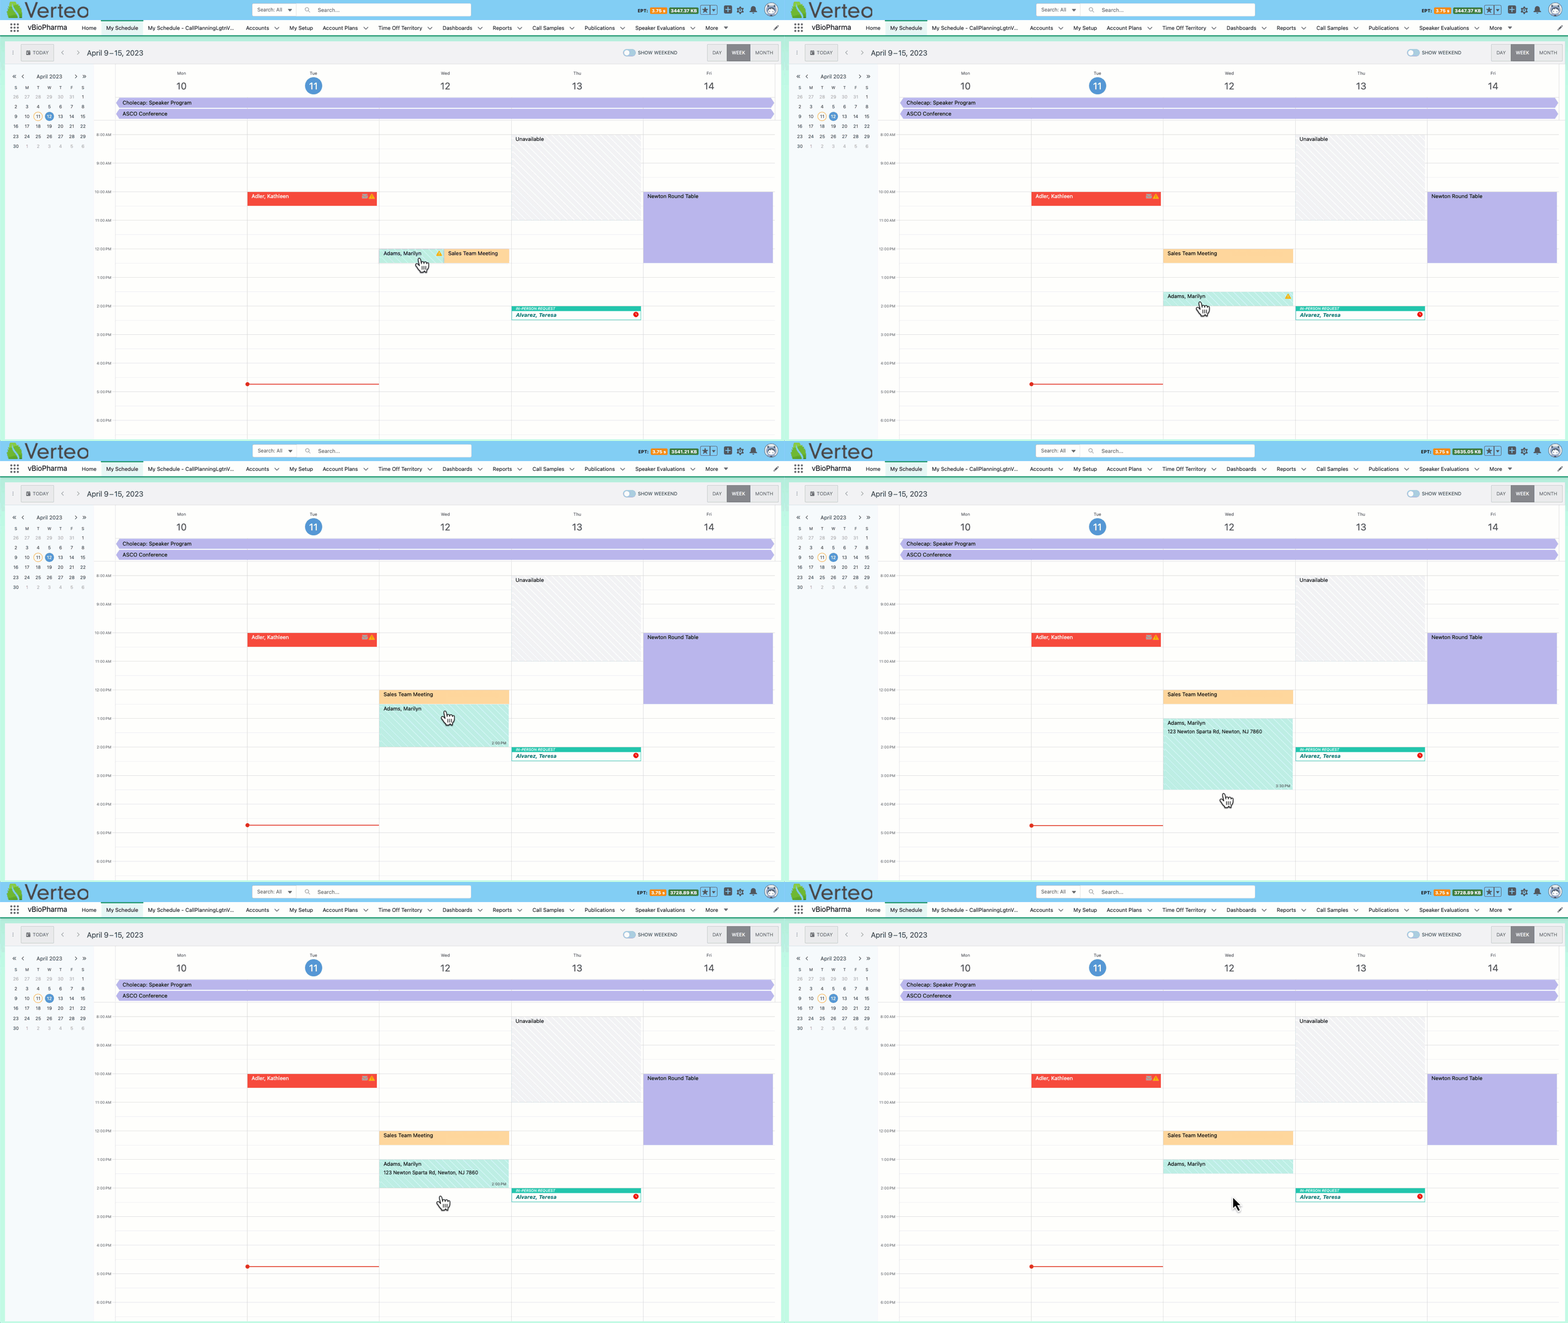
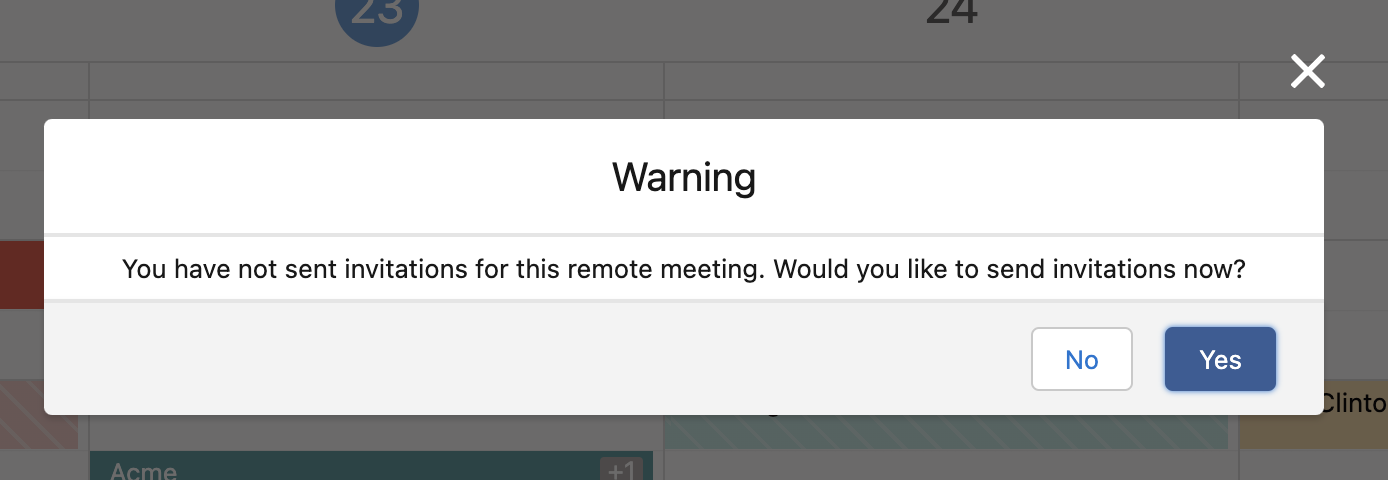
When users reschedule calls related to remote meetings in Lightning for My Schedule, a prompt displays to send invitations with the revised date and time.
When users reschedule calls with call objectives, a warning displays if the new call date is outside of the call objective’s date range. Users can choose to reschedule the call and remove the associated call objective, or cancel to keep the call at the existing date and retain the call objective.

Using My Schedule in Day View
Day View displays users’ daily agenda, with other days of the week available at the top of the calendar. Unlike the existing My Schedule, pre-call and next call notes do not display.
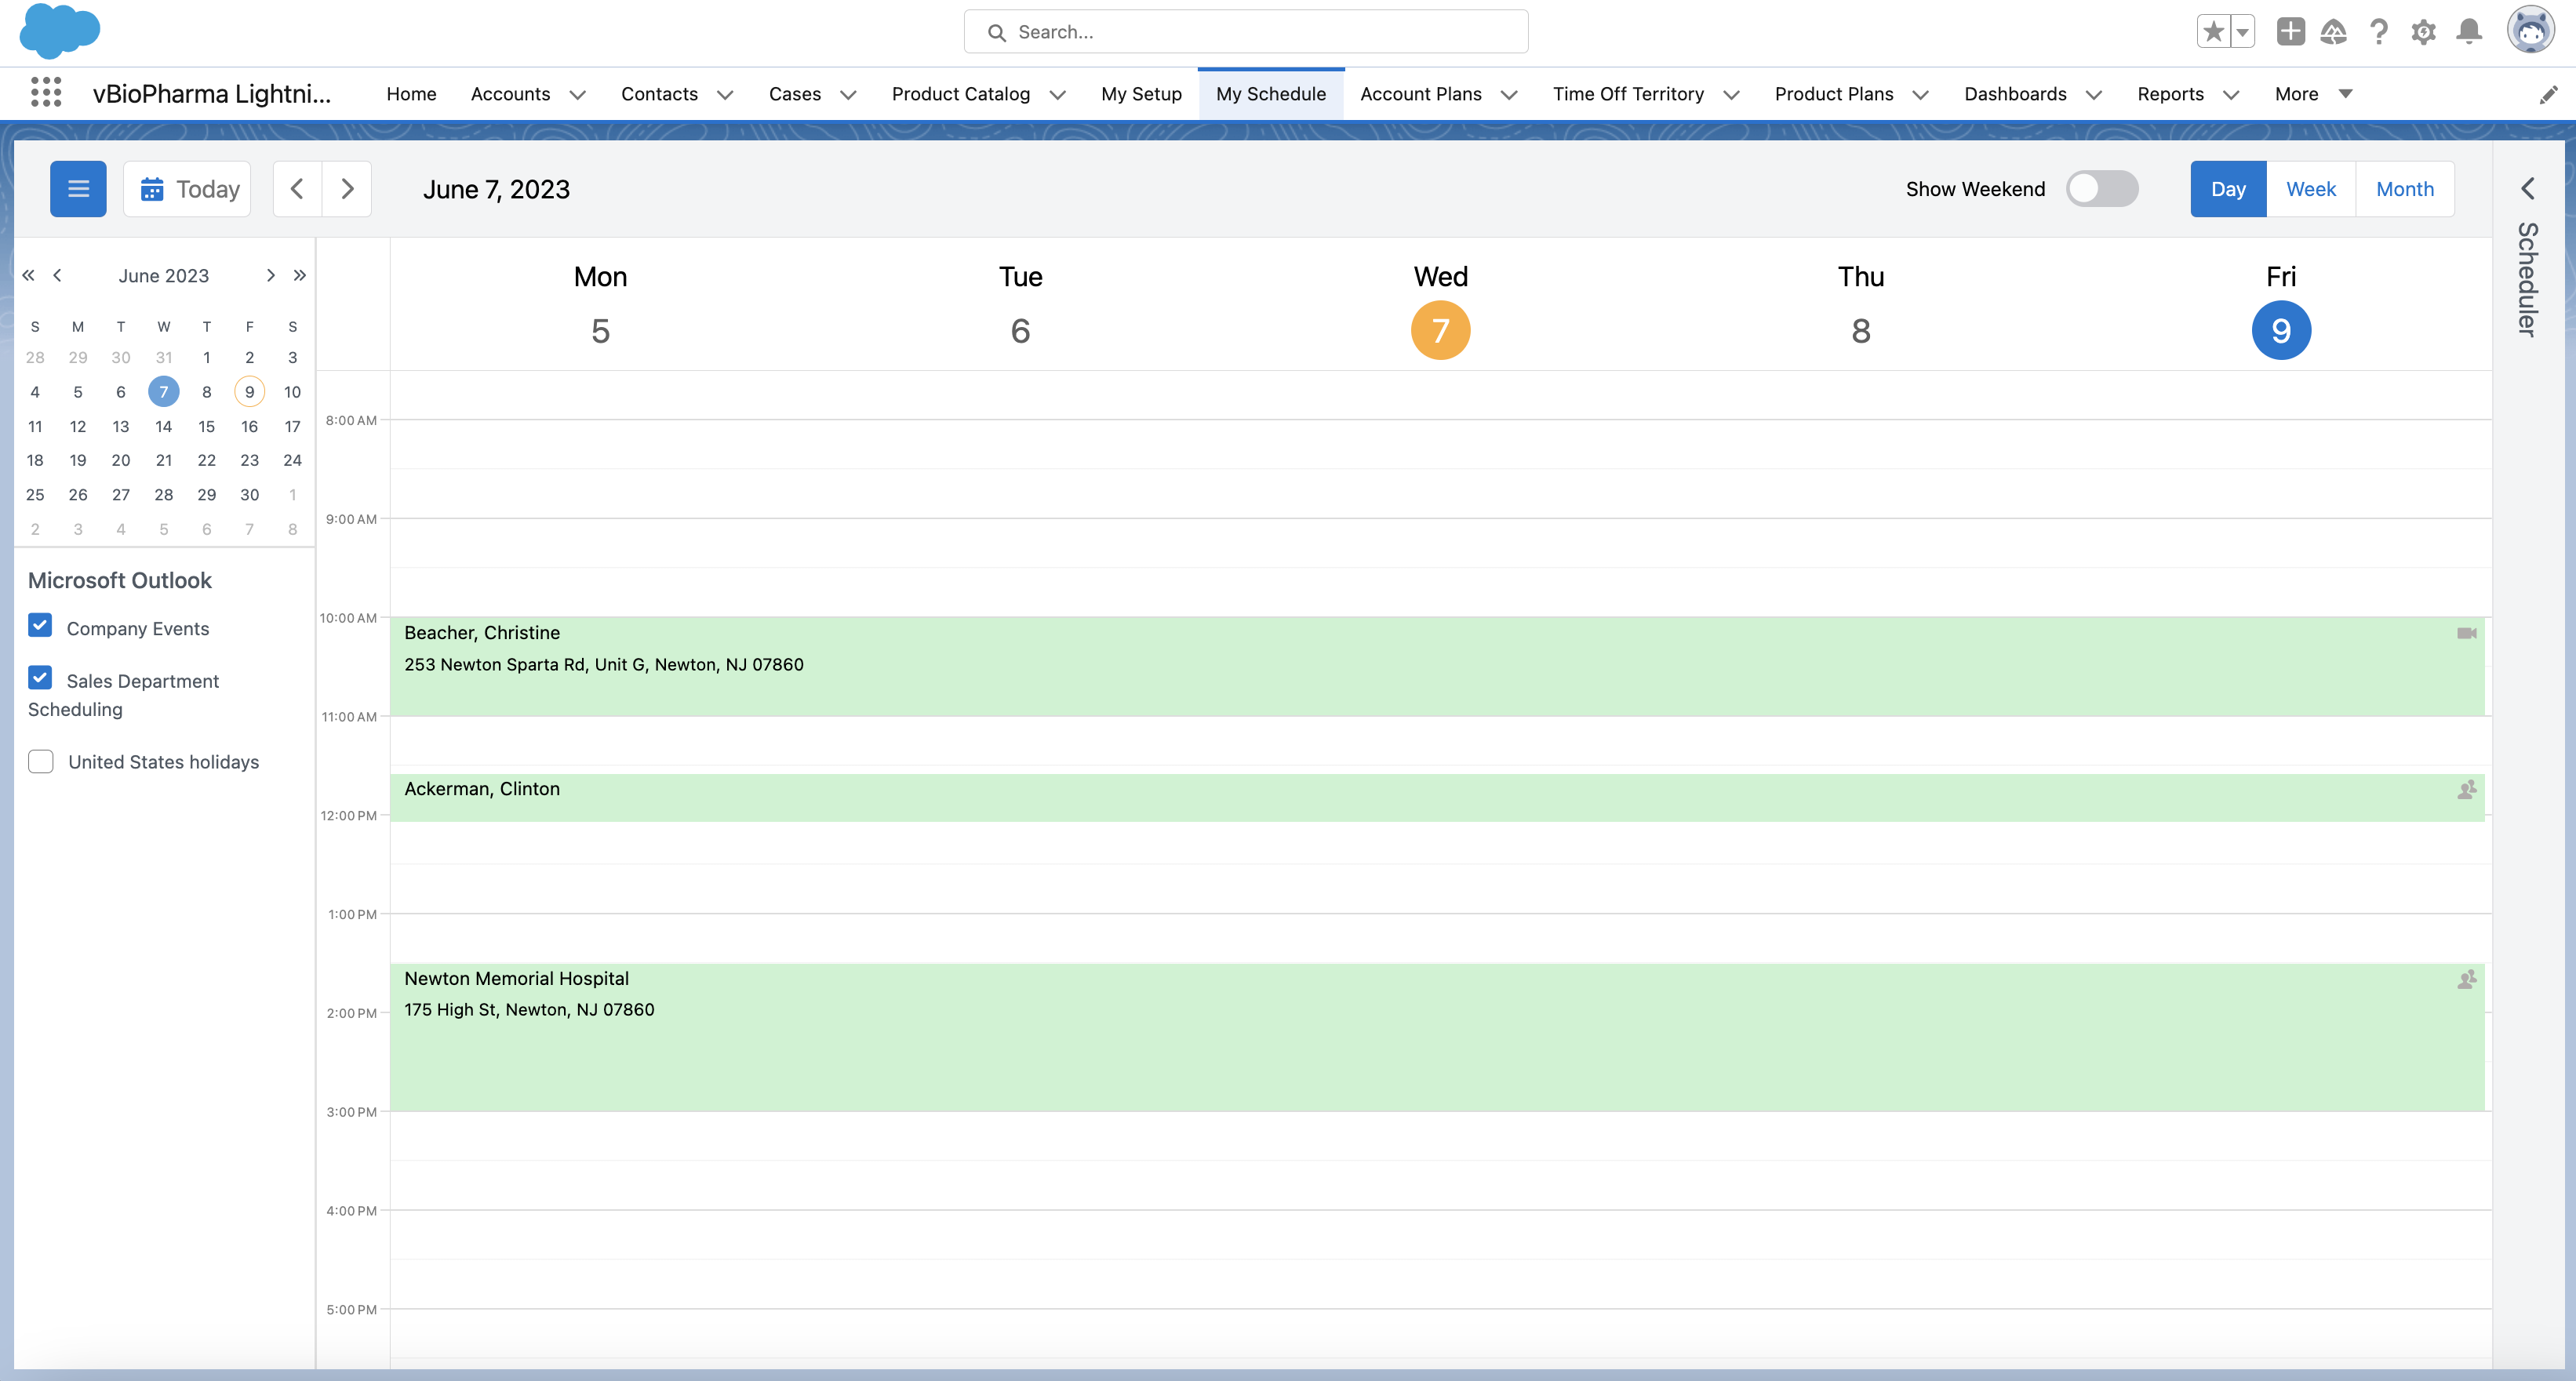
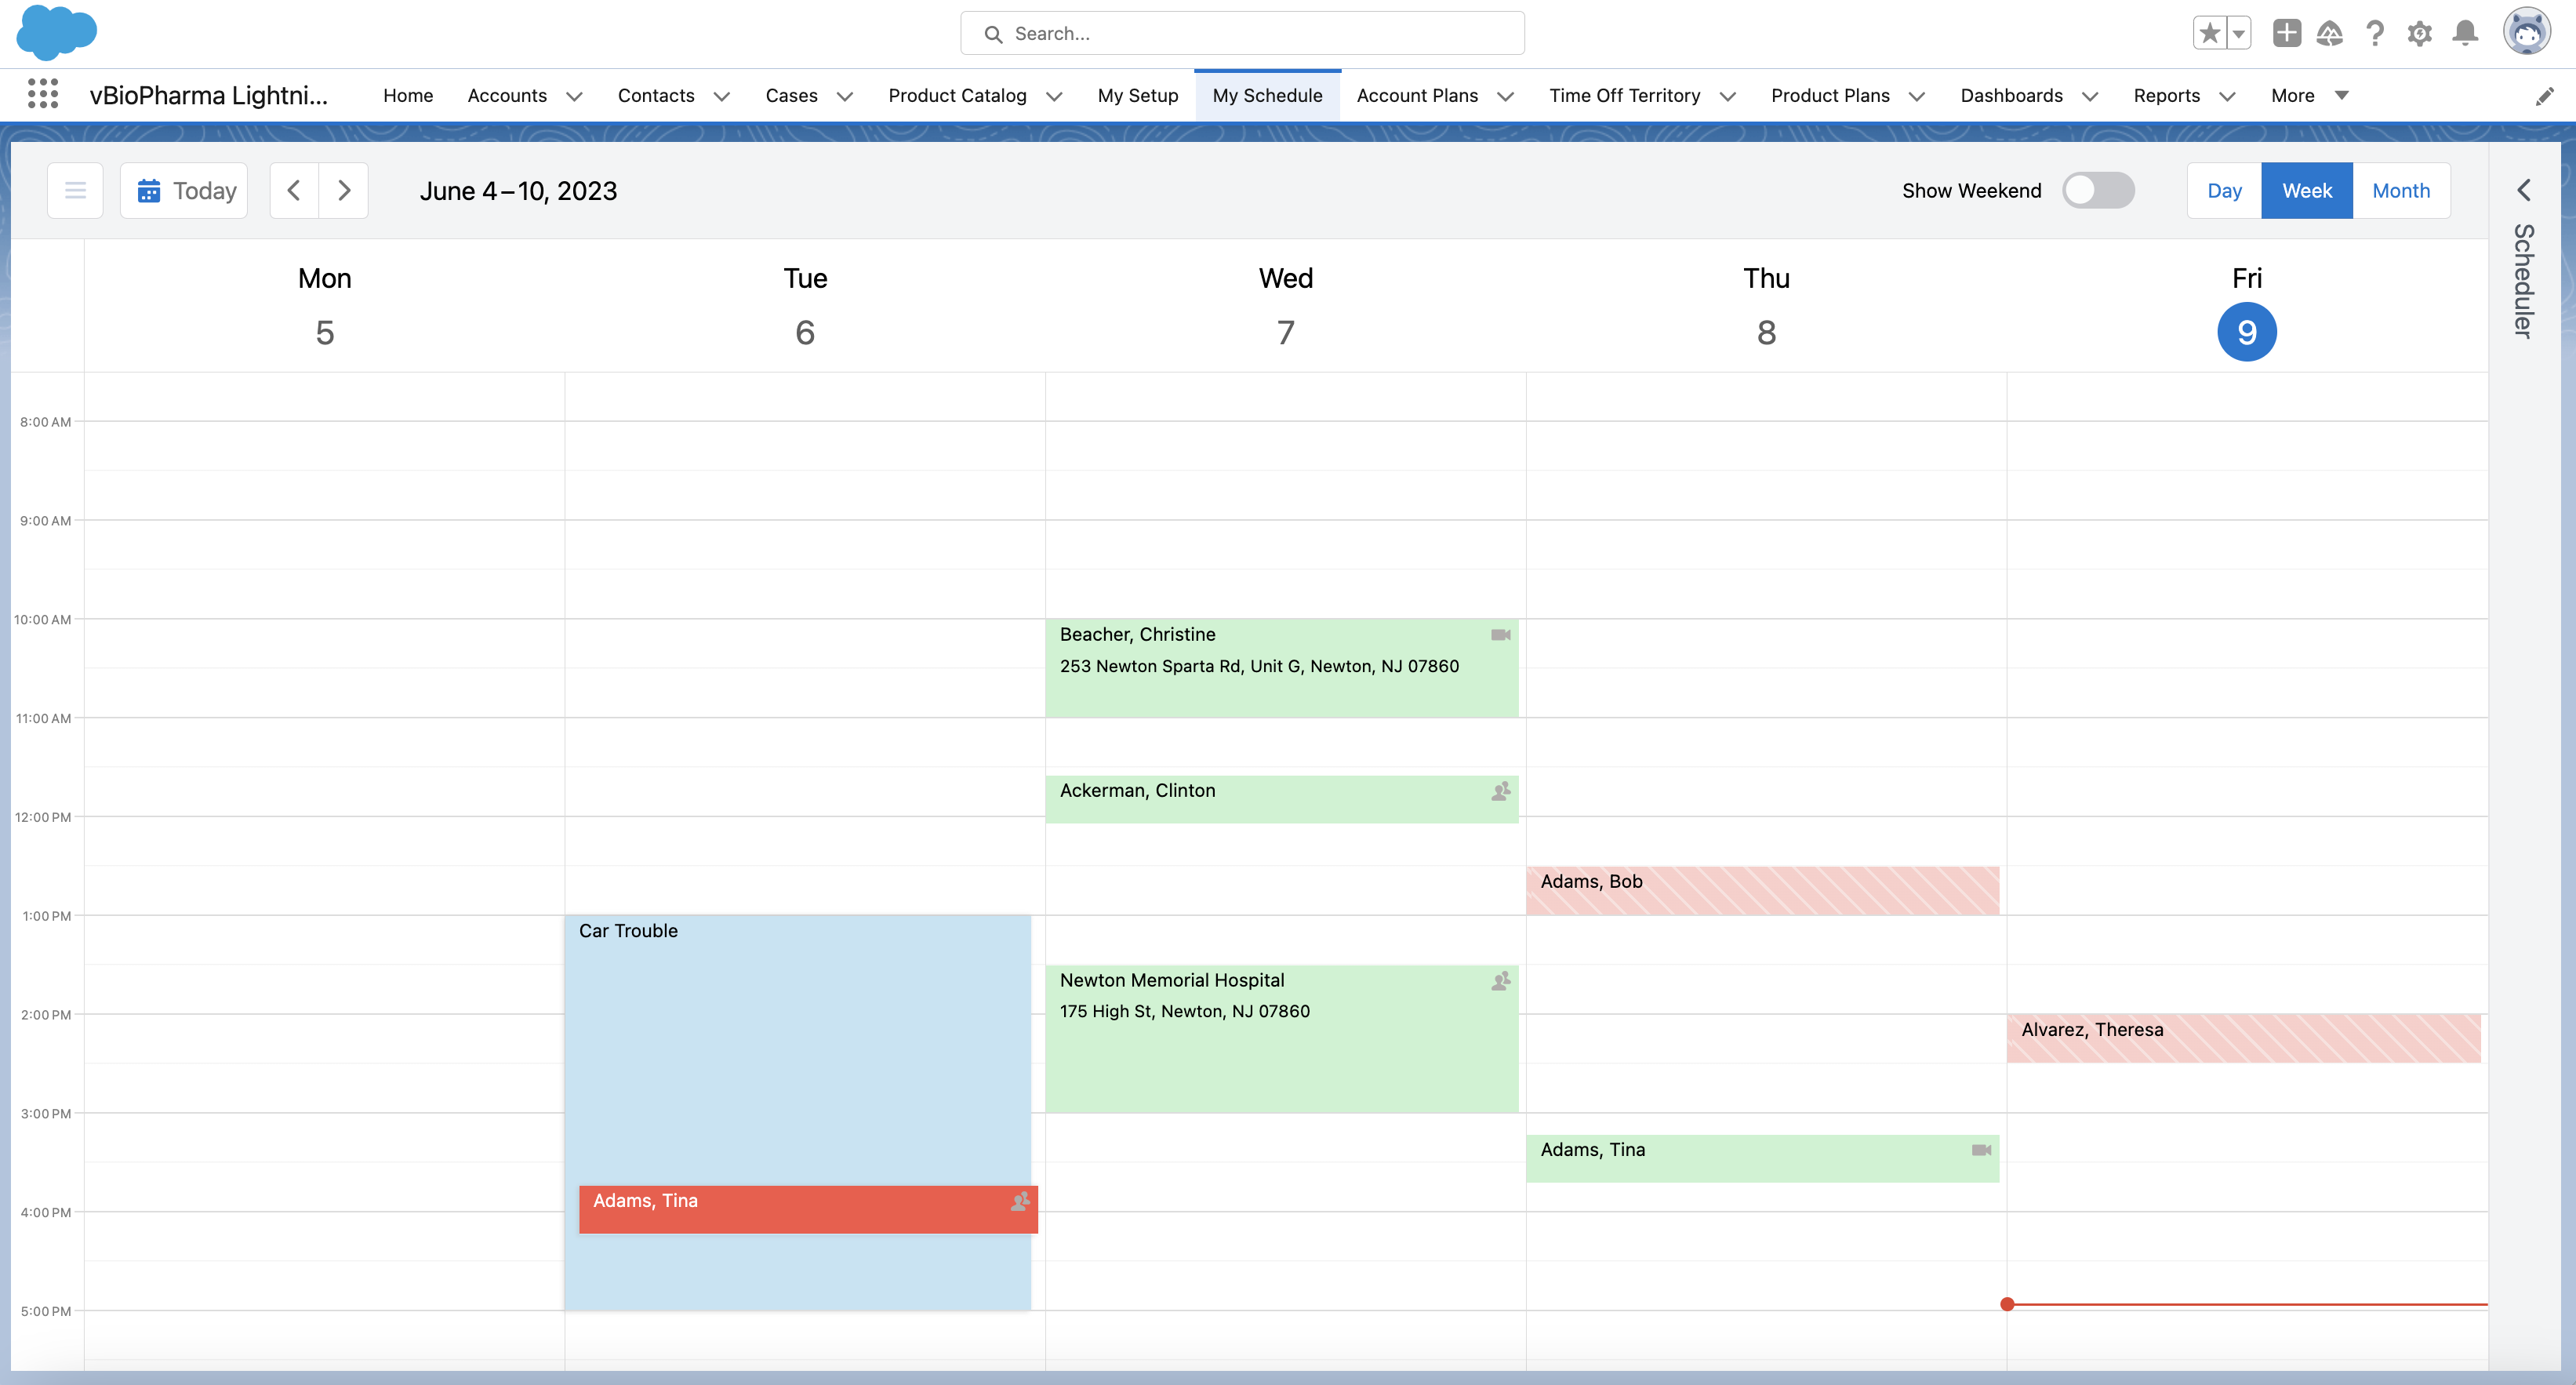
Viewing the Calendar Panel
A calendar displays in the upper left corner of My Schedule. To change dates, users can either select a date from this calendar or use the previous and next buttons. To quickly return to the current date, select the Today button.
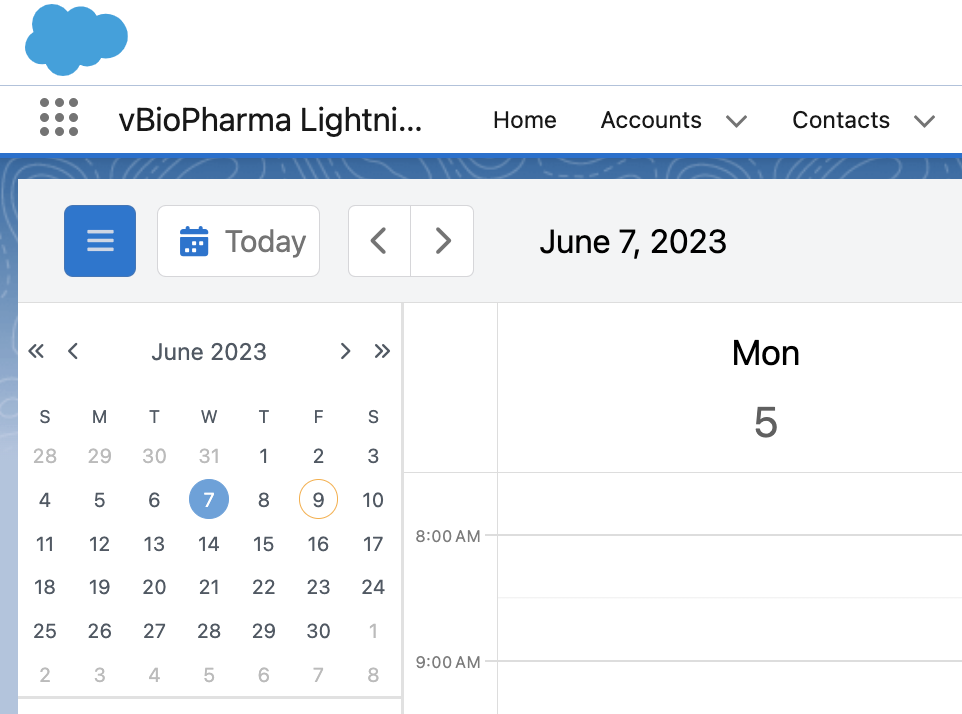
To hide the calendar panel, select the sidebar button to the left of the Today button.
Editing and Deleting Entries Within My Schedule
When users select an entry, a popover with more information and Edit and Delete buttons displays.
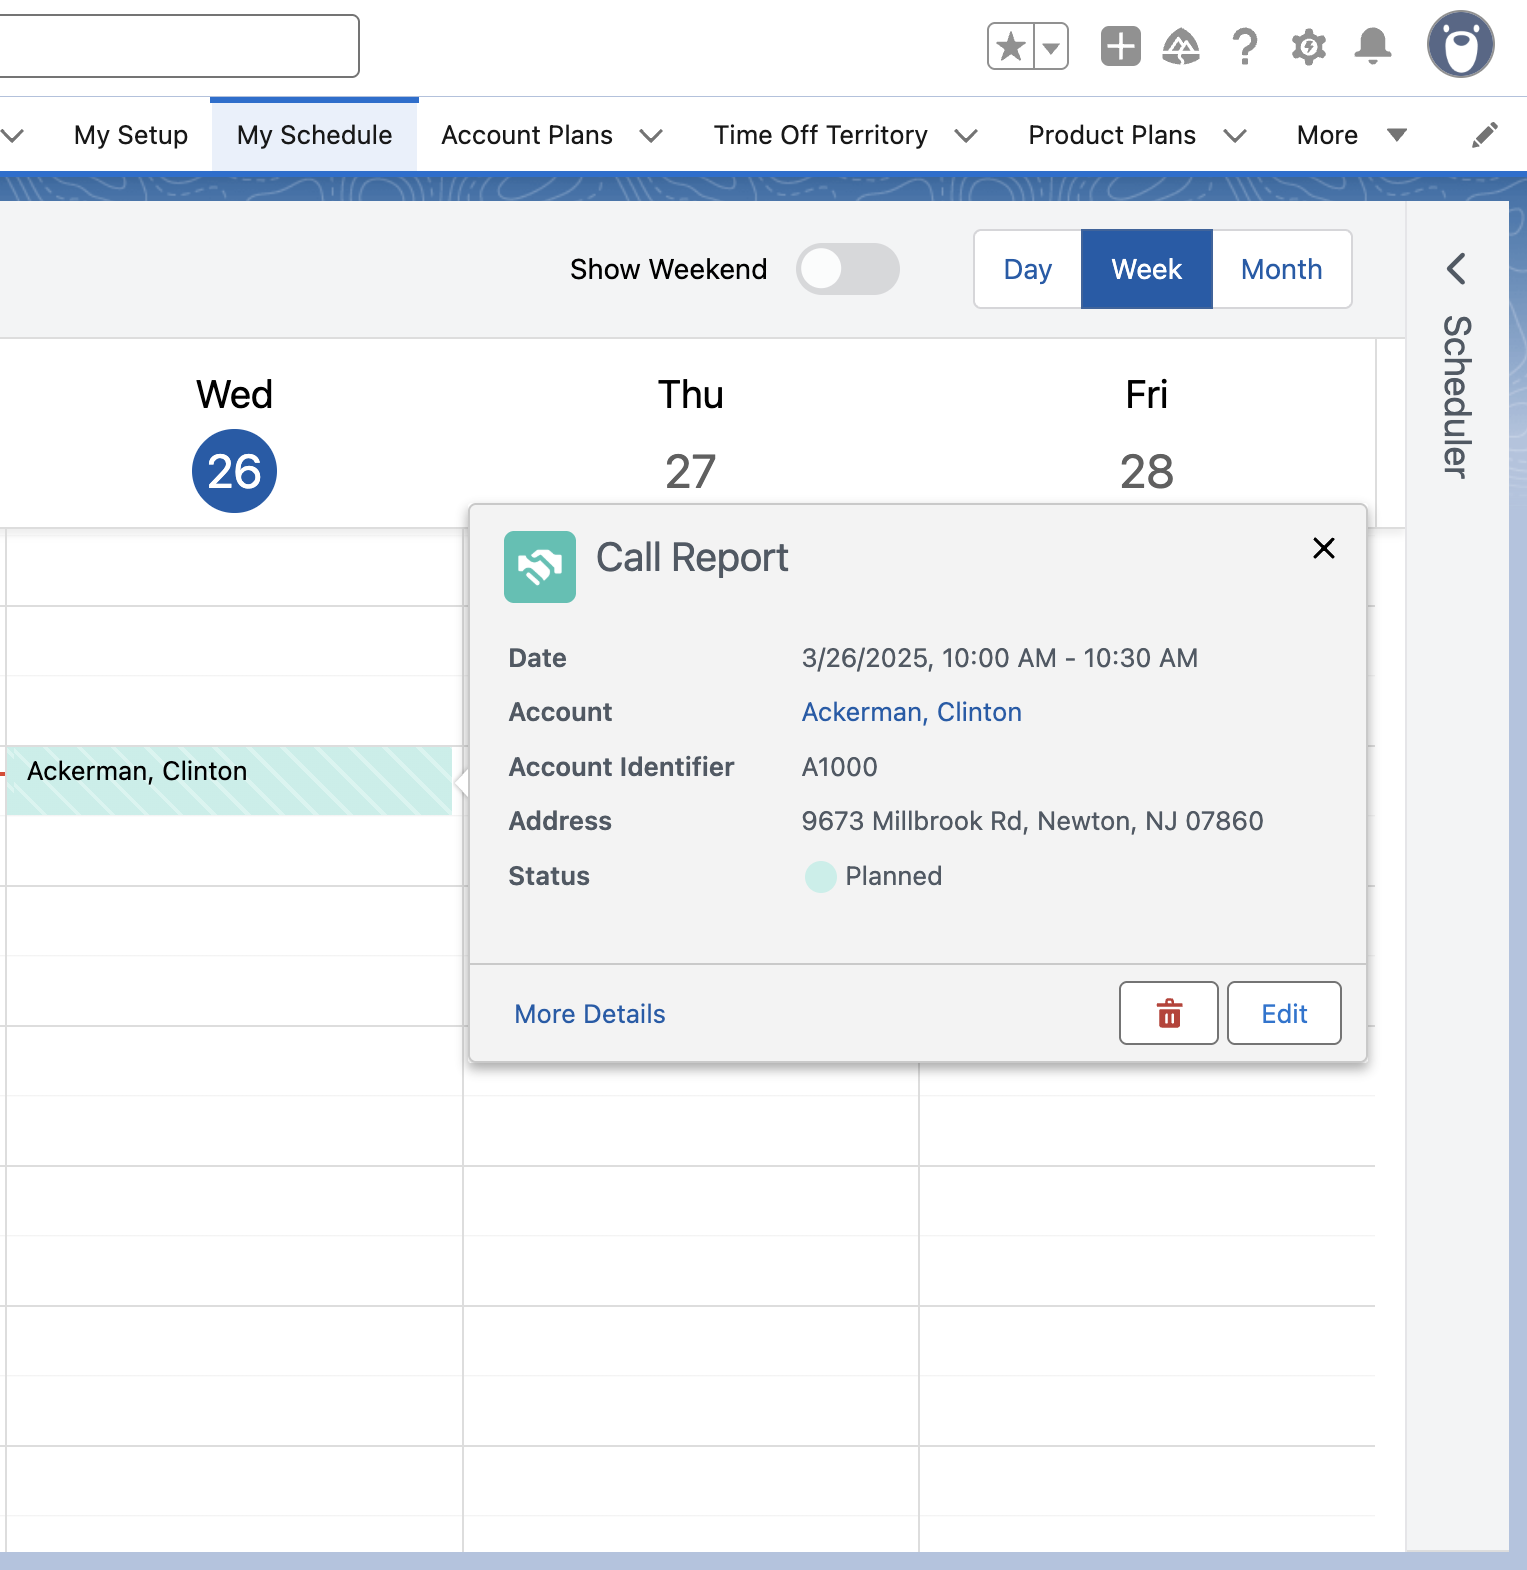
The popover also displays the Lightning tab icon assigned to that object. If Displaying Call Conflict Warnings is enabled, a banner displays on the call popover to highlight the conflict.
Select the Edit button to access the record for the entry. Users can edit the following types of entries directly within My Schedule:
- Calendar Entries
- Time Off Territory
- Medical Events
- Unavailable time slots
When users edit entries within My Schedule, edits display automatically after the user saves the record.
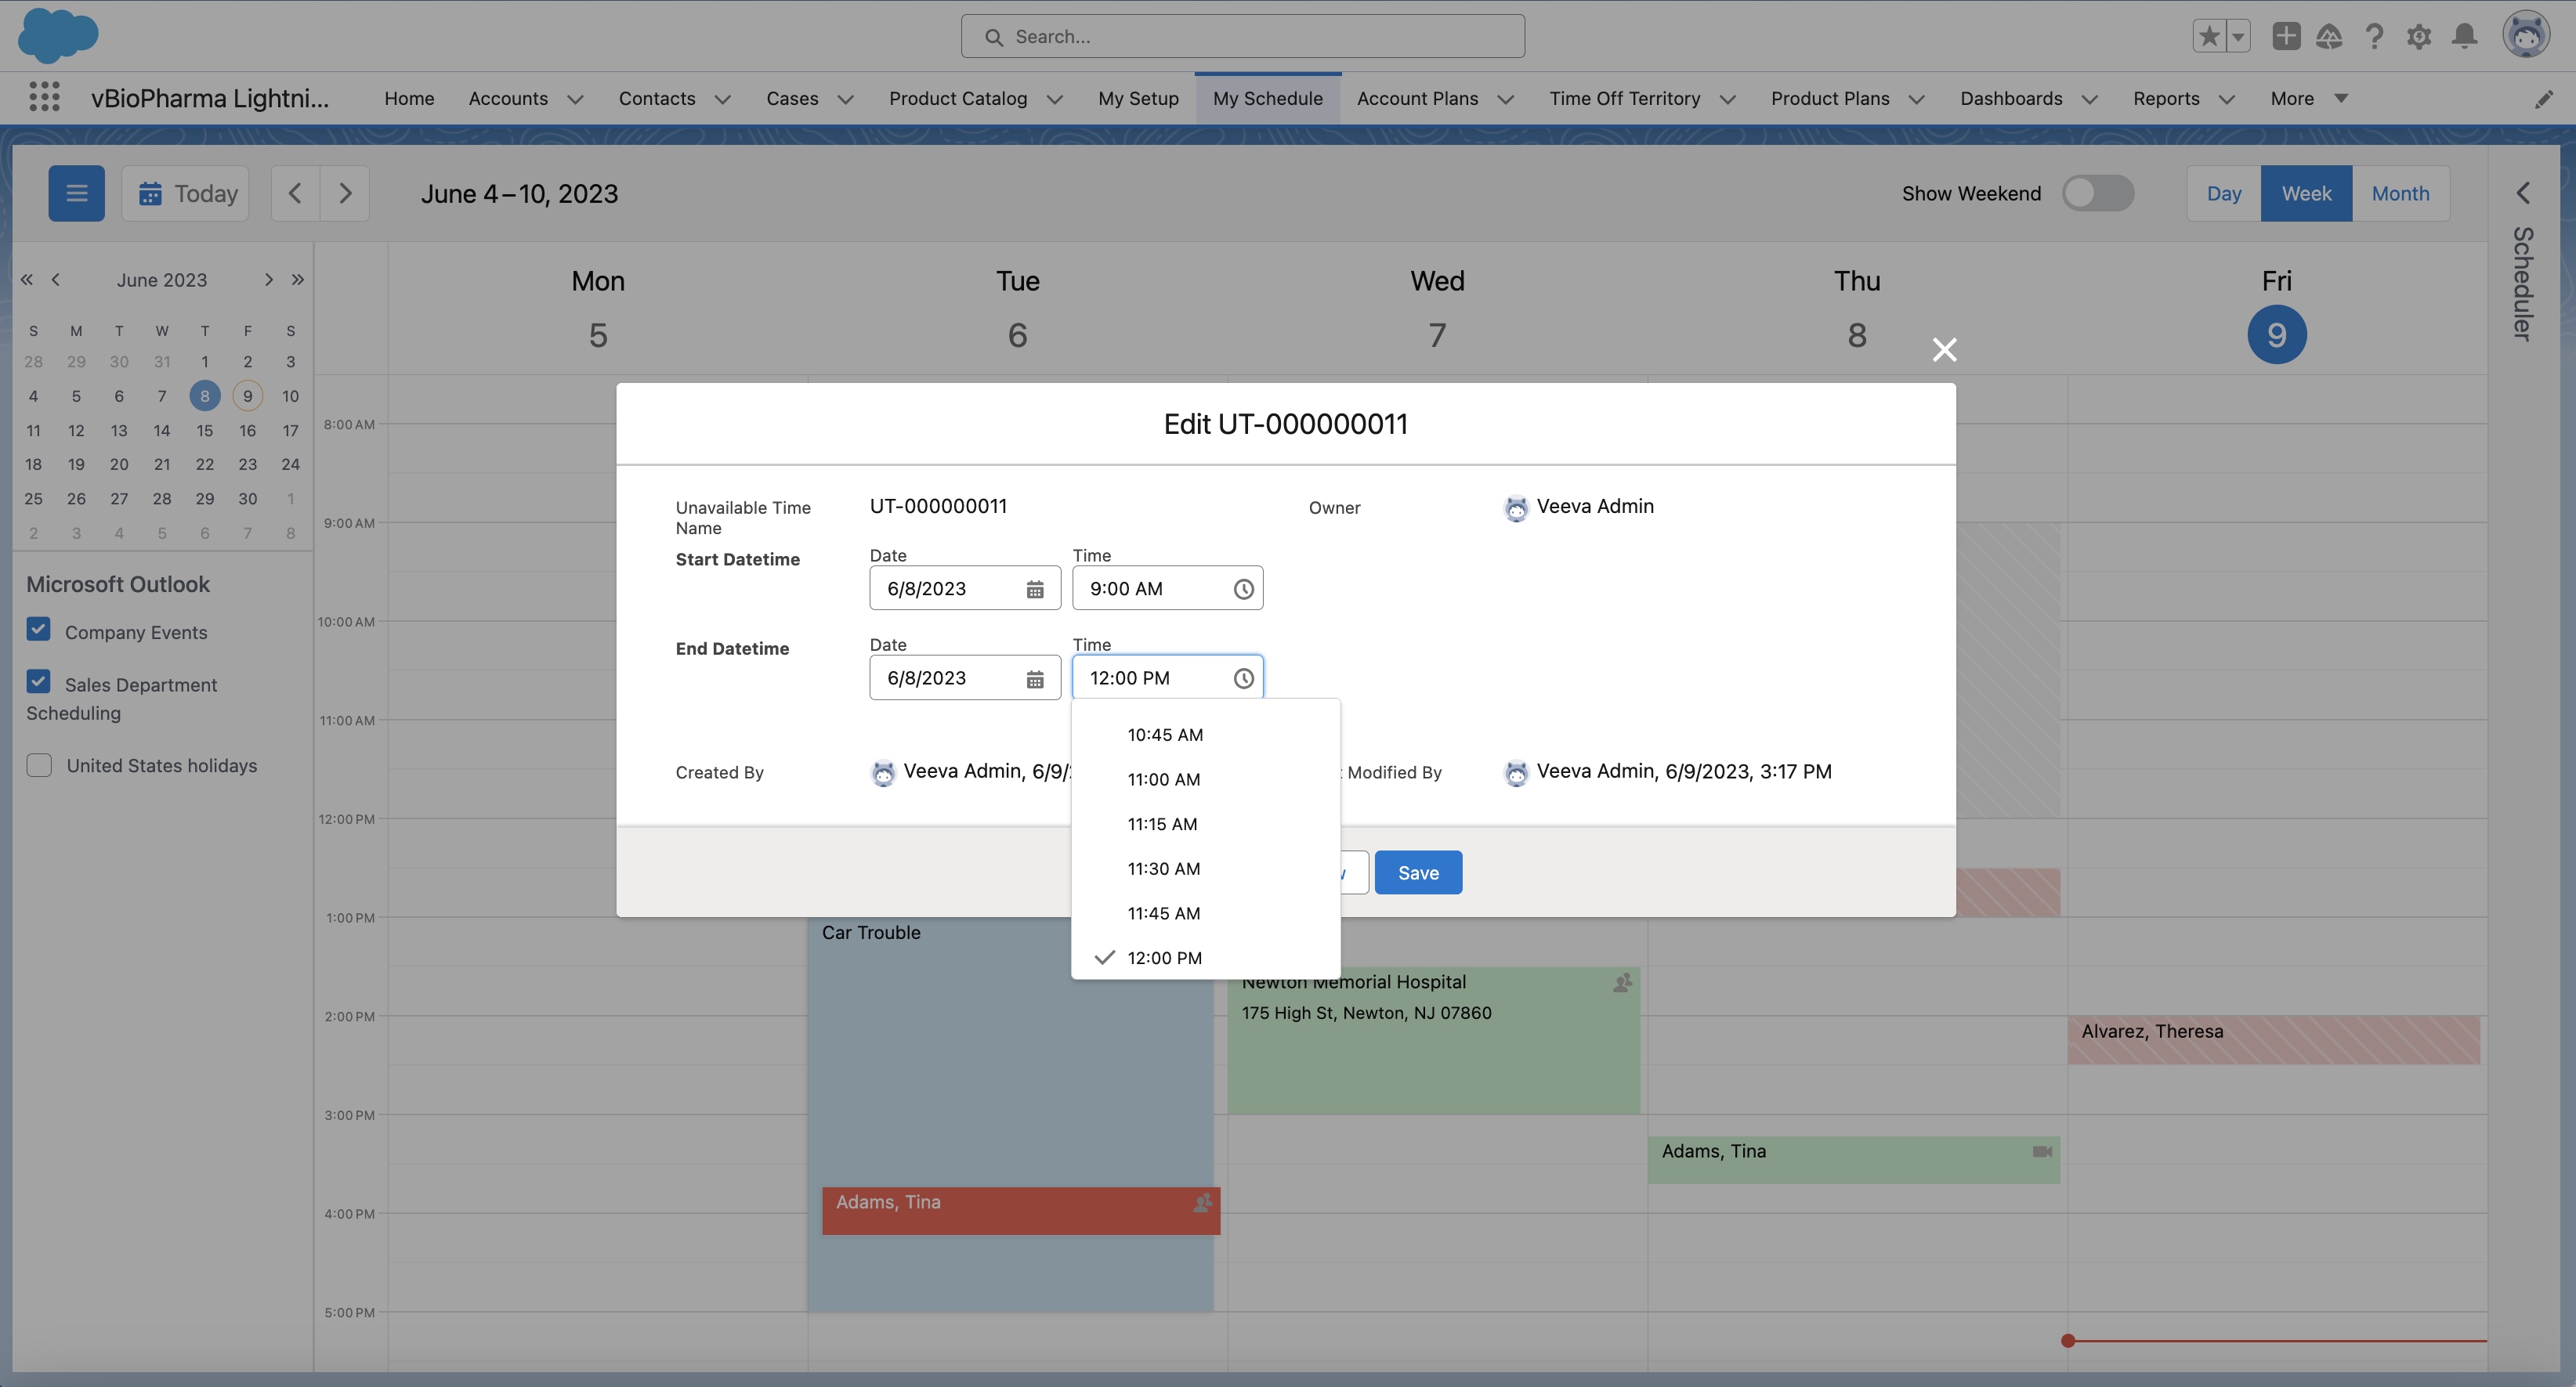
If users create a new unavailable time or Time Off Territory record using the Save & New button on the Edit modal, the new record does not display in Lightning for My Schedule automatically. To view the new record, users must refresh the page.
Deleting Calls in My Schedule
To delete a call in My Schedule:
- Select the call from the calendar.

- Select the Delete button on the popover.
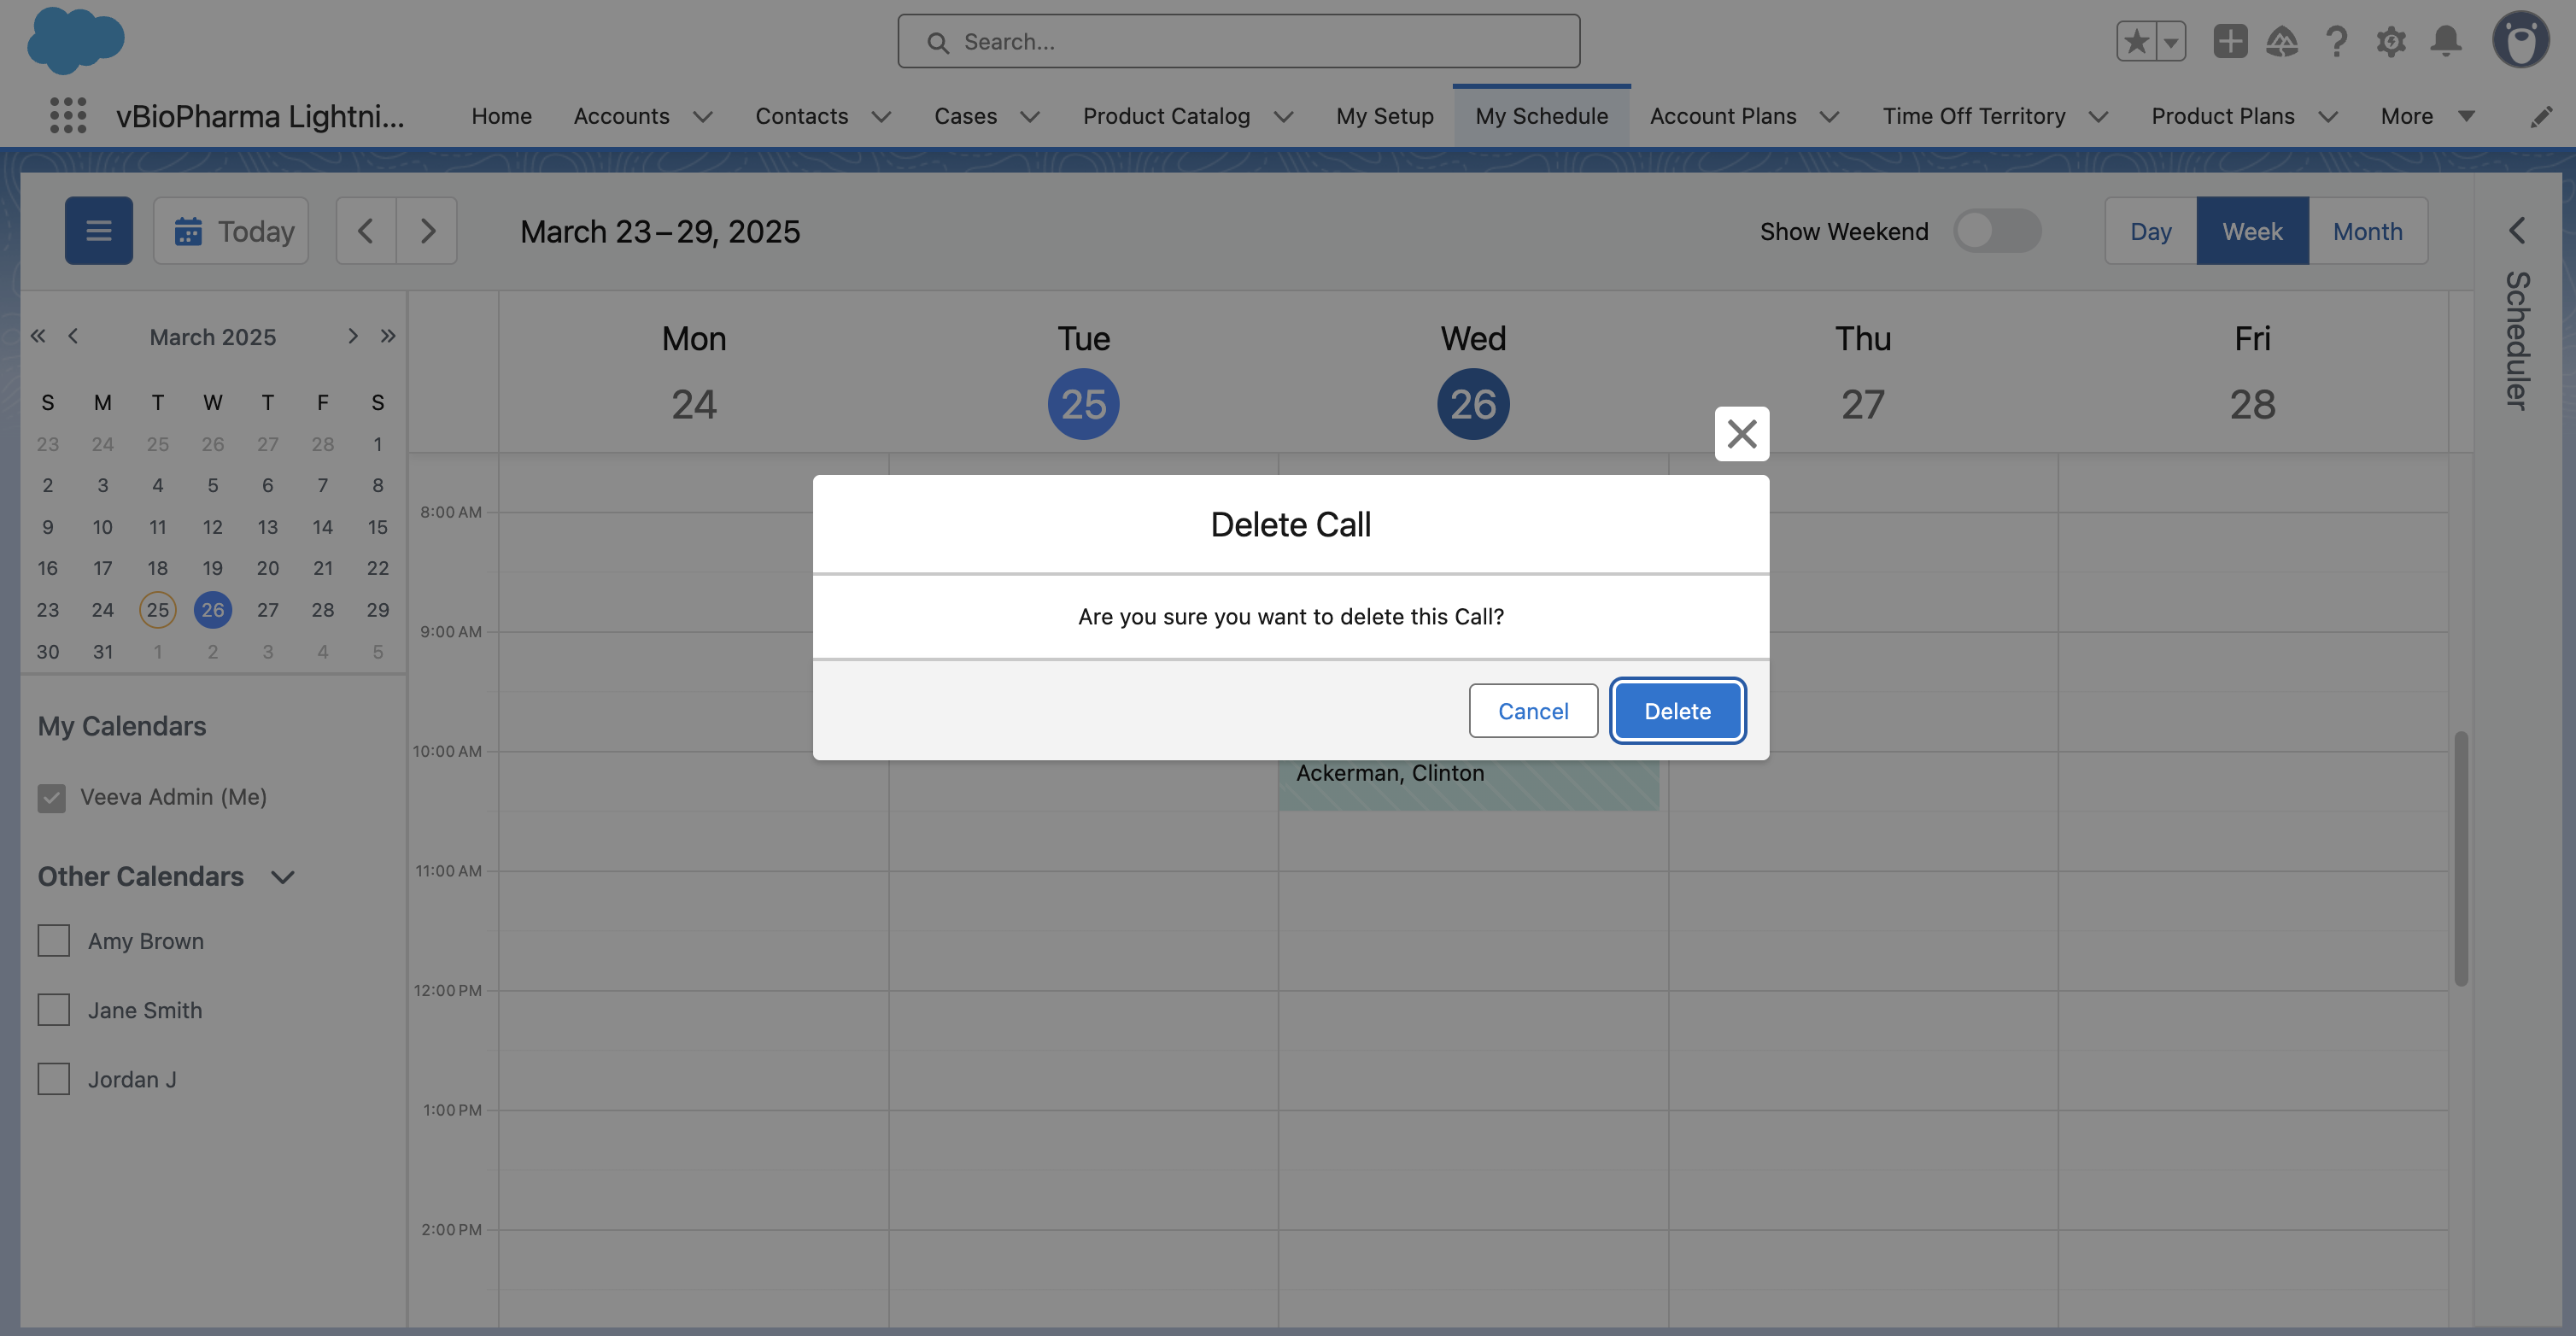
- Confirm the deletion.
The call report and any child calls are deleted.
Editing Entries Outside of My Schedule
Select More Details from an entry popover to open the record in a new tab, outside of My Schedule.

If the record is edited outside of My Schedule, users must reload My Schedule to view updates. This applies to all types of entries.
Call reports and Events Management events always open in a new tab outside of My Schedule, regardless of whether users select More Details or Edit.
Displaying the Call Channel Icon
To help users easily identify which channel a call is scheduled for, the call channel icon displays on calls and on the call popover in My Schedule.
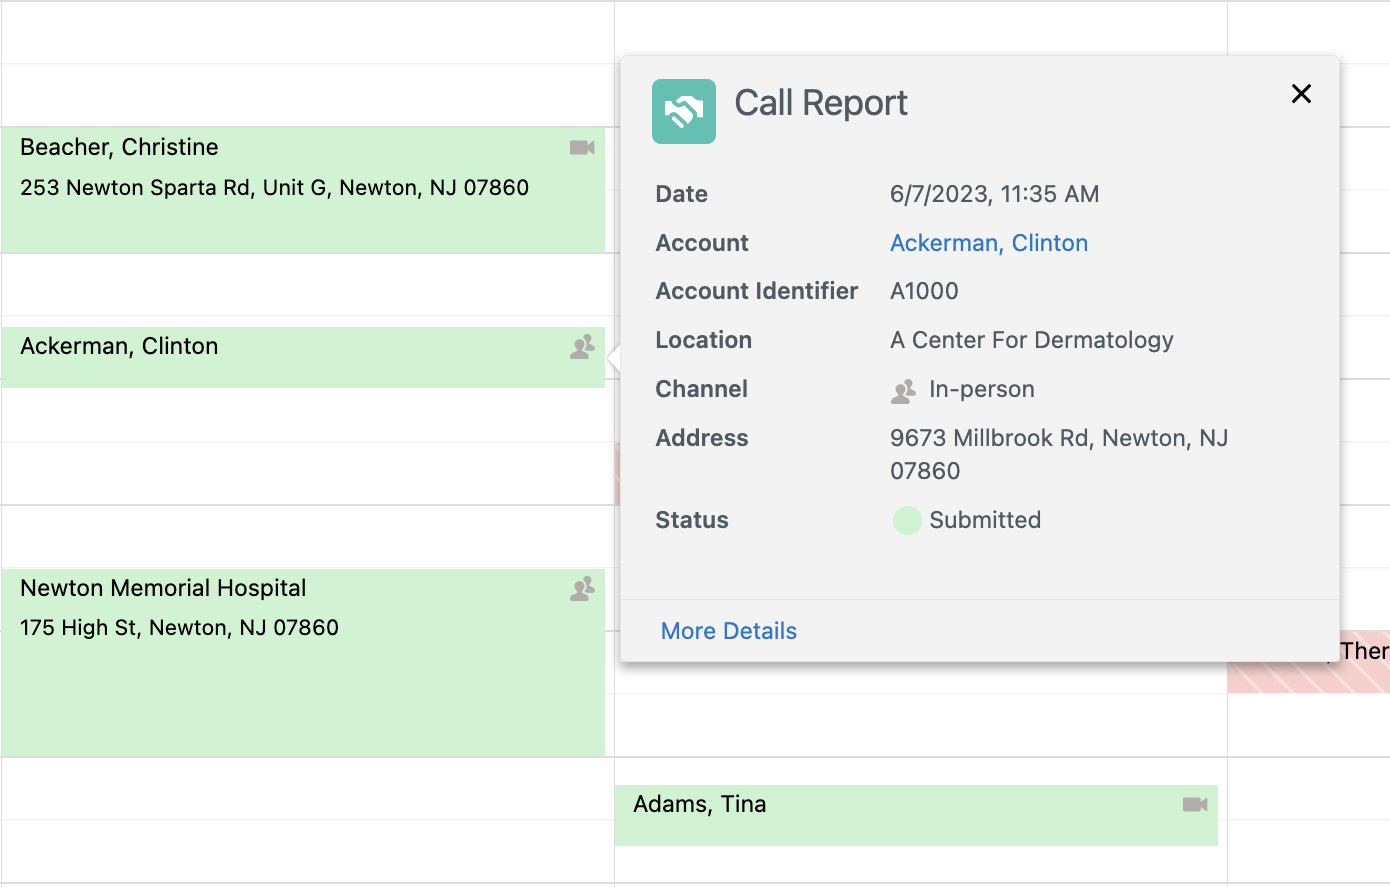
Viewing Child Accounts
For calls against child accounts, the account identifier also displays on the call details popover, if configured. To avoid duplicate information, the Location field does not display on the popover.
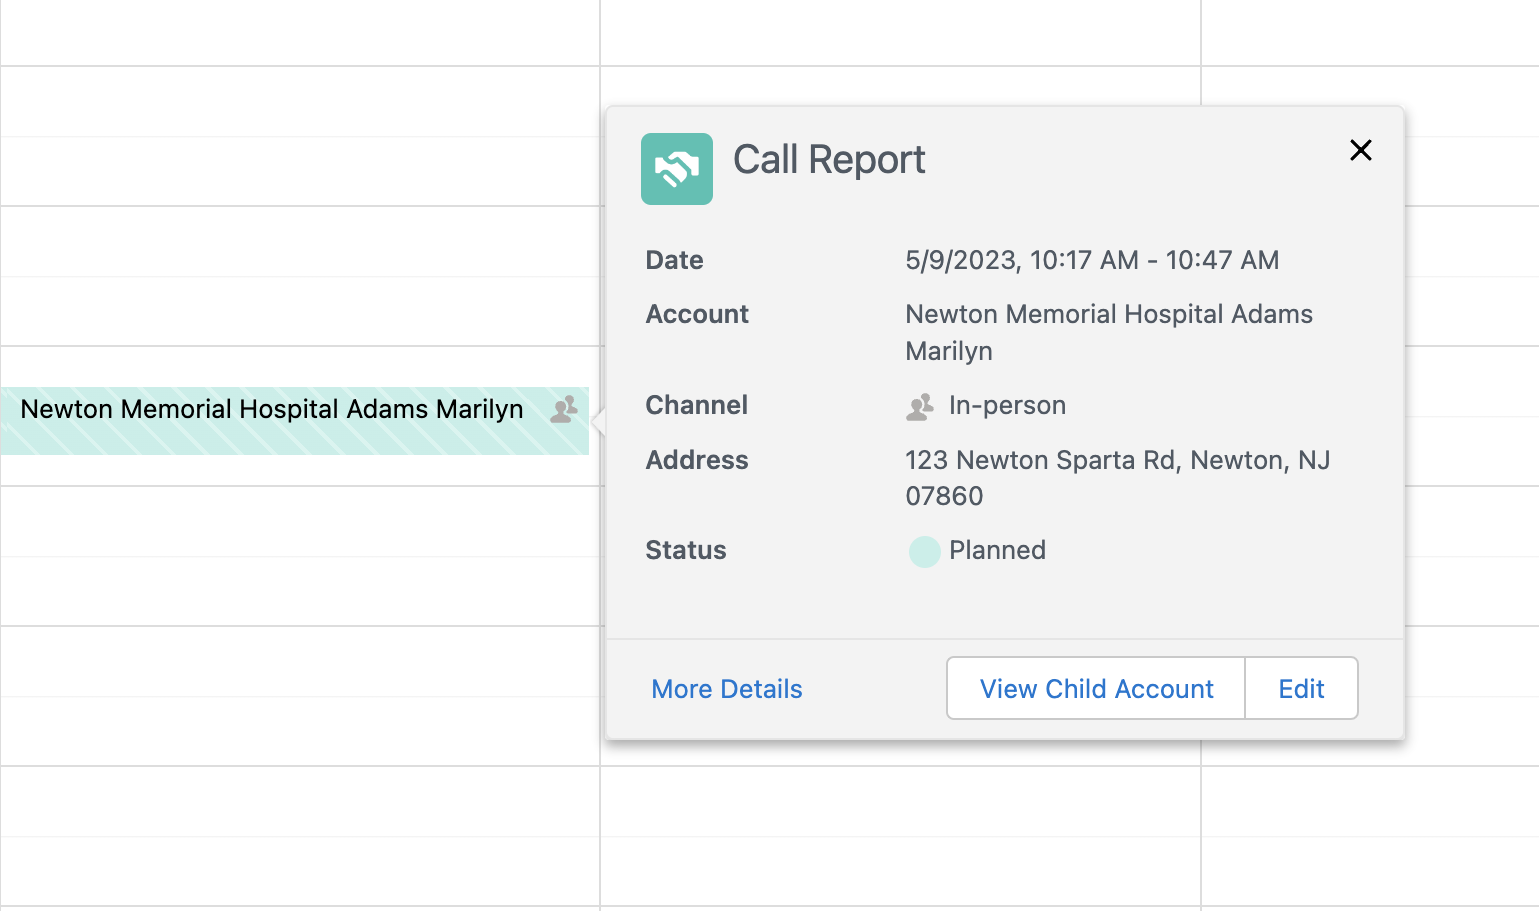
To open a child account record from My Schedule, select a child account call on the calendar. On the call popover, select the View Child Account button. The child account detail page displays in a new tab.
Applying and Managing Call Cycles
Applying Weekly Call Cycles
By default, the By Week option is selected when users first open the Call Cycles tab. To apply call cycles by week, select the check box for the appropriate week. A preview of the call cycle entries display in gray on the calendar. If users move to a different week in My Schedule, the selected call cycle continues to display as a preview over the new week.
Viewing or editing call cycle labels is not supported in Lightning for My Schedule.
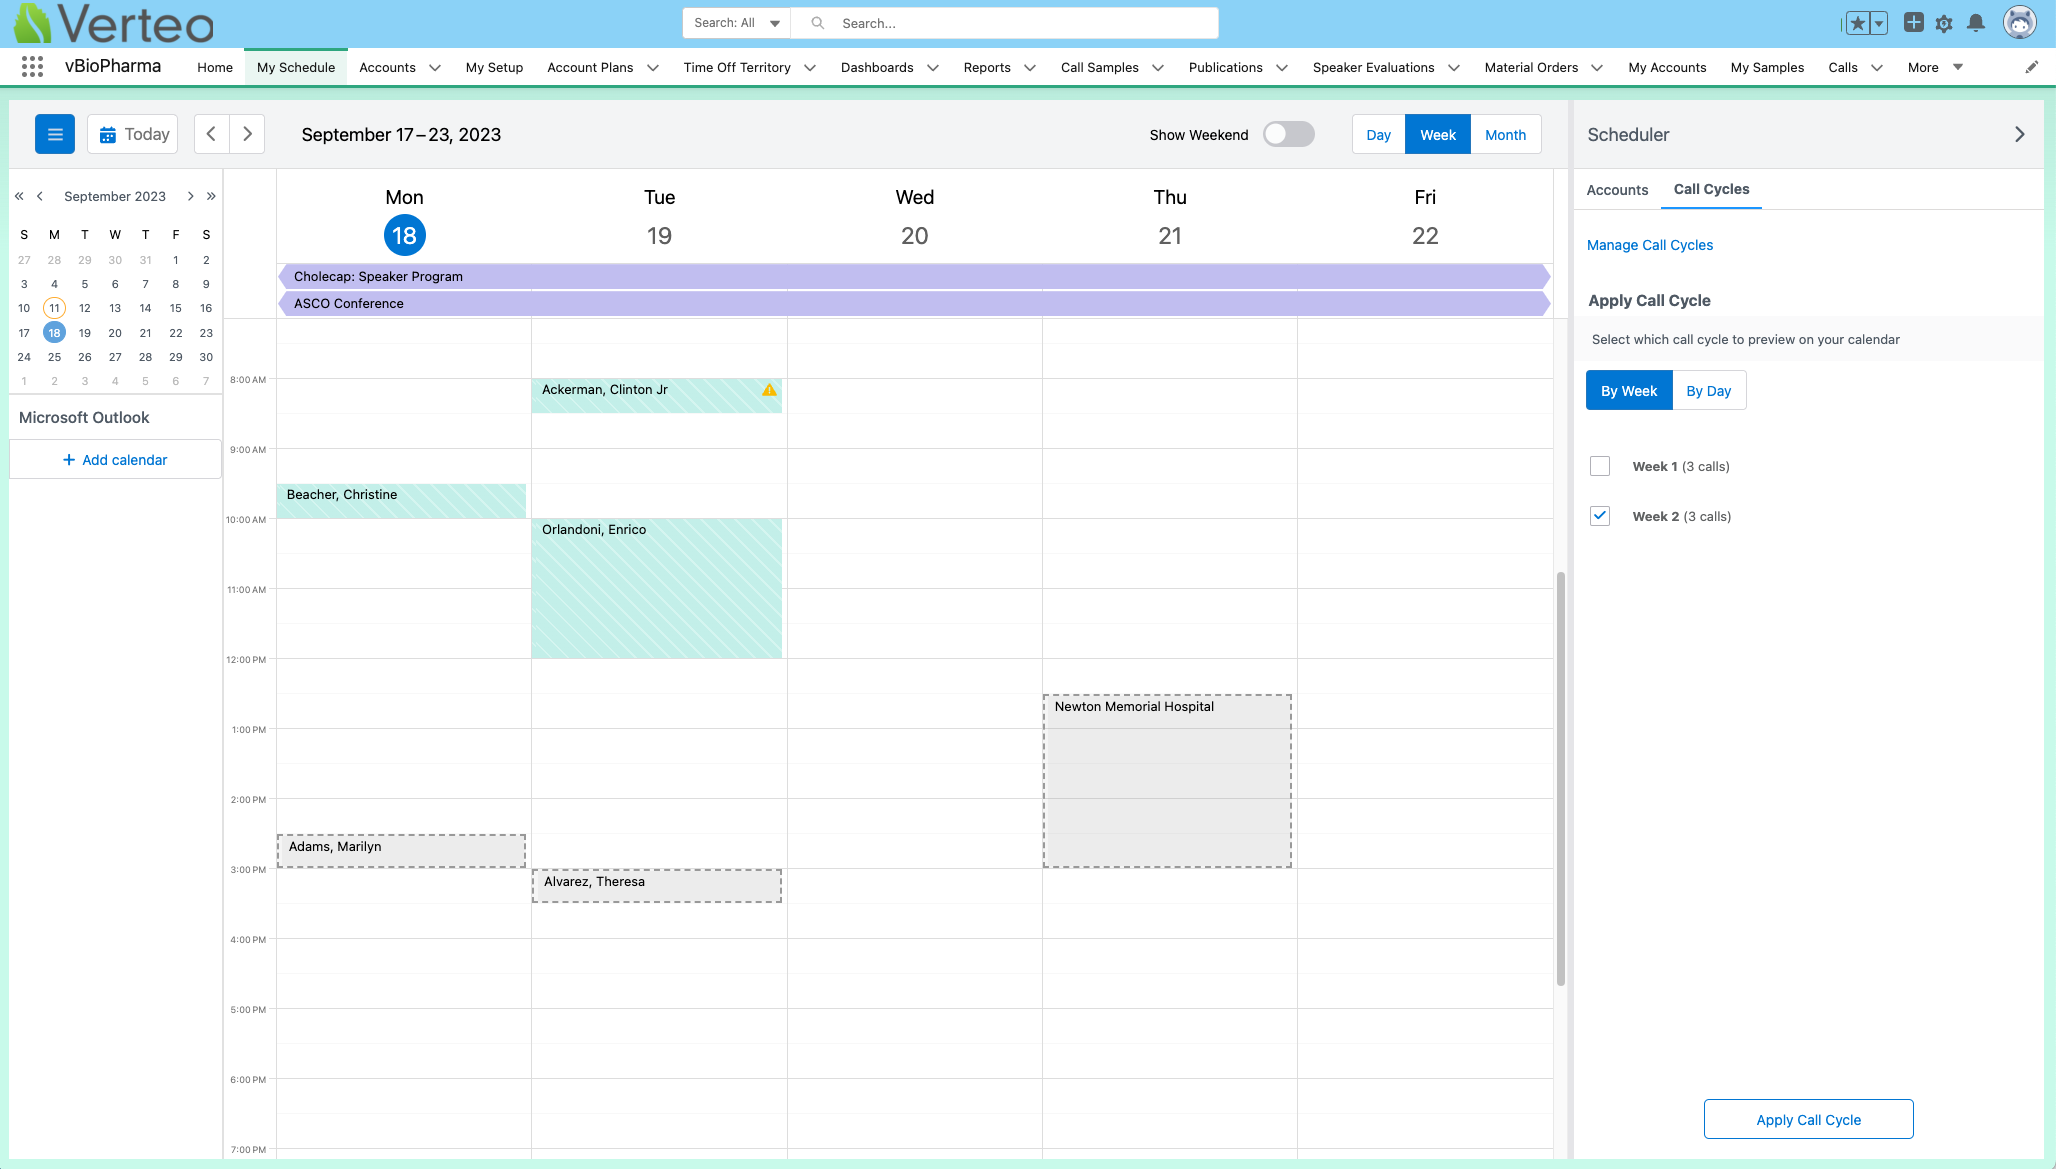
If users switch to Day View while viewing a weekly Call Cycle, the Call Cycles tab switches to the user’s call cycle entries for that day.
Select the Apply Call Cycle button to create the calls.
Applying Daily Call Cycles
To view and apply call cycles by day, select the By Day toggle from the Call Cycles tab on the Scheduler pane. Days of the week display in bubbles above the call cycle options. Select a bubble to move to another day.
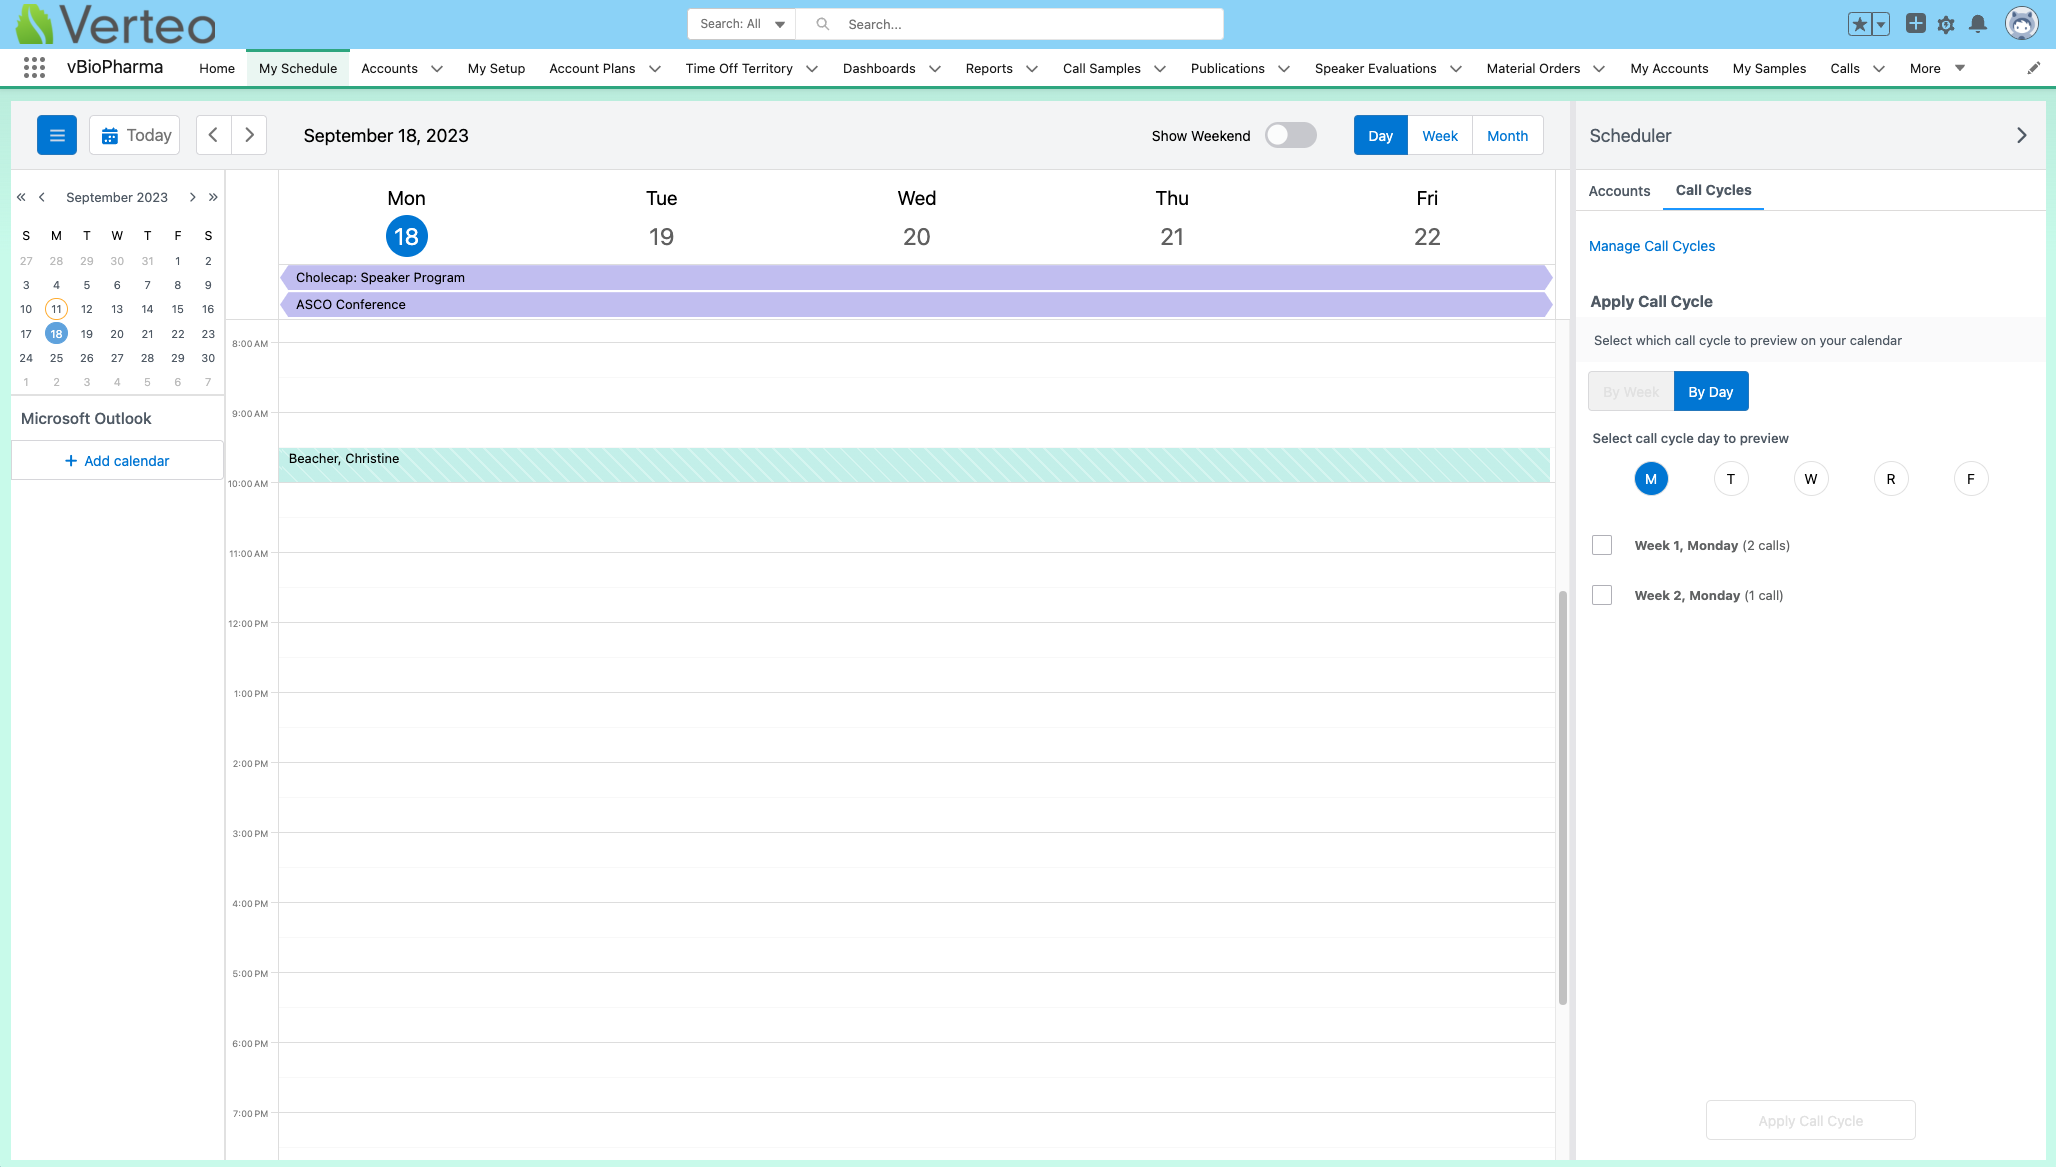
To apply a call cycle day, select the check box next to the call cycle. A preview of the call cycle displays in gray on the calendar.
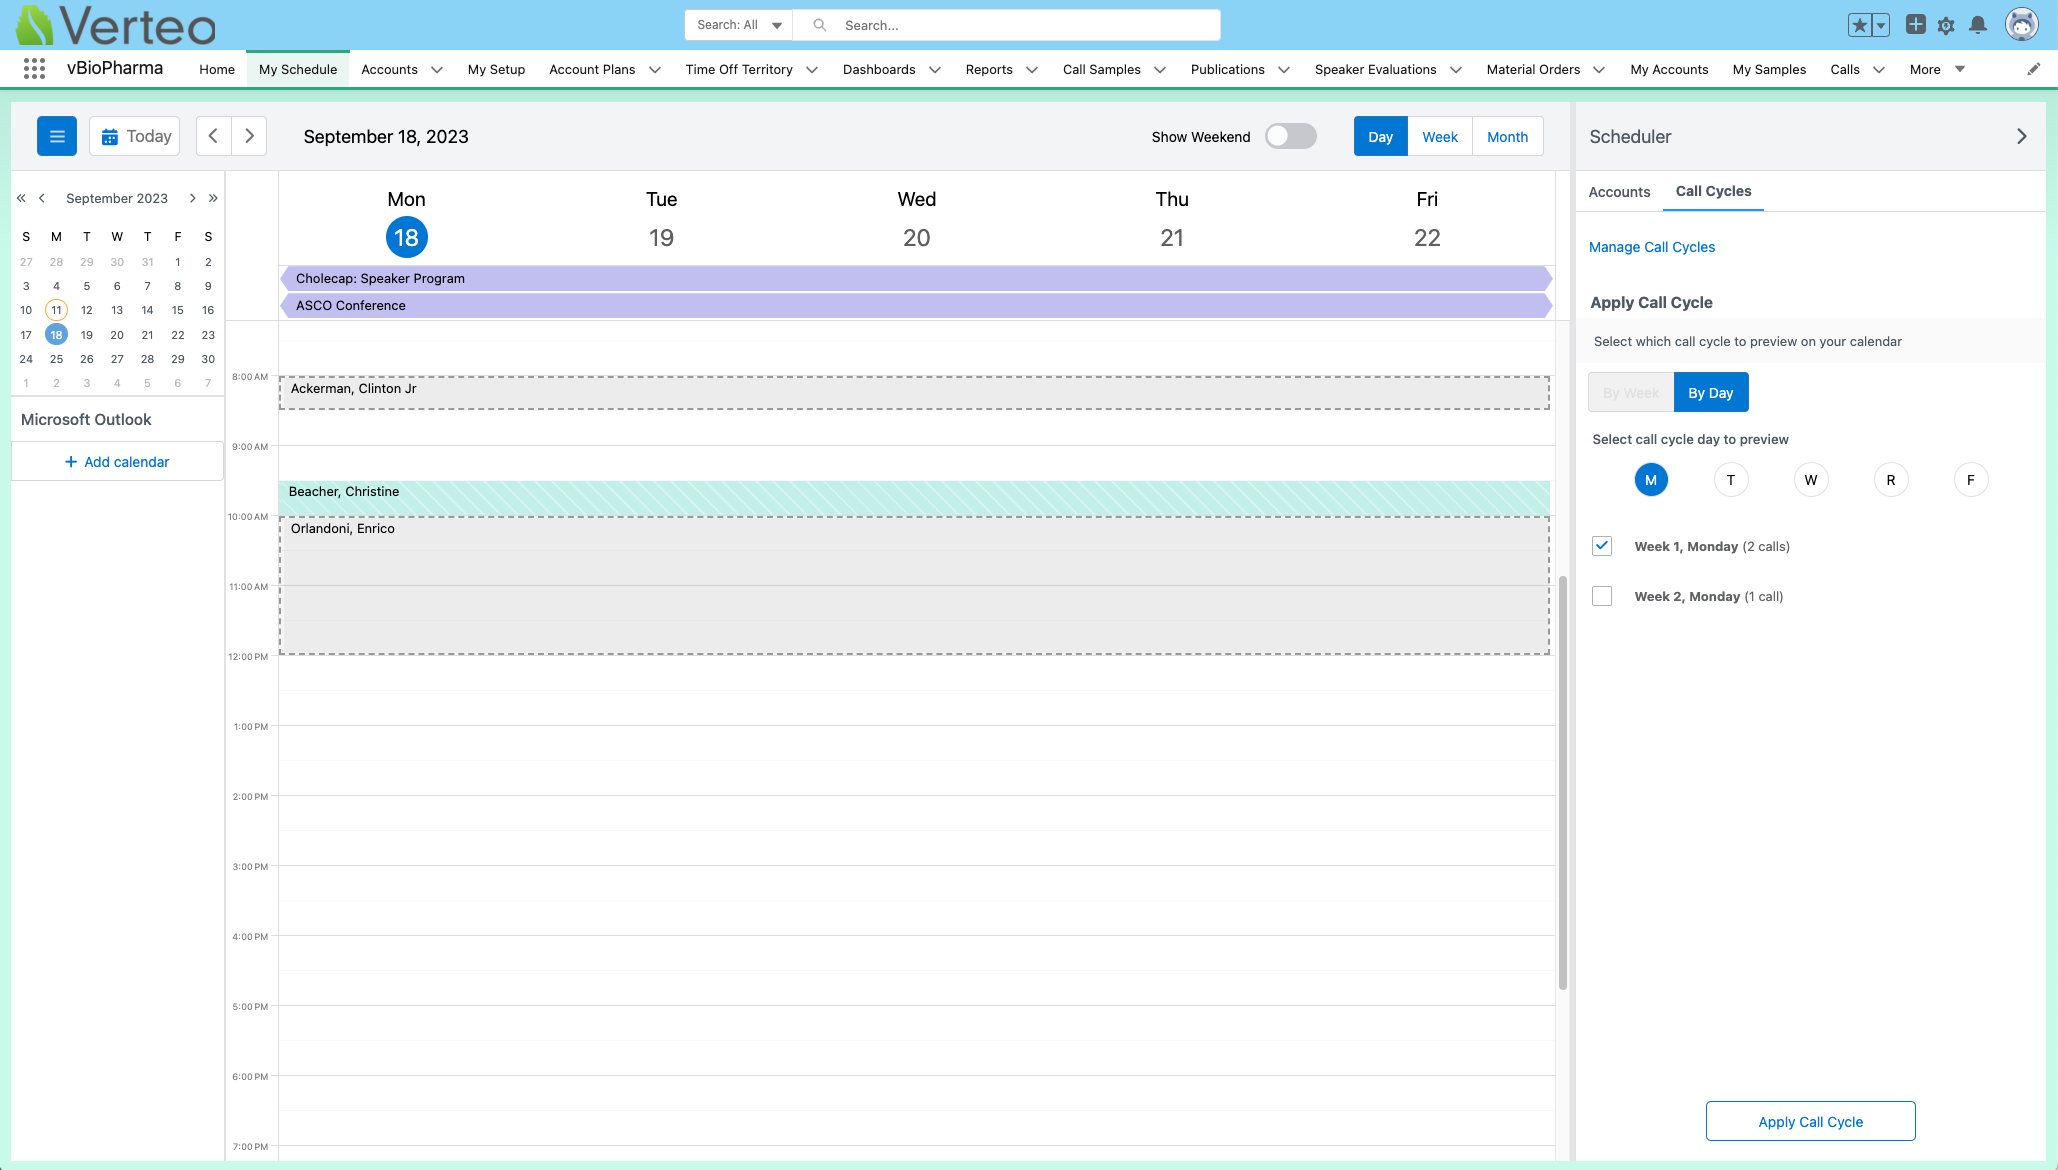
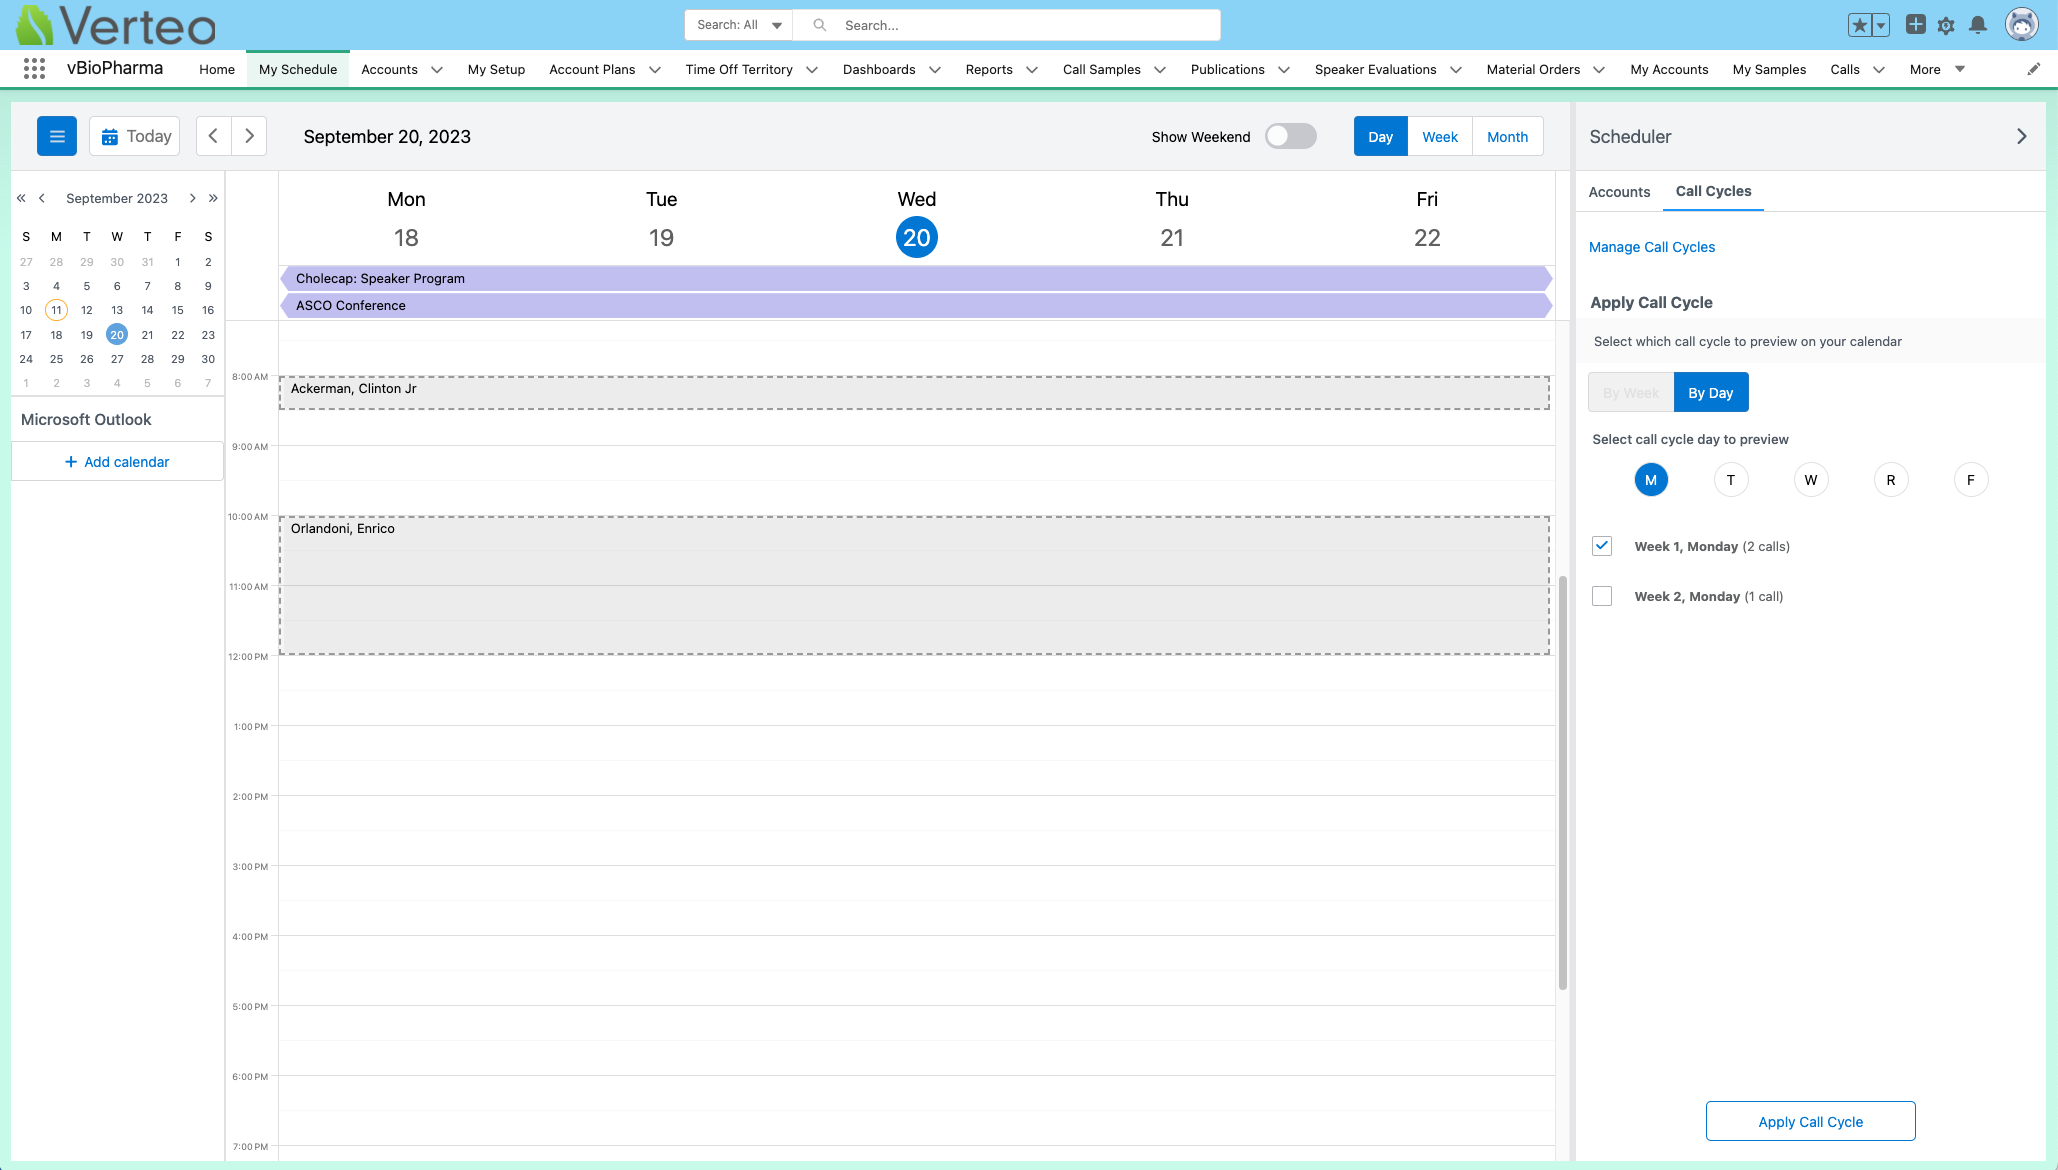
If users move to a different day from My Schedule, the preview remains visible over the calendar. By moving to a different day, users can apply call cycles for one day of the week to another day. For example, by moving to Wednesday while the Week 1 Monday call cycle is selected, users can apply the Week 1 Monday call cycle to Wednesday.
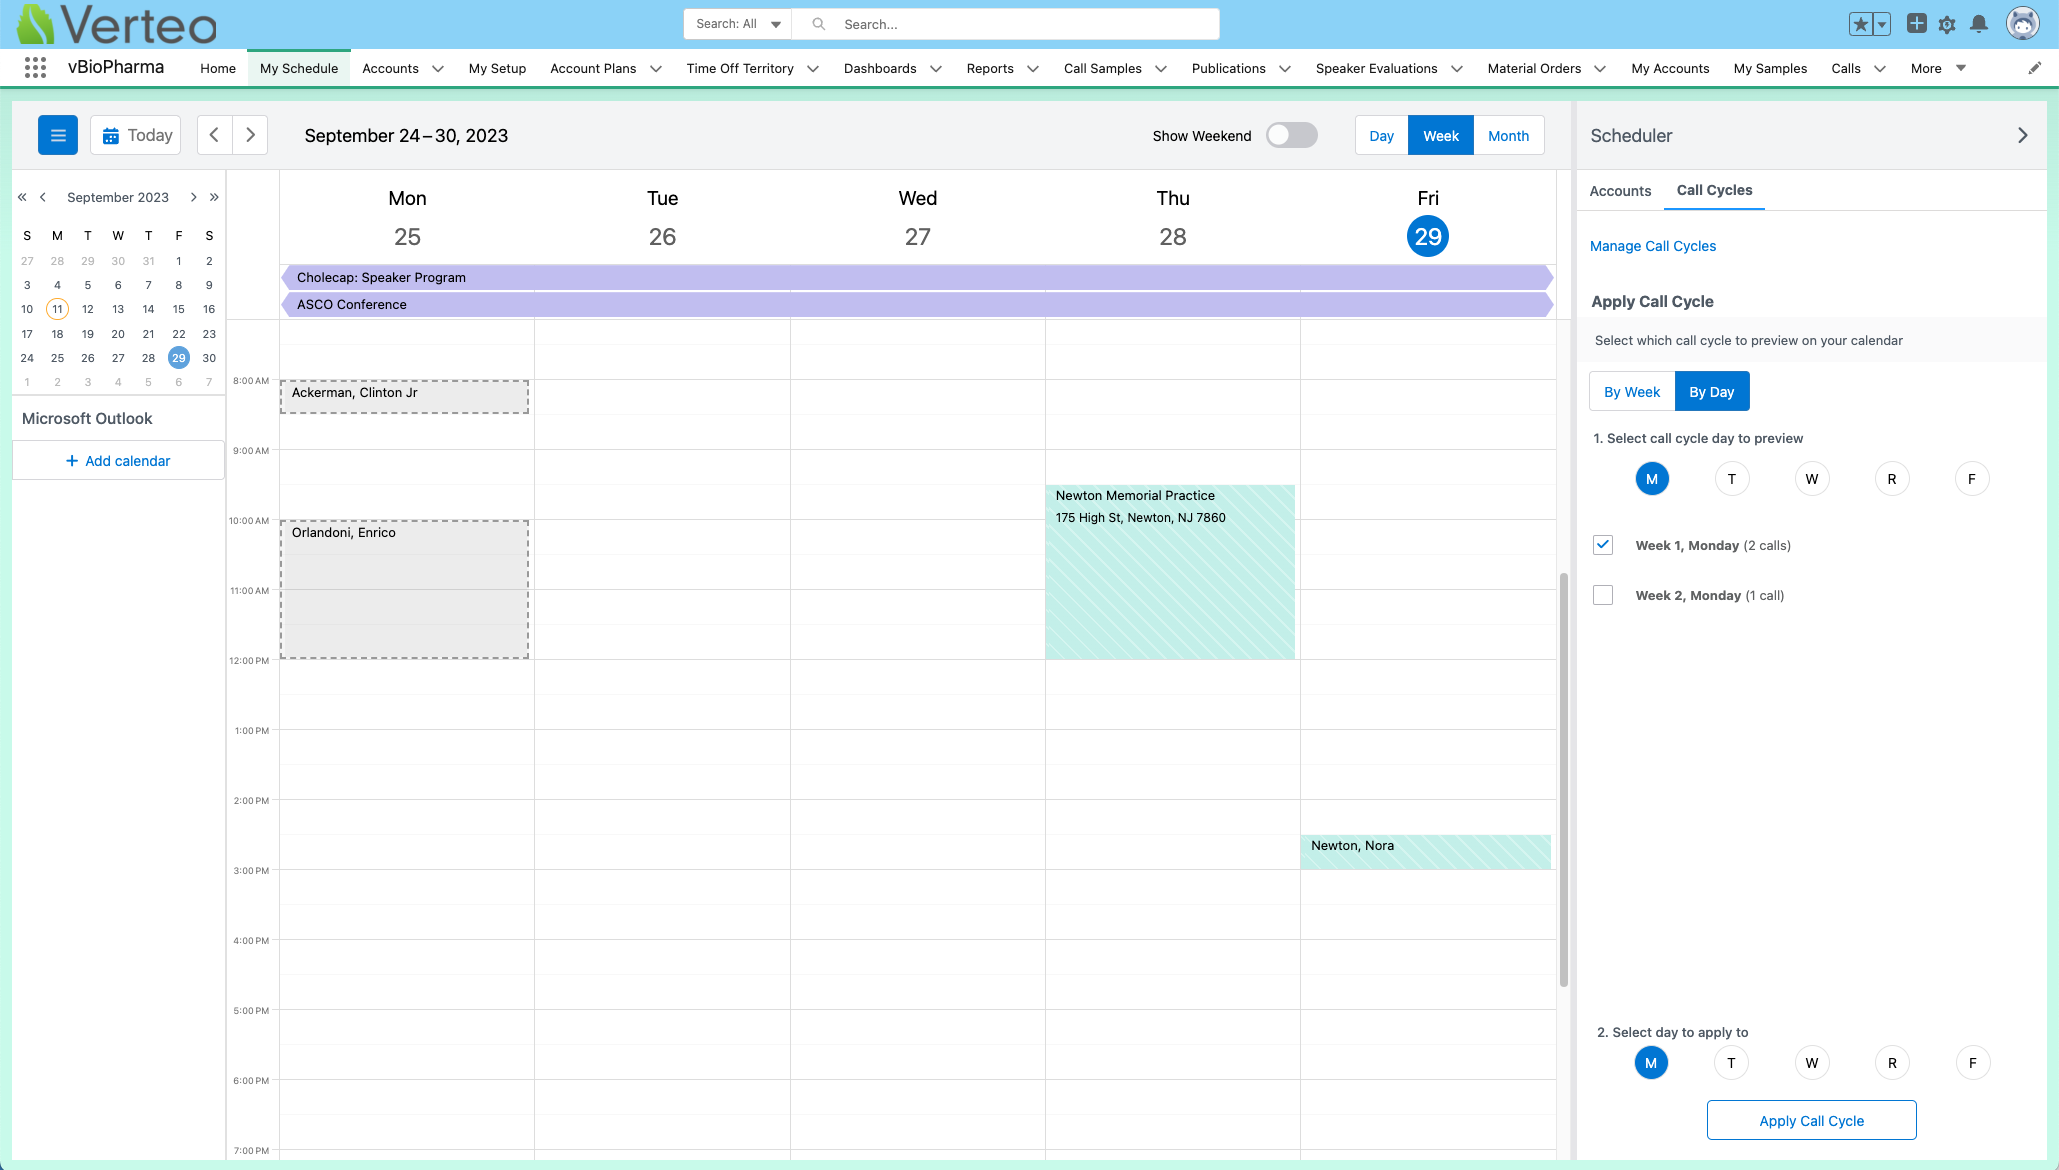
To preview a daily call cycle in the context of the full week, select the Week button in the My Schedule header to transition to Week View. The daily call cycle entries display in gray over the appropriate day.
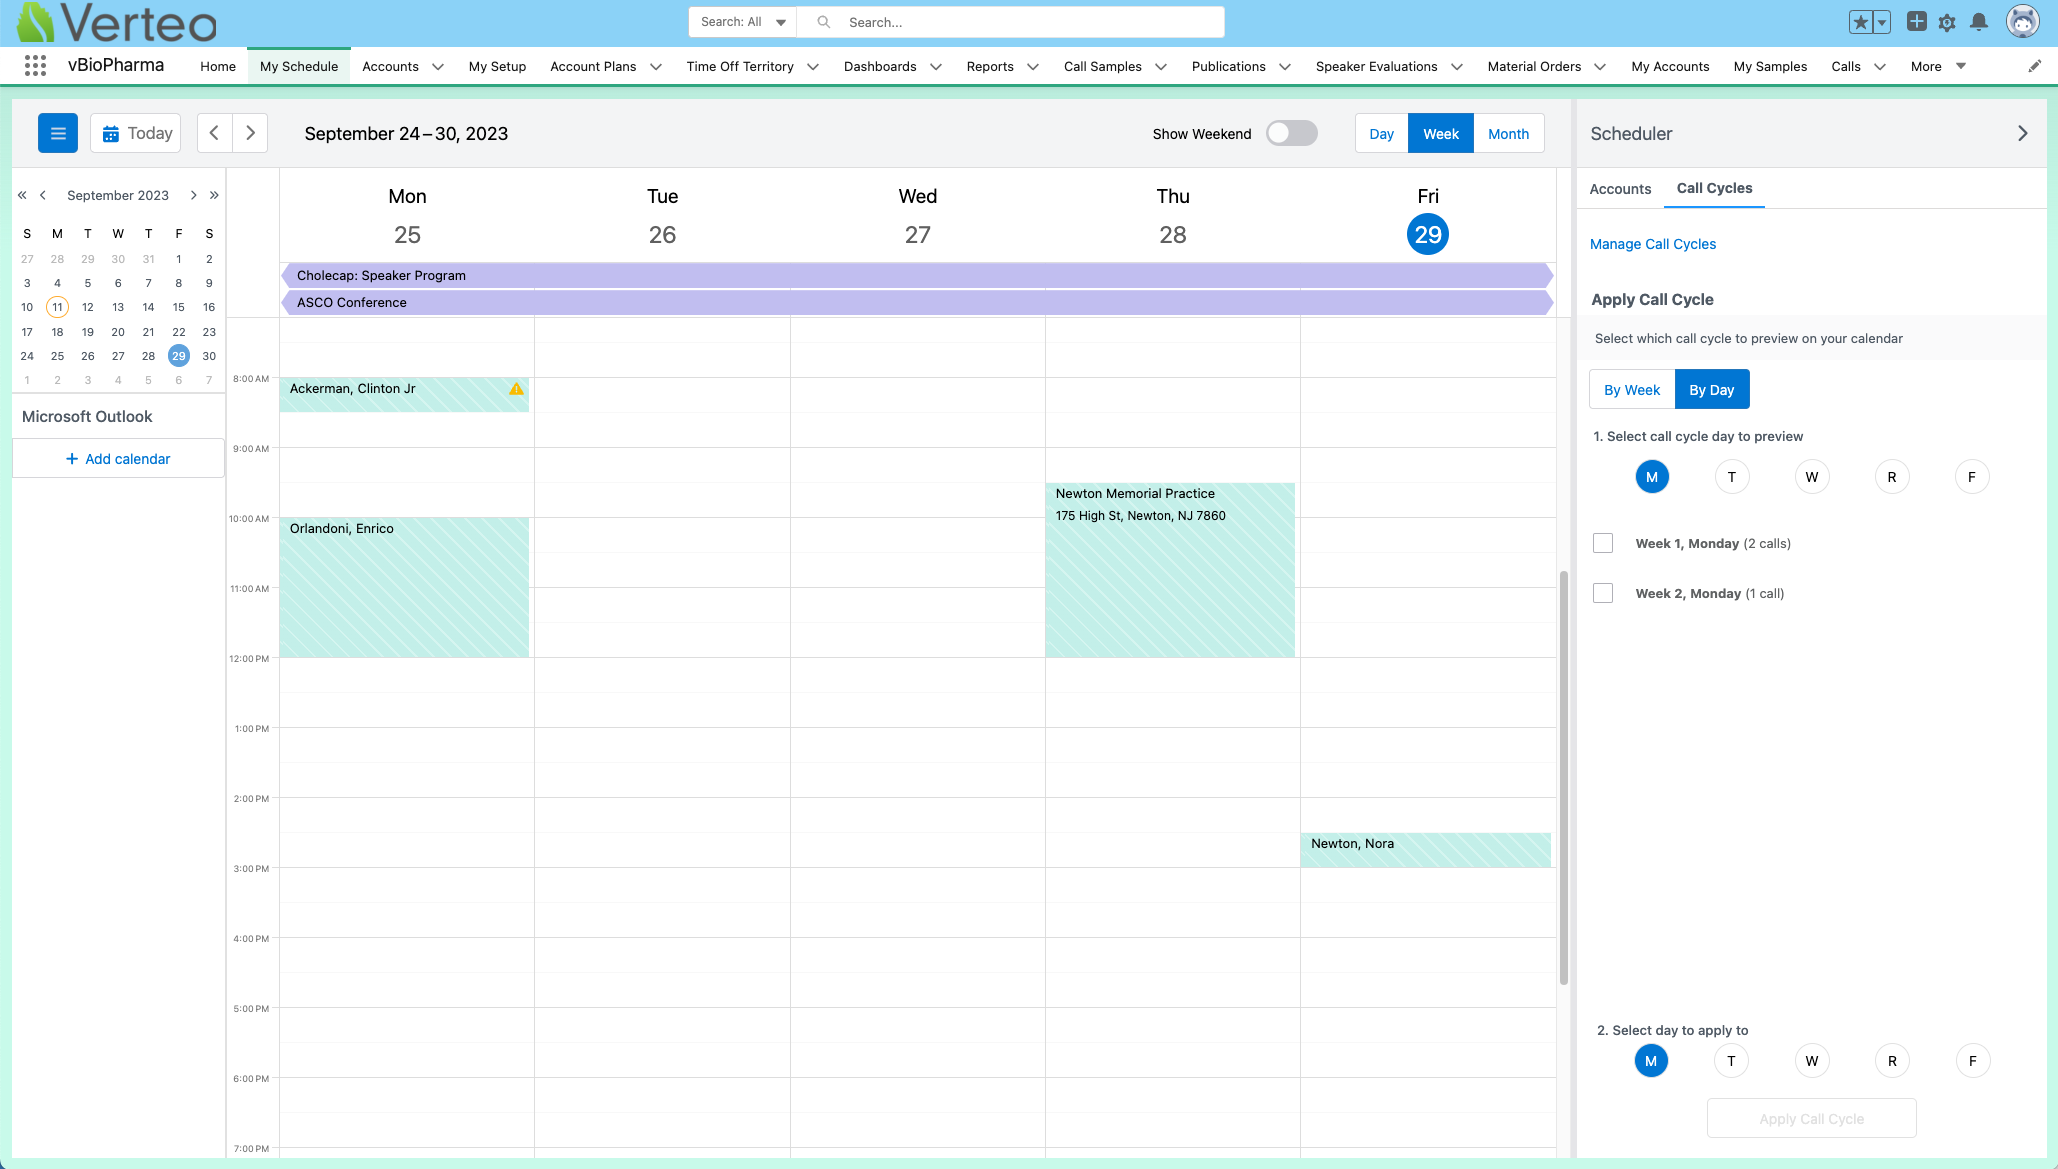
Select the Apply Call Cycle button to create the calls.
Managing Call Cycles
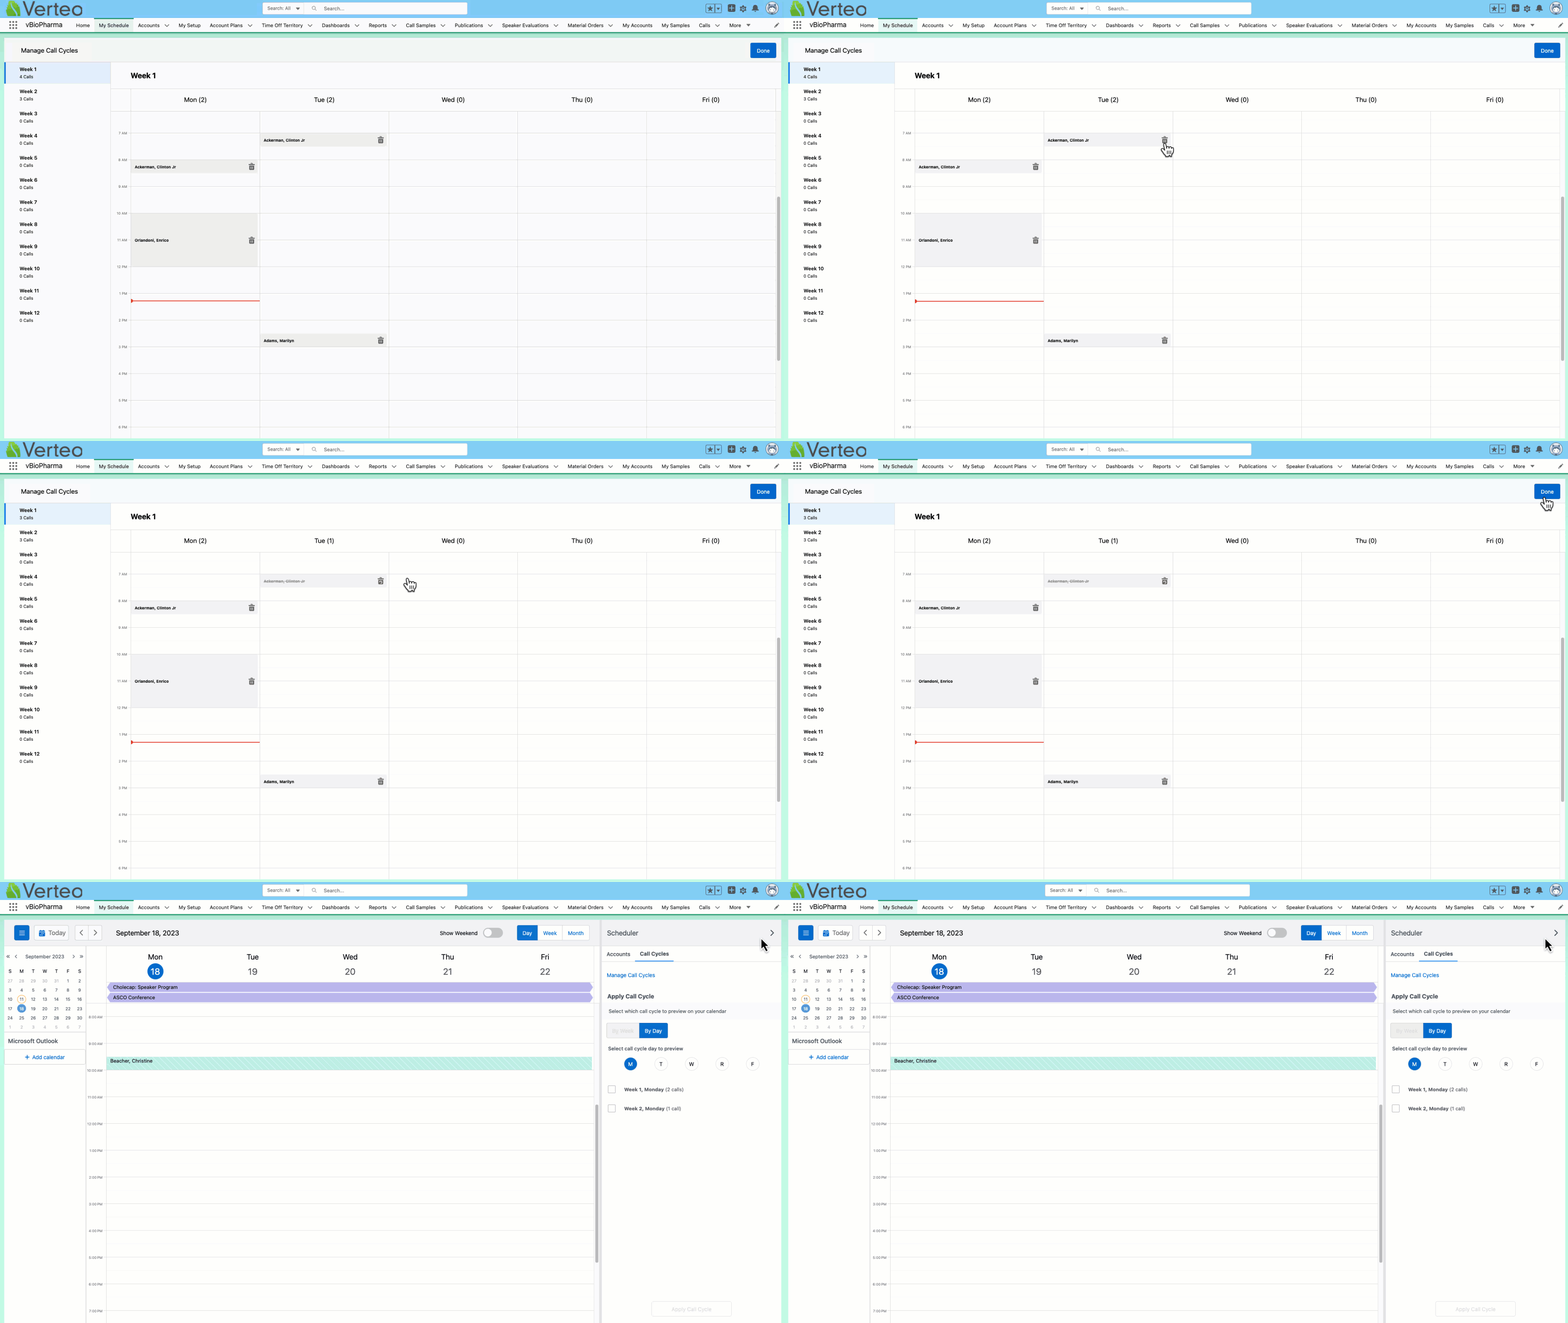
When users select the Manage Call Cycles link from the Scheduler pane, My Schedule’s calendar grid changes to the Manage Call Cycles view where users can:
- Create new call cycle entries
- Reschedule call cycle entries
- Delete call cycle entries
Copying call cycles is not supported in Lightning for My Schedule.
Creating New Call Cycle Entries
To add call cycle entries from the Manage Call Cycles view:
- Select the Manage Call Cycles link from the Call Cycles tab on the Scheduler pane.
- Left-select the appropriate time slot on the calendar.
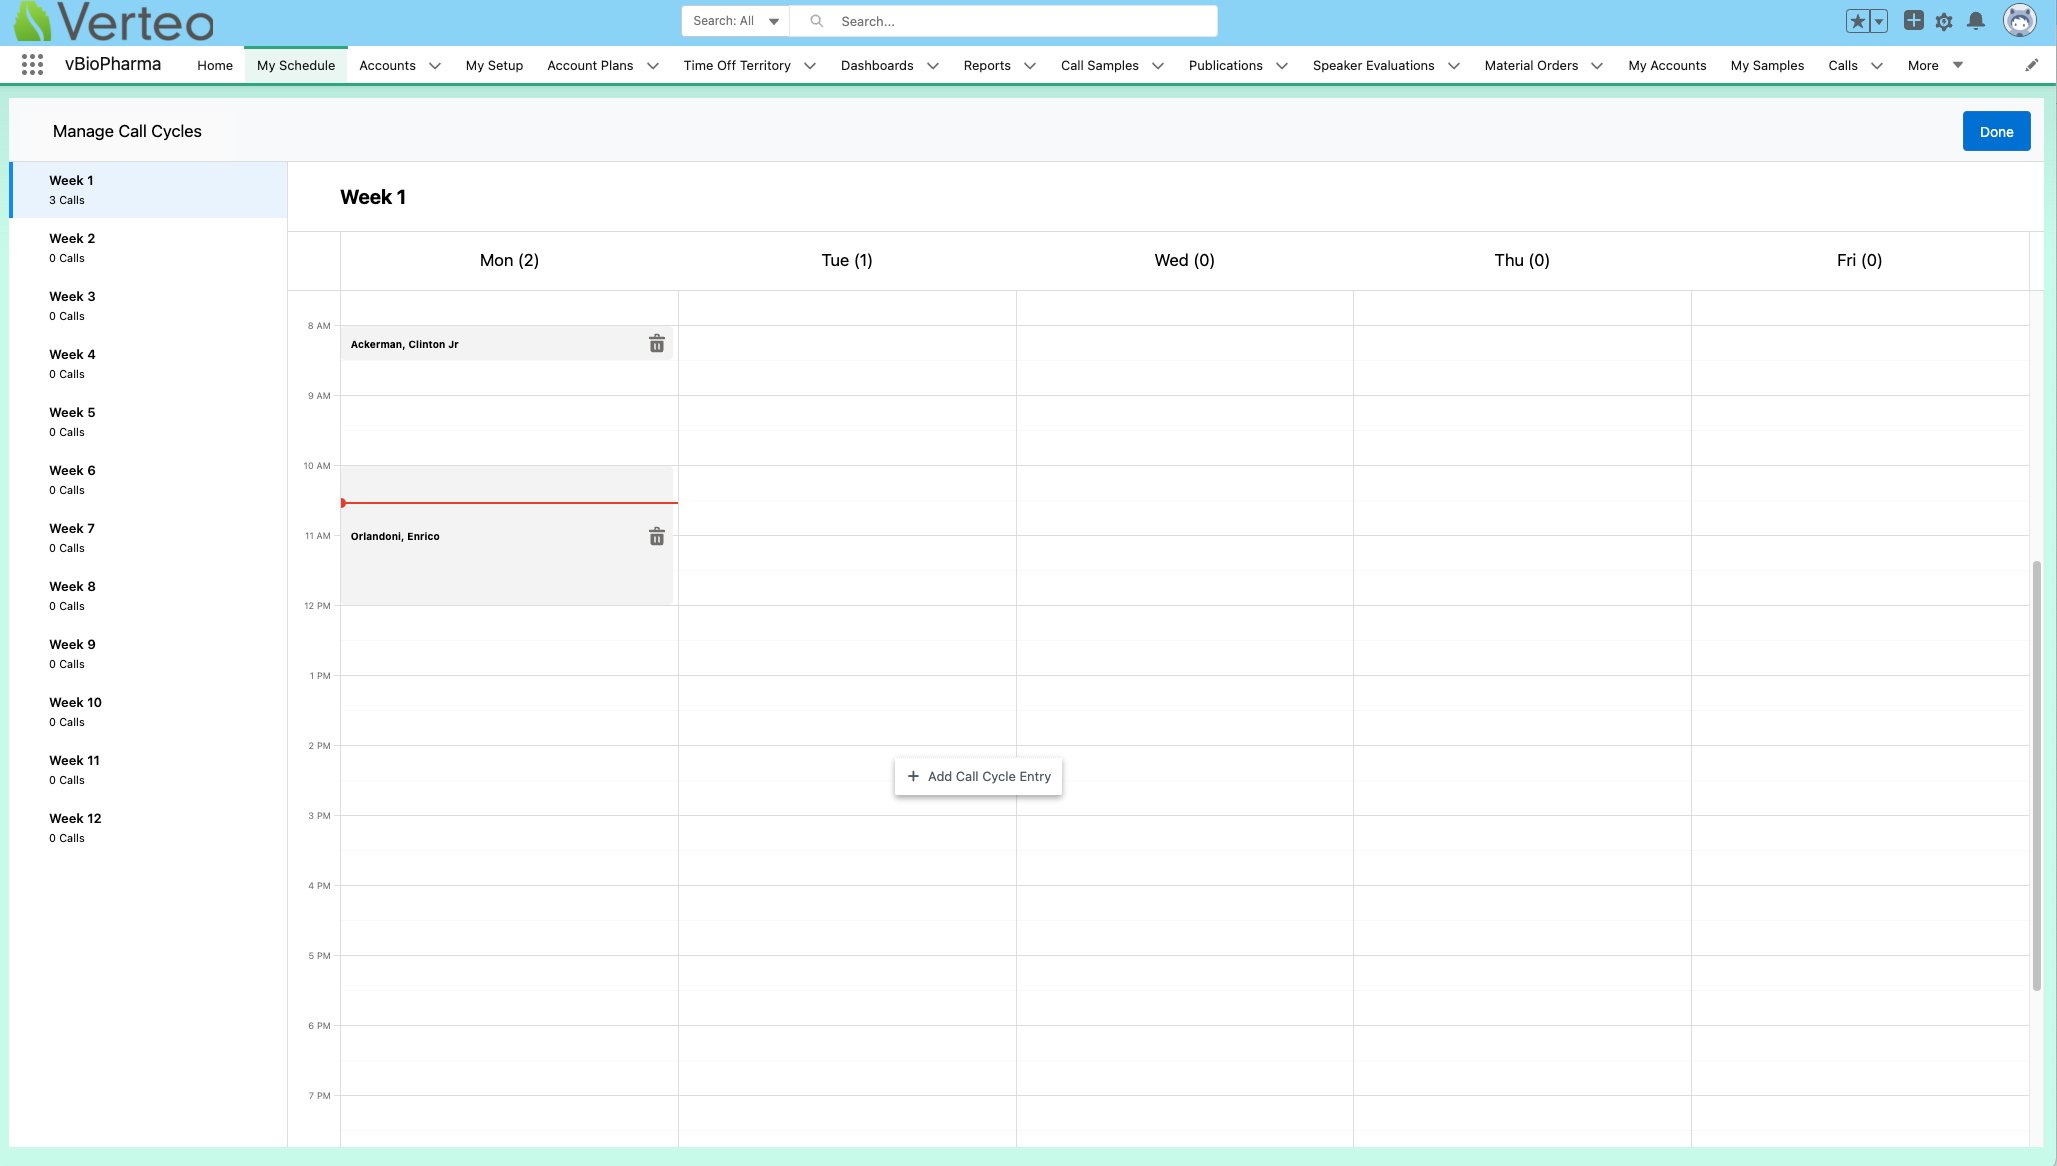
- Select Add Call Cycle Entry. The account search modal displays.
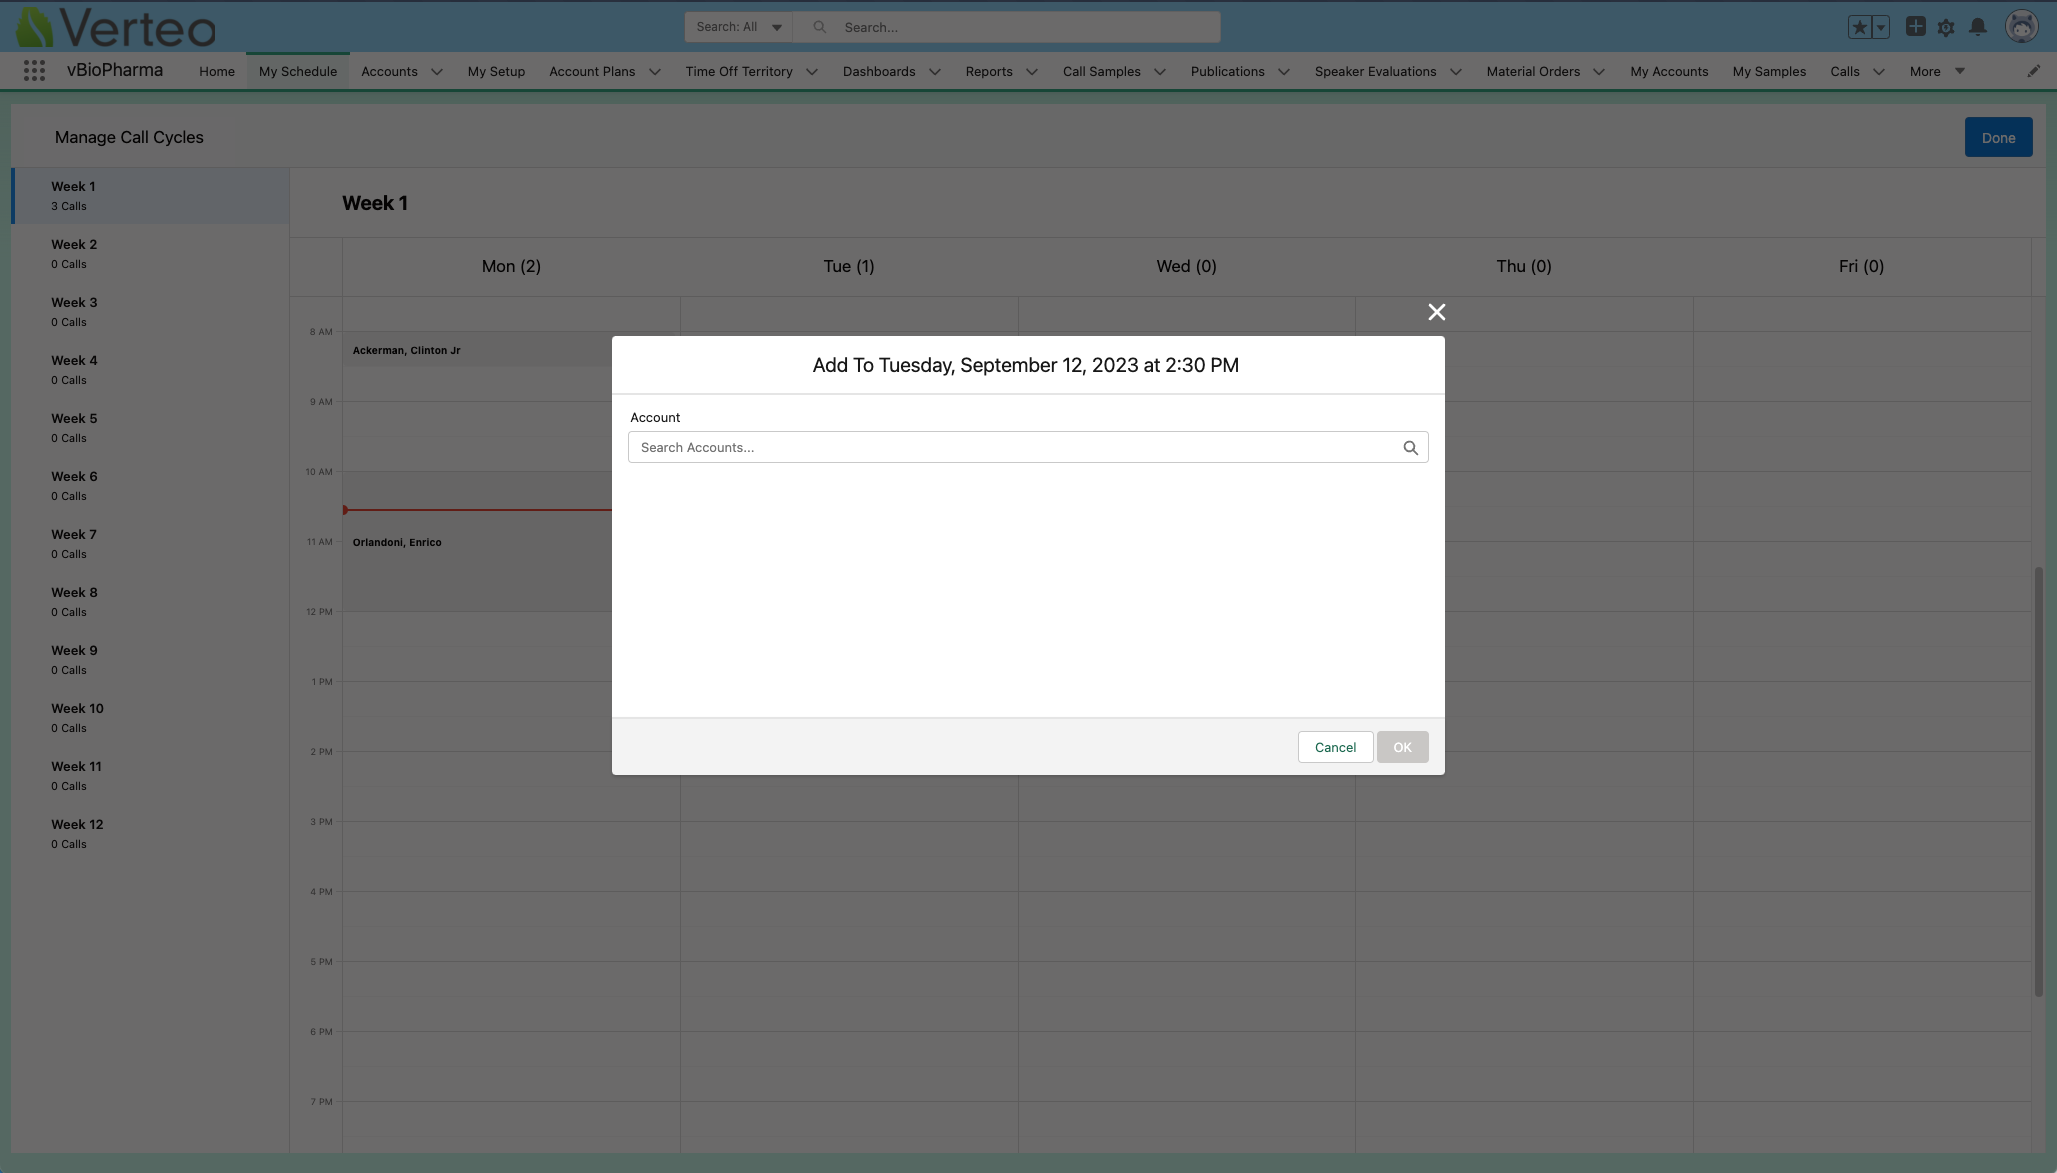
- Search for and select the appropriate account.
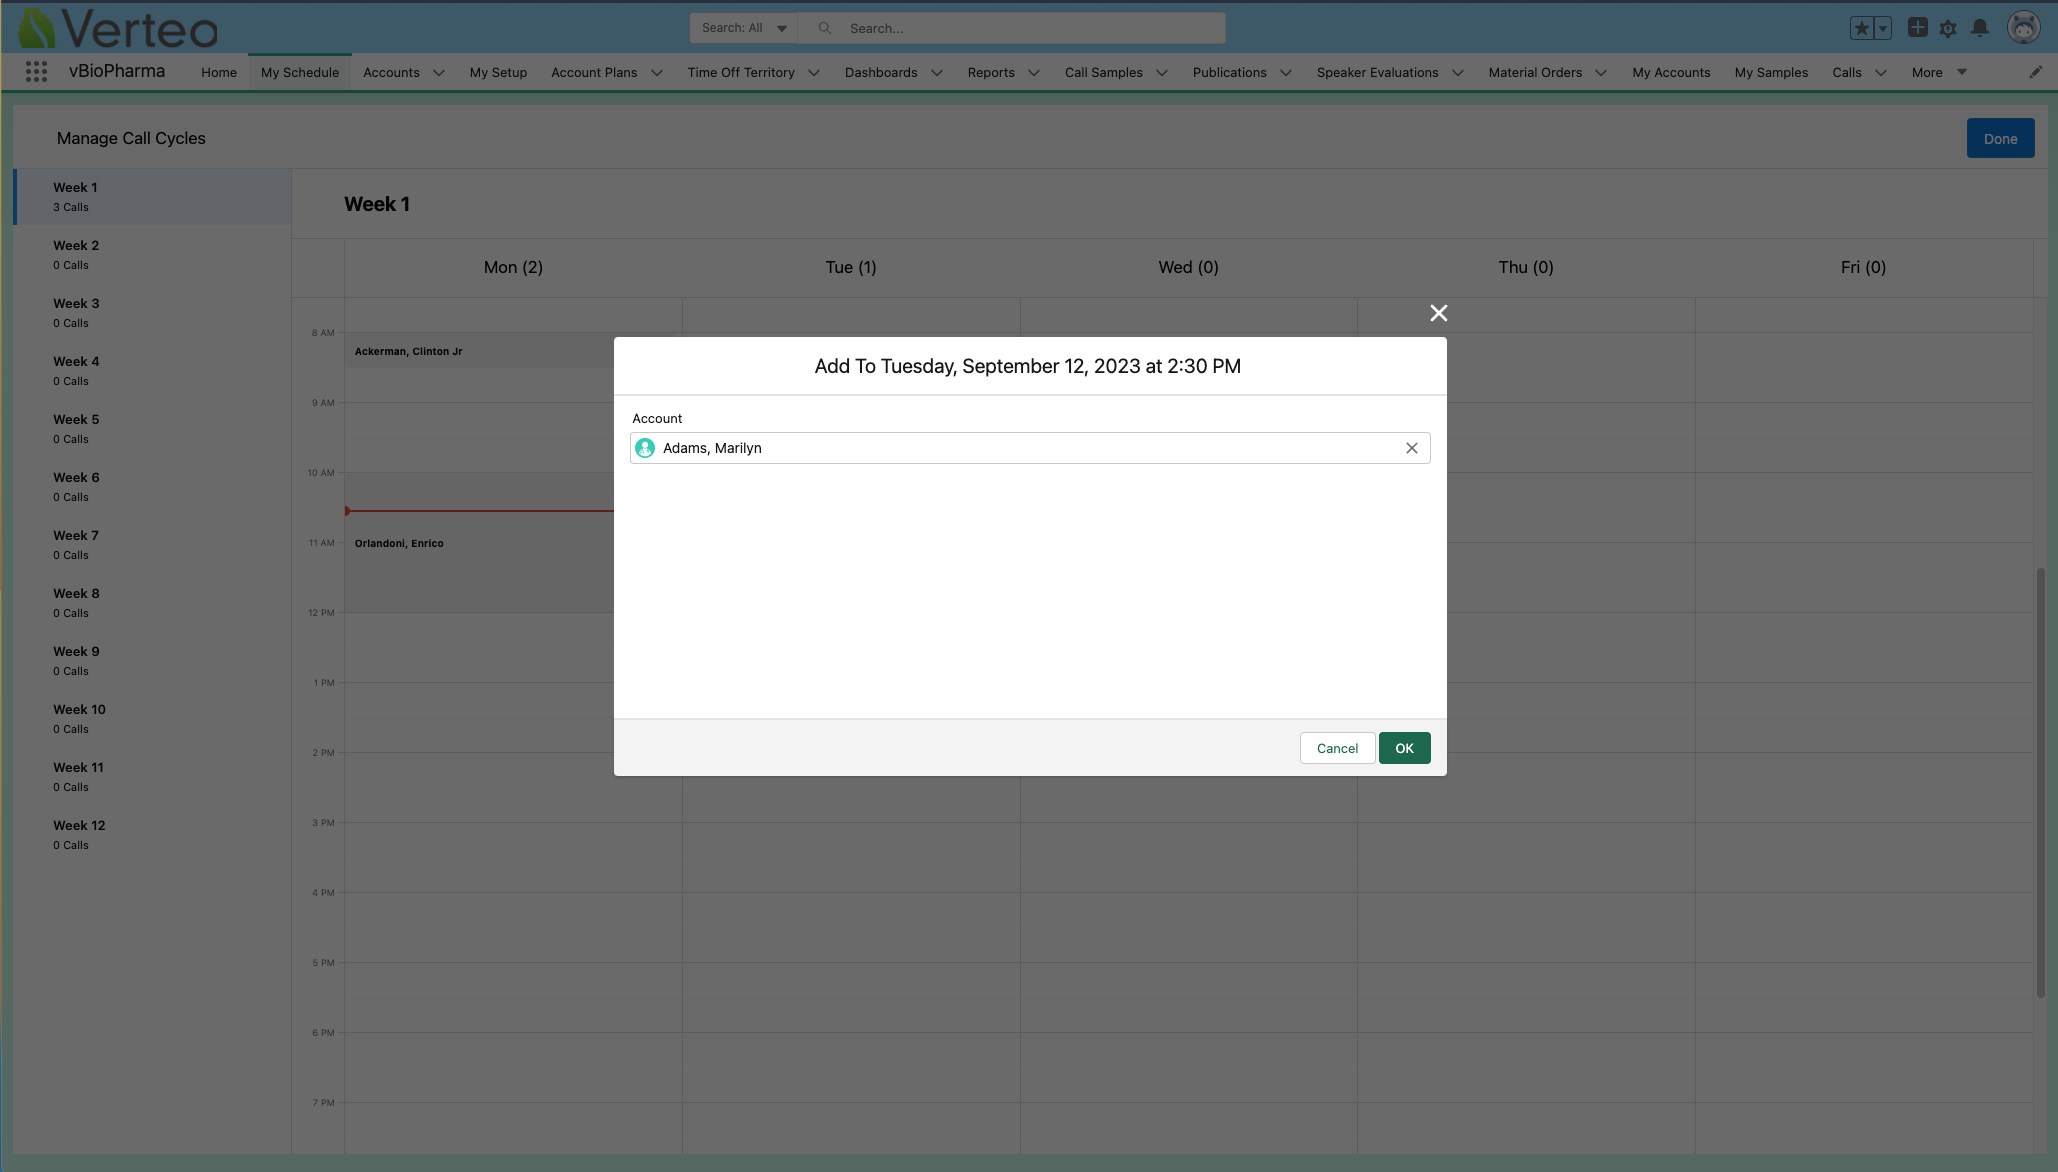
- Select OK to create the new call cycle entry.
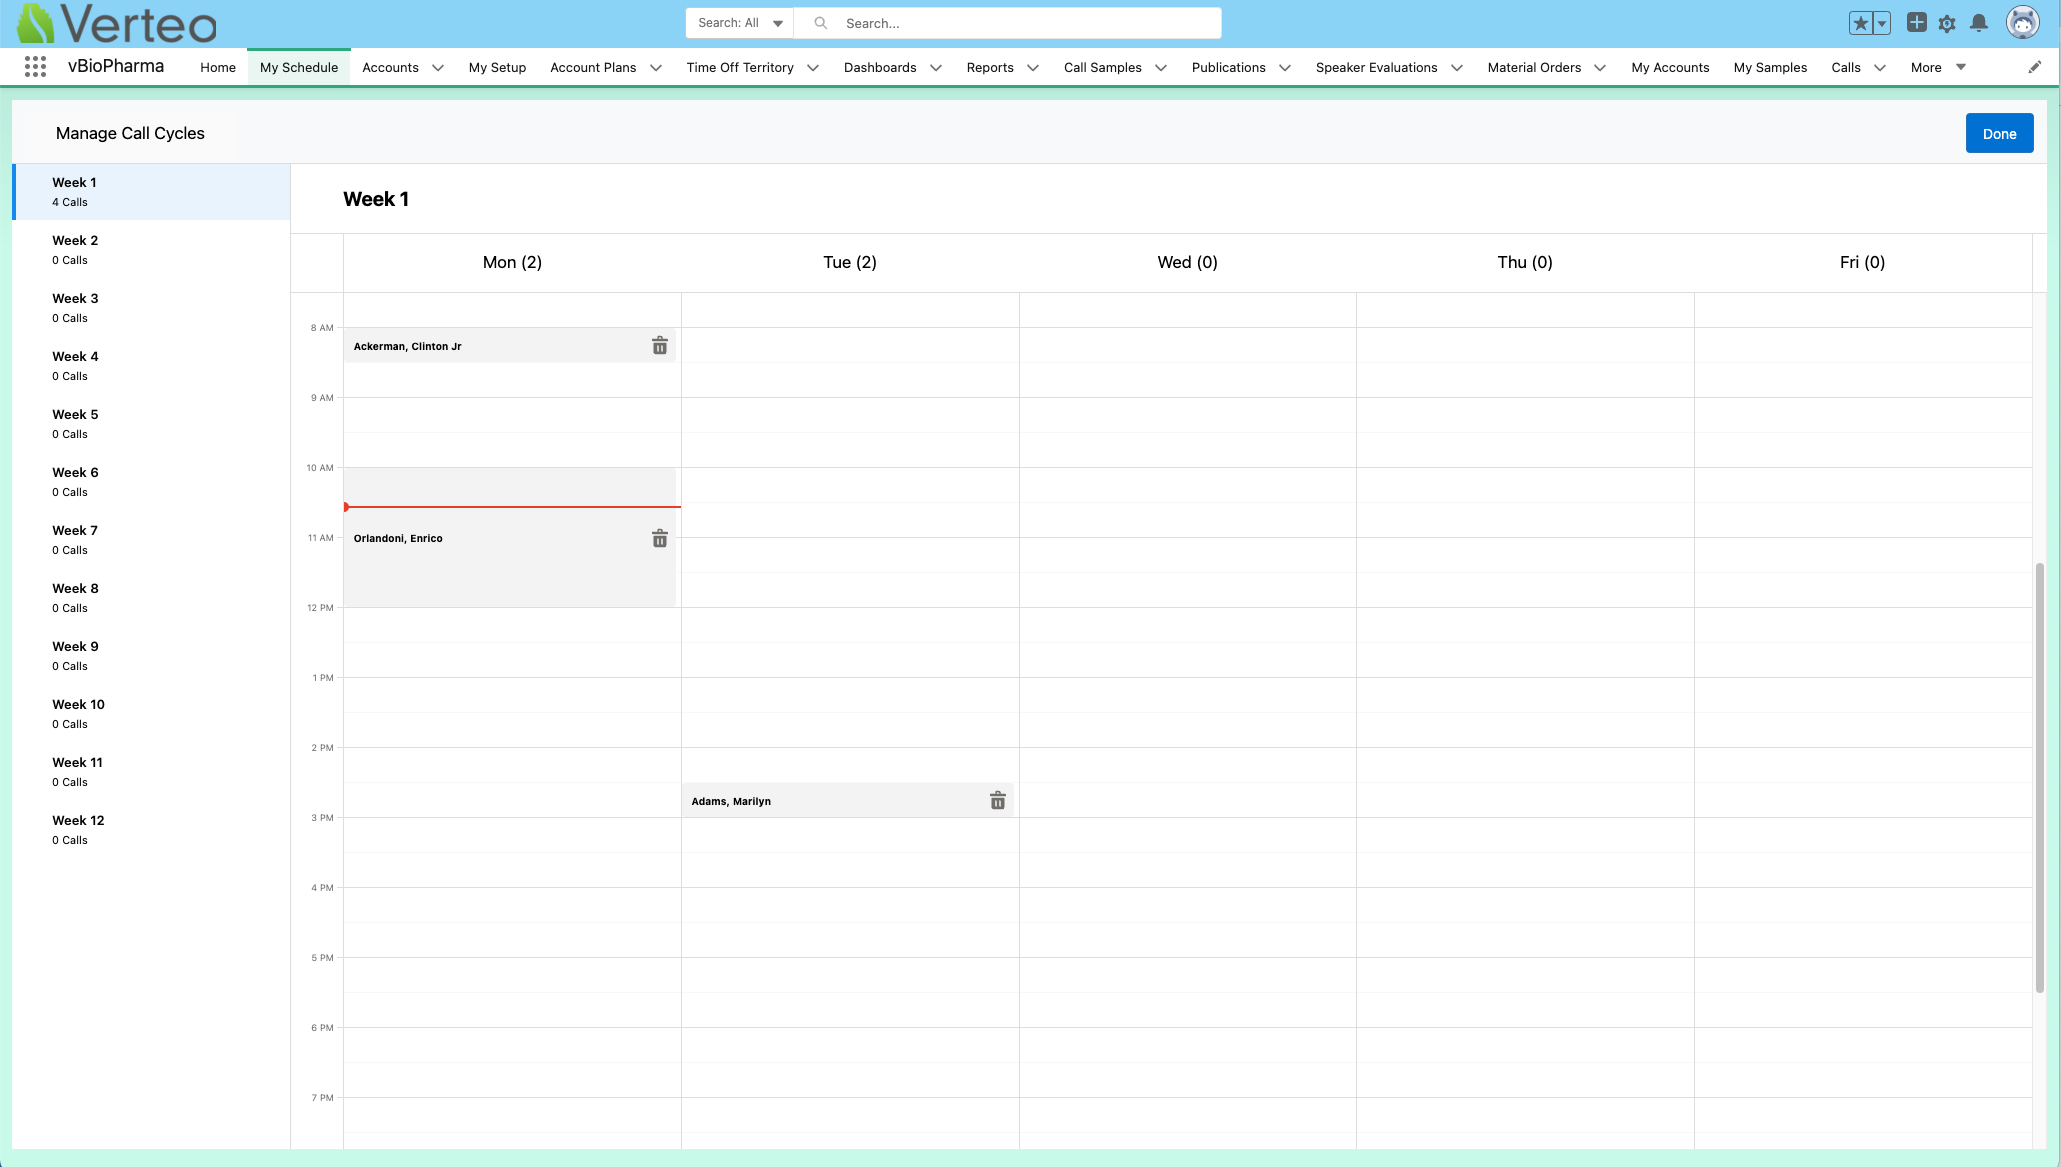
In Lightning for My Schedule, creating a call cycle entry by dragging and dropping an account onto the calendar grid is not supported.
Rescheduling Call Cycle Entries
To reschedule a call cycle entry, drag and drop the call cycle entry to the appropriate time. Alternatively, drag the upper or lower edges of the entry. All-day call cycle entries cannot be dragged to the hourly grid, and hourly entries cannot be dragged to the all-day header.
Deleting Call Cycle Entries
To delete call cycle entries:
- Select the Delete icon on the call cycle entry.

To undo a deletion, select the undo icon on the call cycle entry. Users can undo deletions until they move to another week, or until they select Done and exit the Manage Call Cycles view.
- Select Done to permanently delete the entry.
Using Classic Cycle Plans in My Schedule
When Using Classic Cycle Plans in My Schedule is enabled, users can view Classic Cycle Plan targets and metrics from the Scheduler pane in Lightning for My Schedule.
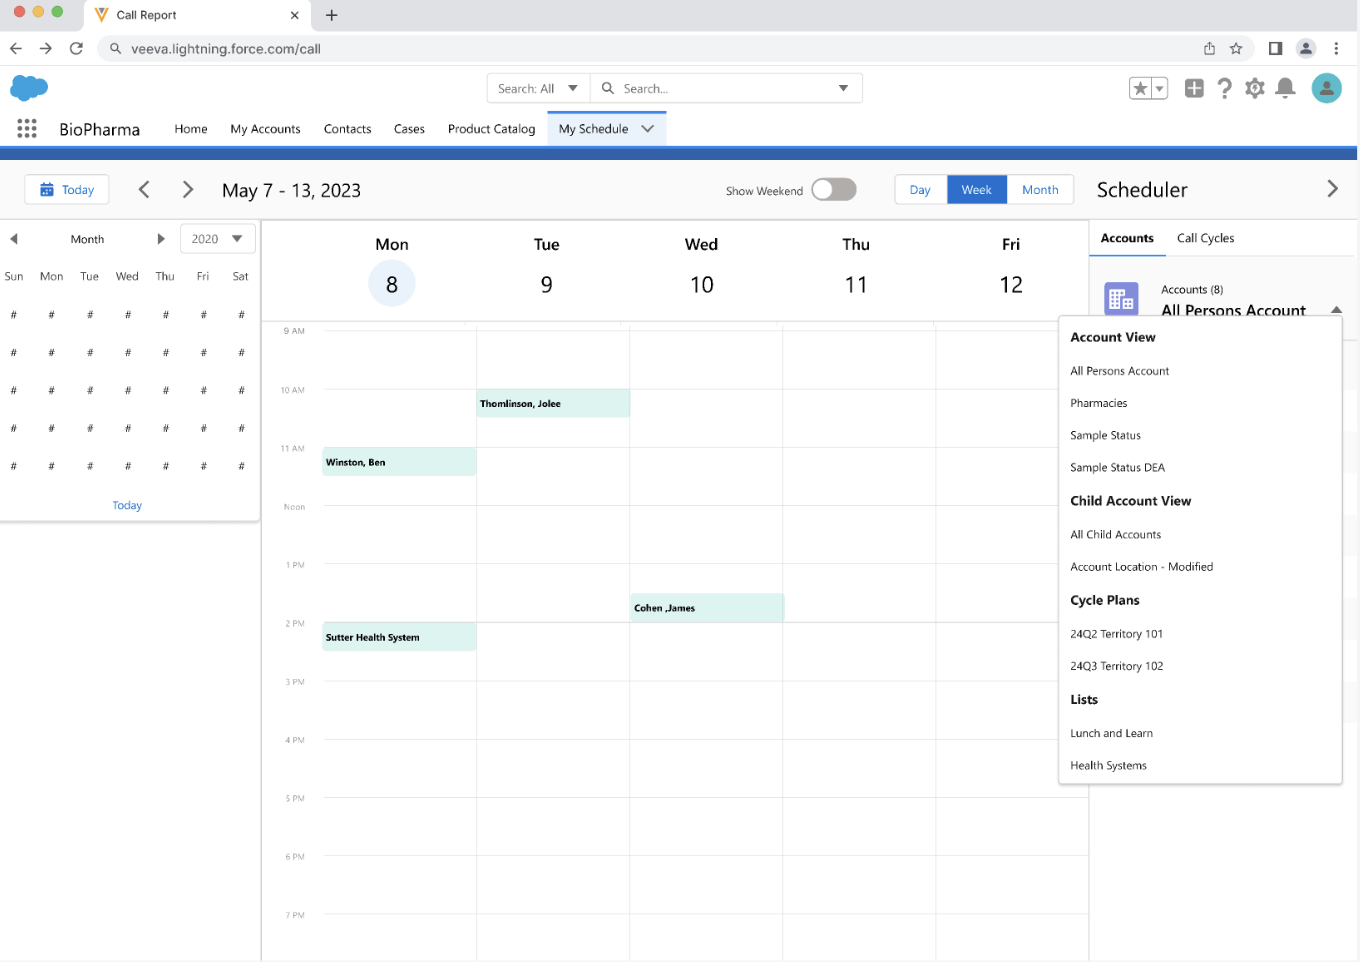
To view Classic Cycle Plan information in My Schedule, select the appropriate Cycle Plan from the account lists and views menu on the Scheduler pane.
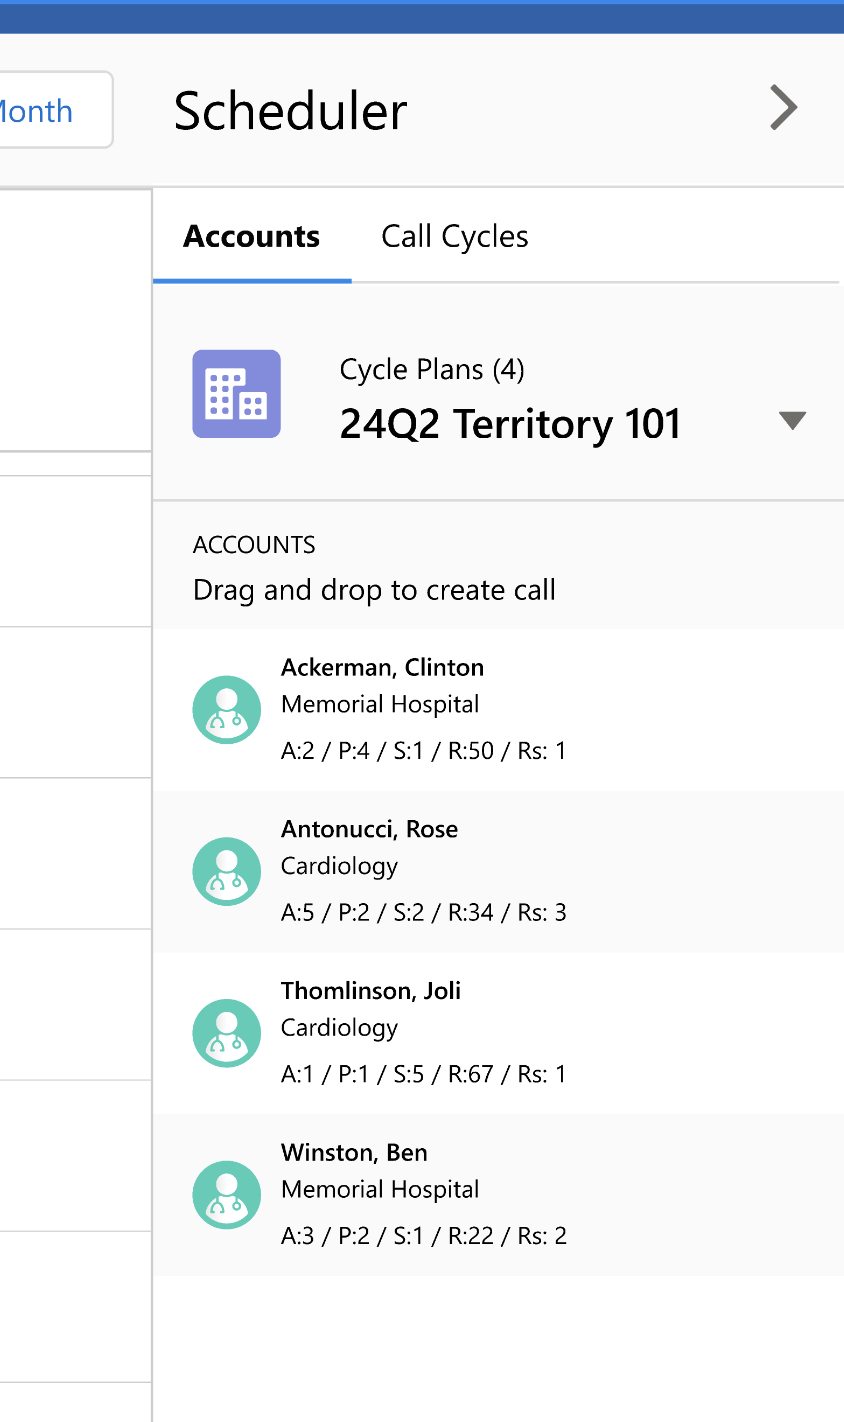
When Lightning for My Schedule is enabled and users create calls using the Scheduler option on a Classic Cycle Plan record, the calls are automatically scheduled in Lightning for My Schedule.
Filtering accounts on Classic Cycle Plan attributes and viewing Classic Cycle Plan information with display-by are not available in Lightning for My Schedule.
For more on classic cycle plans in My Schedule, see Using Classic Cycle Plans in My Schedule.
Viewing Users' Calendars with Manager View
By default, managers can review their direct reports’ scheduled activities. For more information, see Viewing Users' Calendars with Manager View.
Creating, Viewing, and Editing Unavailable Time Slots
If Creating Time Off Territory in My Schedule is enabled, users can create, view, and edit unavailable time slots in My Schedule.
Creating Unavailable Time from Time Off Territory
If Creating Unavailable Time Slots from Time Off Territory is enabled, users can edit Time Off Territory entries and mark them as unavailable for scheduling.
Integrating My Schedule and Outlook Calendars
If Integrating My Schedule and Microsoft Outlook Calendars is enabled, users can view their Outlook events in My Schedule and vice versa.
Accepting and Declining Meeting Requests
If Integrated Scheduling: Accepting and Declining Meeting Requests in My Schedule is enabled, users can view and action meeting requests in My Schedule.
Viewing Unassigned Presentations and Associating Accounts with Tracked CLM Activity
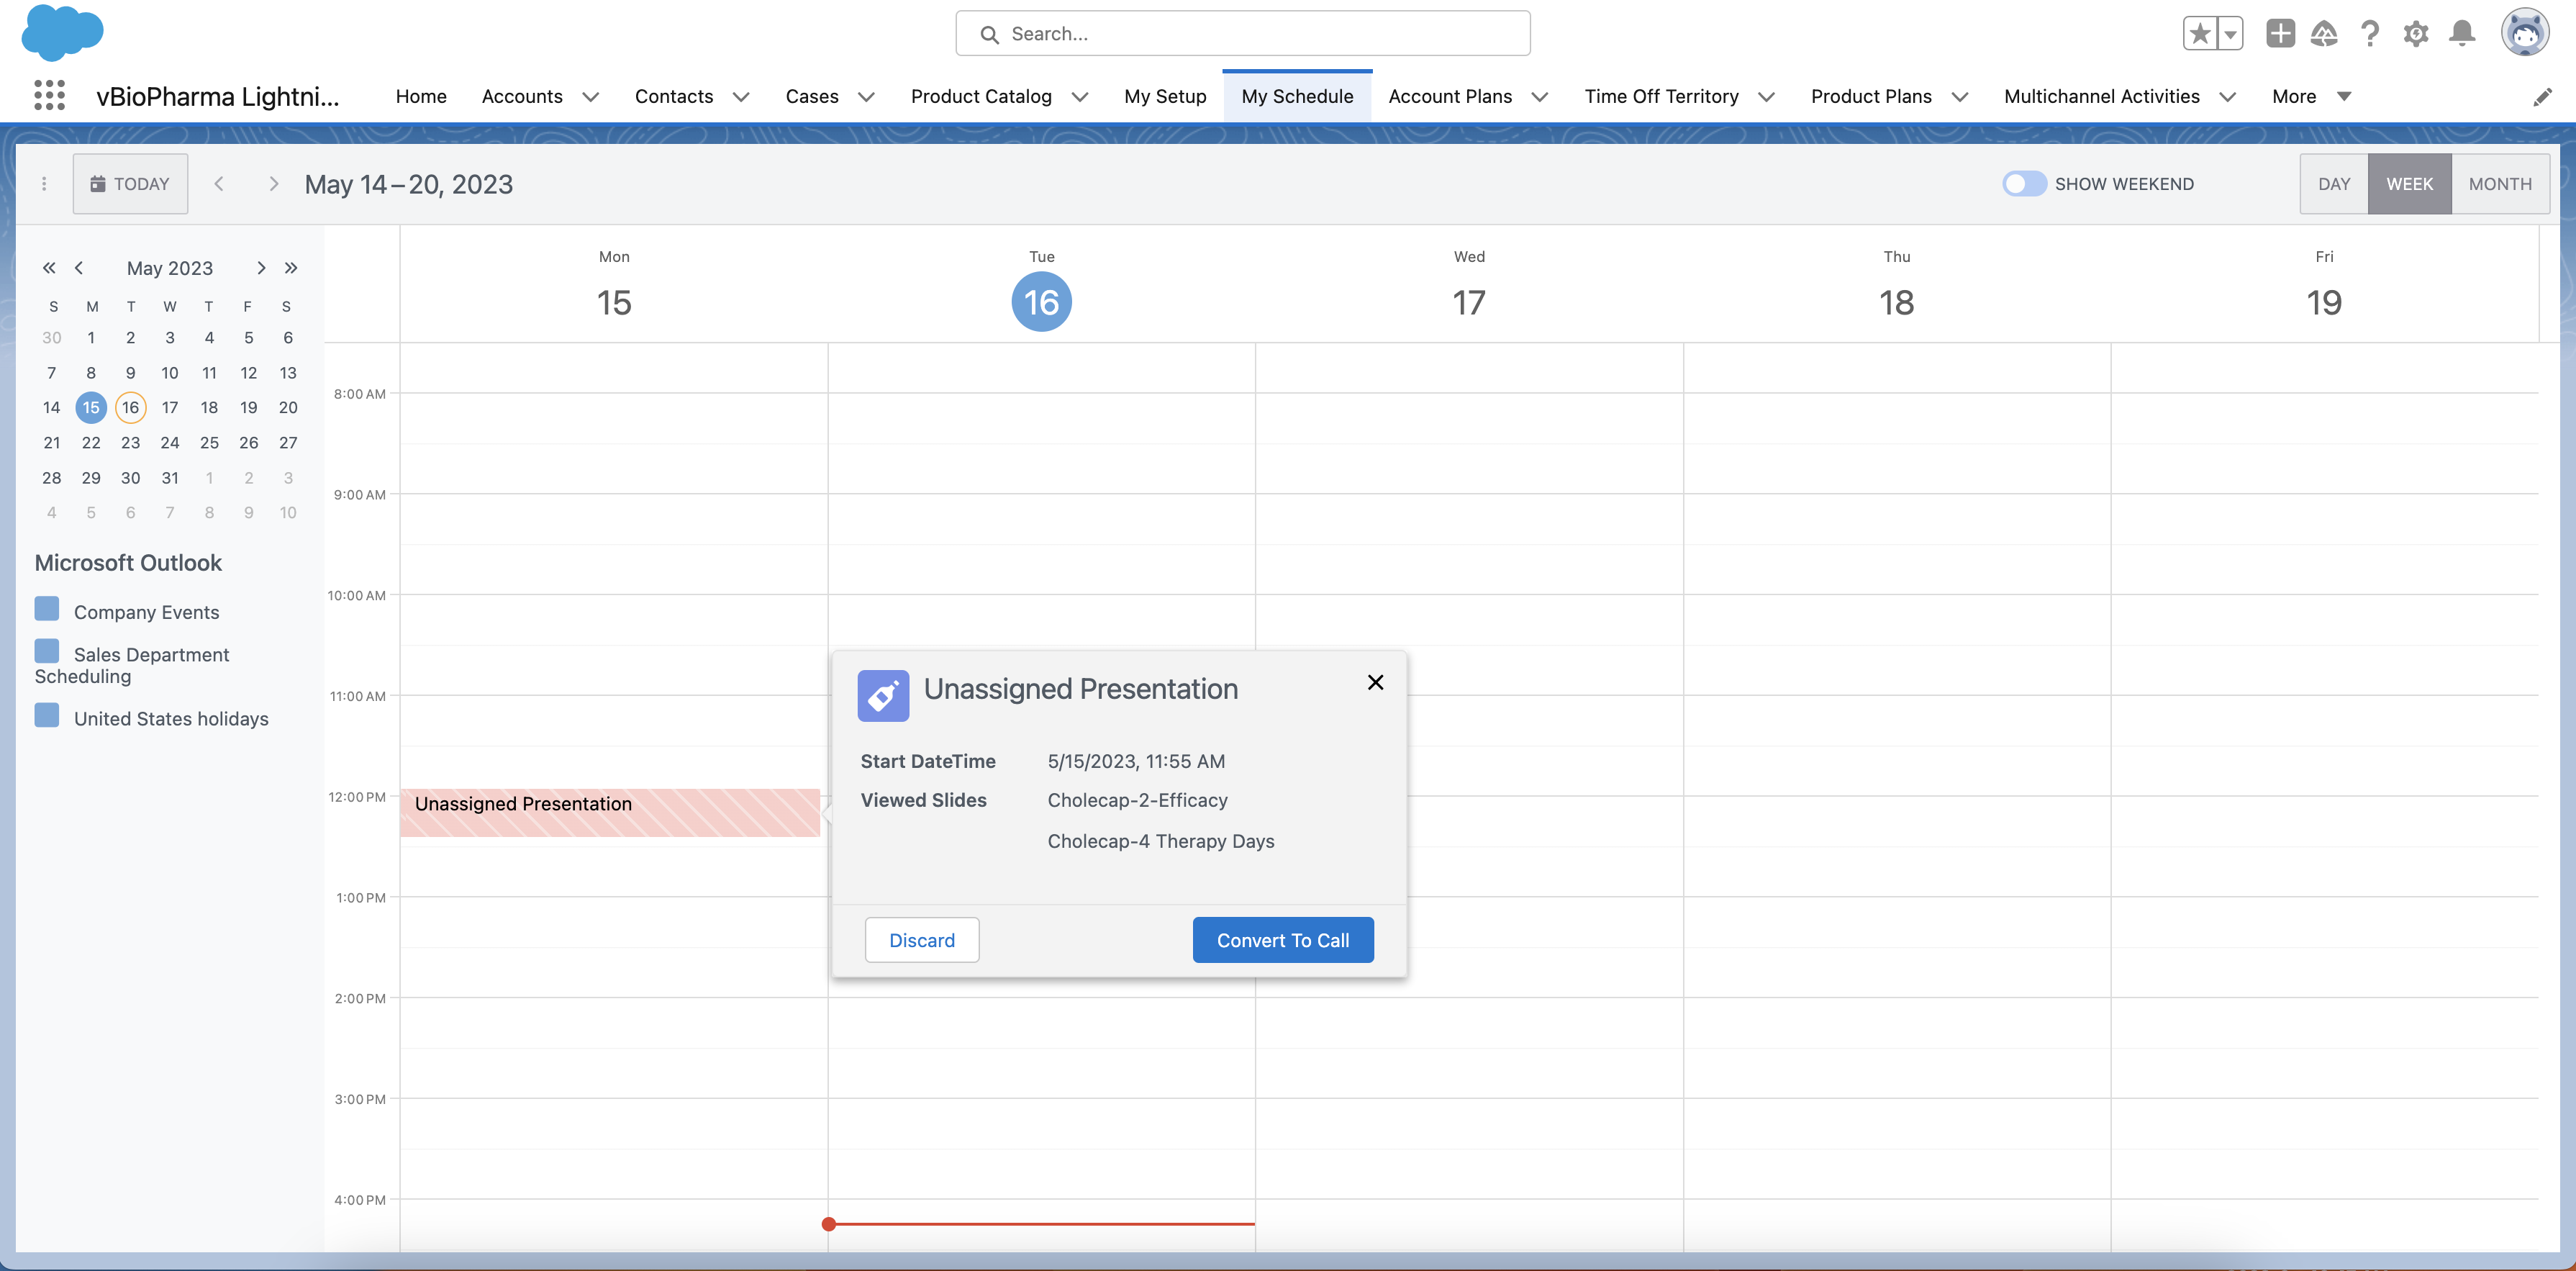
If Associating Accounts with Tracked CLM Activity is enabled, unassigned presentations display in My Schedule. Unassigned presentations display as 30-minute time slots. Unlike on the iPad platform, the value in the Total_Duration_vod field is not considered. To display a popover with more information on the unassigned presentation, hover over the calendar entry. The start datetime and a list of viewed presentation names display. To follow the same color patterns used for call reports, past unassigned presentations display in red and future unassigned presentation display in teal.
From the popover, users can choose to associate unassigned presentations with accounts or discard unassigned presentations. For more information, see Associating Accounts with Tracked CLM Activity.
Partially Supported Functionality
The following functionality is partially supported in Lightning for My Schedule:
Creating Calendar Entries
To create a calendar entry:
- Navigate to the appropriate object tab.
Ensure users have access to the standard Calendar tab.
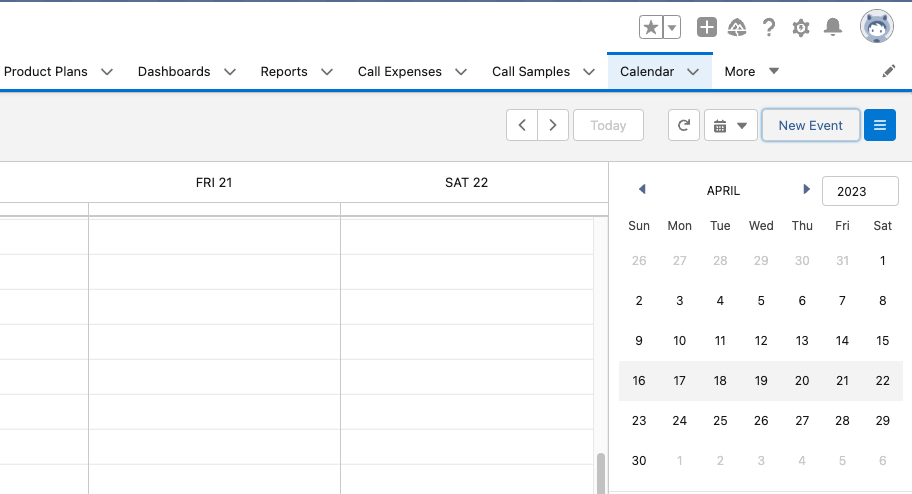
- Select the New button.
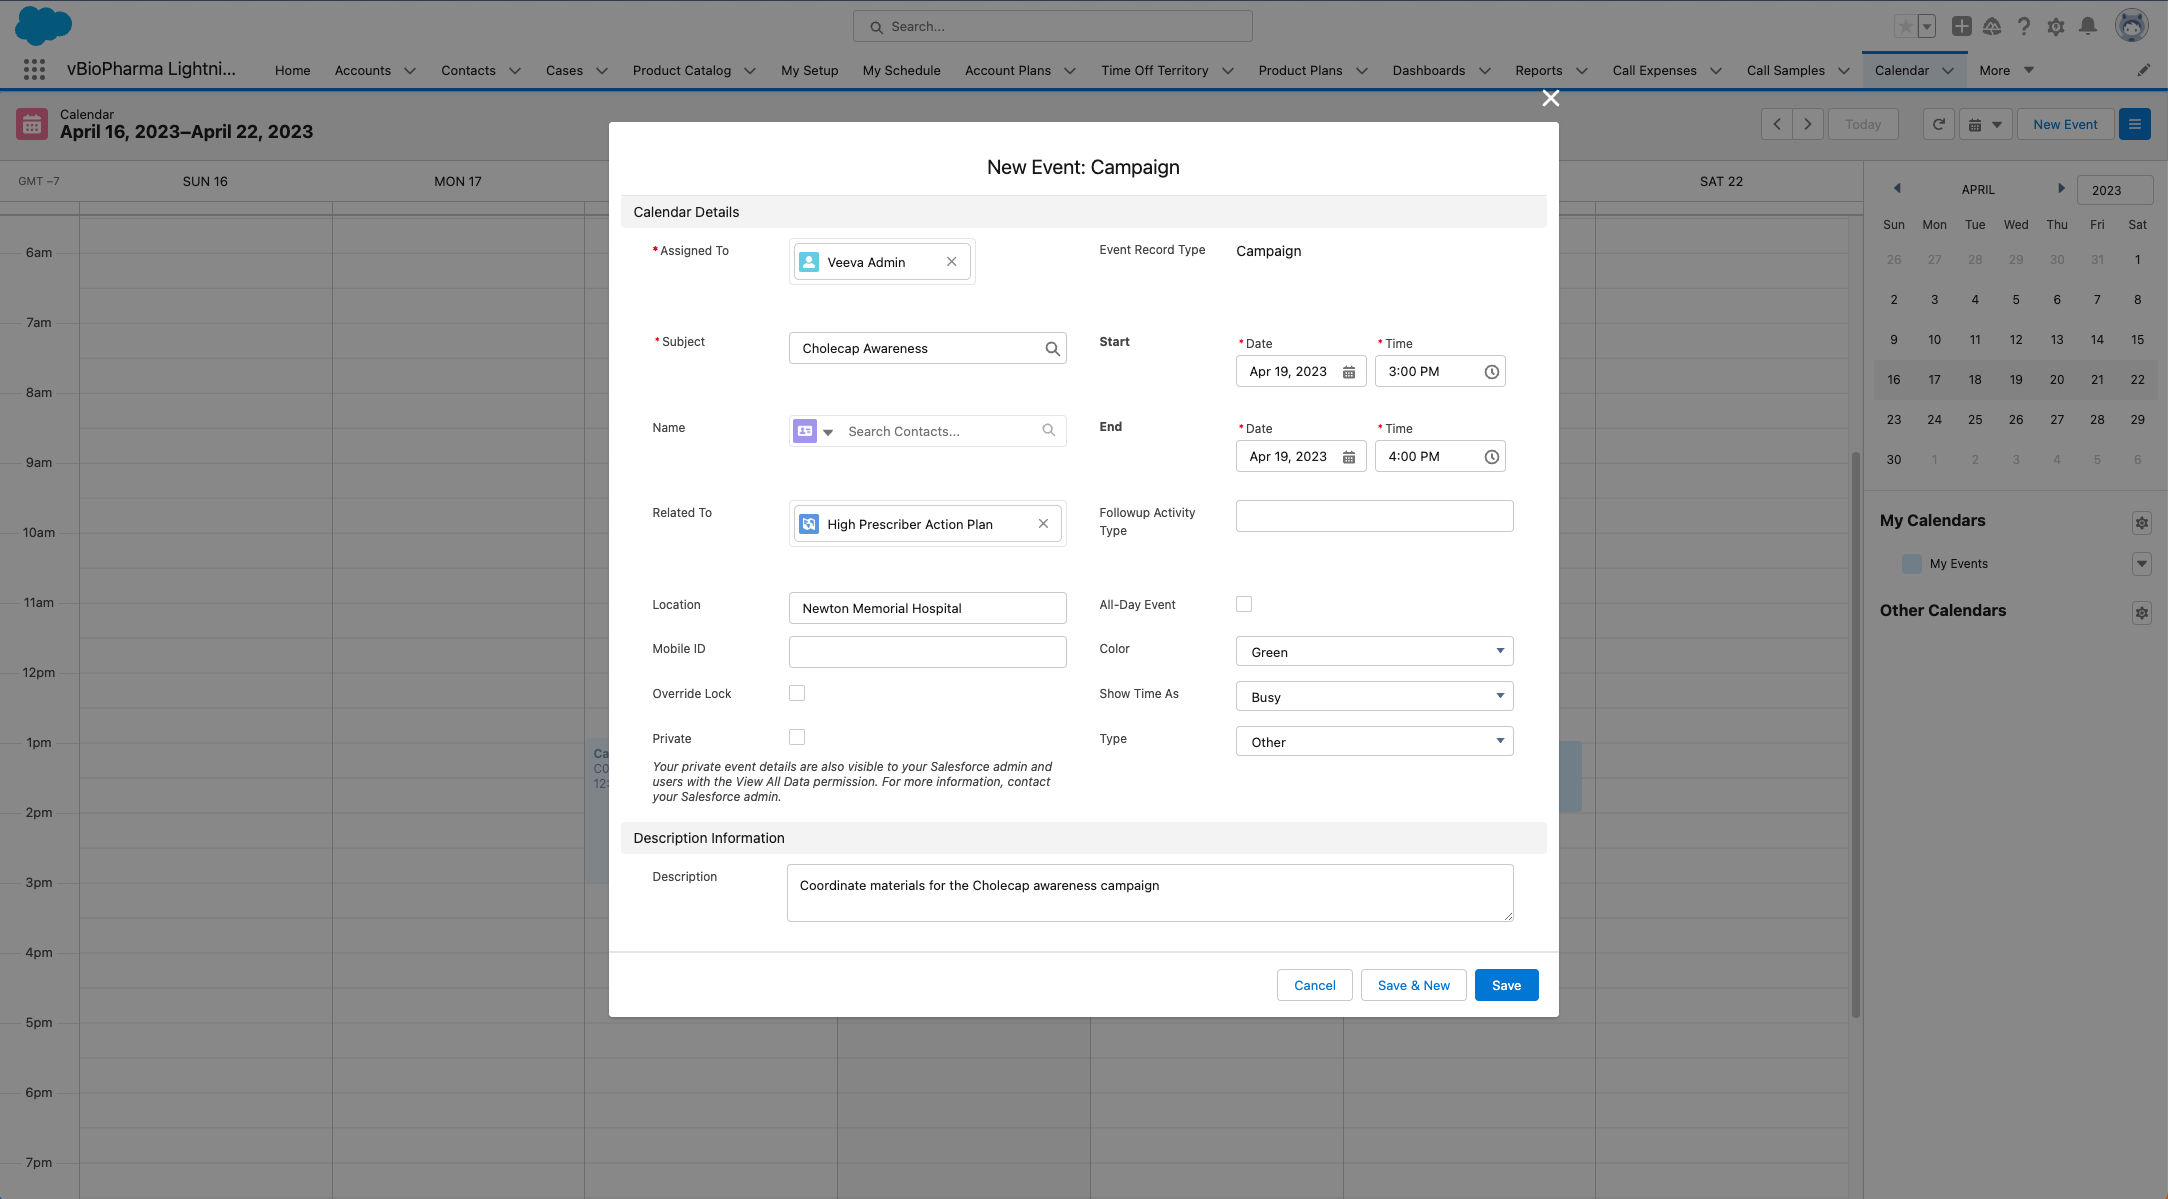
- Complete the appropriate fields and save the record.
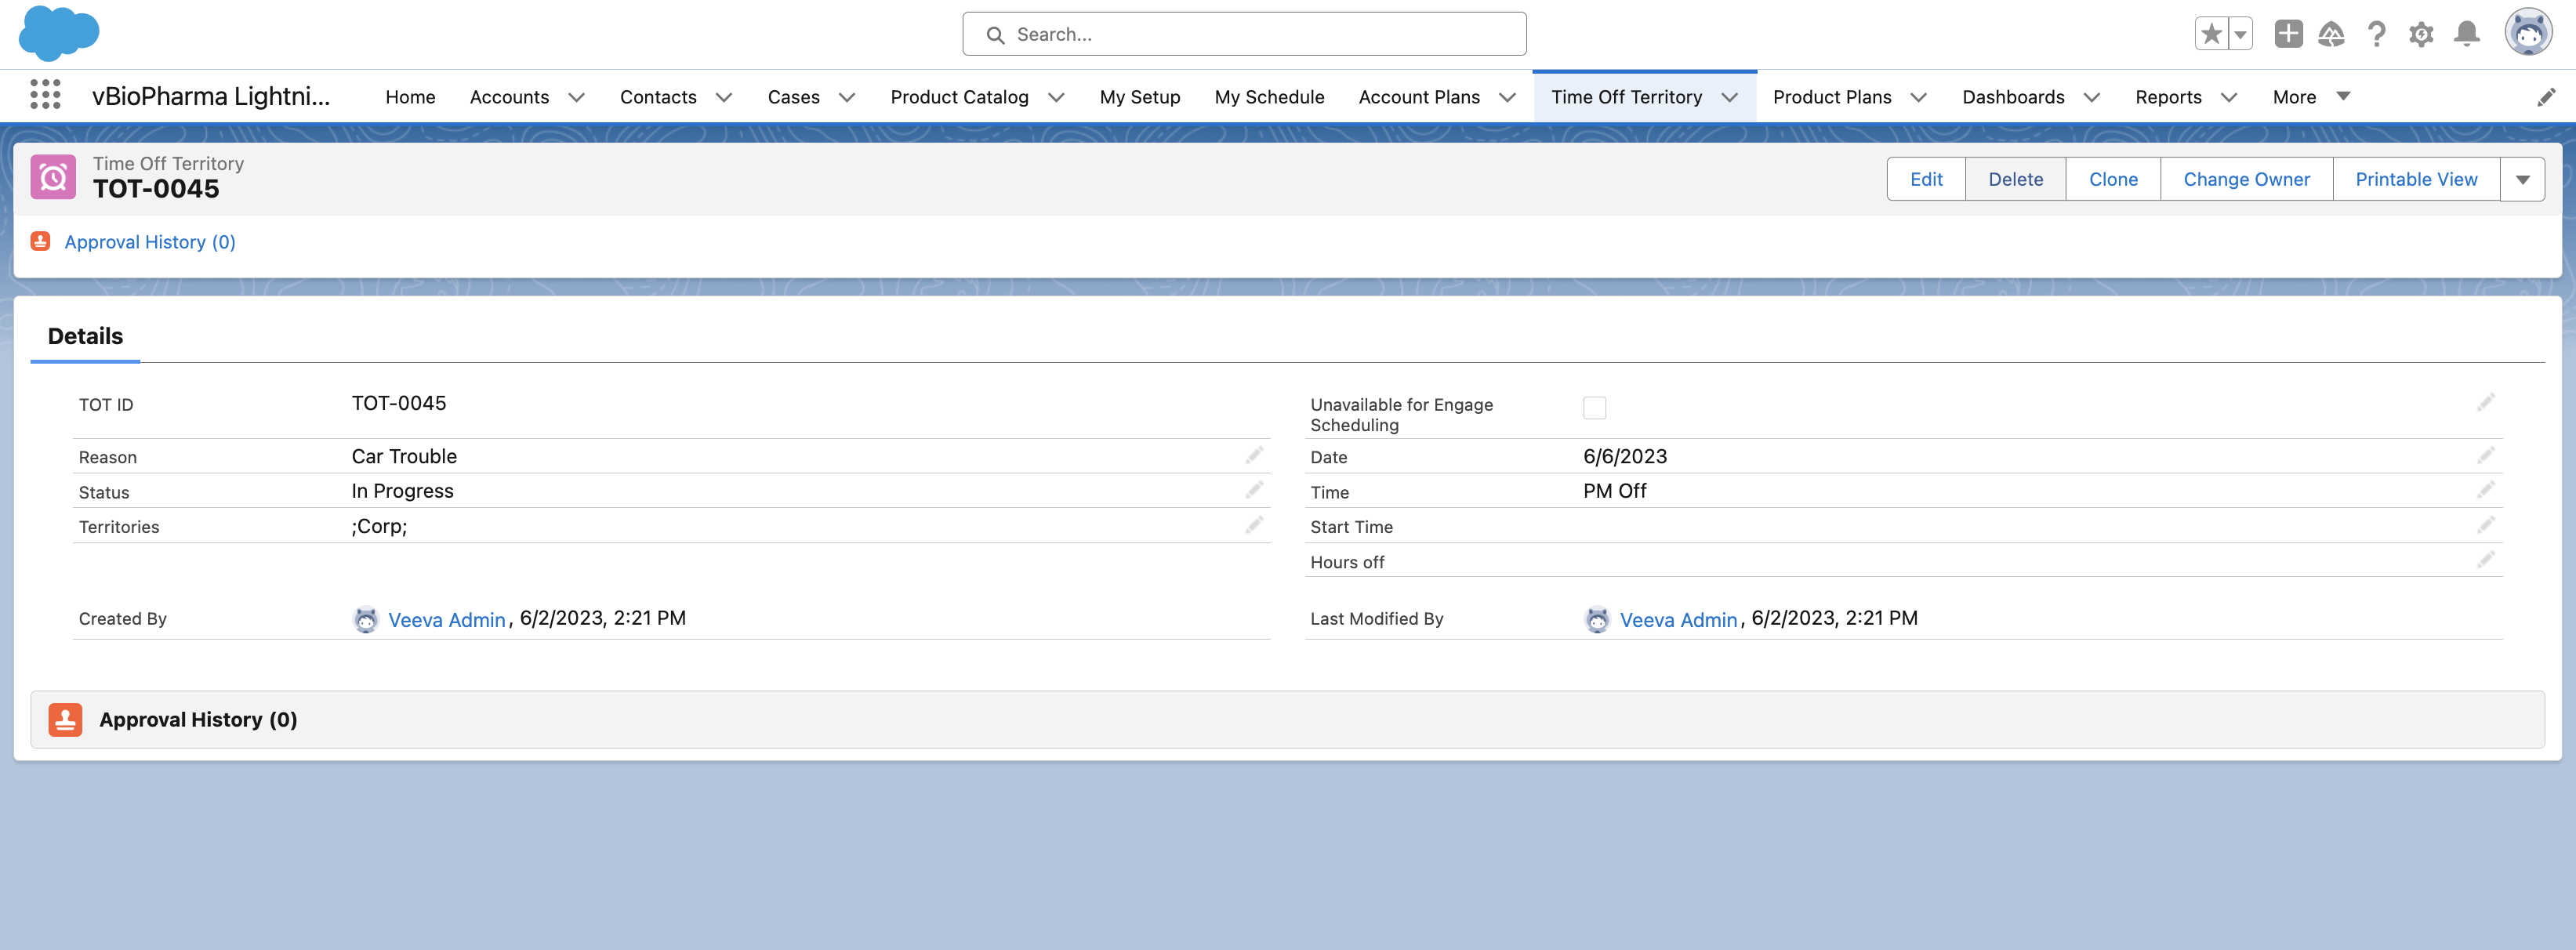
Deleting Calendar Entries or Time Off Territory
To delete calendar entries or Time Off Territory records:
- Select the More Details link from the entry popover.
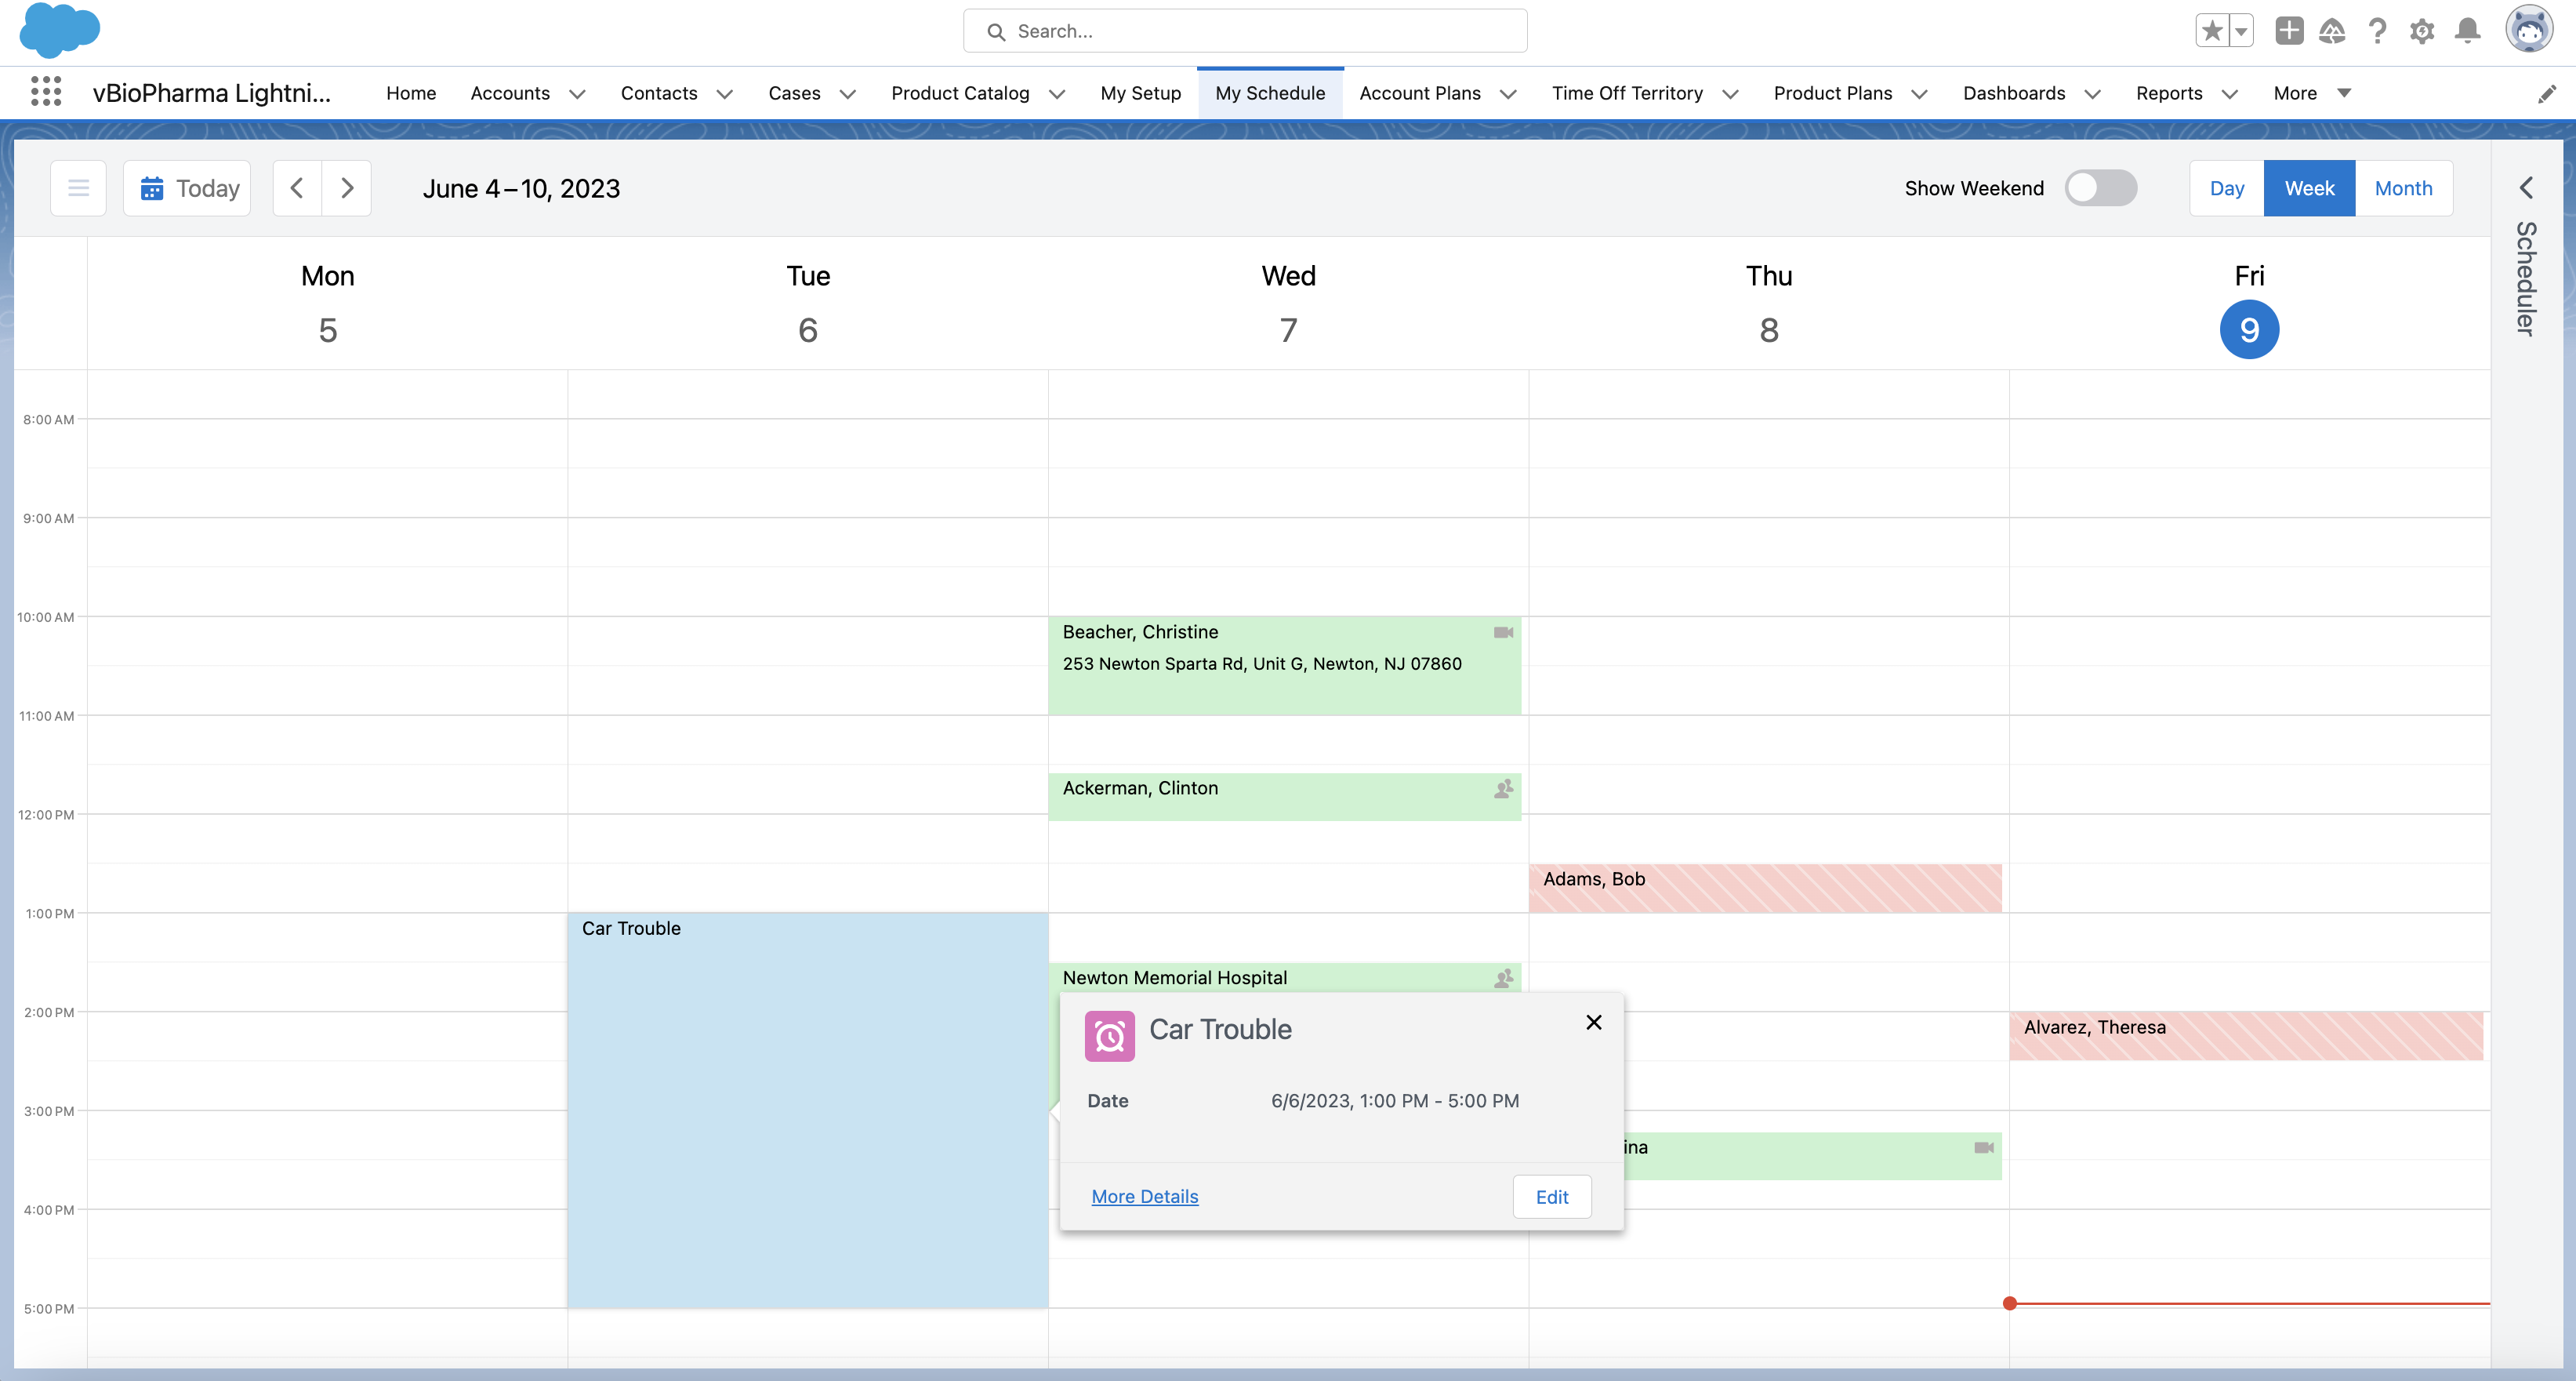
- Select the Delete button on the record detail page that displays.
Considerations
- In this version of Lightning for My Schedule, users cannot create, edit, delete, or otherwise take action on Events Management events
- Rescheduling through dragging and dropping is only supported for calls and calendar entries. Rescheduling other types of entries through dragging and dropping is not currently supported in Lightning for My Schedule. Users must edit entries from the popover or from the record.


