

23R2.0 Functionality Guide
The Functionality Guide is intended for Sales Operations, Business Administrators, System Integrators, and others responsible for making decisions about what features are needed for end users to be successful and deciding which features work together with existing customer configurations.
Account Management
Customizing Account Fields in Stakeholder Navigator
Admins can customize the Account fields that display in Stakeholder Navigator to help identify an account. This makes it easier to determine if users are viewing the correct account when working with large health systems, where there can be multiple HCPs with duplicate or similar names. Displaying up to two identifying fields, for example an MDM ID or specialty, makes it easier to differentiate between accounts without navigating to the Account Details screen.
There are two ways to customize the fields that display for accounts in Stakeholder Navigator:
- Admins can configure up to two fields to display in place of the Account Identifier on account nodes when the single Account Identifier value is not specific enough
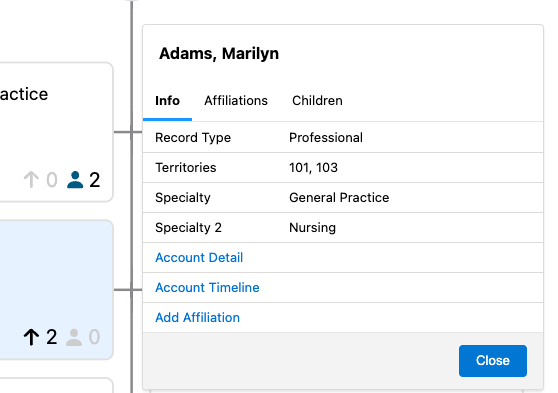
- Admins can configure up to ten fields to display on the Info tab of the account slideout when users select a Person or Business account
Additional account identifier fields and additional fields on the account slideout are not supported for out-of-territory accounts on iPad.
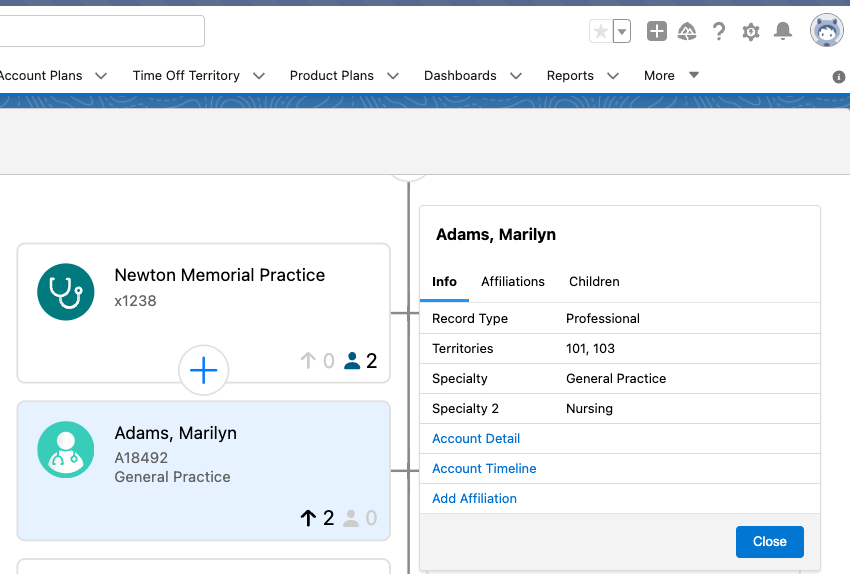
Specifying a Secondary Account Identifier
Admins can define up to two identifying fields from the Account object to display in place of the Account Identifier. This set of fields displays in the following areas:
- Below the account name on the account node in the hierarchy

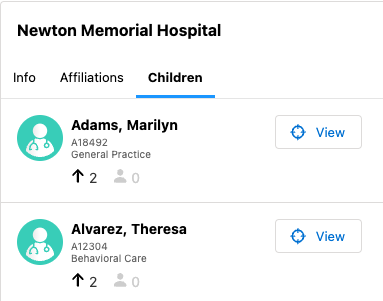
- On the Account row in the Child Account tab of the Account Slideout
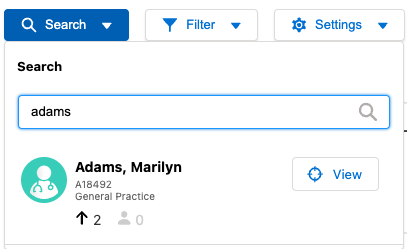
- On the Account row in search results
To define the two account identifier fields, populate the SN_ACCOUNT_IDENTIFIER_OVERRIDE Veeva setting with the API name of up to two fields separated by semicolons. For example:
Specialty_1_vod__c;MDM_ID__c;
The defined identifier fields display for both in and out of territory accounts.
Customizing Fields on the Account Slideout
Admins can add up to ten fields from the Account and Address_vod objects to display on the Info tab of the account slideout when users select a Person or Business account.
To customize the account fields, update the ACCOUNT_FIELDS_OVERRIDE;;STAKEHOLDER_NAVIGATOR Veeva message.
The following field types from the Account and Address_vod objects are supported:
- Text
- Checkbox
- Date
- Date/Time
- Number
- Formula
- Picklist
- Multi-Picklist
- Lookup
- Percent
- Phone
- URL
If a list of fields is not defined in the message, or if the message is invalid or improperly formatted, the Account Slideout displays default fields. If only one set of fields is defined (Business or Personal), default fields display for the non-defined type.
Call Reporting
Deselecting CLM Product Details on the Call Report
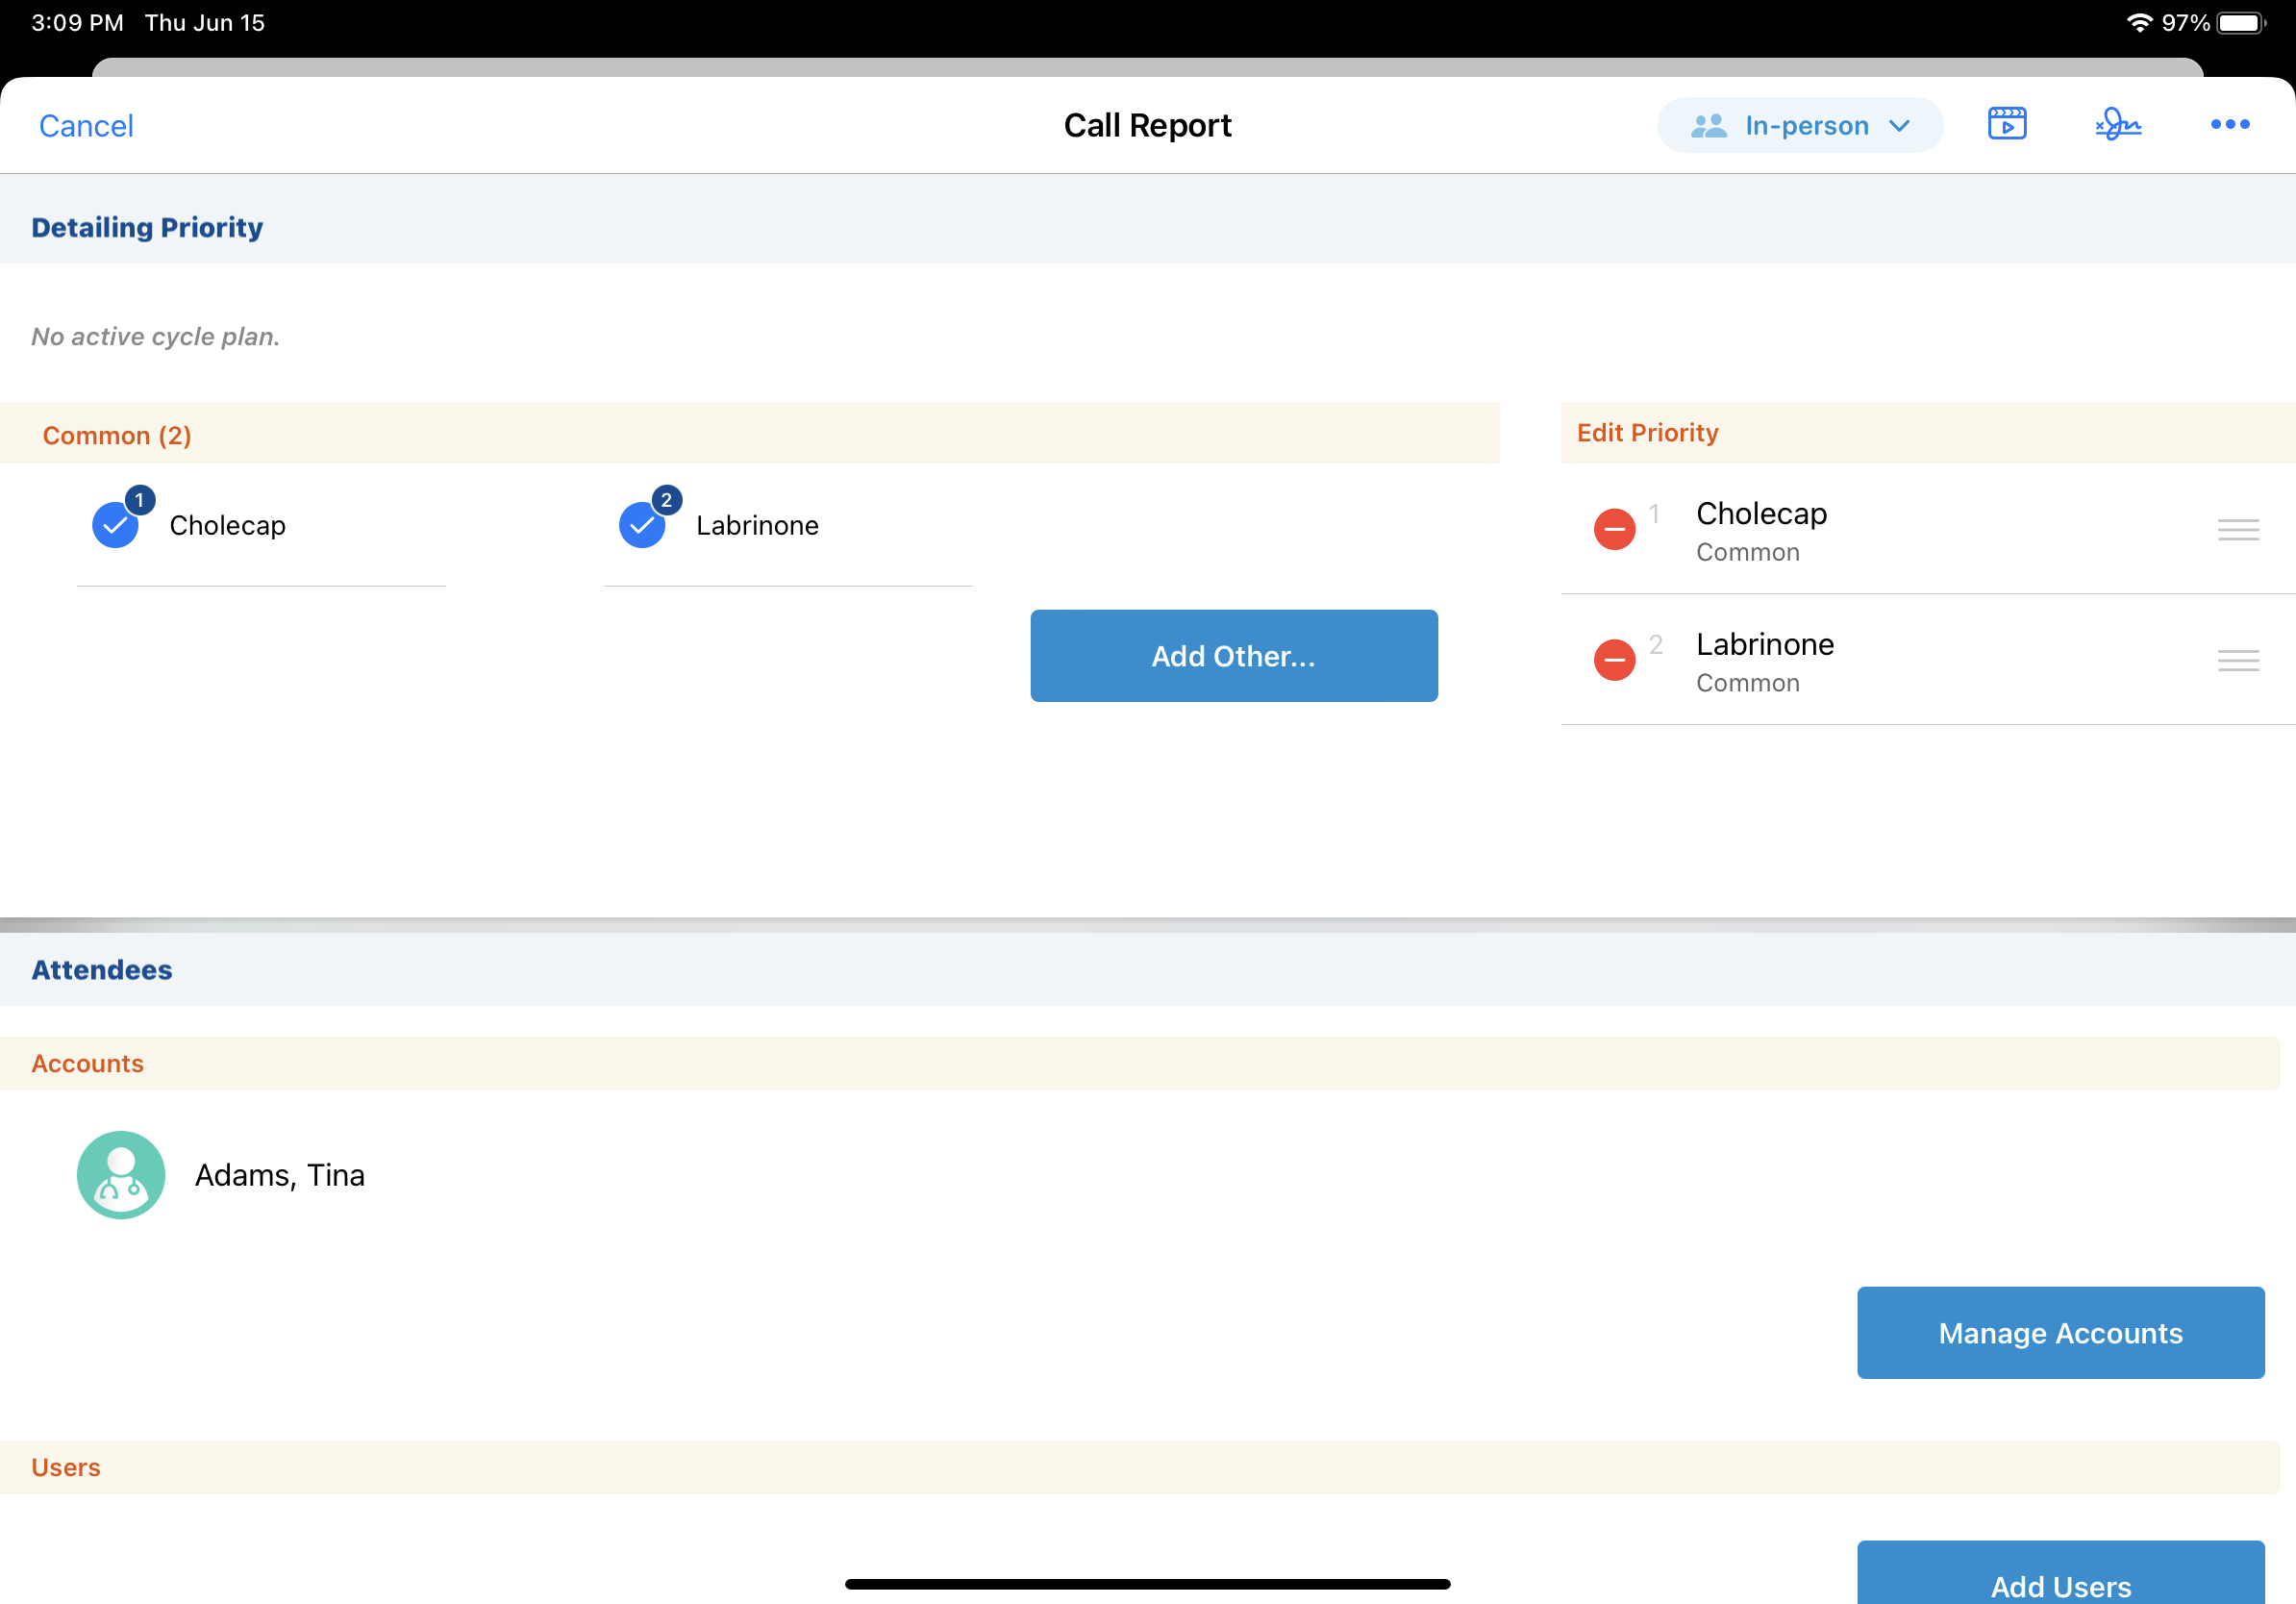
To accurately record information about their interactions with HCPs, users can deselect product details that were automatically added from CLM presentations.
When users present CLM content from the call report, product details associated with the CLM content are automatically added to the call report. However, there are scenarios where users do not discuss each of the products associated with the CLM content and users want to remove the CLM product details from the call.
Deselecting CLM Product Details on the Call Report
Users deselect CLM product details in the same way as they deselect manually added product details. To deselect a product detail, select the delete icon and confirm the deletion. On the iPad platform, users can either deselect the check box next to the product in the Detailing Priority section, or select the Remove icon next to the product in the Edit Priority section.
When the –sd section signal (Sign for Details) is on the Call2_vod page layout, users cannot deselect product details after capturing a signature on the call report. To deselect product details, clear the signature.
When users deselect a CLM product detail, associated Call2_Discussion_vod and Call2_Key_Message_vod records (records where the CLM_ID_vod field is null) are deleted. CLM Key Messages associated with the deselected product are not deleted. To enable admins to track which product details were removed, the Detail_Removed_vod field check box is automatically selected on the remaining CLM Key Message records associated with the deselected product.
The product detail deselection is recorded in the user’s Activity Log. This provides traceability on user actions and may be used for troubleshooting. For example, if a user removes a Cholecap sample, the following text displays in the Activity Log description: Cholecap 10mg / Cholecap Sample was deleted from Call using the (--eed) section signal.
CLM
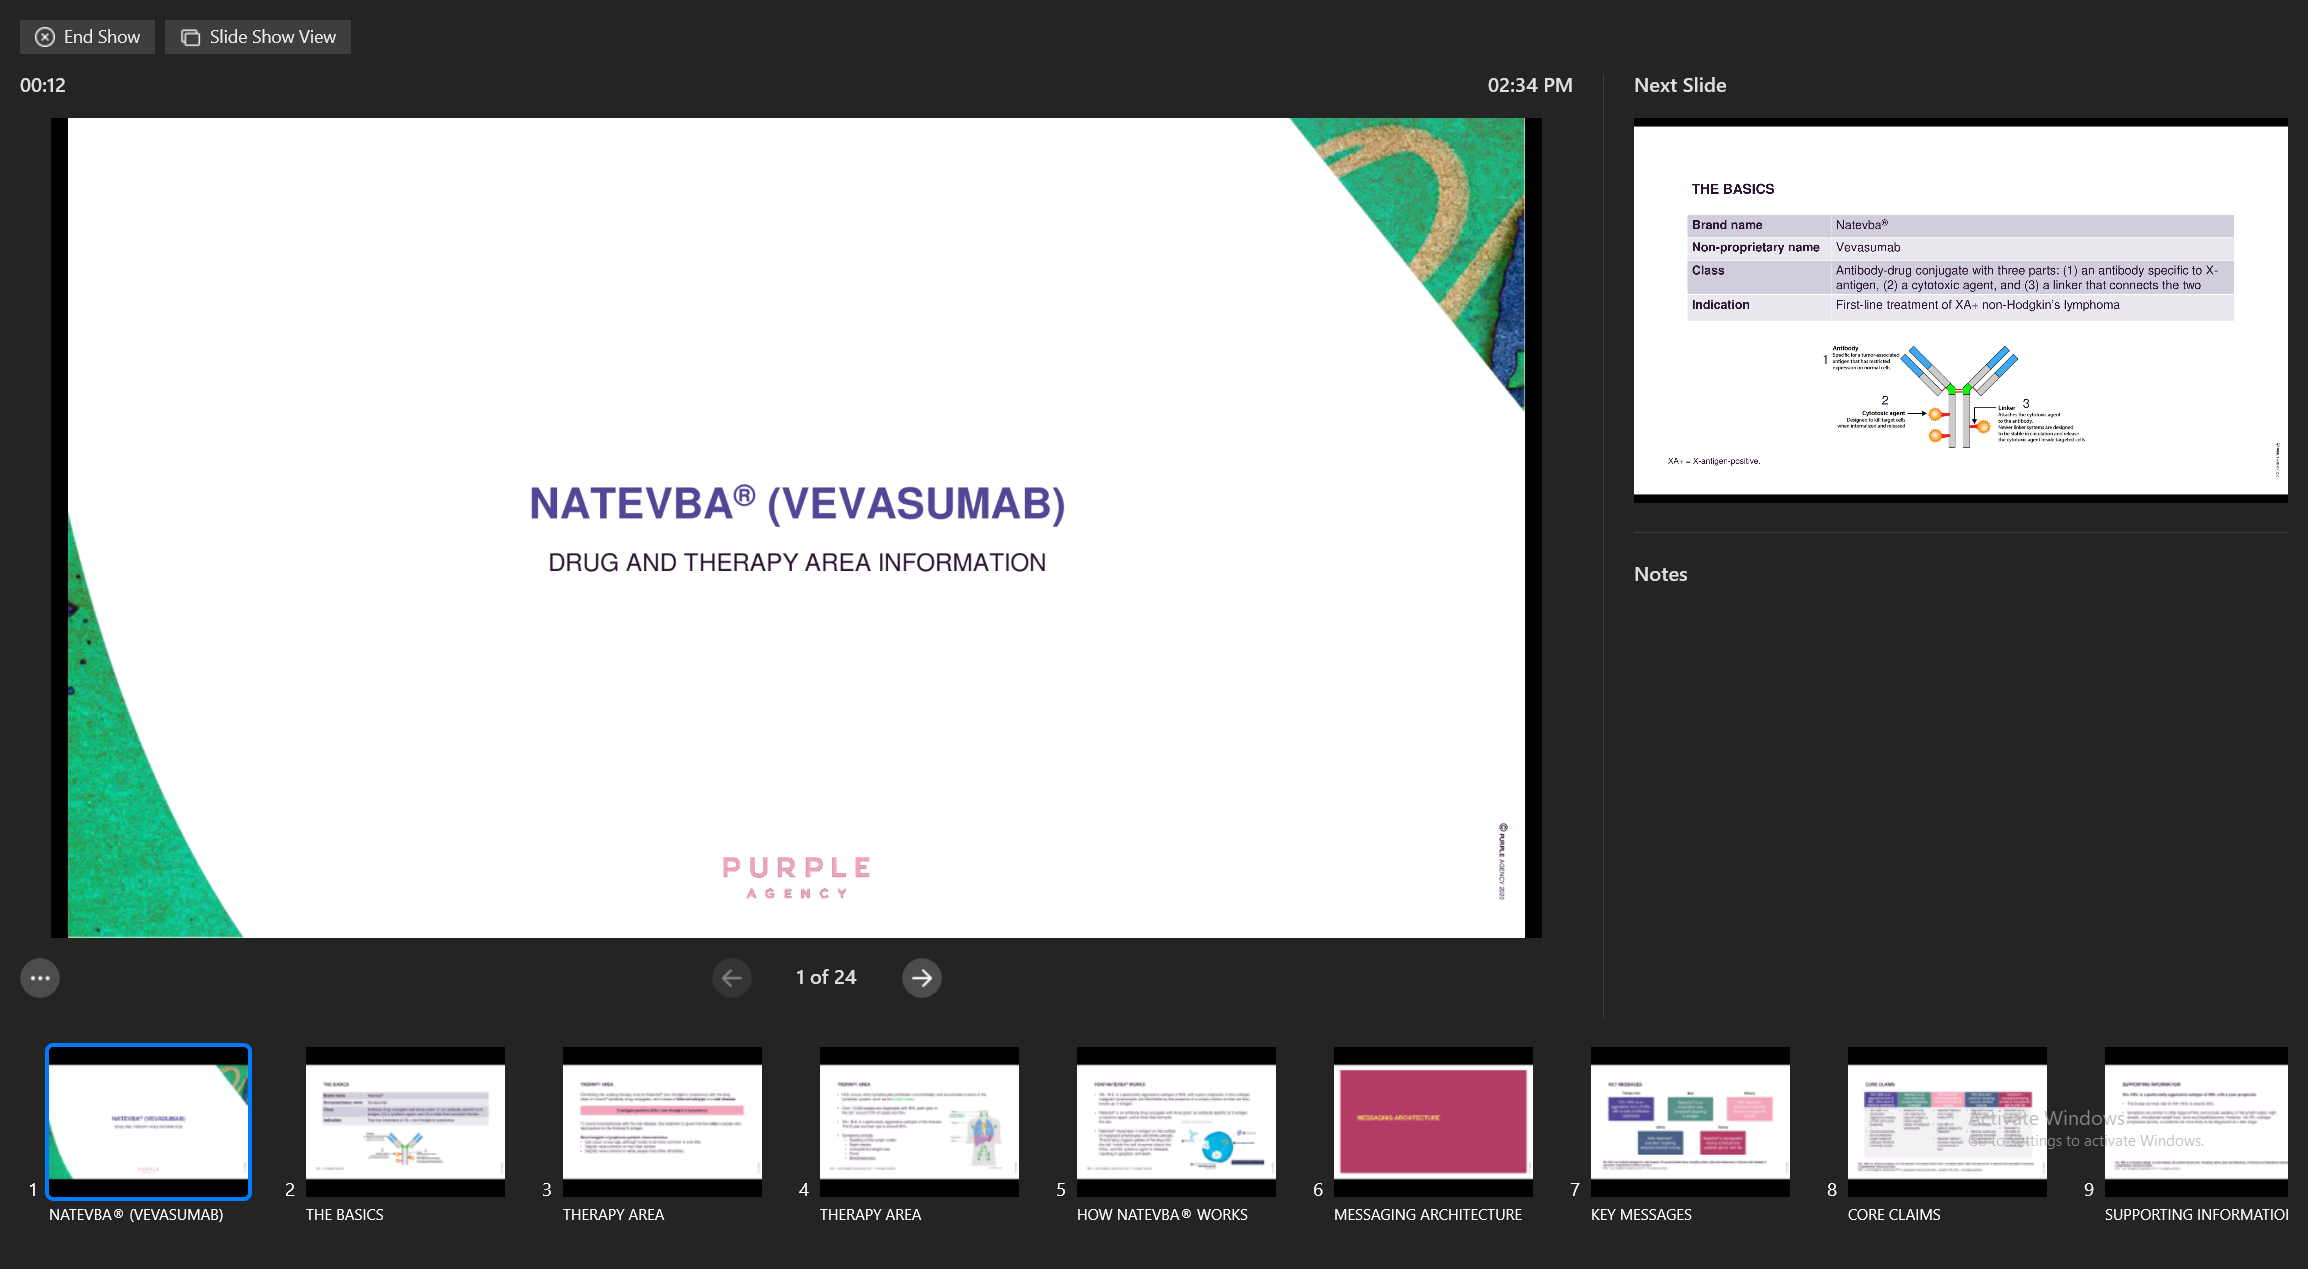
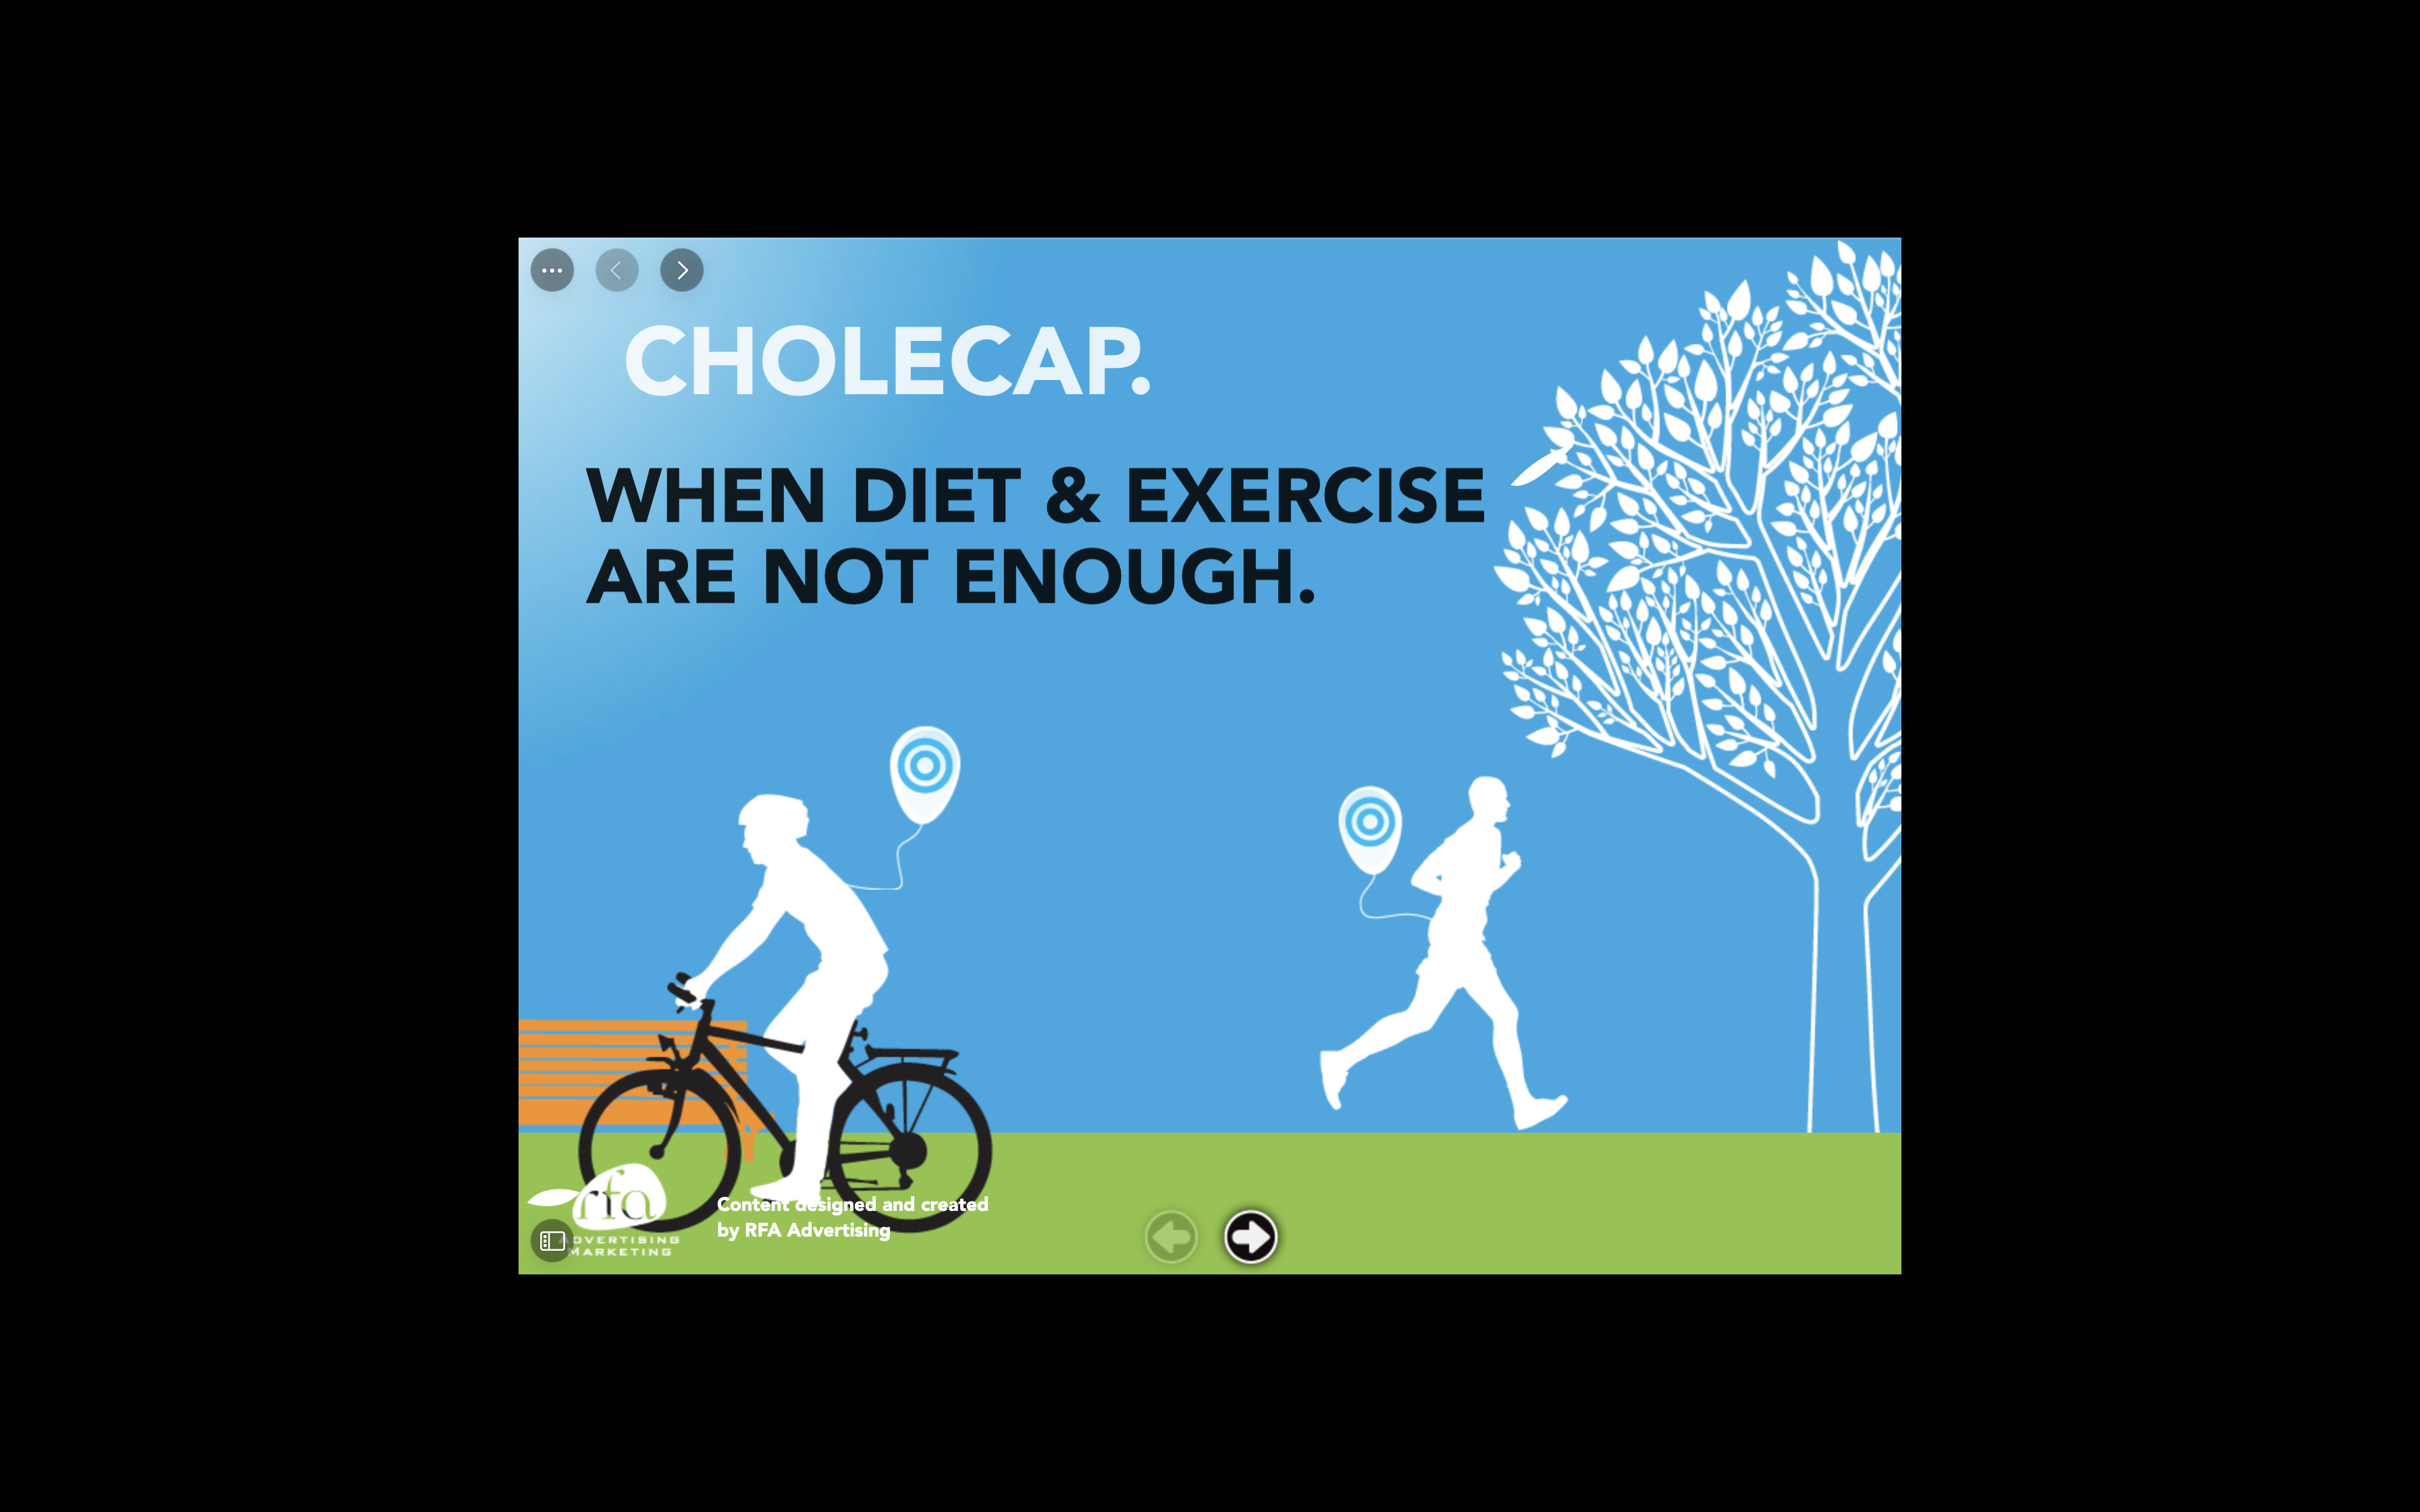
Displaying Presentations in Presenter View
Users can display presentations in Presenter View, which includes the current slide and its slide notes, the navigation bar, and a preview of the next slide. Using Presenter View allows users to:
- Reference their notes for more context when presenting
- Prepare for the upcoming slide
- Easily navigate between slides in a presentation
- Check the amount of time spent presenting in the top left corner of the window to pace themselves if there is a time constraint
Granting Screen Recording Permission for CRM Desktop (Mac)
To display presentations in Presenter View on CRM Desktop (Mac), ebd users must grant screen recording permission to the Veeva CRM Desktop:
- Select the Apple menu > System Settings > Privacy & Security > Screen & System Audio Recording.

- Select the toggle for the Veeva CRM Desktop app. The toggle displays blue when enabled.
- Confirm the update using the appropriate authentication method.
Using Presenter View
- Presenter View always displays in a fullscreen window and cannot be resized
- The fullscreen view of the current slide displays in a separate attendee window
- When sharing the content via Engage meeting, only the attendee window displays to attendees
- When sharing content using another remote meeting application, share the attendee window. Users can still navigate to and view the Presenter View window.
When using the Zoom app with one screen, users must set Screen capture mode to Secure share with window filtering in the Share Screen settings.
- Only one Presenter View window displays at a time. When displaying multiple presentations in Presenter View or switching between presentations using Alt + Tab (Windows) or Command + Tab/Command + ` (Mac), the Presenter View window updates to display information for the presentation in the foreground
- When using two screens, select Swap Displays to move the Presenter View window to the other monitor
- Slide rotation and hot keys are available in Presenter View
When using only one screen to share content from Veeva CRM Desktop via the Microsoft Teams Desktop app, Presenter View is not supported. Users can share content in Presenter View either via Microsoft Teams in the browser with only one screen or via the Microsoft Teams Desktop app with two or more screens.
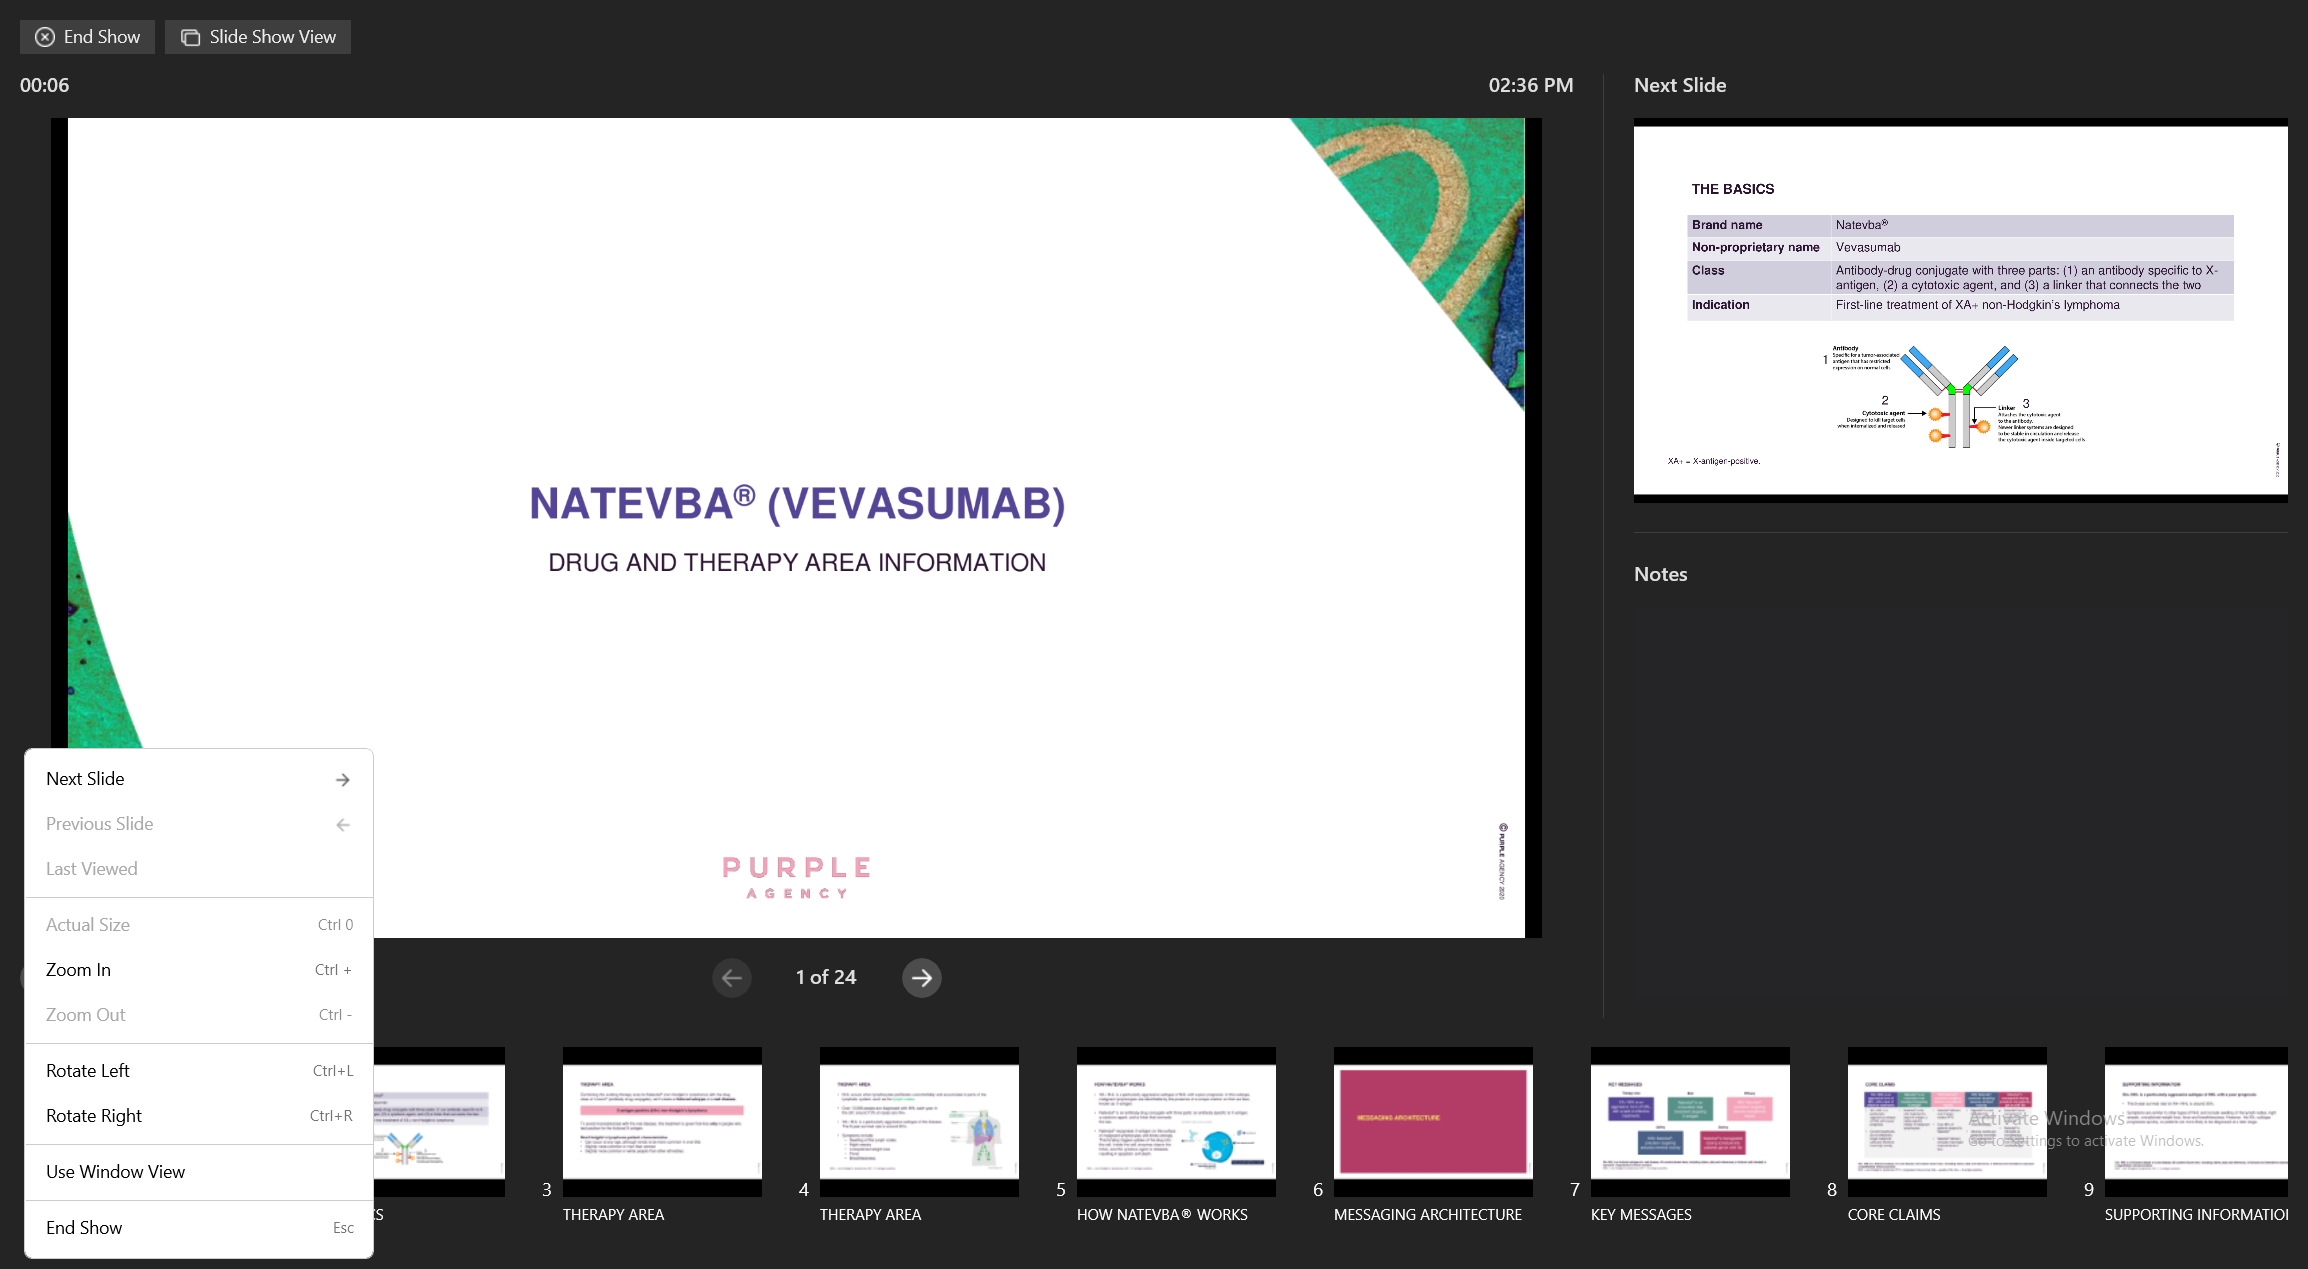
To display a presentation in Presenter View:
- Select the Start Slideshow dropdown menu.
- Select Presenter View. When the user is not already in call mode, this starts preview mode or Save for Later call mode, if configured.
To interact with the presentation in Presenter View, select the displayed slide. The cursor displays orange to indicate you are interacting with the slide. The cursor returns to white when navigate away from the slide.
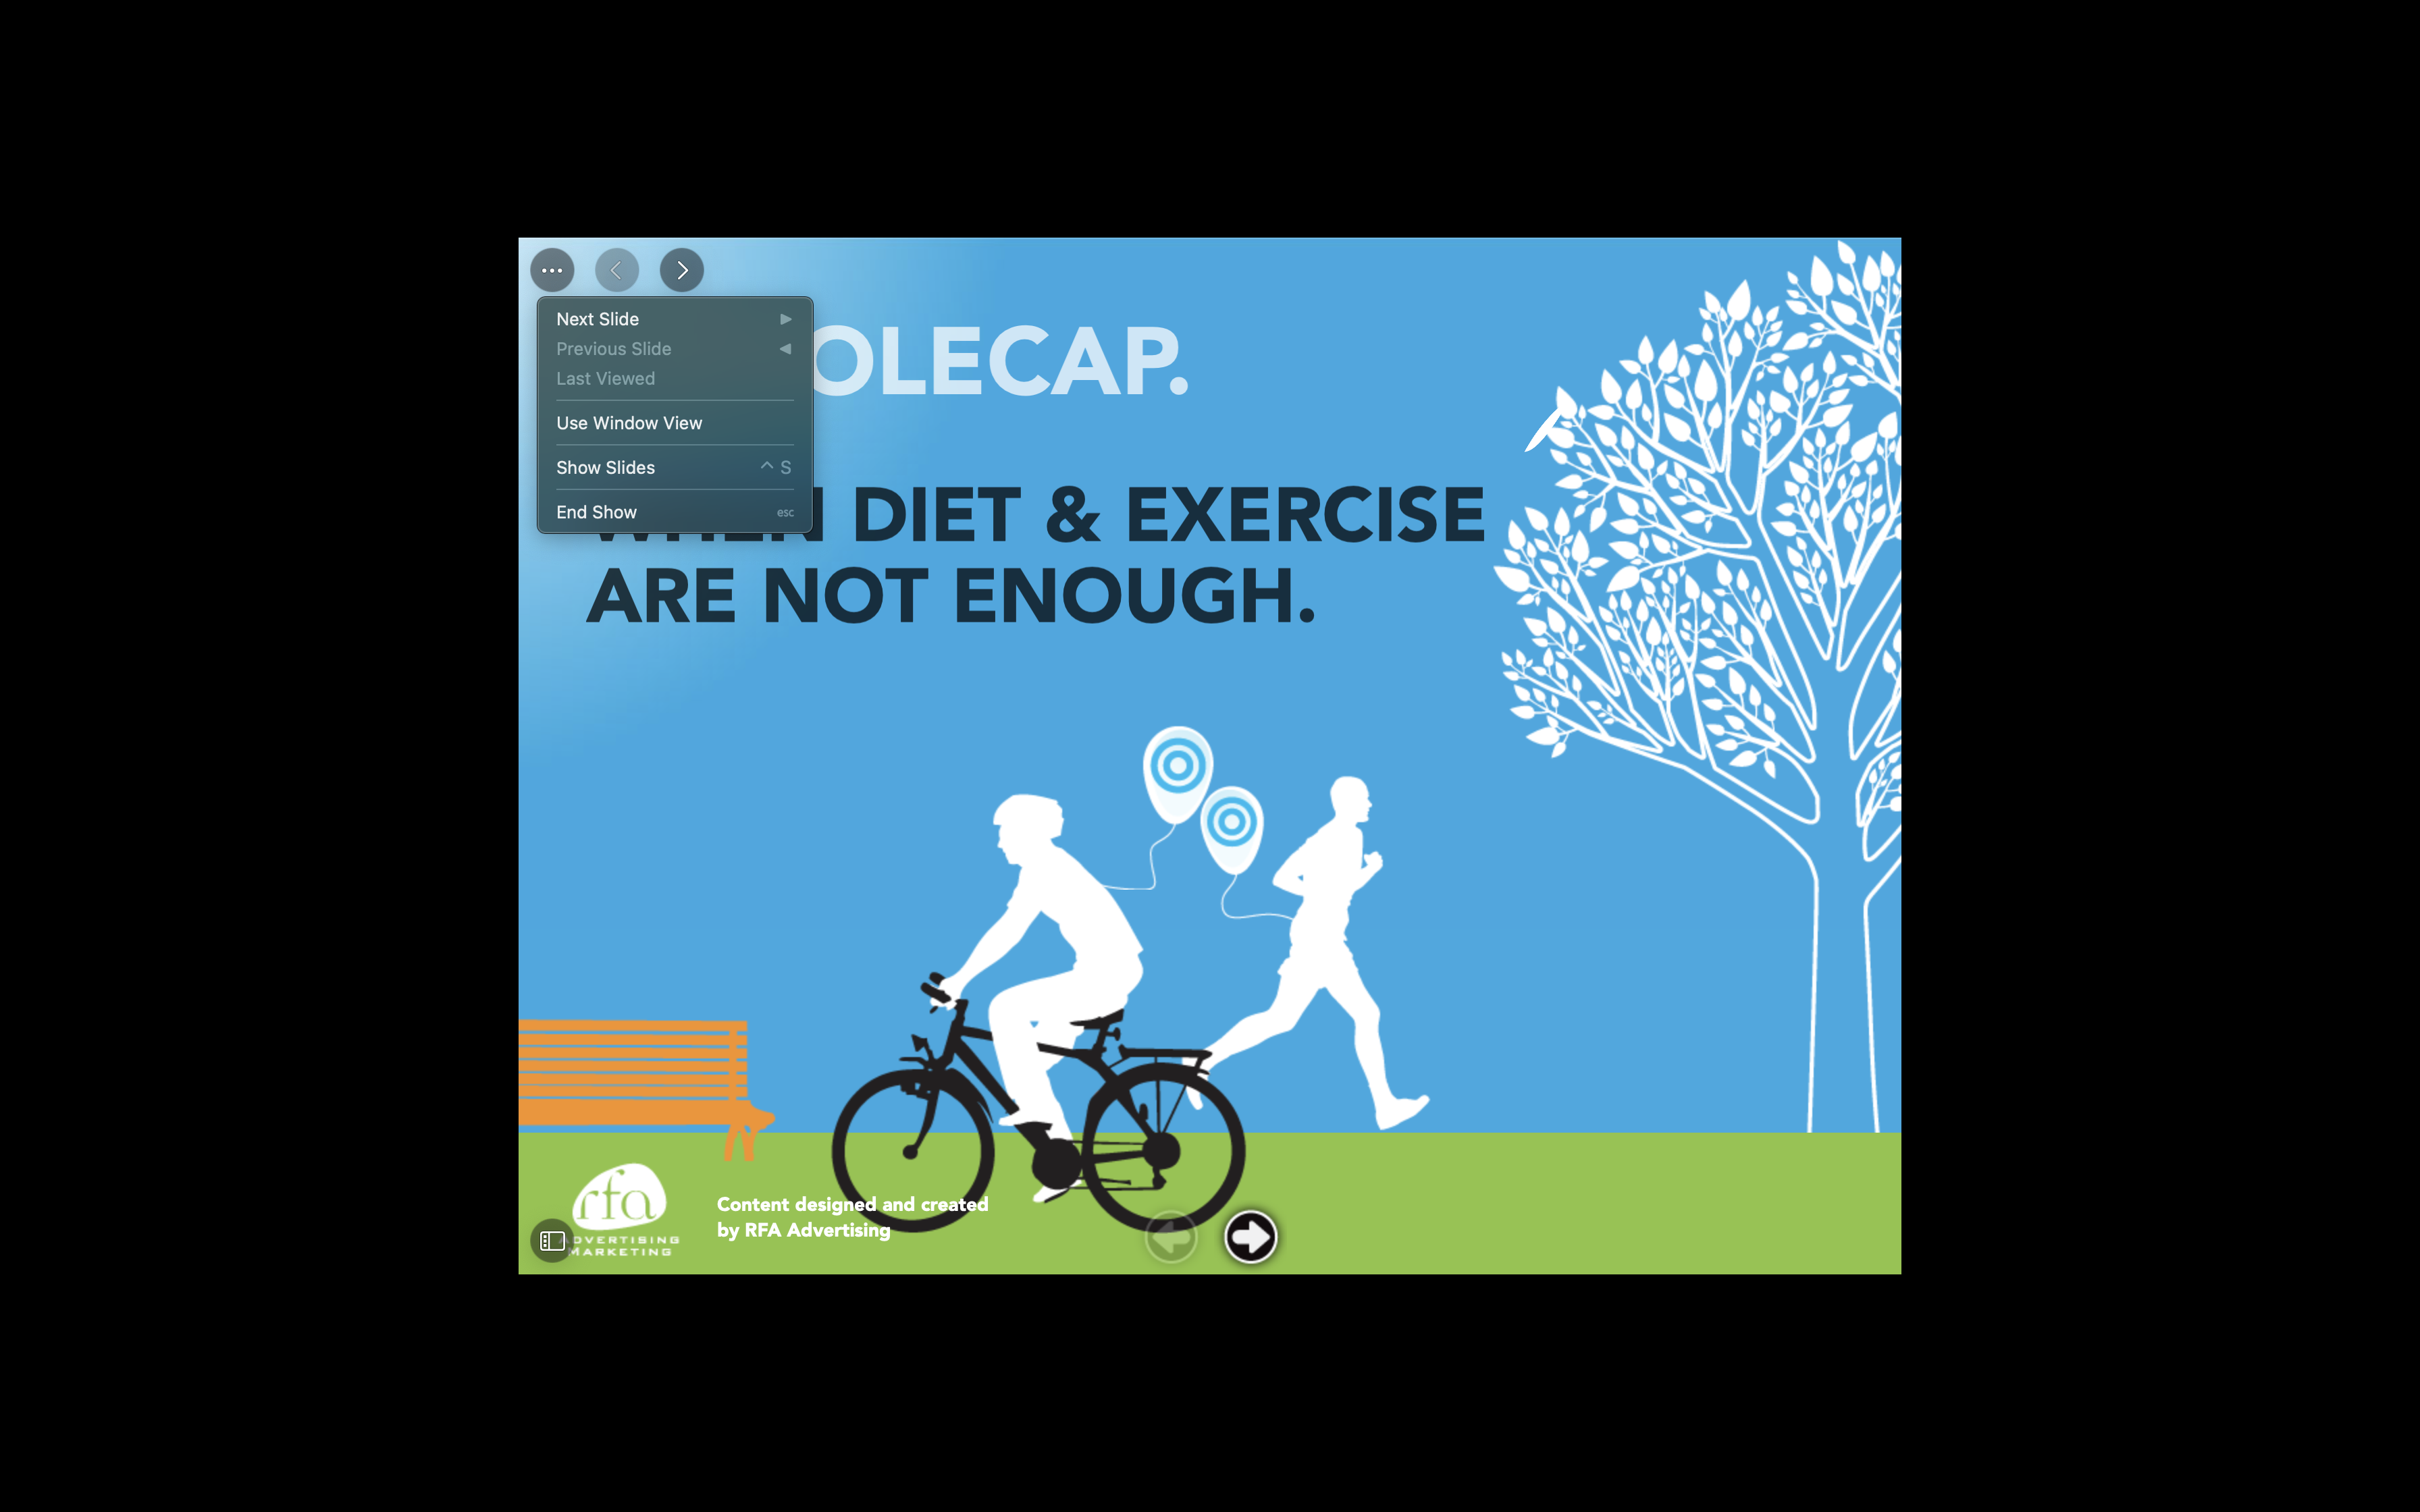
To transition from Slide Show View or Window View to Presenter View, select Use Presenter View from the More Actions menu or the right-select context menu.
To transition from Presenter View to Slide Show View, select Use Slide Show at the top of the window. Alternatively, select Use Slide Show View from the More Actions menu or the right-select context menu.
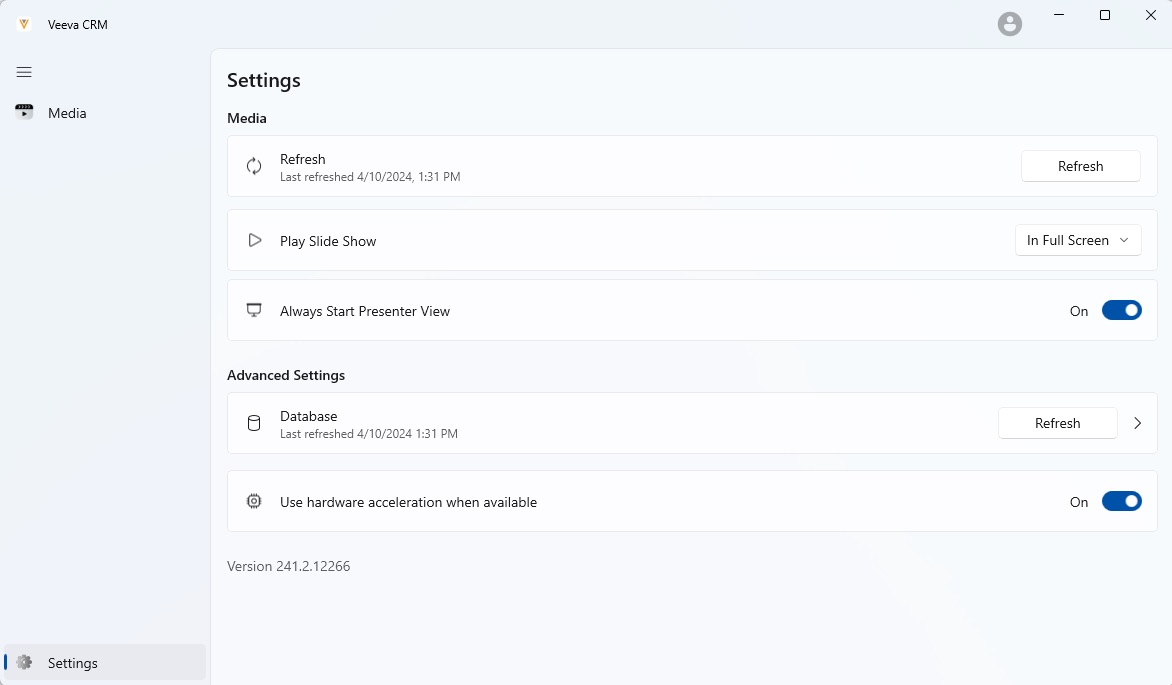
When users use the Present in Engage button to quickly share CLM content in an Engage meeting or when two monitors are available, CLM presentations display in Presenter View by default. To disable this:
- Select Settings.
- Deselect the Always Start Presenter View check box.
Using Sub-Presentations in Presenter View
In the navigation bar, the thumbnail for a sub-presentation displays as a stack of slides with the label Required. Thumbnails for the main presentation slides associated with the sub-presentation are grayed out until the user finishes displaying all the slides in the sub-presentation.
Select the sub-presentation thumbnail to view all the slides in the sub-presentation. Each slide in the sub-presentation is grayed out until the preceding slide displays for at least two seconds, to ensure users display the slides in order. After all the slides in a sub-presentation display, the thumbnail in the navigation bar becomes grayed out and does not display the Required label. However, users can still select the grayed out thumbnail and navigate to the sub-presentation.
Locking CLM Content Size
Admins can lock CLM content to 1024 pixels by 768 pixels to prevent content that was originally developed for iPad using a fixed size from being distorted when displayed on larger screens. This allows content to display at the same size regardless of the size of the screen. Locking the size of the content allows customers to reuse existing content that has been developed for legacy iPad screens because the content does not stretch to fill larger screens.
Locking the size of custom presentations is not recommended. Custom presentations can include slides of various sizes from multiple presentations, and locking the content size can result in content displaying incorrectly.
Locking CLM Content Size
For presentations managed in Vault, Vault admins can select the crm_legacy_ipad_content_mode__v field on the appropriate presentations. The values sync to the corresponding CLM_Presentation_vod records in CRM.
For presentations not managed in Vault, admins can lock the size of a CLM presentation in CRM:
- Navigate to the appropriate CLM_Presentation_vod record.
- Select Edit.
- Select the Legacy_iPad_Content_Mode_vod check box field.
This field is only applied when displaying content on the CRM Desktop (Mac, Windows) platforms.
- Select Save.
Displaying Content with Locked Size
When a user displays a presentation locked to 1024 pixels by 768 pixels from Veeva CRM on Desktop, the content displays in the center of the screen with a black border on all sides. The media player buttons display on the content, not in the black border. When sharing the content in an Engage meeting, the black borders do not display to attendees.
As a best practice, test content after locking the size to ensure it displays correctly. Content with a minimum fixed size larger than 1024 pixels by 768 pixels is cut off.
Engage
Sending Engage Connection Invites to HCPs
Users can send Engage connection invites to HCPs directly from Veeva CRM. Connecting with HCPs allows users to chat with them in Engage.
Users must have an active internet connection to send connection invites.
Users can send Engage connection invites to HCPs from the following entry points:
- Engage Tab – invites are not linked to accounts
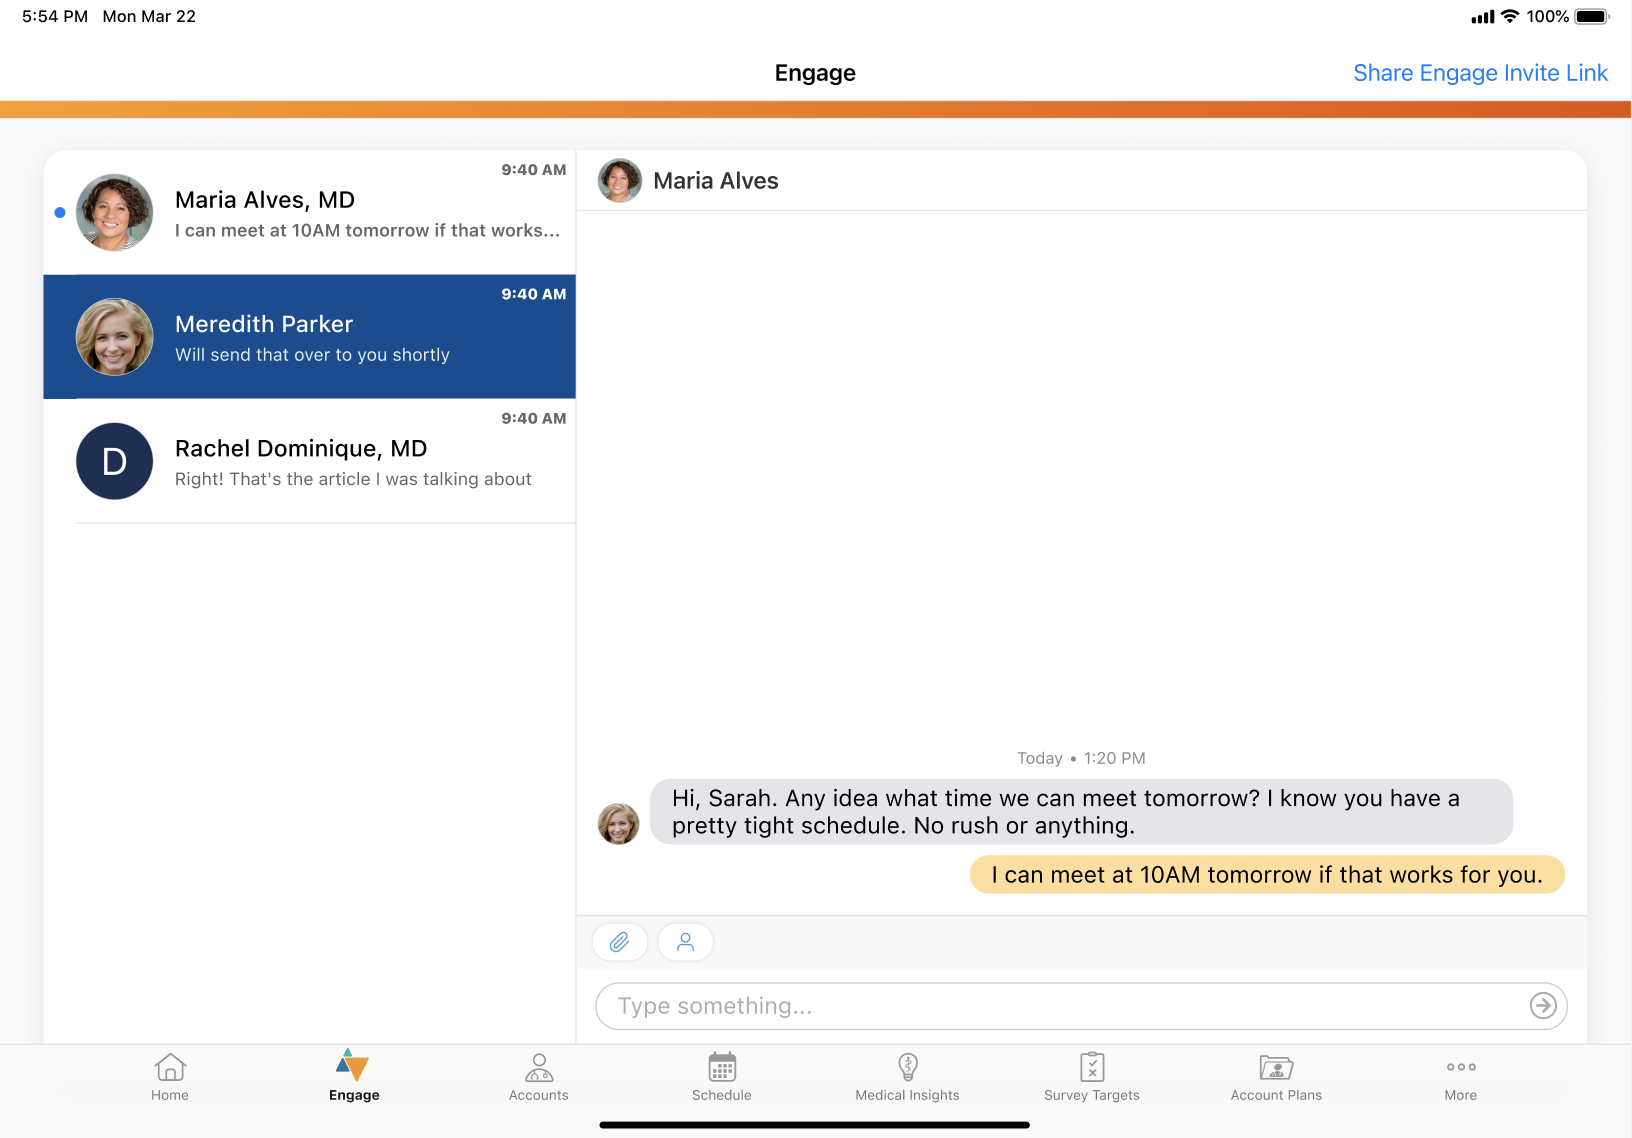
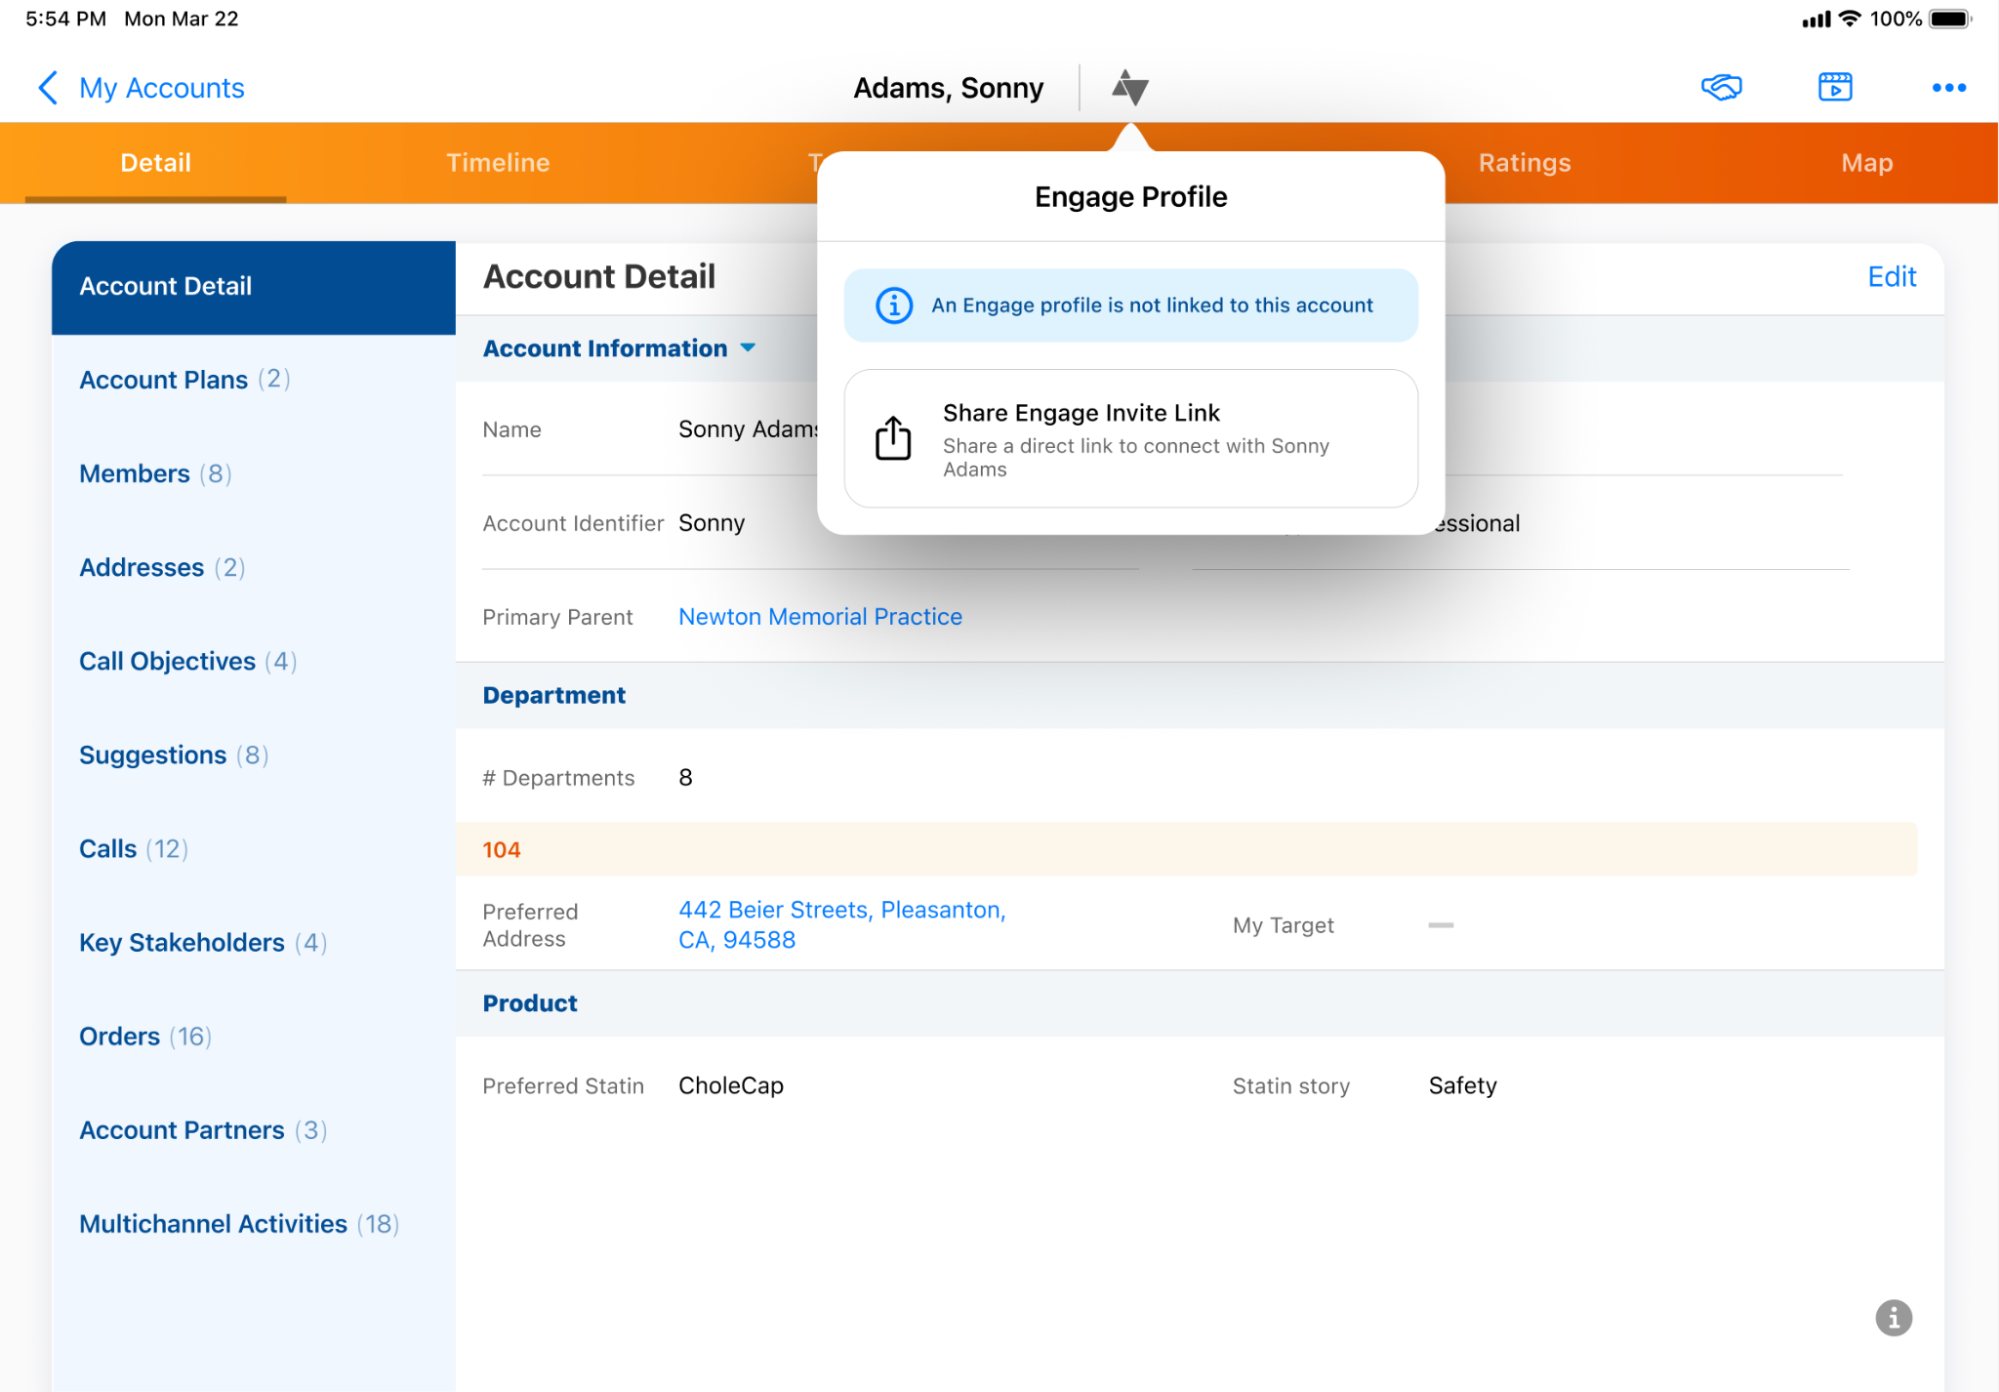
- Engage profile indicator on the HCP’s account – invites are linked to specific accounts
- The More Actions menu in the My Accounts list and the Account Details screen for HCP accounts – invites are linked to specific accounts
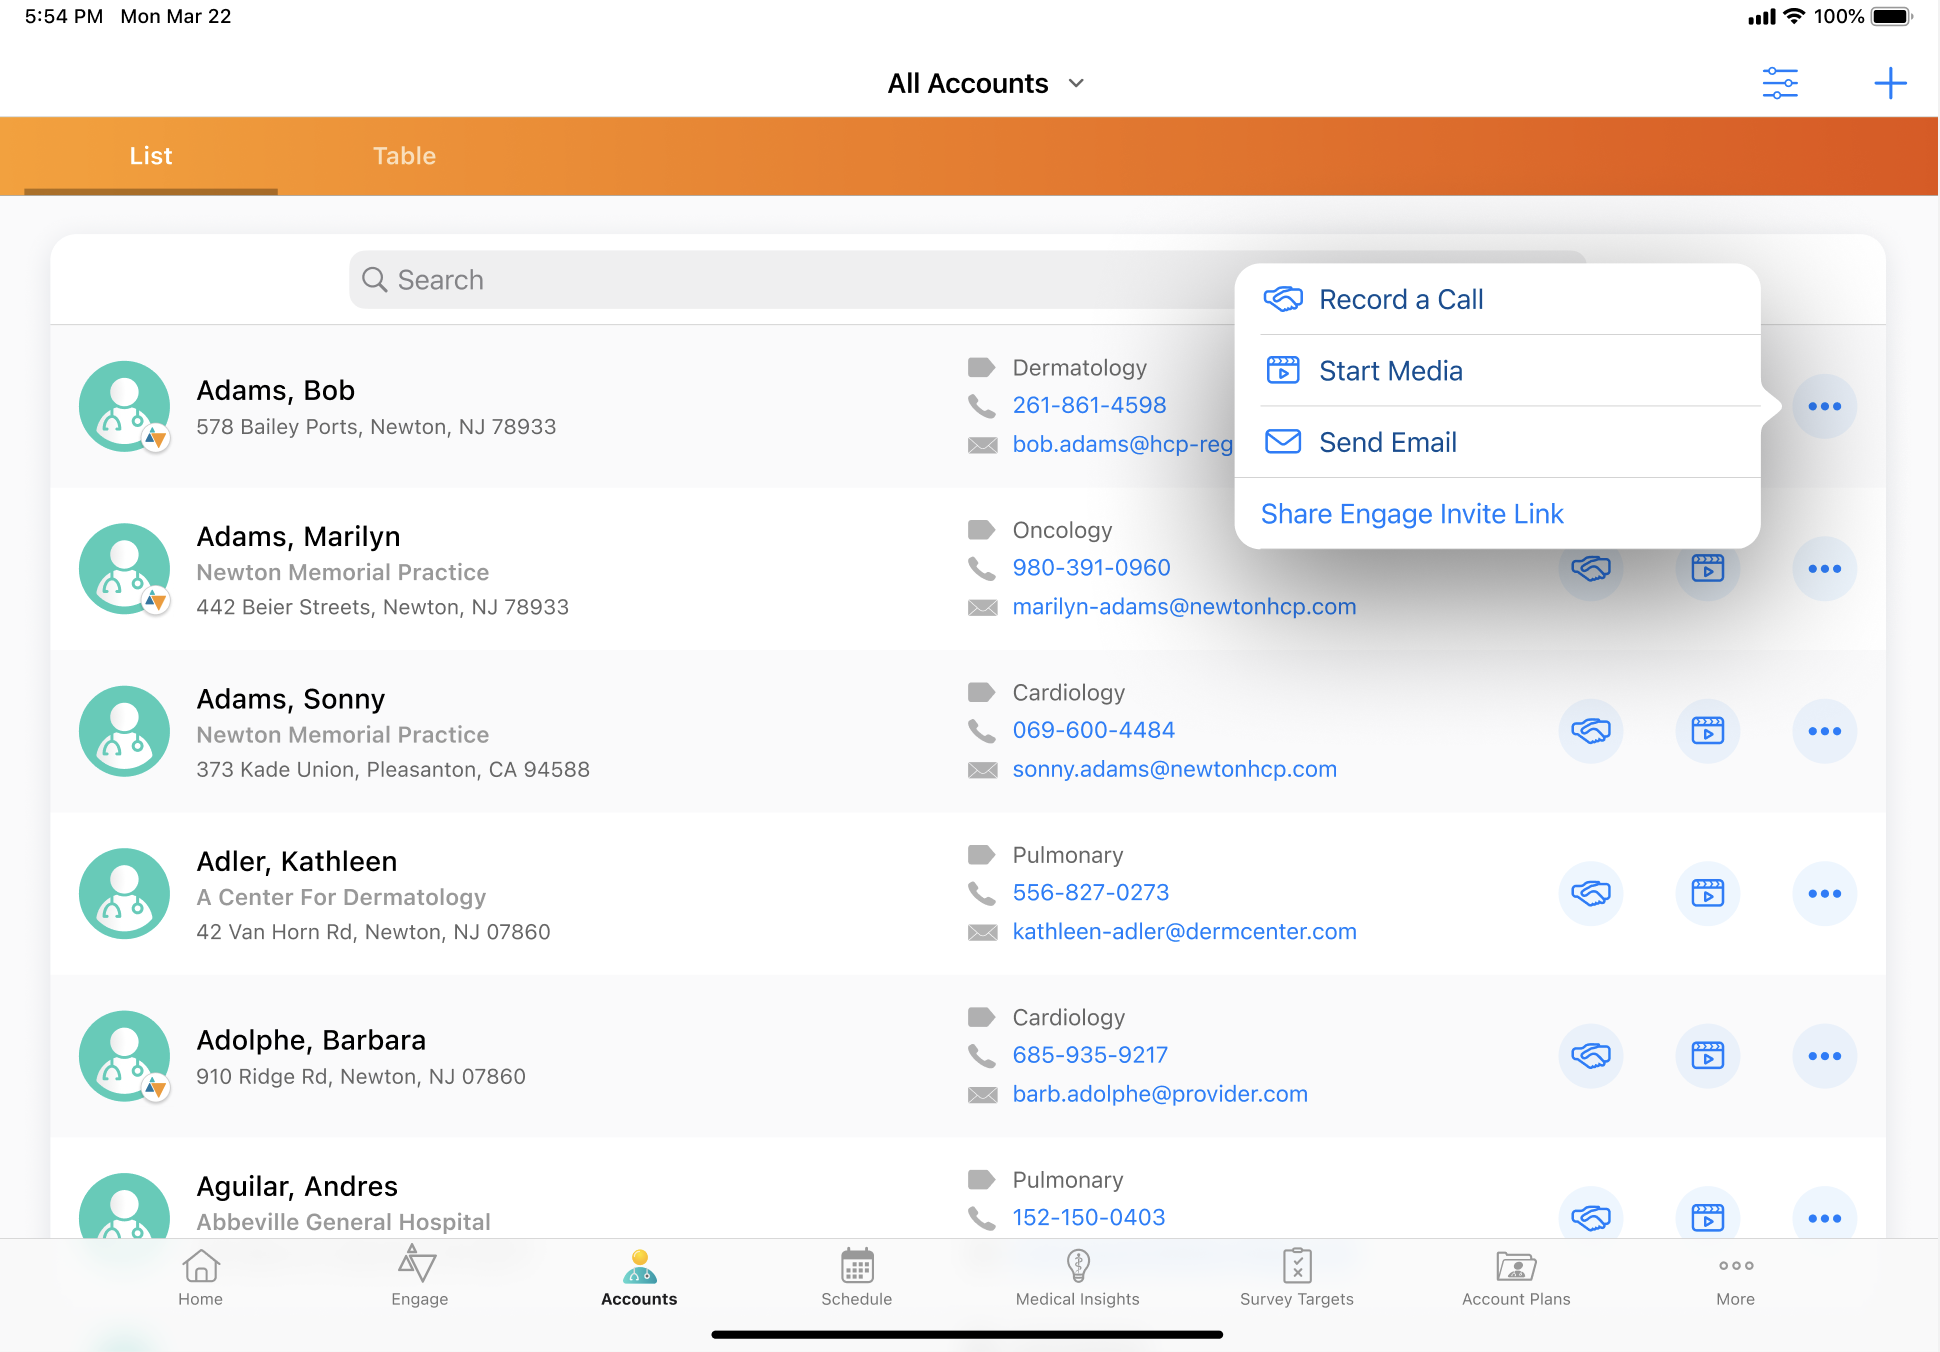
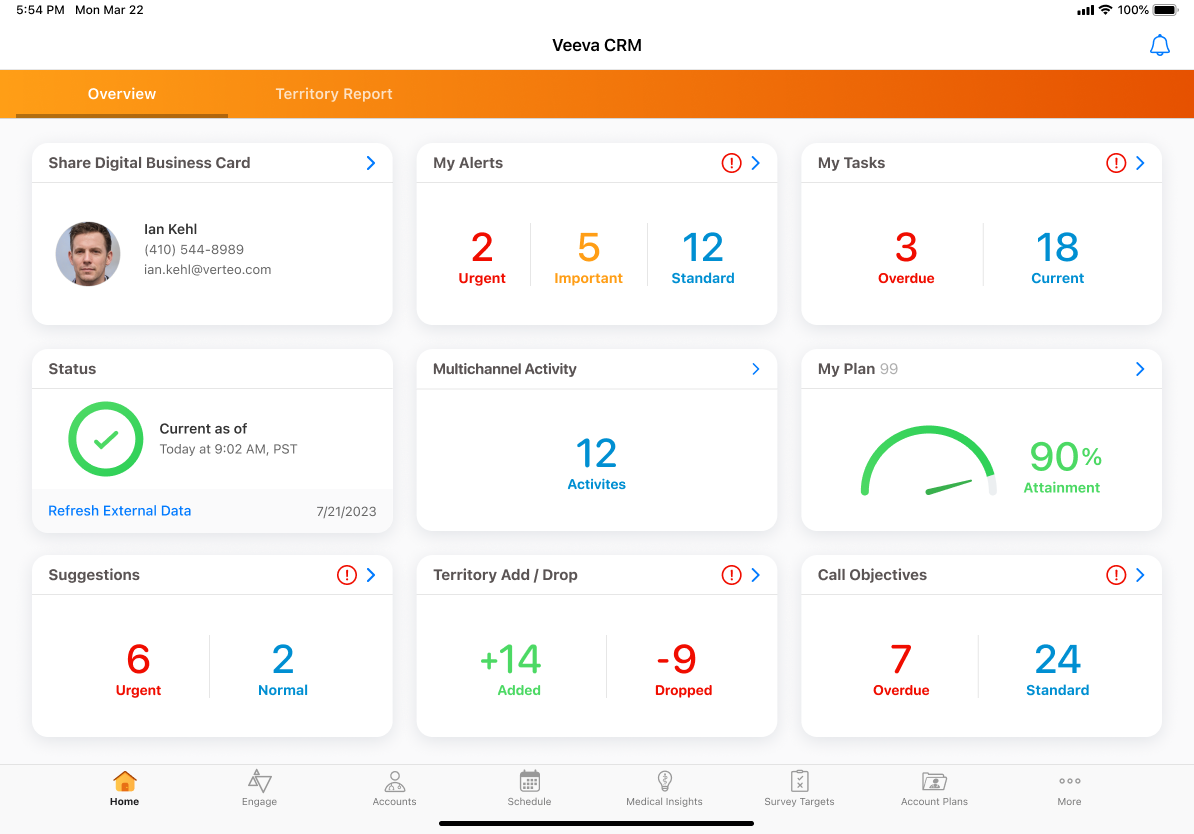
- The Share Digital Business Card homepage component
If an HCP connects with a user via a connection invite linked to their account, the HCP's Engage profile is automatically linked to the account and displays in the profile indicator after the user syncs.
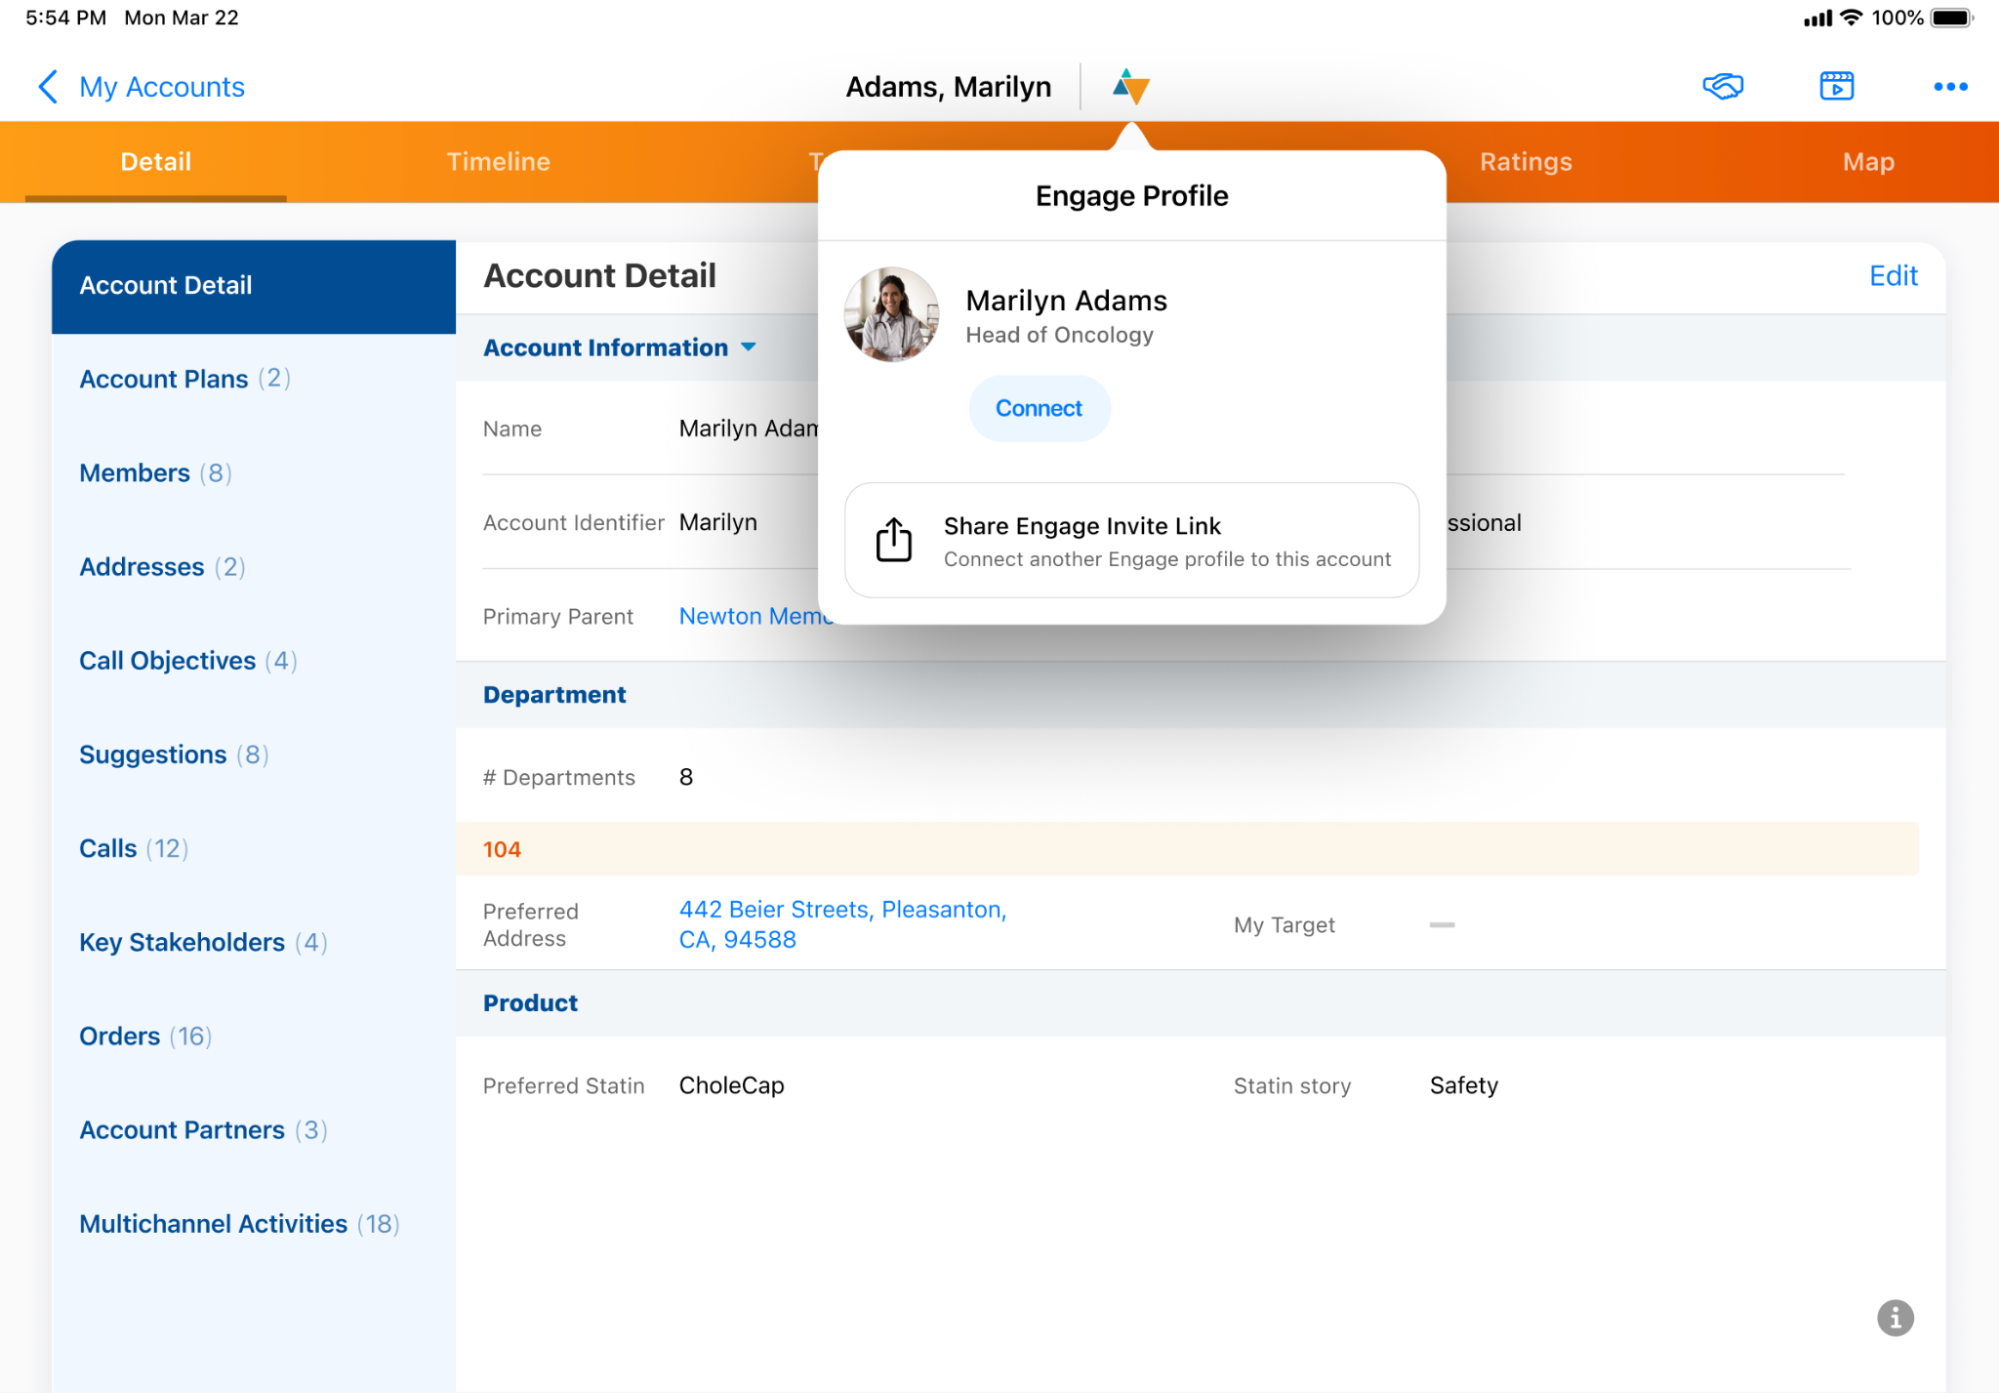
Sending an Engage Connection Invite to an HCP
To send a connection invite after navigating to one of the entry points:
- Select Share Engage Invite Link.
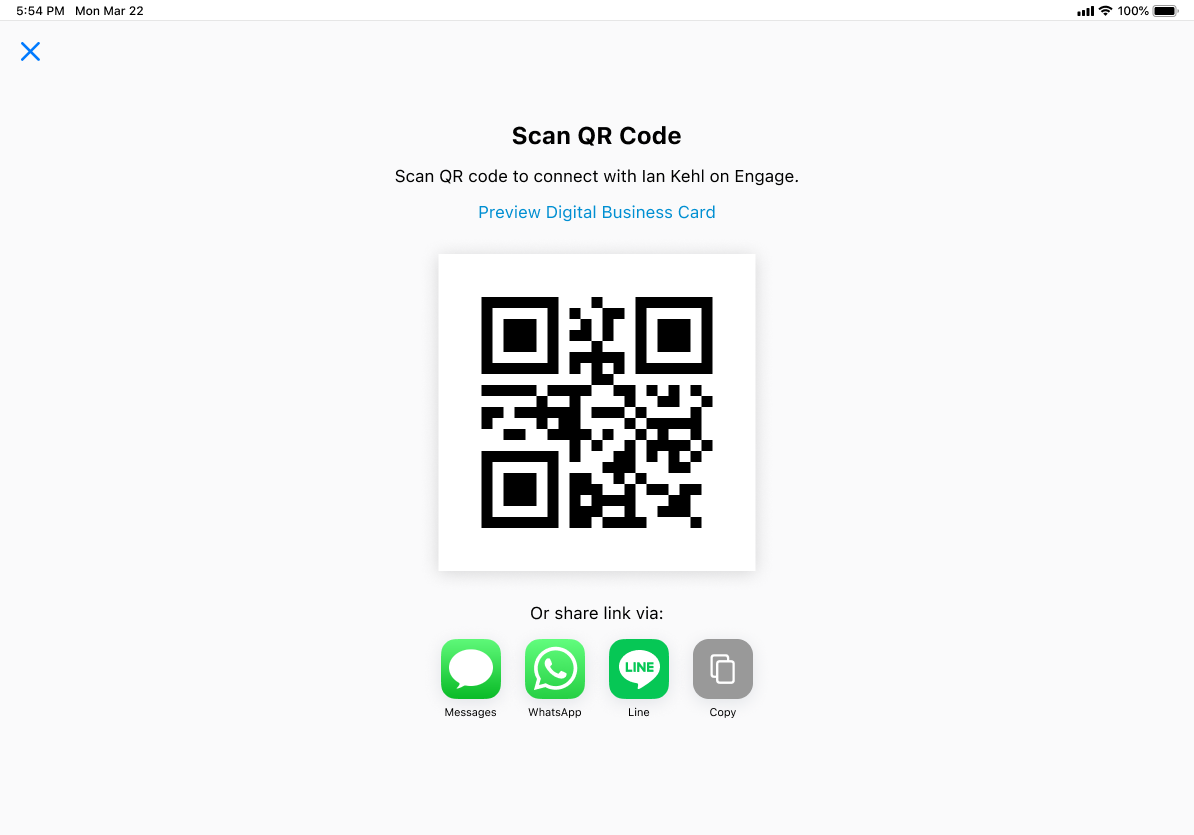
When the QR Code® is generated, a Sent_Message_vod record is immediately created.
- Select the appropriate sharing option. You can send the invite link to the HCP via QR Code® or a supported messaging app, or by copying the invite link and sending it via another messaging app.
When the HCP accepts the invite, a chat thread with the HCP is automatically created in the Engage tab for the user. If push notifications are enabled, you also receive a push notification.
If an account has a linked Engage profile but you are not connected and you have not previously sent a connection invite in Engage Connect, the Connect button displays in the Engage profile indicator. Select Connect to send the invite. The HCP receives an in-app notification and an email notification informing them of the connection invite.
You can send connection invites to HCP who do not have linked Engage profiles. For accounts that do not have linked Engage profiles, the Engage profile indicator displays as grayed out on the Account Details screen. You can still select the indicator and select Share Engage Invite Link.
Tracking Engage Connection Invite Links
Information about each sent invite link is tracked on a Sent_Message_vod record. Users can view the Sent_Message_vod records for an account on the account timeline. The following information is stamped on each record:
If the full URL for an invite link is sent instead of the shortened URL, the reason is stamped in the Details_vod field on the Sent_Message_vod record.
|
Field |
Value |
|---|---|
|
Record Type |
Engage_Connection_Invite_vod |
|
Account |
Lookup to the account who received the link. This is blank when the invite is sent from the Engage tab or the Share Digital Business Card home page tile. |
|
User |
Lookup to the user who sent the link |
|
Capture Datetime |
The datetime at which the sharing option was selected |
|
Shortened Engage Link |
The shortened version of the invite link |
|
Engage Link |
The Engage Connect server for the org and parameters for the User ID, Org ID, and Account ID |
|
Mobile ID |
System-generated Id |
|
Sent From Platform |
The platform from which the link was sent |
|
Sent Via |
The app/sharing option used to send the link |
|
Transaction Type |
Engage_Connection_Invite_vod |
Each time the recipient accesses the invite link, a Message_Activity_vod record is created with the following information:
|
Field |
Value |
|---|---|
|
Record Type |
Message_Activity_vod |
|
Activity |
Clicked_vod |
|
Activity Datetime |
The datetime at which the activity occurred |
|
IP Address |
The IP address of the server/device which accessed the URL |
|
User Agent |
The User Agent details returned from the IP address |
|
Client Name |
The name of the client software |
|
Client OS |
The name of the OS family running the client software |
|
Client Type |
The type of software used to access the URL |
|
Client Device |
The type of device used to access the URL |
Starting Microsoft Teams Meetings from Calls in Microsoft Outlook
To easily work across Microsoft Teams, Microsoft Outlook, and Veeva CRM, users can start Microsoft Teams meetings from calls synced to their Microsoft Outlook calendars.
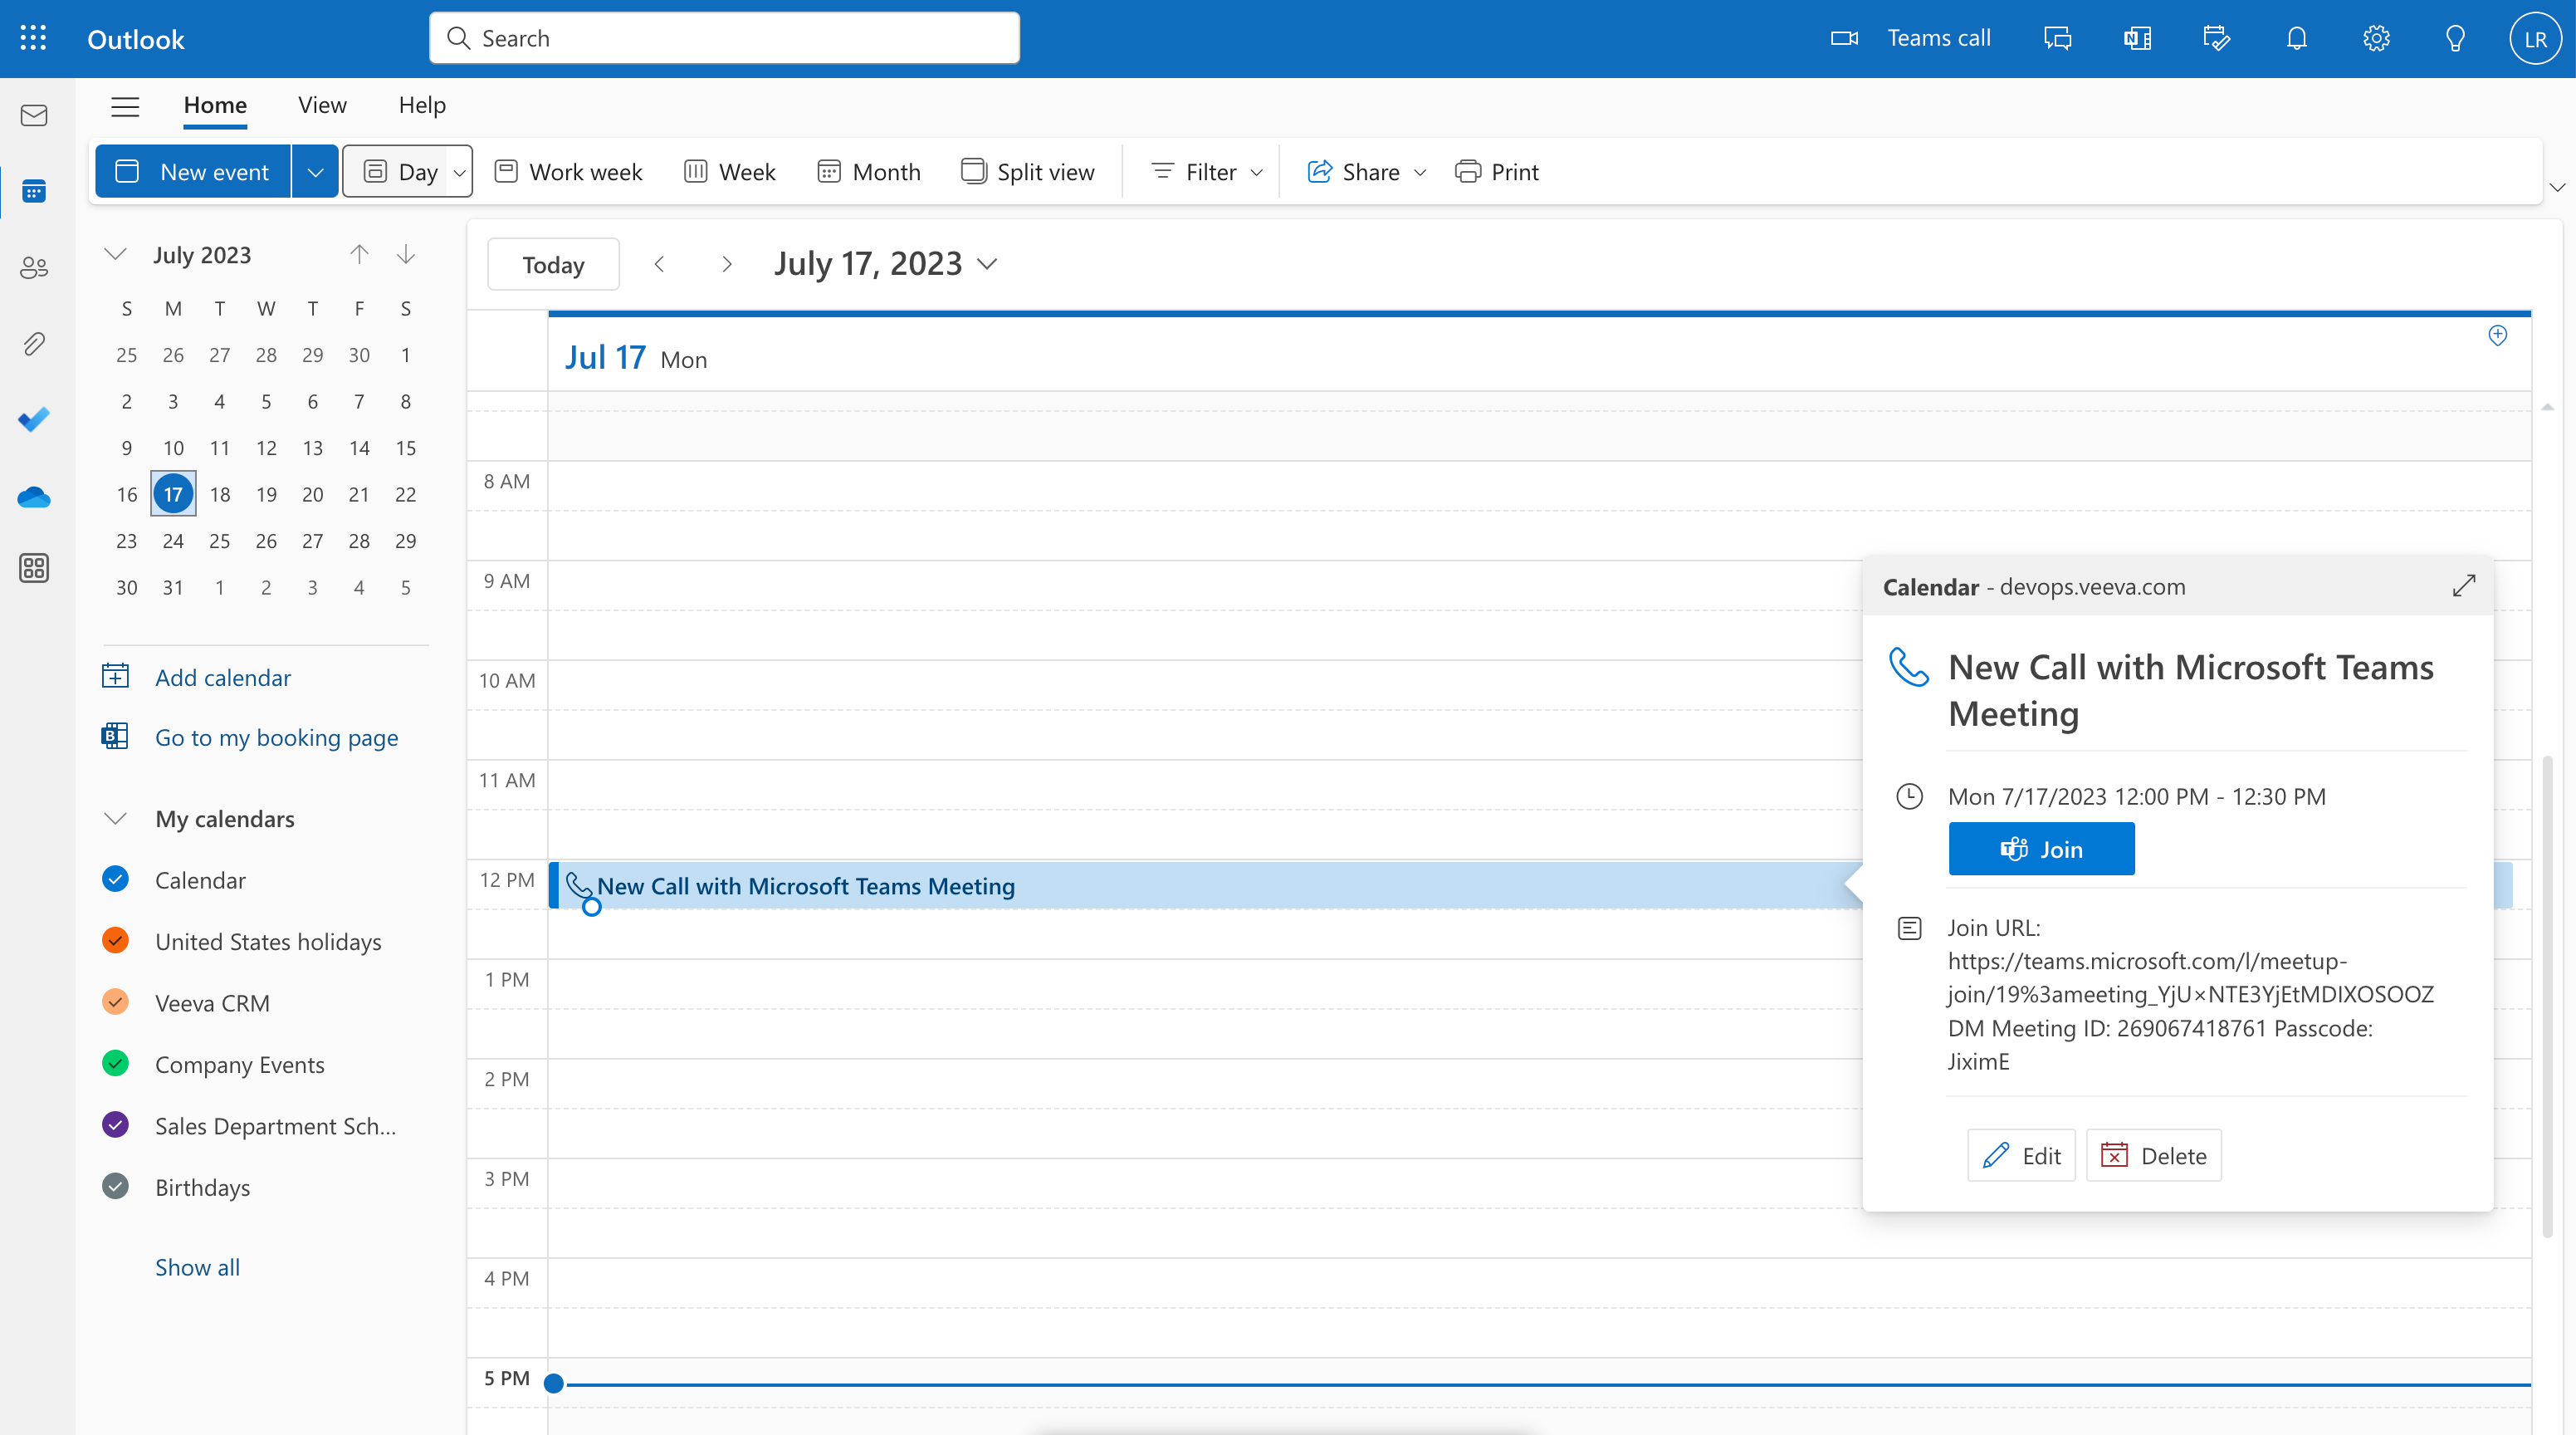
When calls associated with Microsoft Teams meetings are synced from Veeva CRM to Microsoft Outlook, Microsoft Teams meeting information is synced along with the other call data. This information is included in the body of the calendar event and displays on the calendar popover for the call.
This functionality is available for users who can access both Microsoft Teams and Microsoft Outlook on their devices. If users do not have Veeva CRM installed on their devices, they can conduct the meeting but are not able to share media from Veeva CRM.
Starting Microsoft Teams Meetings from Calls in Microsoft Outlook
When calls associated with Microsoft Teams meetings are synced from Veeva CRM to Microsoft Outlook, the values from the MS_Teams_Meeting_Link_vod, Meeting_Password_vod, and Meeting_Id_vod on the Remote_Meeting_vod object are synced along with the other call data.
How users start Microsoft Teams meetings from calls in the Microsoft Outlook calendar is determined by Microsoft and varies across platforms. Admins should evaluate how users start Microsoft Teams meetings on the appropriate platforms for their organization. For example, to start a Microsoft Teams meeting from Microsoft Outlook online, select the Join button on the call popover.
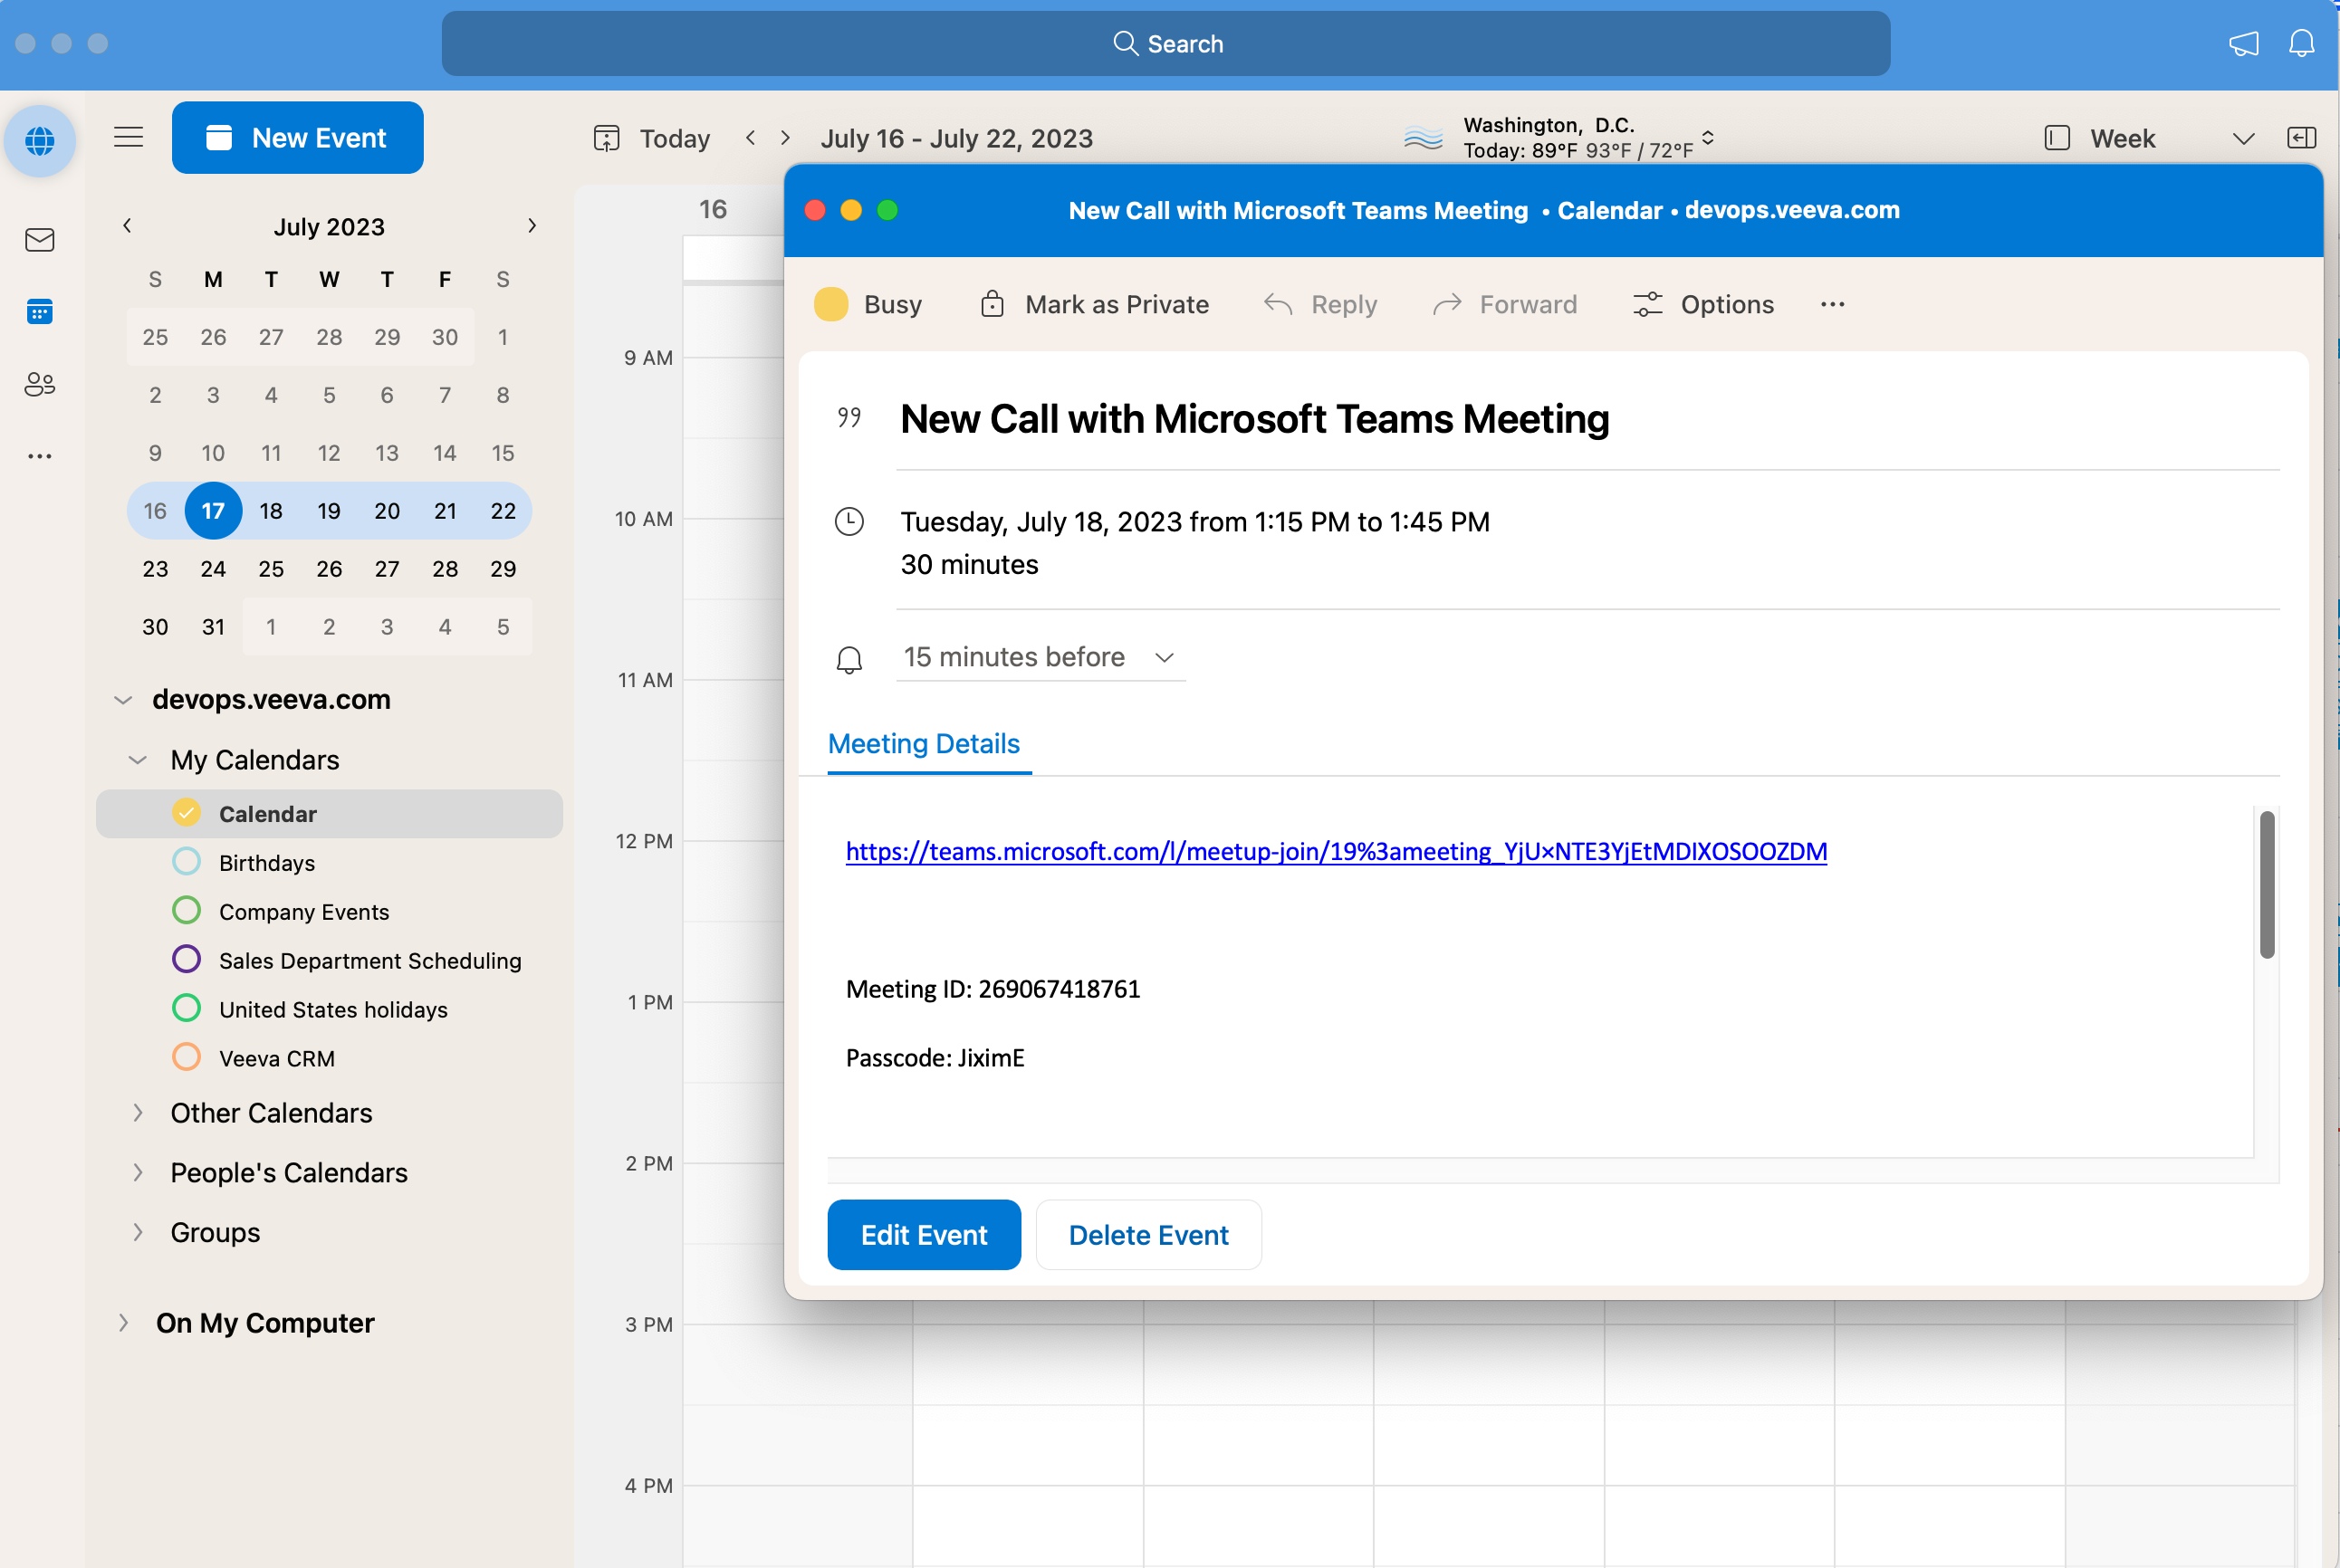
To start a Microsoft Teams meeting from the Microsoft Outlook desktop app, expand the popover for the call, then select the Microsoft Teams meeting link.
Scheduling and Starting Microsoft Teams Meetings
Users can schedule and start Microsoft Teams meetings from Veeva CRM. Meetings are conducted in Microsoft Teams, using the host’s corporate Microsoft Teams account. The meeting is hosted by Microsoft Teams and the meeting experience is controlled by the user’s corporate Microsoft Teams configuration.
If Integrating My Schedule and Microsoft Outlook Calendarsis enabled, users can also start Microsoft Teams meetings from call reports in their Microsoft Outlook calendar. See Starting Microsoft Teams Meetings from Calls in Microsoft Outlook for more information.
Scheduling Microsoft Teams Meetings in Veeva CRM
Users are prompted to sign into their Microsoft account the first time they schedule or start a Microsoft Teams meeting from Veeva CRM.
Ensure users sign in with their company-provided Microsoft account. Before signing in, users must clear Microsoft cookies if they have both a company-provided Microsoft Teams account and a personal Microsoft Teams account.
If users do not clear Microsoft cookies before signing in, their personal Microsoft Teams account is linked to Veeva CRM. To remove a personal Microsoft Teams account, your organization's admin must log a support ticket with Veeva CRM and clear Microsoft cookies.
If users have already authenticated their Microsoft account for Integrating My Schedule and Microsoft Outlook Calendars they do not need to sign in again.
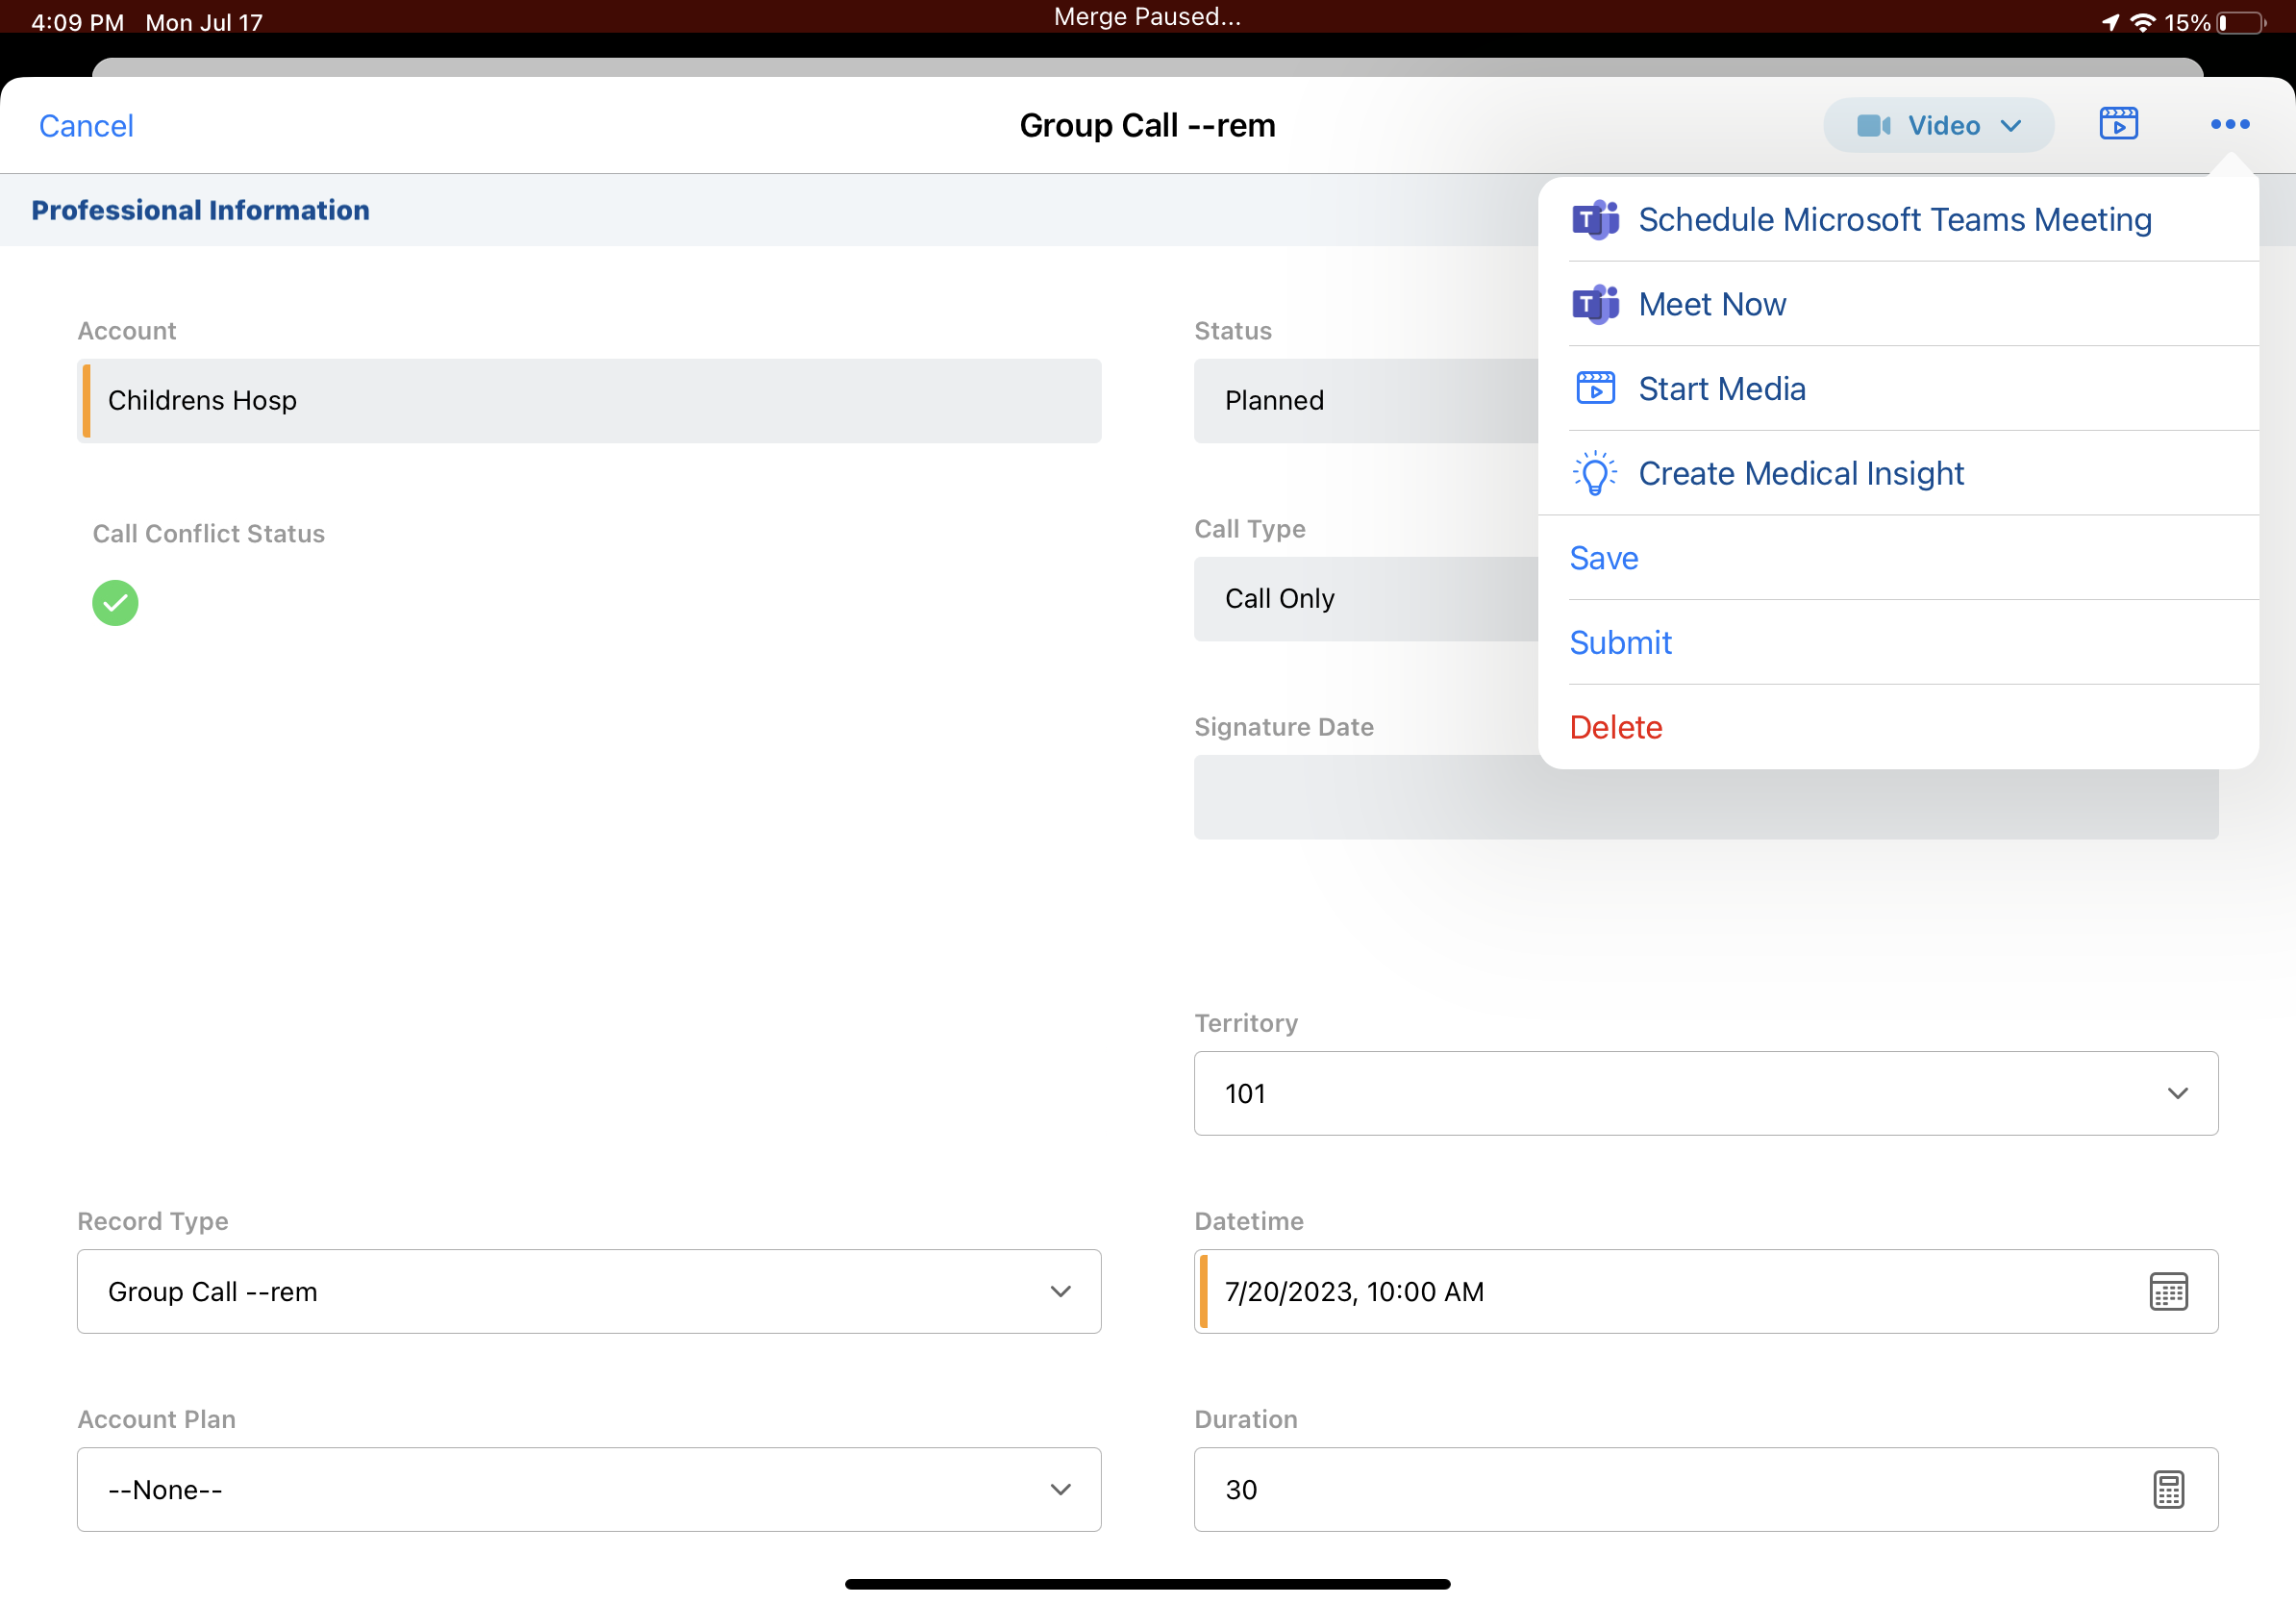
To schedule a Microsoft Teams meeting in Veeva CRM, select Schedule Microsoft Teams Meeting from the call report. On the Browser platform, the Schedule button displays on the call report user interface. On the iPad platform and on the high performance call report, the Schedule option is under the More Actions menu. When users schedule Microsoft Teams meetings from Veeva CRM, a passcode is automatically generated for the meeting, regardless of the user’s corporate Microsoft Teams configuration.
Users can only schedule meetings for call reports they own. The Schedule option displays when a remote meeting is not scheduled for the call and the call is not submitted.
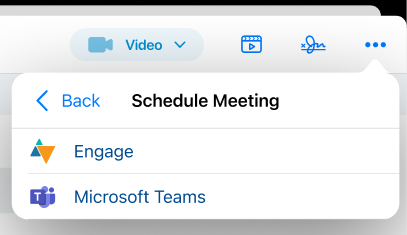
If both Engage Meeting and Microsoft Teams are enabled, select Schedule Meeting from the More Actions menu, then select the appropriate meeting type.
Once the meeting is scheduled, a related Remote_Meeting_vod record is created with the MS_Teams_Call_Meeting_vod record type, and the meeting type displays in the call report header. To edit the meeting datetime, edit the datetime on the call report or reschedule the call through My Schedule. The updated meeting time is reflected in Microsoft Teams.
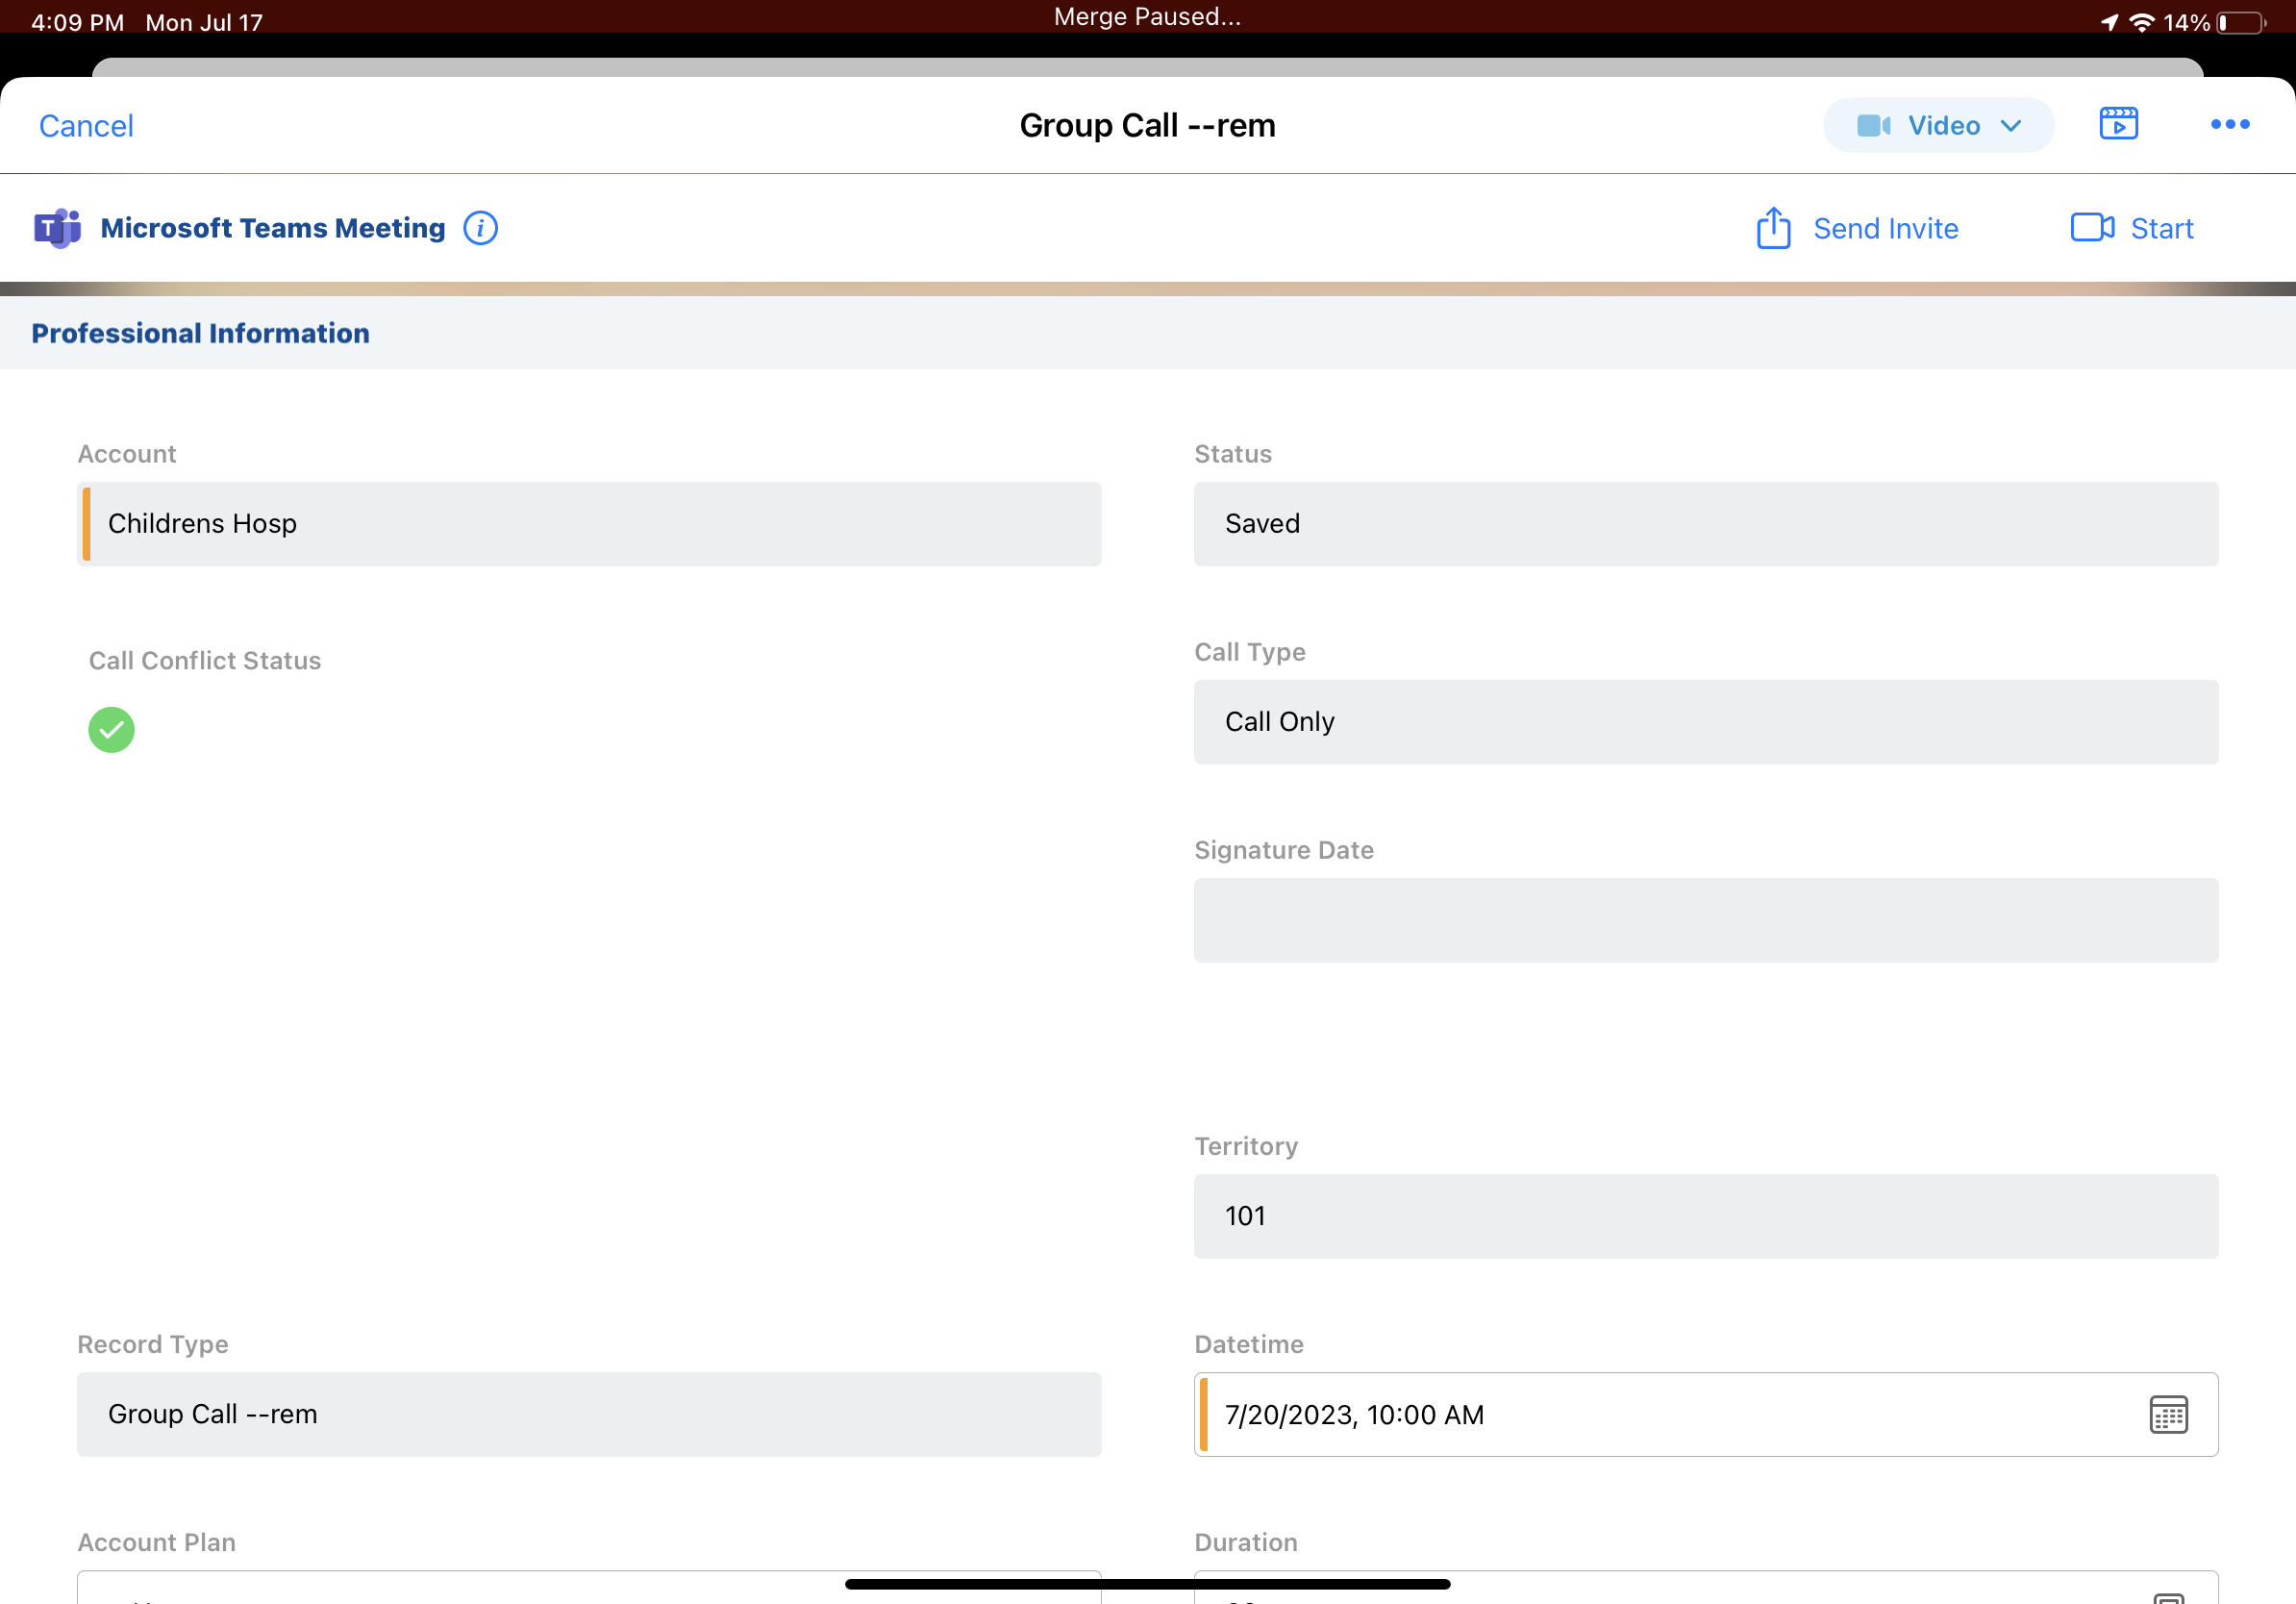
To view or edit meeting details, select the information icon on the call report. The information modal displays.
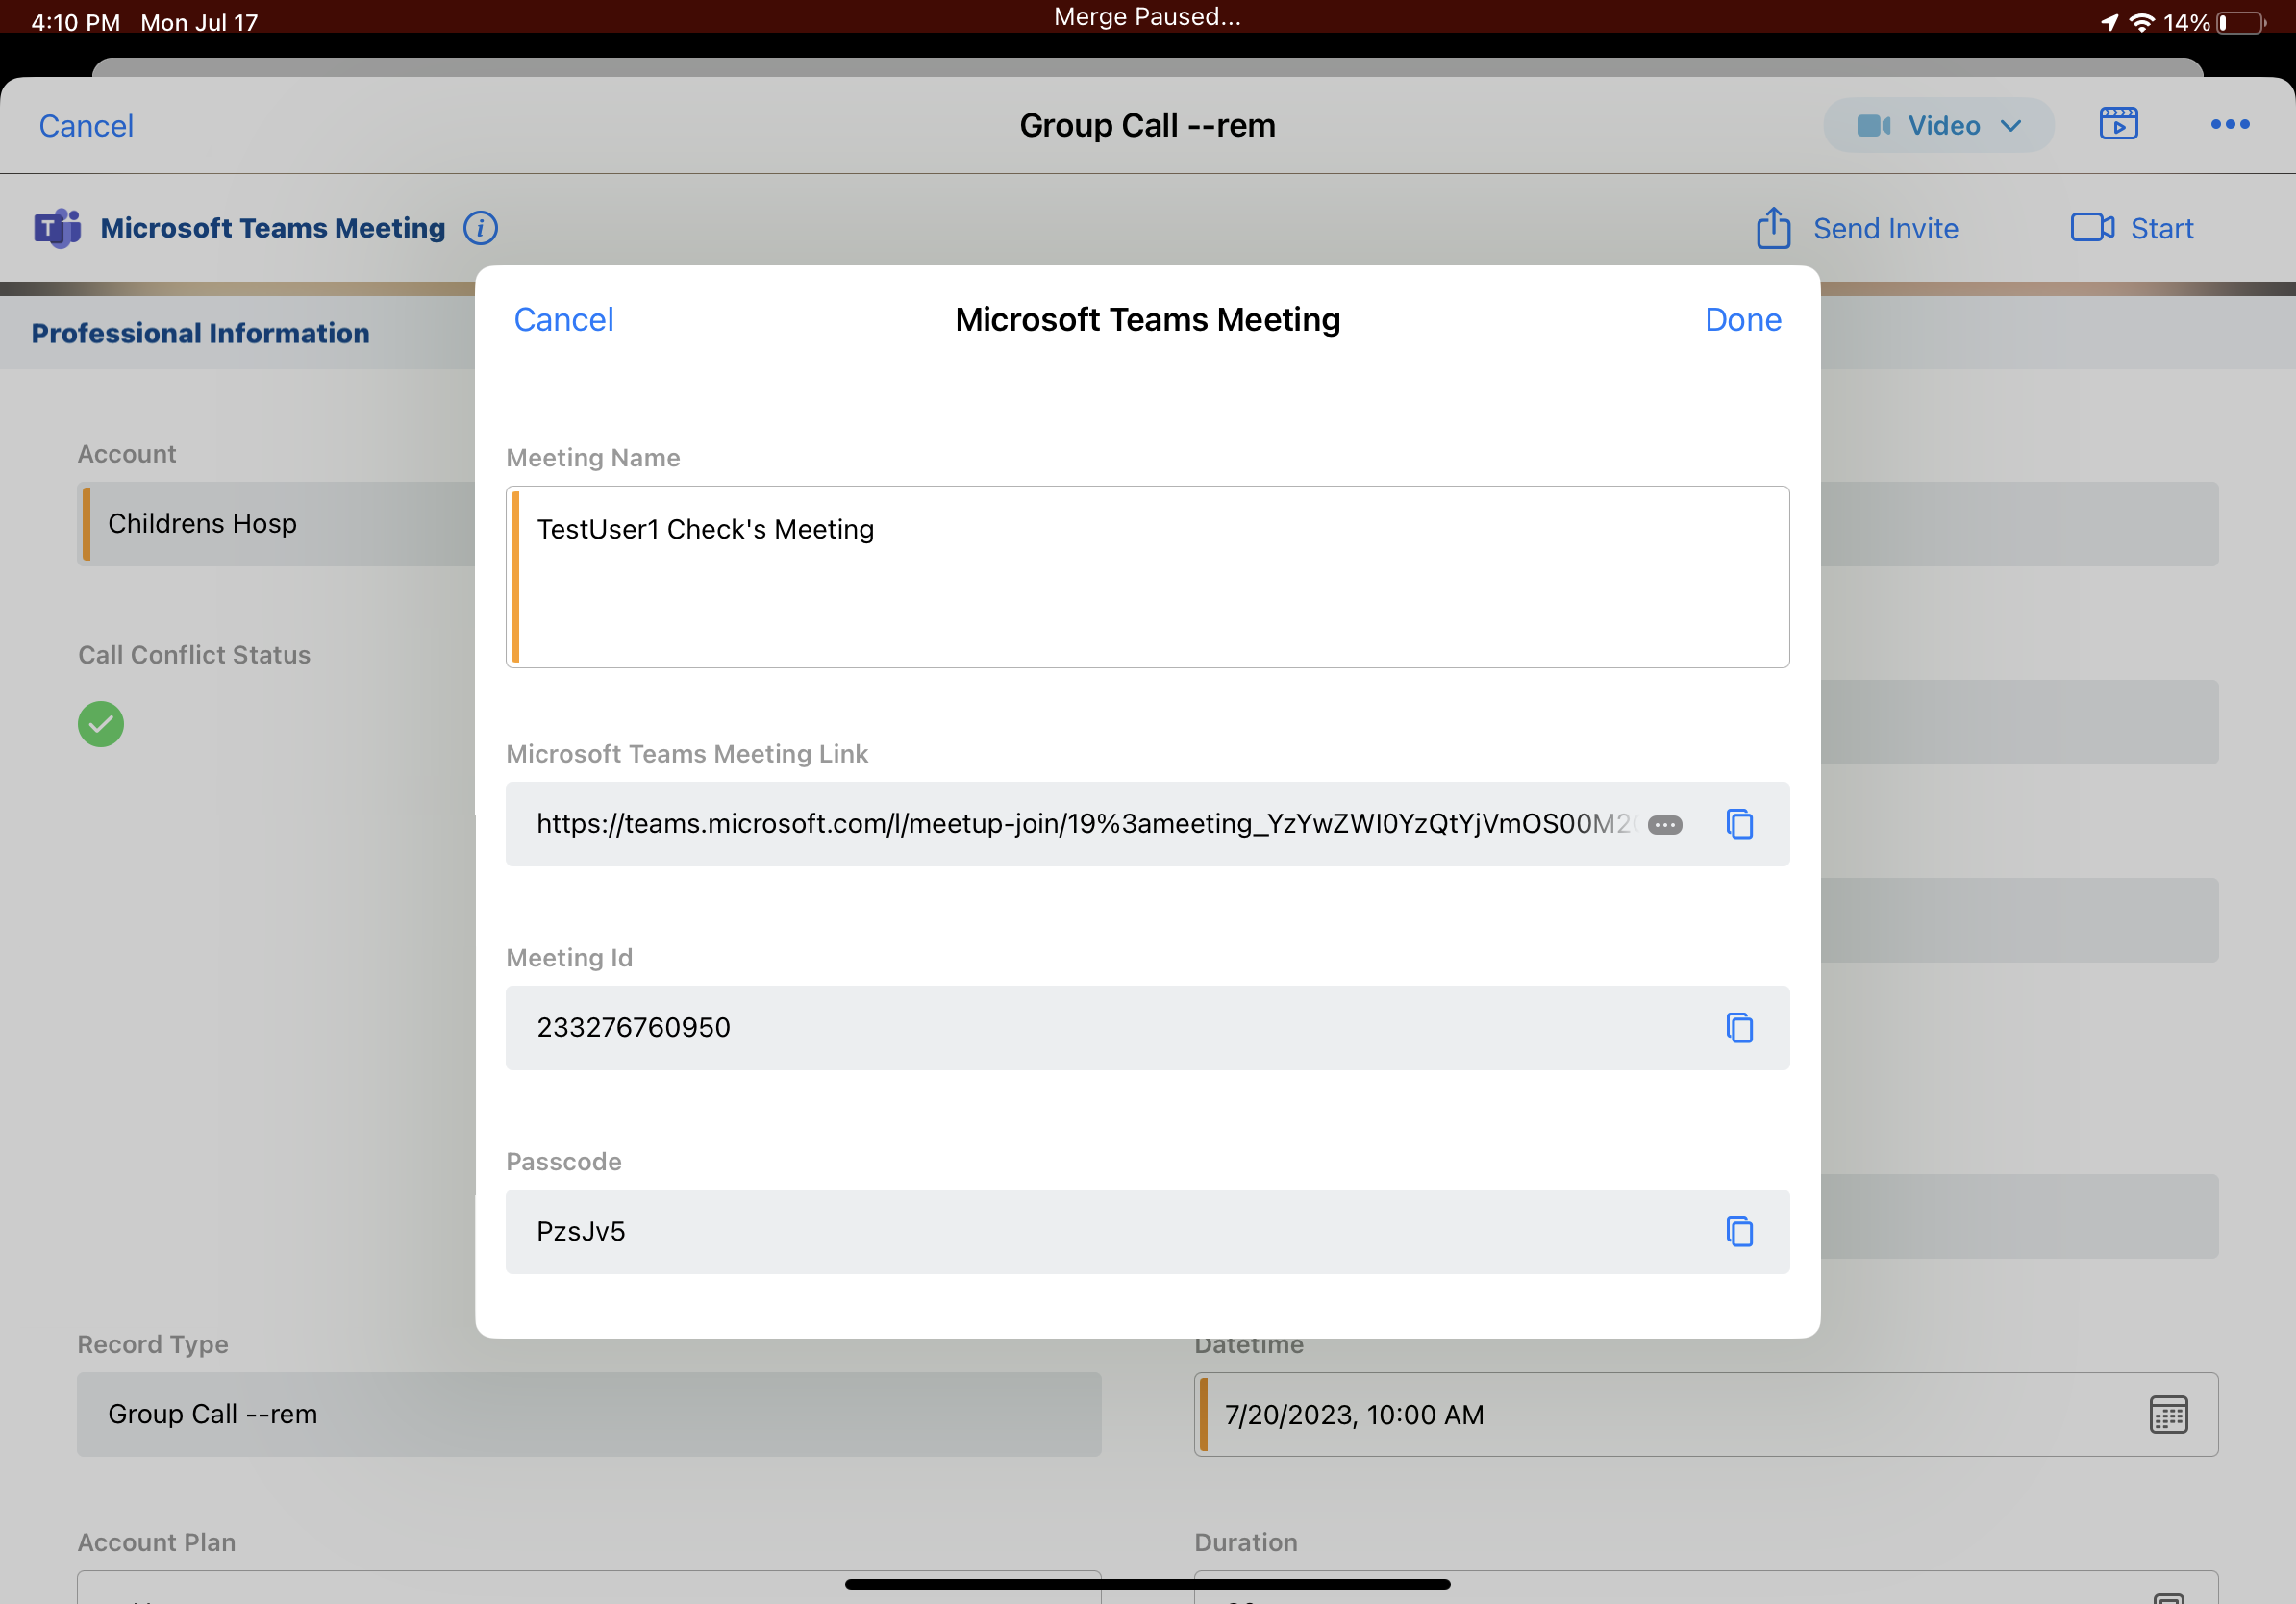
Starting Microsoft Teams Meetings from Veeva CRM
To start a scheduled meeting, select Start. The Microsoft Teams landing page displays in the user’s default browser. The meeting is conducted in Microsoft Teams, using the user’s Microsoft Teams configuration.
Starting Microsoft Teams Meetings with the Meet Now Button
If a meeting is not scheduled for the call and you want to start a meeting immediately, select the Meet Now button to schedule and start a meeting immediately. On the Browser platform, the Meet Now button displays on the call report user interface. On the iPad platform and on the high performance call report, the Meet Now option is under the More Actions menu.
Starting Microsoft Teams Meetings from My Schedule
To start Microsoft Teams meetings from My Schedule (iPad and Lightning for My Schedule):
- Select the appropriate call from the calendar.
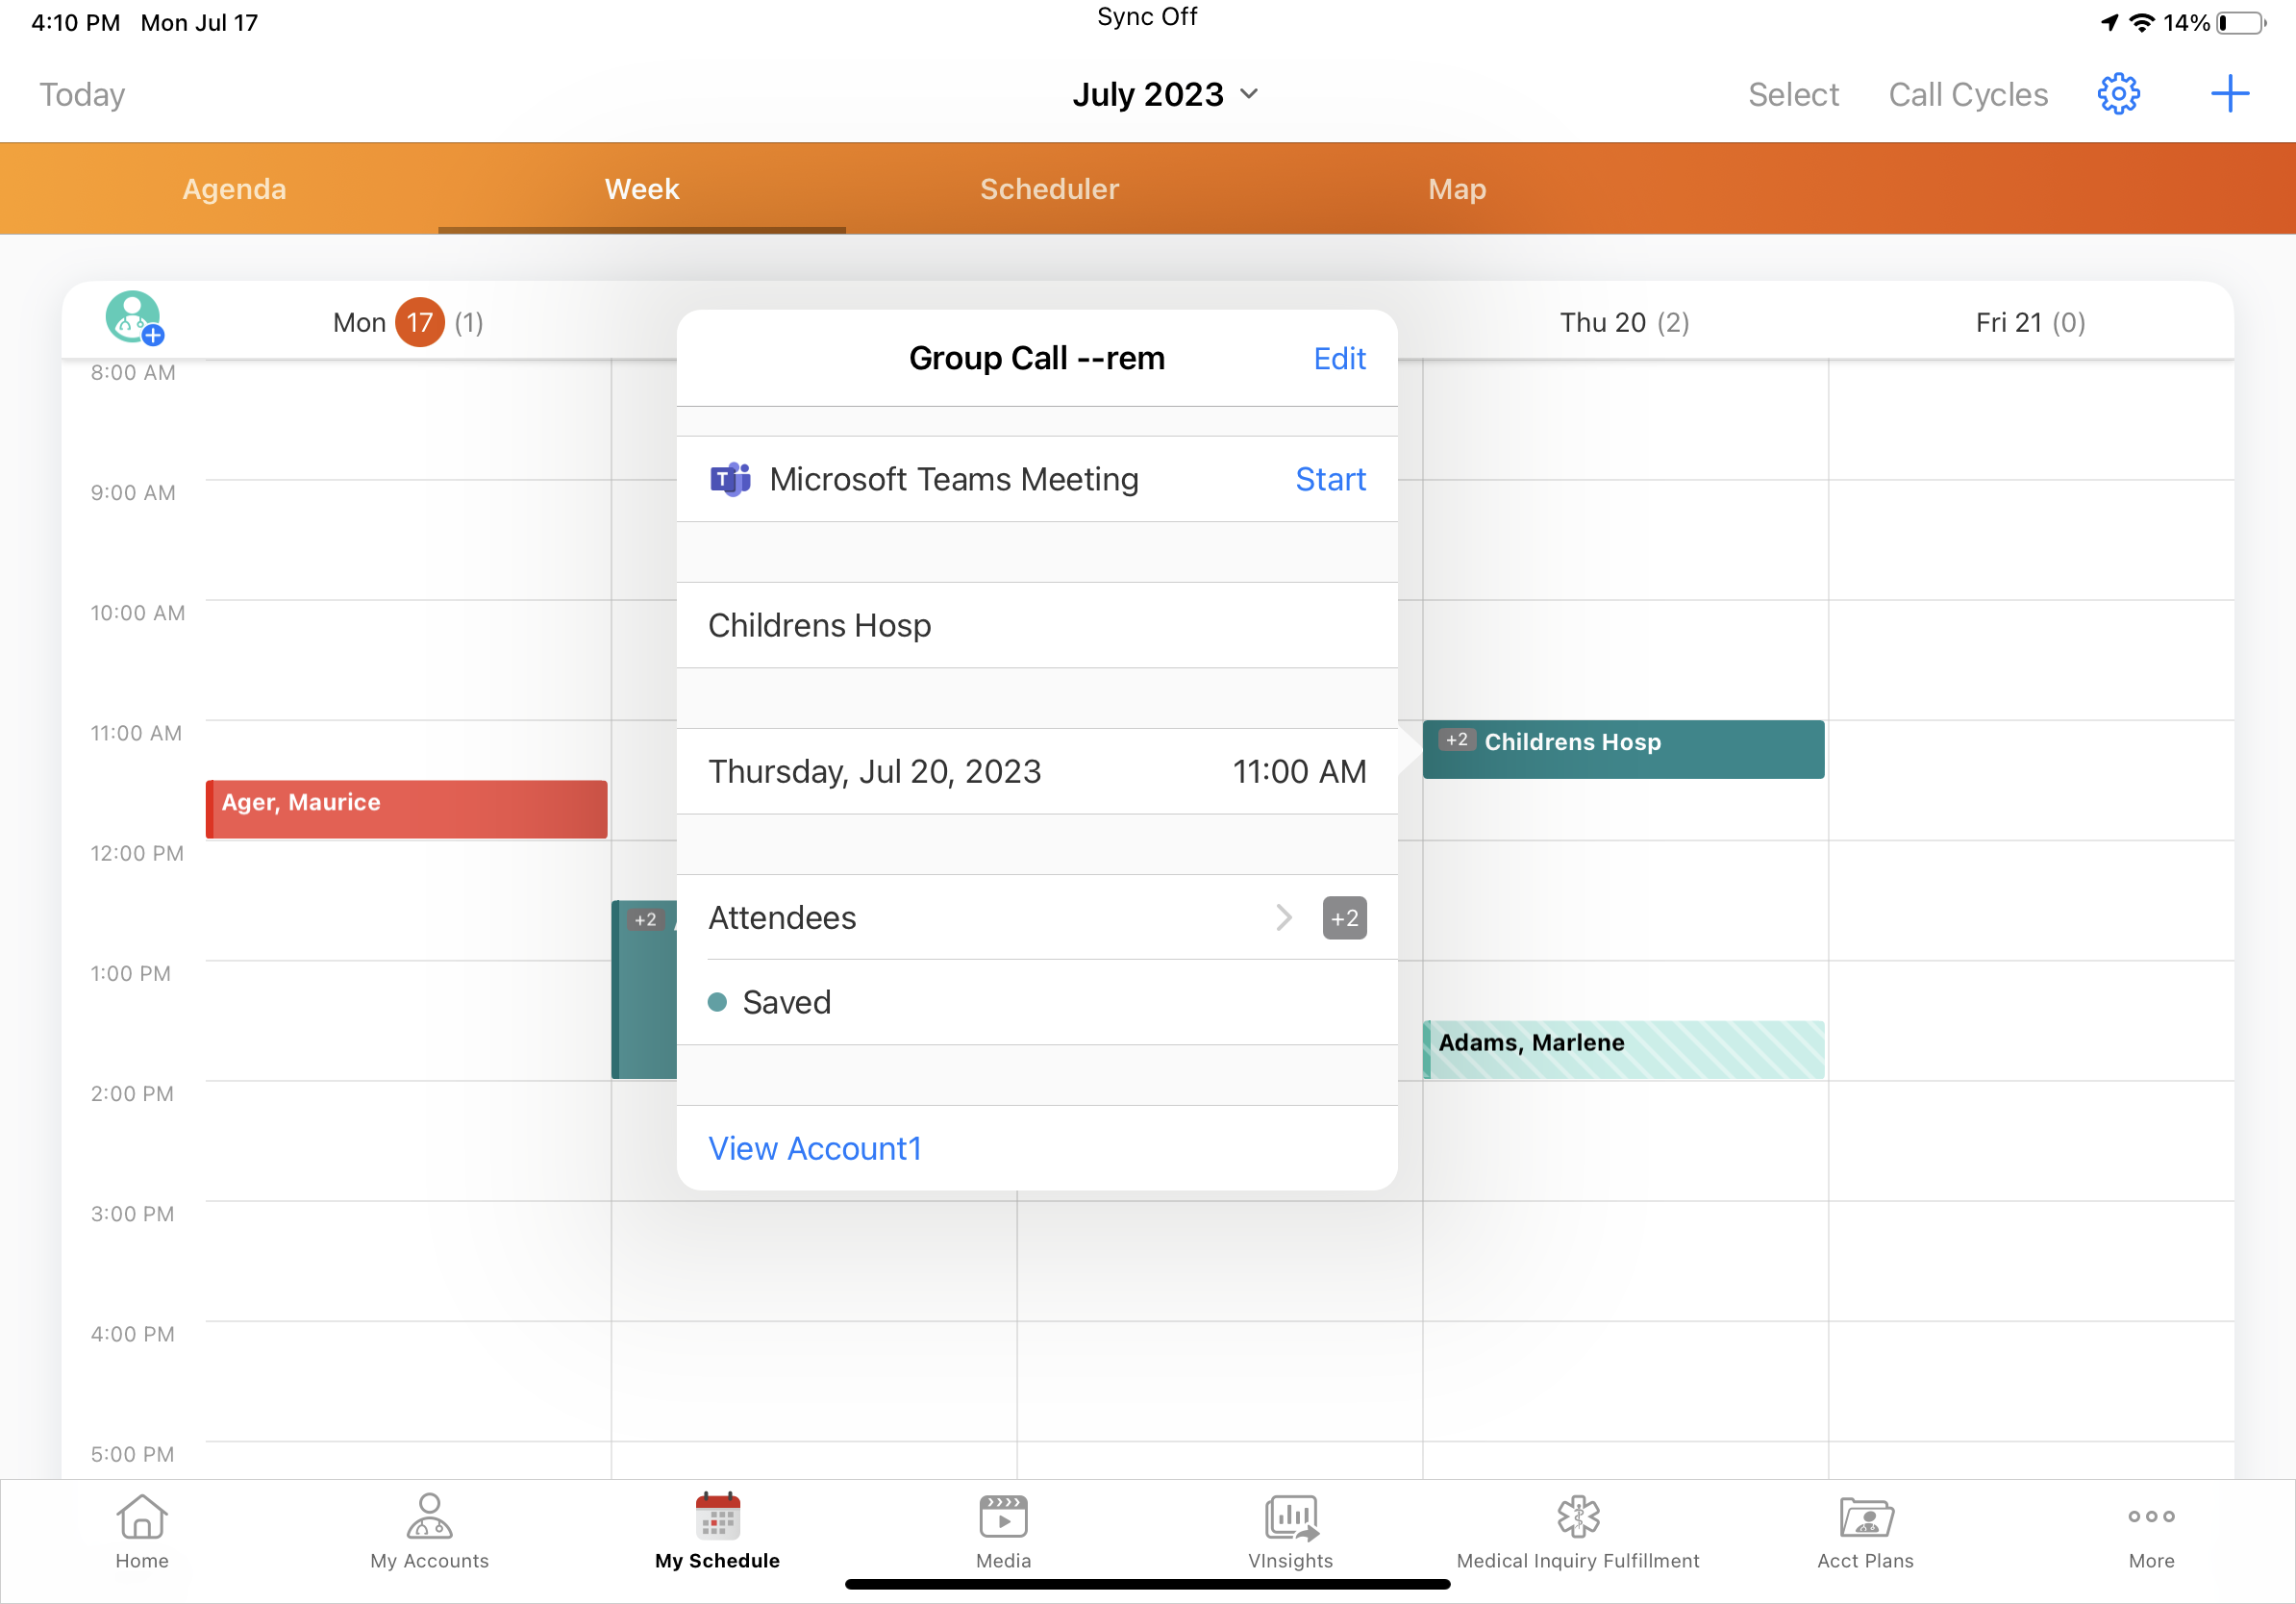
- Select the Start button from the popover (iPad only). On Browser, select More Details from the popover, then select the Microsoft Teams meeting link from the call record.
The call report launches before users are redirected to the Microsoft Teams landing page.
Starting Microsoft Teams Meetings from Microsoft Outlook
If Integrating My Schedule and Microsoft Outlook Calendars is enabled, users can start Microsoft Teams meetings from their calls in Microsoft Outlook. See Starting Microsoft Teams Meetings from Calls in Microsoft Outlook for more information.
Tracking CLM Activity
If users share CLM content in a Microsoft Teams meeting, the CLM activity is captured in Veeva CRM:
- When users return to Veeva CRM after starting a Microsoft Teams meeting and share CLM from the call report, media is tracked against the call. The Share_Channel_vod field on the Call2_Key_Message_vod record if stamped with the value MS_Teams_Meeting_vod.
- If Tracking CLM Activity Anonymously is enabled, media activity is also saved when users share CLM from the media library during a Microsoft Teams meeting
Creating Unavailable Time Slots from External Calendar Events
To prevent HCPs from sending meeting requests for times when users are not available, users can mark external calendar events in My Schedule as unavailable for scheduling.
When an external calendar event—for example, a meeting synced from your Microsoft Outlook calendar—is marked as unavailable in My Schedule, an unavailable time slot for the same time period is automatically blocked off on the Engage Scheduling Site. If users edit or delete an external calendar event after marking it as unavailable, their availability is updated on the Engage Scheduling Site.
Creating Unavailable Time Slots from External Calendar Events
In My Schedule, users can mark external calendar events imported from their Microsoft Outlook calendar as unavailable for scheduling. When users mark an external calendar event as unavailable, the unavailable time slot is reflected on the Engage Scheduling Site.
Currently, this functionality is only available for events with the Microsoft_Outlook_vod record type.
To create unavailable time slots from an external calendar event:
- Select the external calendar event in My Schedule.
- Select the Edit button from the event popover.
- Select the Unavailable for Scheduling check box.
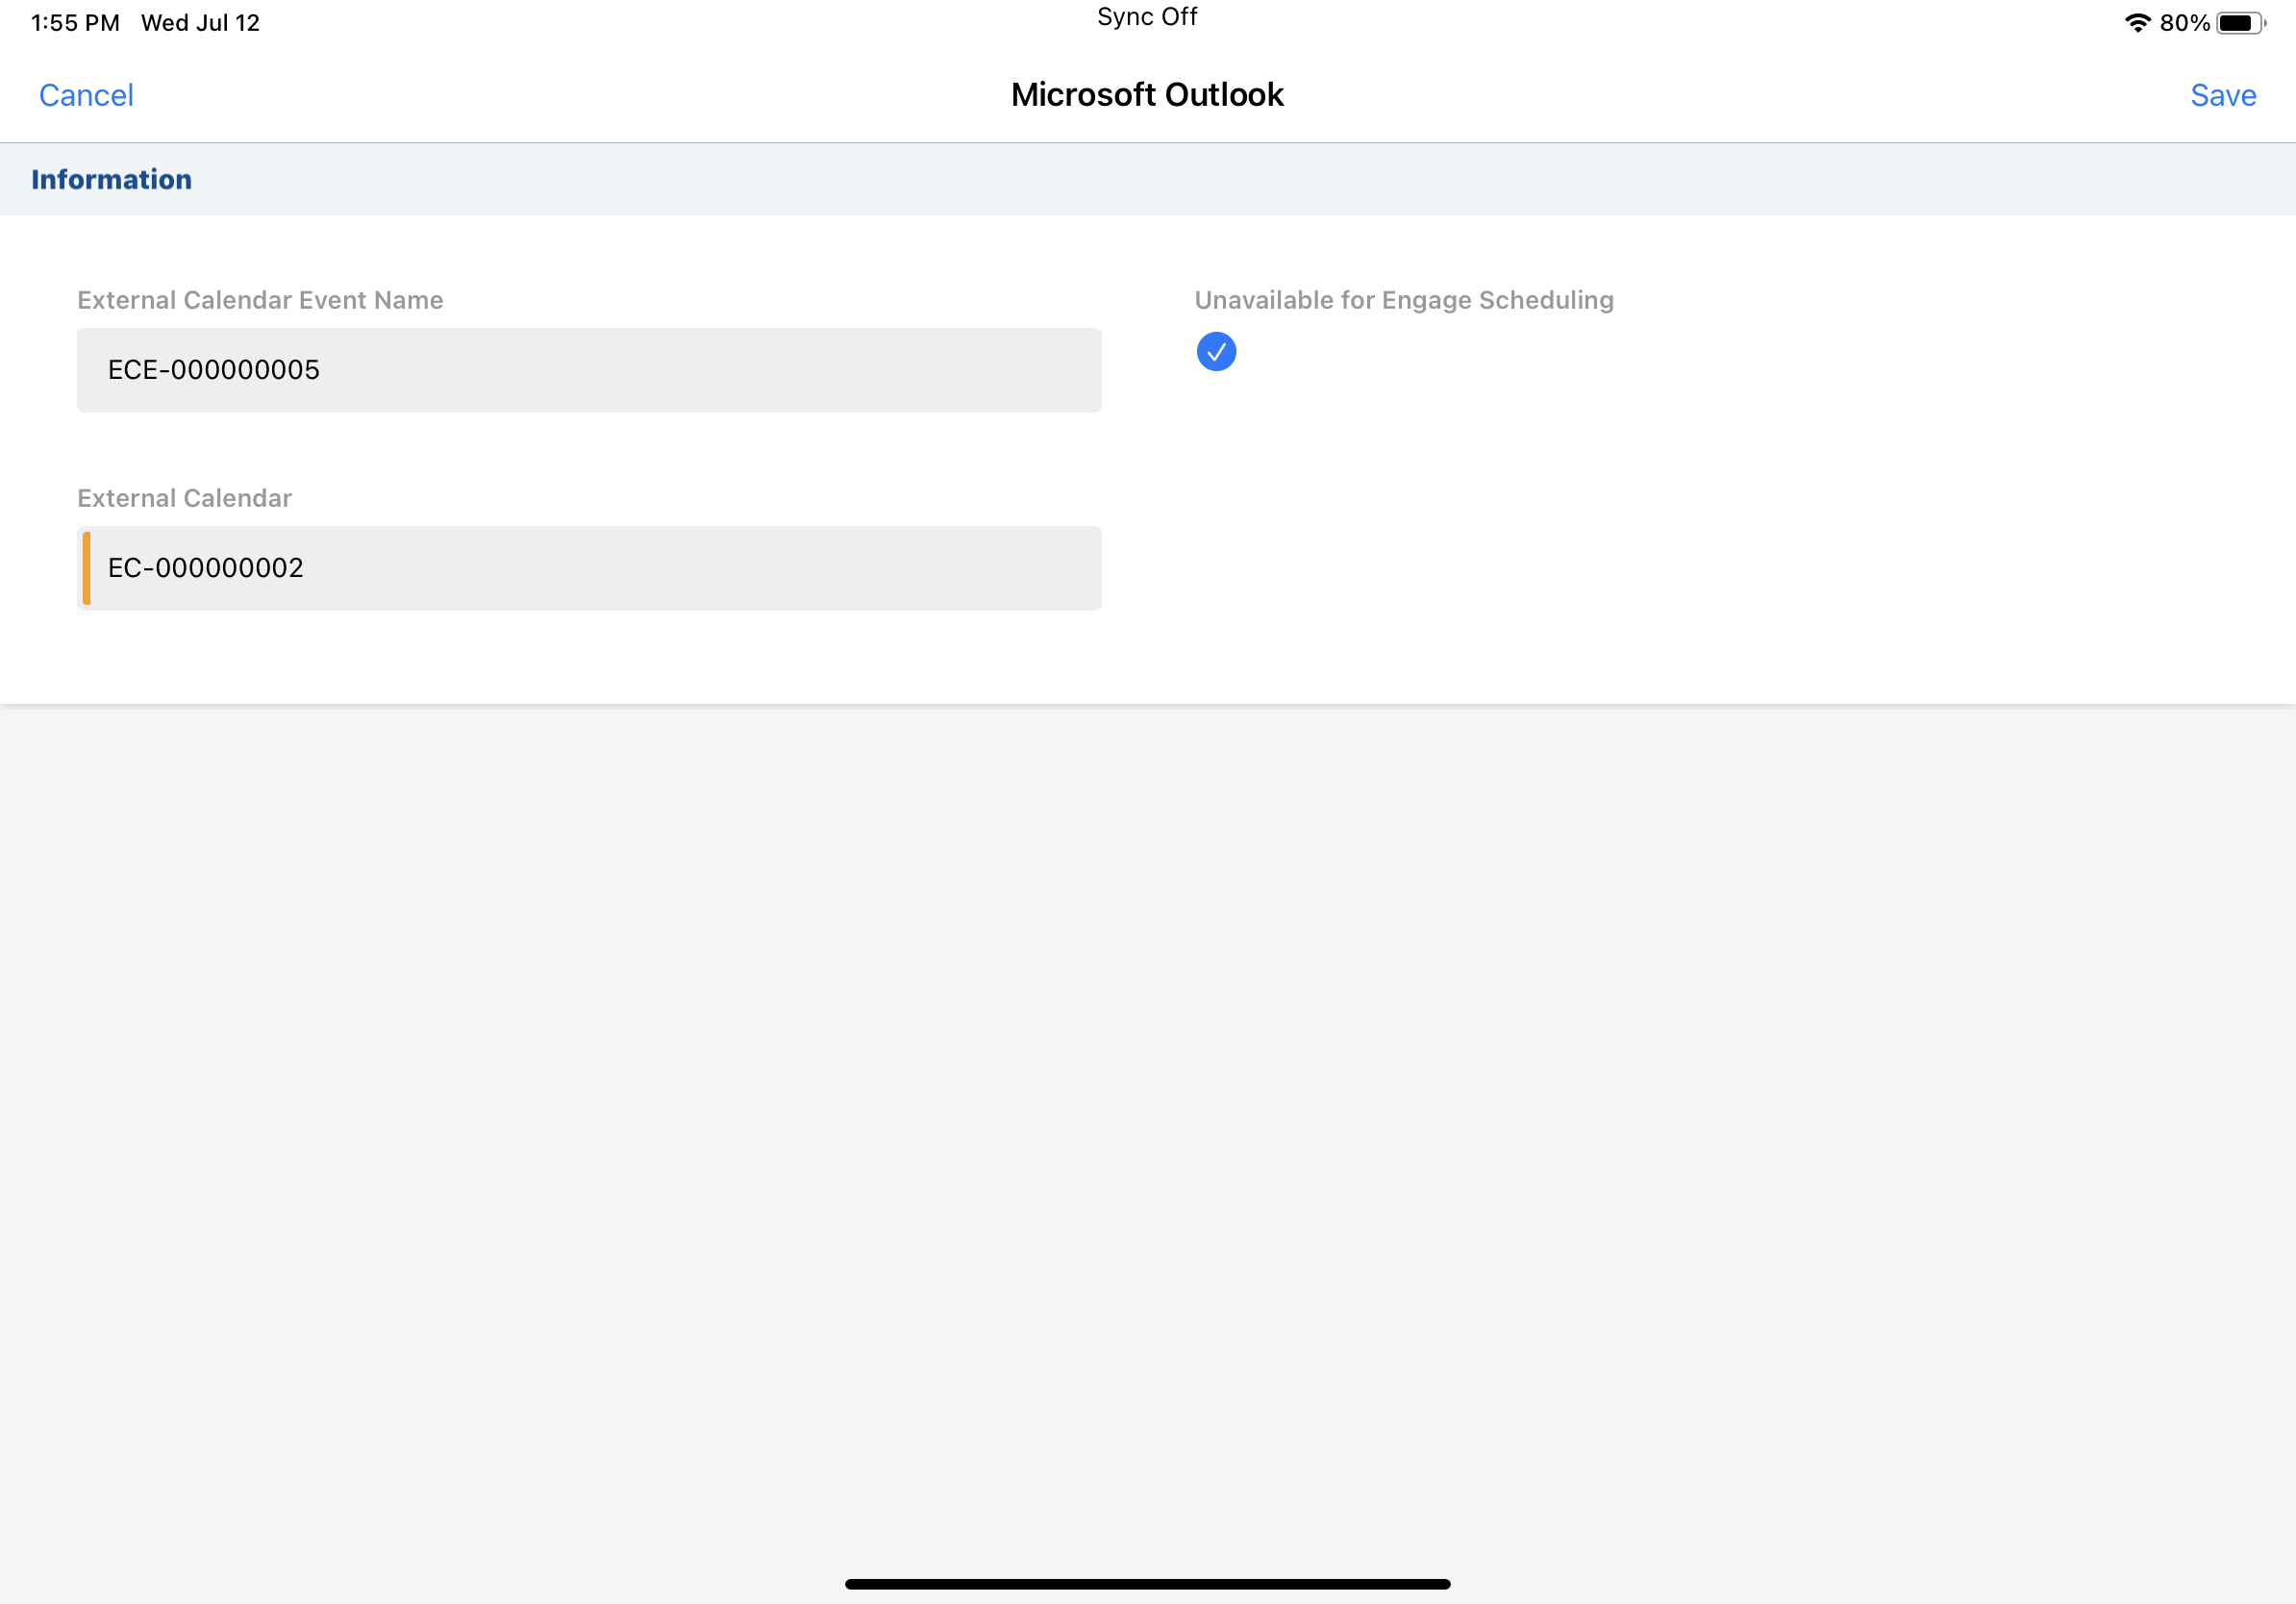
- Select Save.
When users save their edits to the External_Calendar_Event_vod record, an Unavailable_Time_vod record is automatically created for the times selected on the External_Calendar_Event_vod record. Only the external calendar event displays in My Schedule. From the popover, users can easily see the event is marked unavailable.
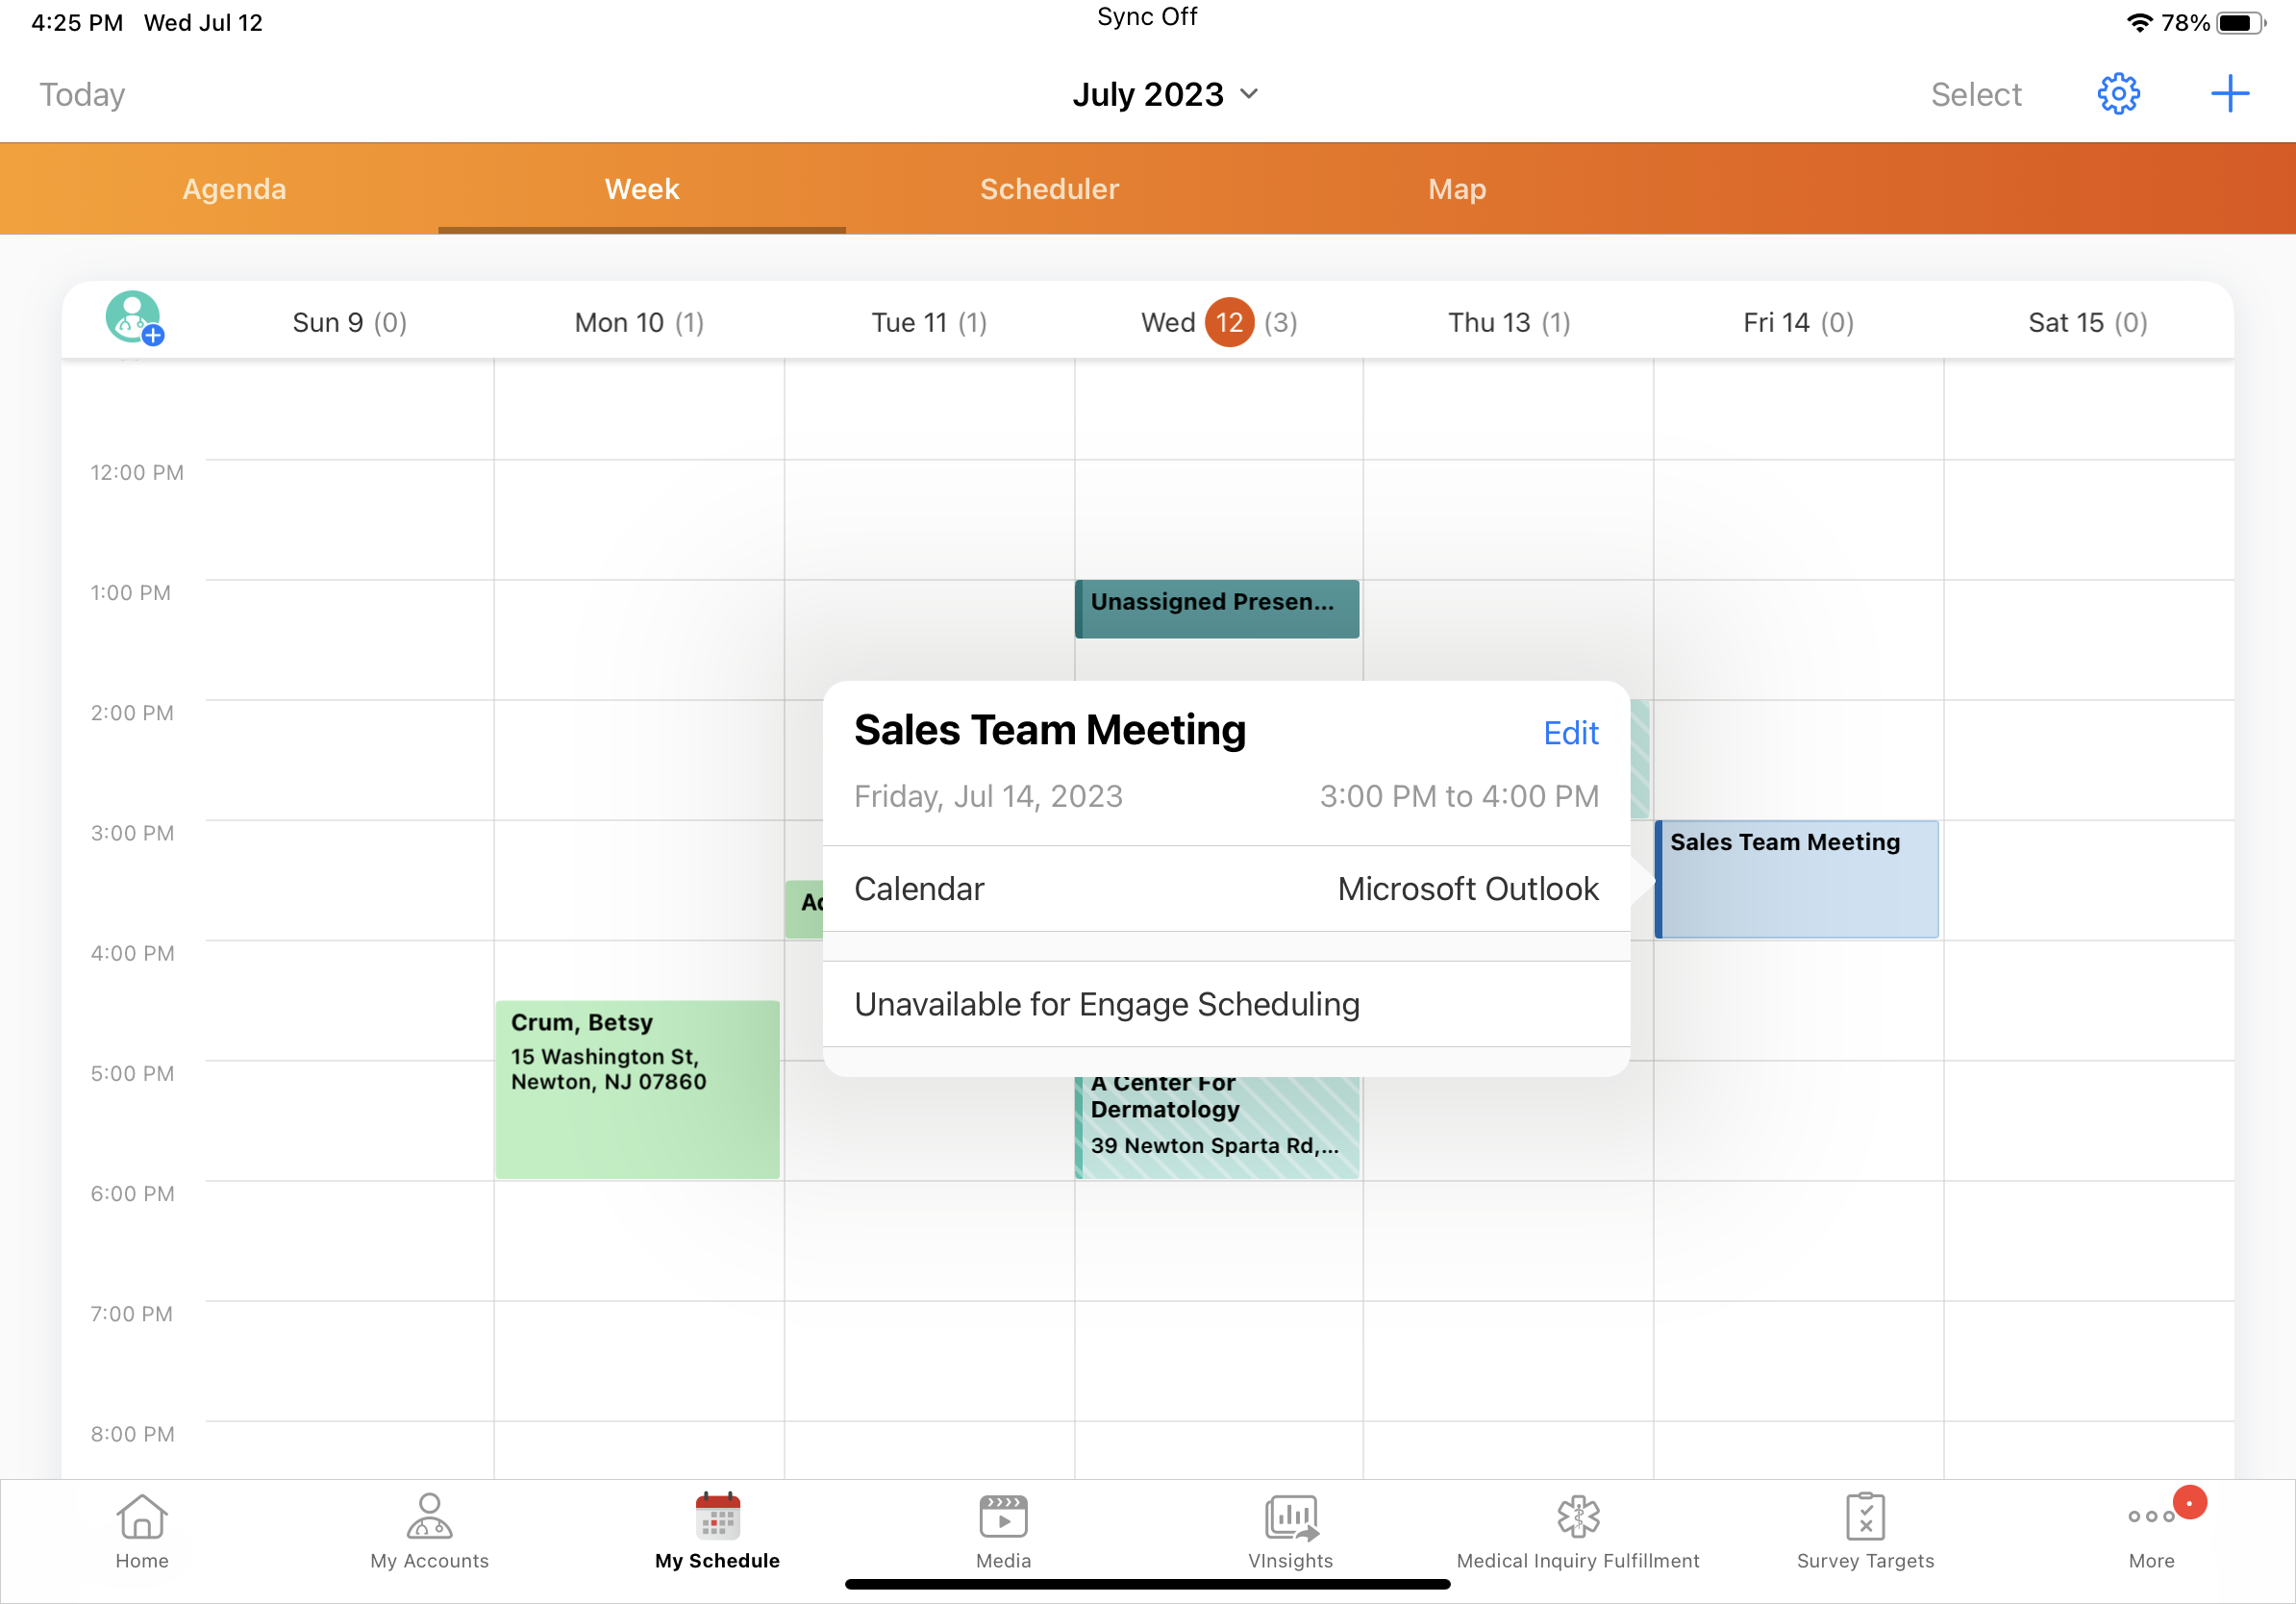
The unavailable time slot displays on the Engage Scheduling Site.
If users edit the external calendar event, the corresponding unavailable time slot is updated on the Engage Scheduling Site. If users delete the external calendar event or deselect the Mark_As_Unavailable_vod check box, the corresponding unavailable time slot is removed from the Engage Scheduling Site.
Events Management
Defining Speaker Caps for the Next Year
To prepare for a speaker’s changing responsibilities, for example, a popular speaker being more utilized, business admins can define a speaker’s annual cap for the upcoming year. This is useful if the business admin knows that a speaker will need a different annual cap for their next year compared to their current year.
Business admins can define what the cap amount for the next year should be for a speaker, then when the speaker’s year-to-date reset date occurs, their current cap automatically updates to reflect the value entered into next year’s cap by the business admin.
If this featured is enabled, all speakers must have a defined Next Year Annual Cap. If this feature is enabled and the Next Year Annual Cap is left empty, the speaker’s cap automatically updates to zero when their Next Year Reset Date occurs.
Defining a Speaker’s Cap for the Next Year
Business admins can define a speaker’s total cap for the upcoming year:
- Edit to the appropriate EM_Speaker_vod record.
-
Populate the Next_Year_Annual_Cap_vod field with the appropriate amount.
- Select Save.
When the speaker’s cap resets as defined by Resetting Speaker Year-to-Date Caps, the speaker’s Annual_Cap_vod field automatically updates to match the value entered in the Next_Year_Annual_Cap_vod field.
Designating Speaker Caps by Product
Business admins can allocate a portion of a speaker's annual cap for a specific product. This enables tracking a speaker’s yearly spending and utilization on a product-specific level, since speakers may speak on behalf of more than one product.
After a product-specific cap is defined and a speaker speaks at an event for that product, any speaker related expenses are automatically deducted from that product-specific cap. Business admins can monitor the speaker's yearly spend for that product and reallocate the speaker’s total cap among product-specifc caps, if necessary.
Creating Product-Specific Speaker Caps
To create a speaker cap for a specific product:
- Navigate to the Speaker Cap related list of the appropriate EM_Speaker_vod record.
- Select New to create a new EM_Speaker_Cap_vod record.
-
Populate the following fields:
- Record Type – Product_Cap_vod
- Product_vod – Select the appropriate product the cap applies to
- Starting_Year_vod – Select the year the cap applies to
- Annual_Cap_vod – The annual cap for the selected product
-
Select Save. The following additional fields automatically populate based on the fields populated by the business admin:
- Start_Date_vod – The components of the start date are based on the following fields:
- Year – Populates based on the Starting_Year_vod field
- Month – Populates based on the associated EM_Speaker_vod record’s Year_to_Date_Reset_Month_vod field
- Day – Populates based on the associated EM_Speaker_vod record’s Year_to_Date_Reset_Day_vod field
-
End_Date_vod – Calculates as the day before one year into the future from the Start_Date_vod field
For example, if the start date is January 2, 2024, the end date is January 1, 2025
After an EM_Speaker_Cap_vod record is created, only the Annual_Cap_vod field can be updated. If the End_Date_vod field is in the past, the record cannot be edited.
This process can be repeated for all appropriate product-specific speaker caps.
Business admins are prevented from creating EM_Speaker_Cap_vod records when one of the following is true:
- Another EM_Speaker_Cap_vod record for that speaker already exists with the same Product_vod and Starting_Year_vod fields
- The sum of the Annual_Cap_vod field for all other EM_Speaker_Cap_vod records exceeds the speaker’s annual cap
- If the EM_Speaker_Cap_vod record’s Starting_Year_vod is the current year, the sum is compared to the speaker’s Annual_Cap_vod field
- If the EM_Speaker_Cap_vod record’s Starting_Year_vod is the next year, the sum is compared to the speaker’s Next_Year_Annual_Cap_vod field
Counting Product-Specific Expenses Against Speaker Caps
When end users perform the one of the following actions, the corresponding EM_Speaker_Cap_vod record is updated:
- An Expense_Header_vod record on the event is created, updated, or deleted where both of the following are true:
- A related Expense_Line_vod record has an Expense_Type_vod field included in the speaker’s cap
- The Incurred_Expense_Account_vod or Incurred_Expense_Speaker_vod fields are populated
- An Expense_Line_vod record is created, updated, or deleted where both of the following are true:
- The Expense_Type_vod field is included in the speaker’s cap
- The record’s related expense header has a populated Incurred_Expense_Account_vod or Incurred_Expense_Speaker_vod field
- One of the following EM_Event_vod fields are updated:
- Product_vod – The EM_Speaker_Cap_vod record’s Product_vod field must match this field
- Start_Time_vod – This field must be between the Start_Date_vod and End_Date_vod fields of the EM_Speaker_Cap_vod record
- Status_vod – Events with a status of Canceled are not included in Speaker Caps
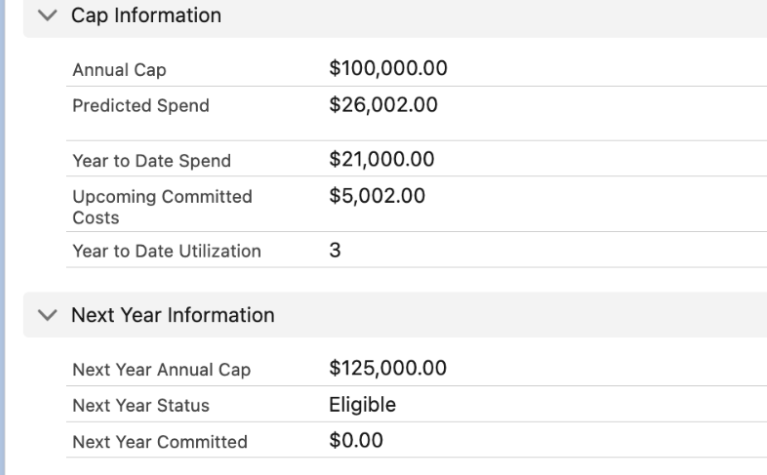
The following fields on the matching EM_Speaker_Cap_vod record automatically update to reflect the new matching expenses:
|
Field |
Update Behavior |
|---|---|
|
Upcoming_Committed_Costs_vod |
Updates with the values of the Commited_vod fields of matching expense lines. Expense lines must have an empty Actual_vod field for the Commited_vod field to be added. |
|
Year_to_Date_Spend_vod |
Updates with the values of the Actual_vod field of matching expense lines. |
|
Year_to_Date_Utilization_vod |
Represents the total number of times the speaker spoke about the product in the defined time period. By default, only EM_Event_Speaker_vod records with a Status_vod of either Signed_vod or Attended_vod count towards utilization. However, admins can customize which statuses count towards utilization. See Speaker Utilization for more information. |
|
Predicted_Spend_vod |
Upcoming_Committed_Costs_vod + Year_to_Date_Spend_vod |
|
Cap_Remaining_vod |
Annual_Cap_vod - Year_to_Date_Spend_vod |
|
Cap_Remaining_Committed_vod |
Cap_Remaining_vod - Upcoming_Committed_Costs_vod |
If the event’s Product_vod or Start_Time_vod fields are updated resulting in a different EM_Speaker_Cap_vod matching, both the new match and the previously associated match update accordingly.
Updating Speakers with Product Speaker Caps
If a speaker has active EM_Speaker_Cap_vod records, business admins are prevented from saving edits to the Annual Cap and Next Year Annual Cap fields if the edits result in exceeding cap limits
Business admins are warned when saving edits to either the Year_to_Date_Reset_Month_vod or Year_to_Date_Reset_Day_vod field on an EM_Speaker_vod record.
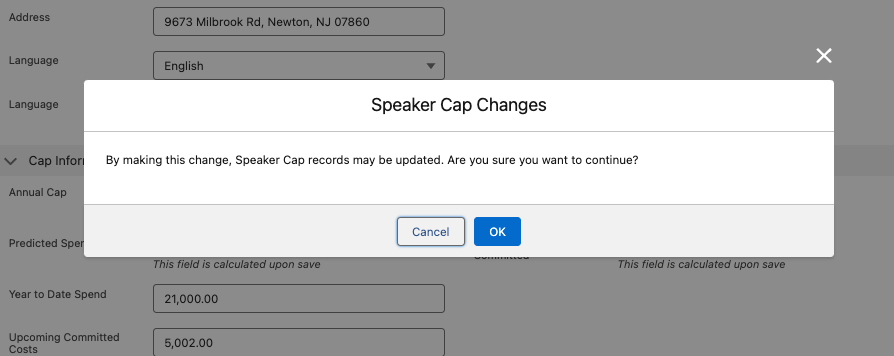
If the business admin proceeds with saving, active EM_Speaker_Cap_vod records are also updated:
- The Start_Date_vod and End_Date_vod fields update to reflect the new Next Year Reset Date
- The following calculated fields update to reflect expenses incurred by the speaker during the newly defined time period:
- Upcoming_Committed_Costs_vod
- Year_to_Date_Spend_vod
- Year_to_Date_Utilization_vod
- Predicted_Spend_vod
- Cap_Remaining_vod
- Cap_Remaining_Committed_vod
Business admins are prevented from editing the Annual_Cap_vod and Next_Year_Annual_Cap_vod fields of an EM_Speaker_vod record if the sum of active related EM_Speaker_Cap_vod records for that year exceeds the new Annual_Cap_vod or Next_Year_Annual_Cap_vod.
Displaying the Event Identifier on the Events Homepage
To enable event team members to quickly identify events on the Events Homepage, admins can configure an additional field used to search for an event. Organizations can populate this field via an automated process, for example an integration, to display identifying information to event team members.
Customers are responsible for defining and populating the Event_Identifier_vod field. The field can be populated by any means, for example, manually, an integration, or via data-loading.
When the Event_Identifier_vod field is populated, it displays on the Events Homepage on each event card in the timeline beneath the event’s record type and Program_Type_vod field.
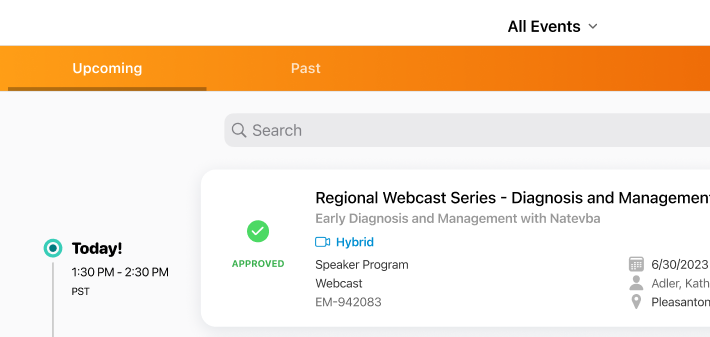
End users can search on the Event_Identifier_vod field. Matches to search terms highlight in the resulting event cards.
Searching and Filtering in Lightning for Events Management Related Lists
With Lightning for Events Management enabled, event organizers can search and filter related lists on EM_Event_vod records. This enables organizers to quickly find records related to an event, as large events may also have large amounts of related records.
Searching Related Records
Each related list on an EM_Event_vod record displays with a search bar in the related list header.
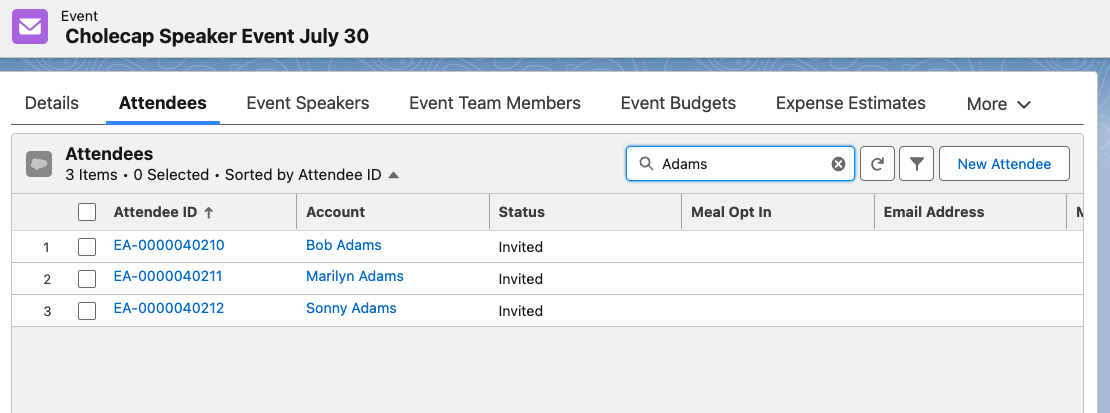
Entering a search term into the search bar automatically searches all records in the related list, even if the records are not loaded into the related list.
Data from any field on the related list is available for searching, though searching on Formula, Lookup, or Picklist type fields is not supported.
Filtering Related Records
To filter related records:
-
Navigate to the appropriate EM_Event_vod related list. The following related lists support filtering:
- EM_Attendee_vod
- EM_Event_Speaker_vod
- EM_Event_Team_Member_vod
- EM_Event_Material_vod
- Expense_Header_vod

-
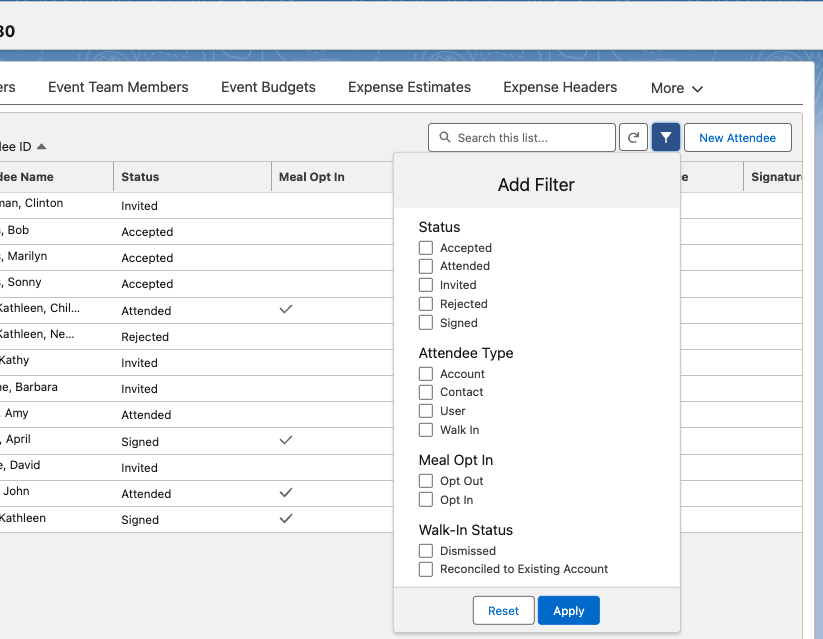
Select the Filter icon in the related list header.
-
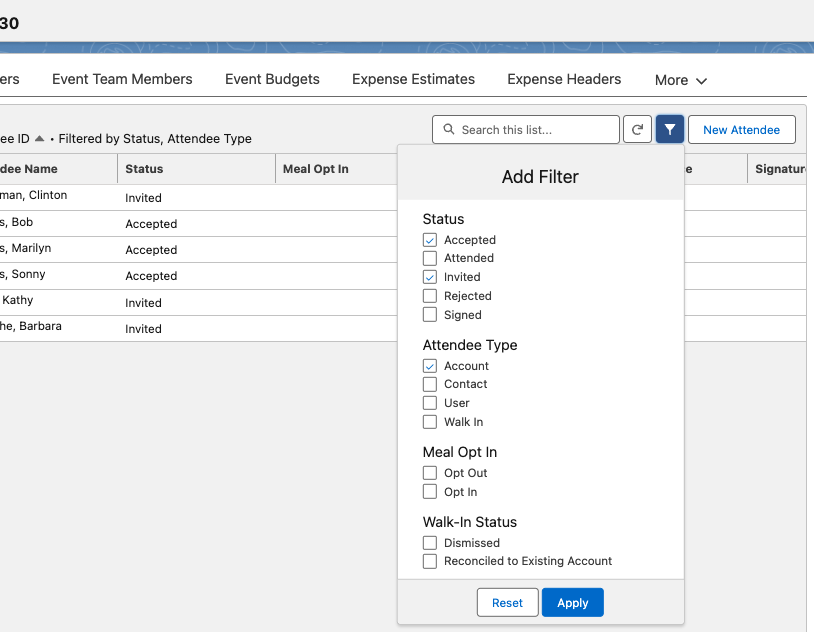
Apply the appropriate filters. Available filters are based on the related list:
Related List
Available Filters
EM_Attendee_vod
- Status_vod
- Attendee_Type_vod
- Meal_Opt_In_vod
- Walk_In_Status_vod
EM_Event_Speaker_vod
- Status_vod
- Meal_Opt_In_vod
EM_Event_Team_Member_vod
Role_vod
EM_Event_Material_vod
Record Type
Expense_Header_vod
- Record Type
- Split Lines?
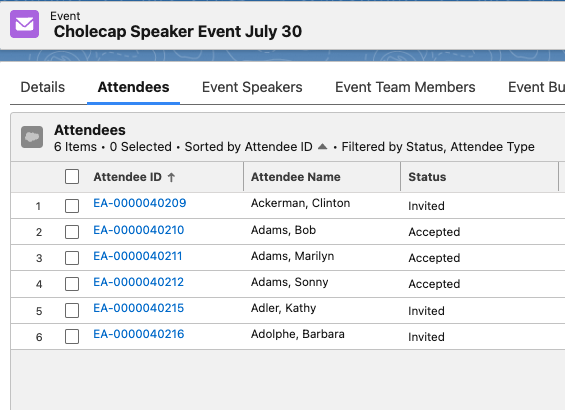
- Select Apply.
When filters are applied to a related list, the applied filter displays in the related list header, so users know how the related list is filtered.
To clear applied filters:
-
Select the Filter icon in the related list header.
- Select Reset.
Medical Events
Supporting Medical Event Sharing Rules on the iPad
Admins can configure Medical Event VMOCs to support Sharing Rules on the iPad. This enables Sharing Rules configured on the Browser platforms to be synced down and respected on the iPad platform.
MyInsights
Using CLM Thumbnails in MyInsights
Content creators can add a thumbnail image and descriptive information from the first slide in a CLM presentation to a MyInsights page. Users can see an image of a CLM presentation on the page without opening the presentation, allowing them to quickly determine the appropriate presentation to show an HCP. Alternatively, content creators can add a thumbnail image for a specific slide in a CLM presentation.
Using Thumbnails in CLM Presentations with MyInsights
When a user views a MyInsights page containing CLM materials, they can see a thumbnail image of the first slide in a CLM presentation (or a specific slide in the presentation) and information about the first slide in a CLM presentation.
MyInsights Studio
Viewing Compass Data Using MyInsights
Content creators can use MyInsights Studio to create a MyInsights page that embeds Compass patient data and aggregated prescription and medical claim data at the HCP and product levels. For example, content creators can create a MyInsights page displaying total HCP treatments at the product level.
Using the MyInsights Template to View Compass Data
Offline devices require an internet connection to display data.
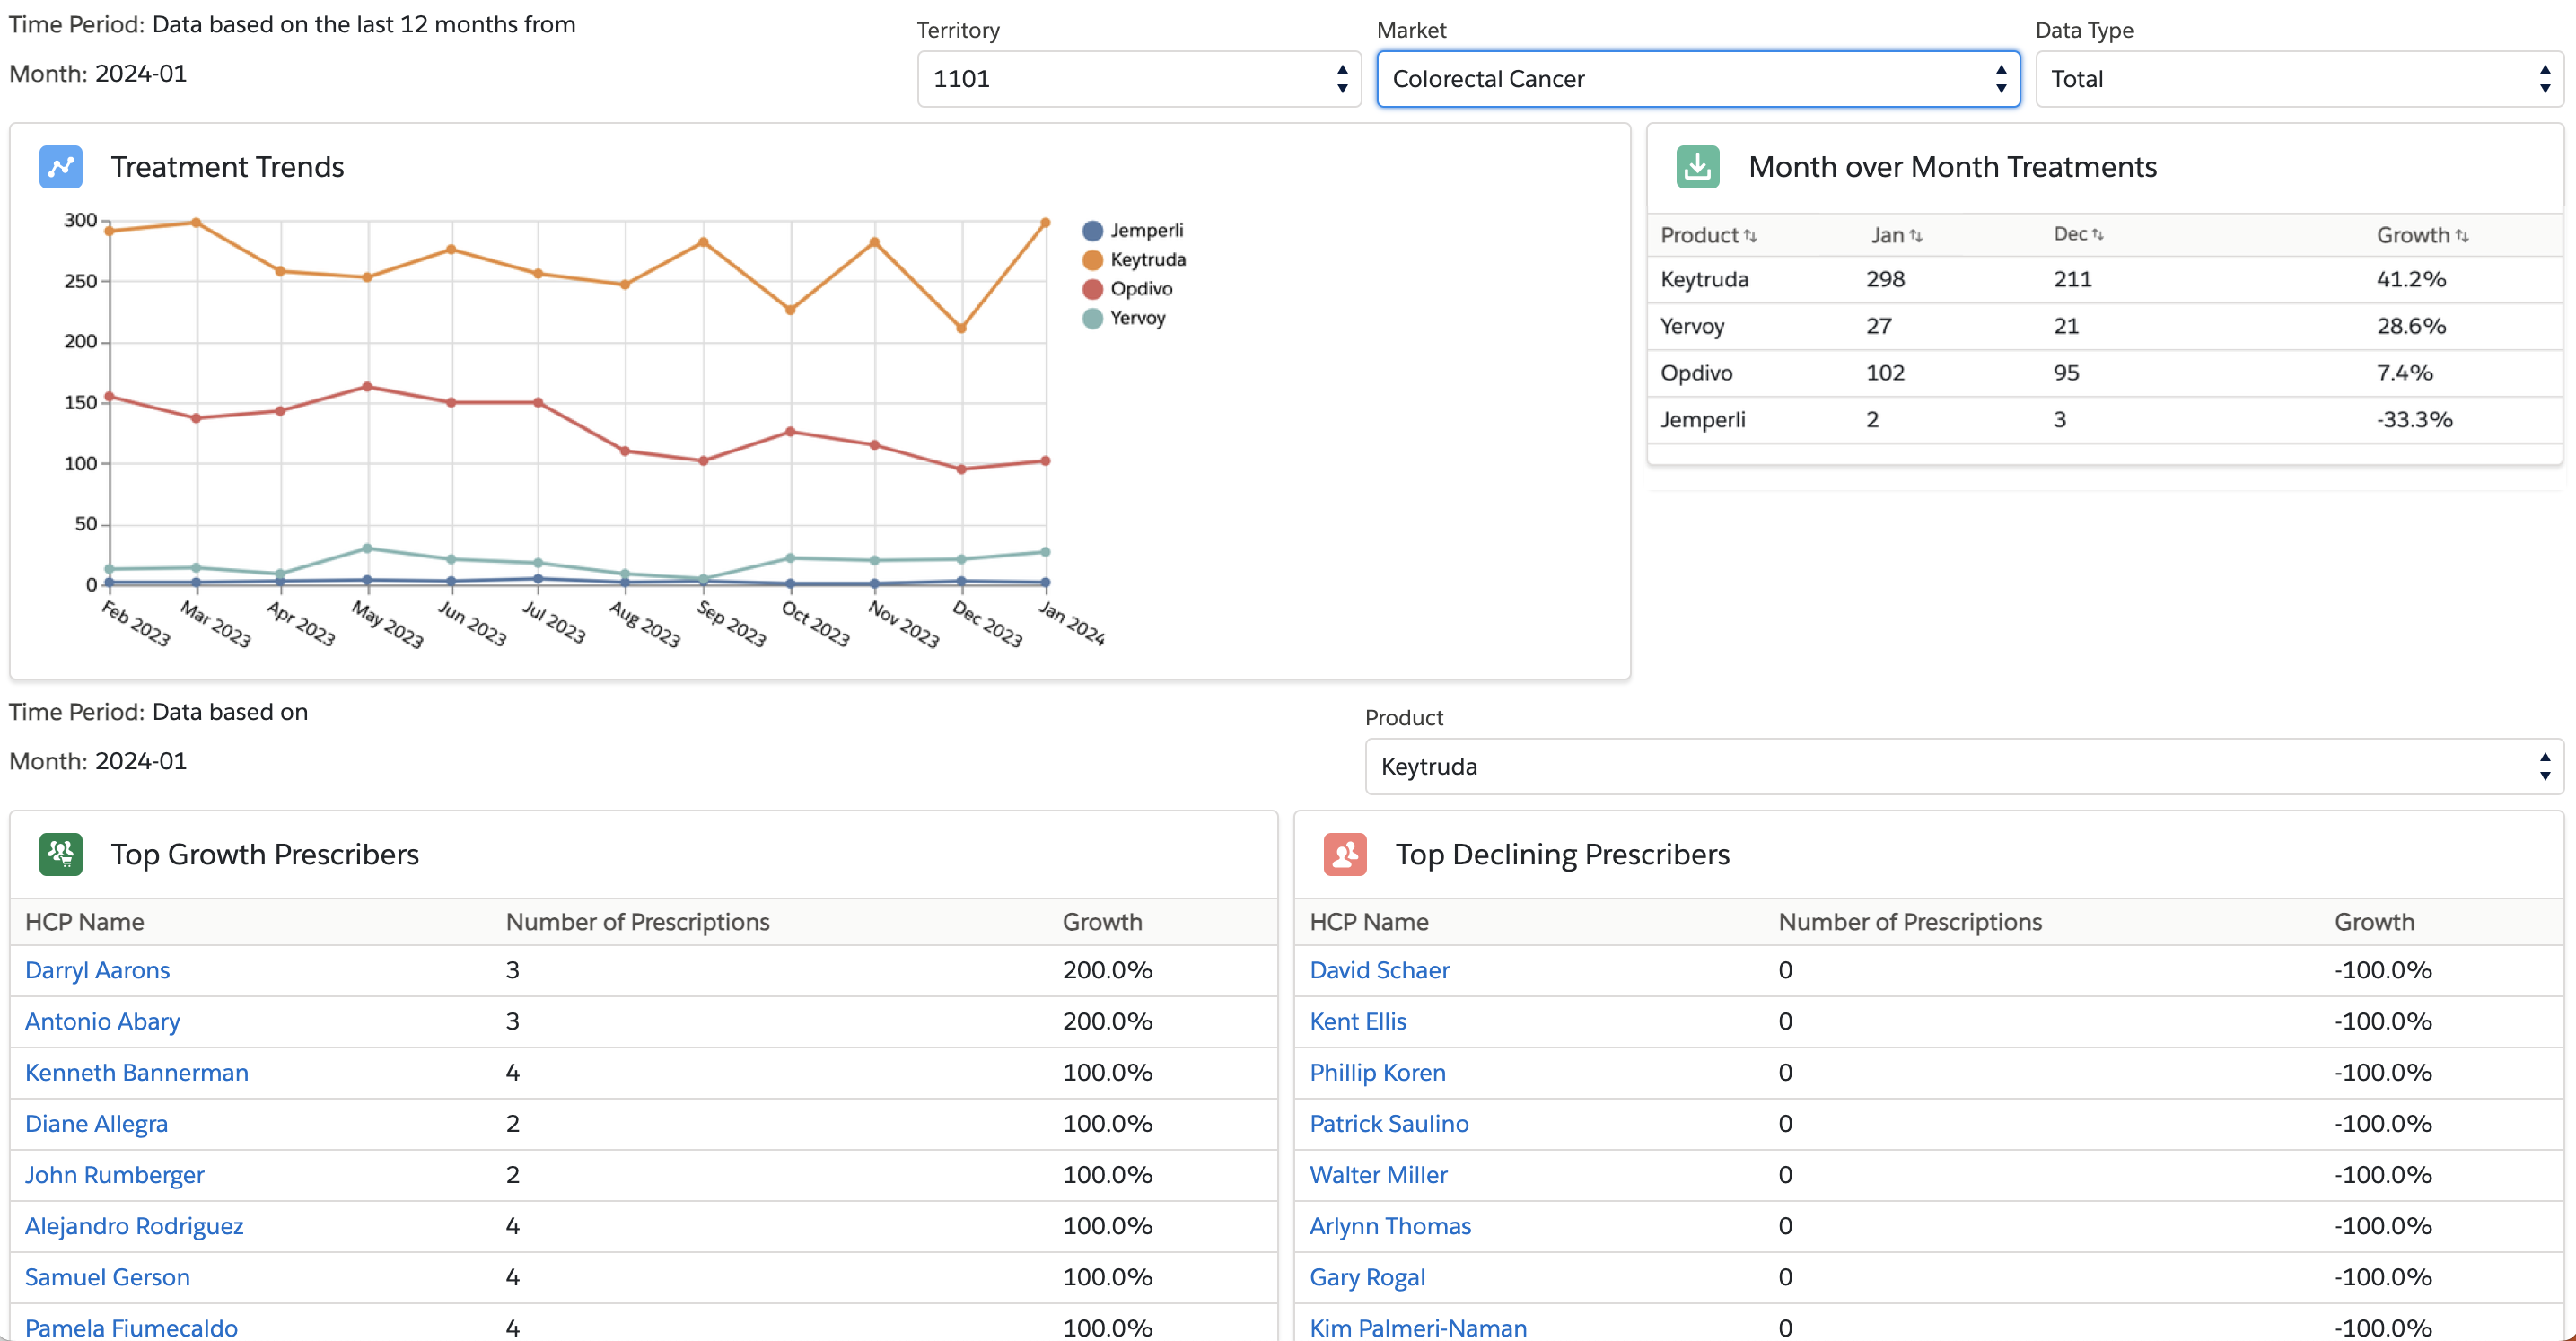
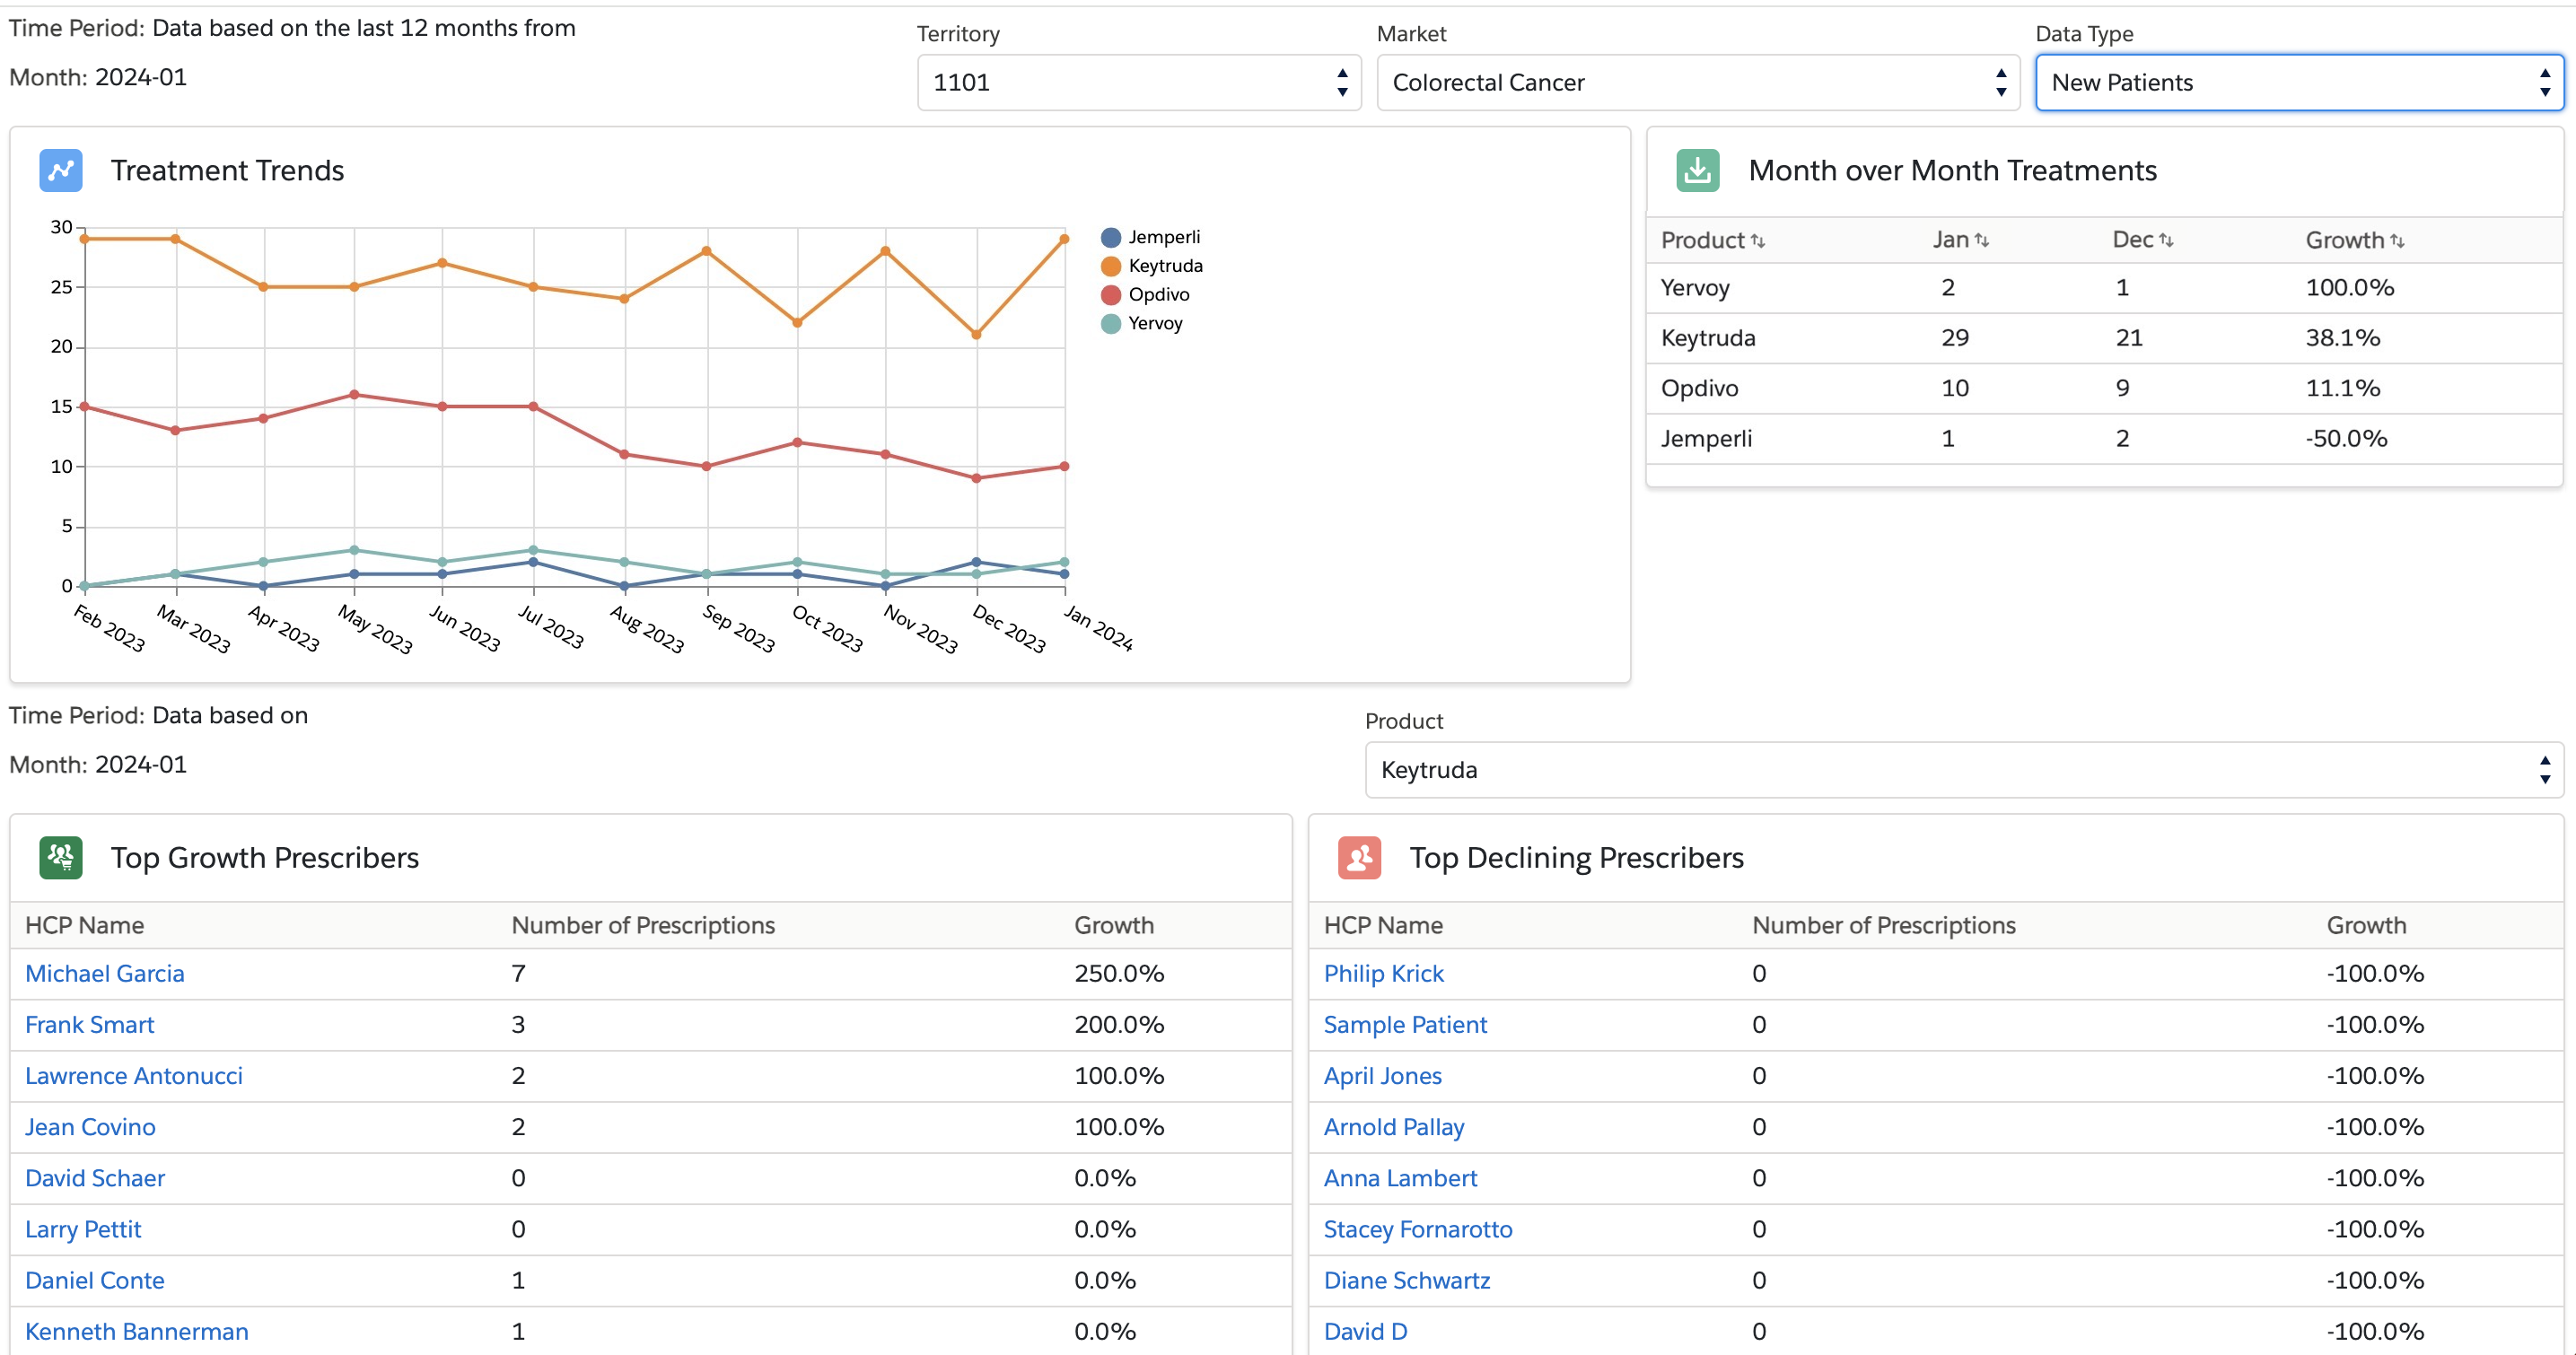
The Market Trend page template displays the following sections:
- Territory - Aligned territories for the user
- Market - Displays market list based on Analytics Market object
- Data Type - Select between:
- Total - Counted from Compass patient data
- New Patients - Counted from Compass patient data if a patient is taking any brand for the first time or after a one year period
- Treatment Trends - Displays twelve months’ treatment trend by products in the selected market
- Month Over Month Treatments - Displays monthly treatment growth for products in the selected market
- Product - Select from available products based on the Analytics Product Group object in the selected market to display top growth and top declining prescribers
- Top Growth Prescribers - Displays top ten growth prescribers for the selected product
- Top Declining Prescribers - Displays top ten declining prescribers for the selected product
Scheduling and Planning
Using the Business Calendar
The business calendar enables users to visualize and track ongoing sales cycles, campaigns, and account plans within their company. Additionally, business administrators can create a customized company calendar, facilitating communication of company-defined holidays, industry-level events, and company-specific events, for example PDUFA dates.
Using the business calendar, brand managers can effectively coordinate their sales cycles and campaigns. Centralizing long-term activities in a single tab promotes better coordination between different groups within the company, for example, sales and marketing, as they plan their respective activities. Additionally, brand managers can use the business calendar to view upcoming holidays, company, and industry events, which is important information for them during the planning process.
Both business administrators and brand managers can use the business calendar to access detailed information about calendar items, apply filters to display relevant items, and modify the calendar's view to better understand long-term activities.
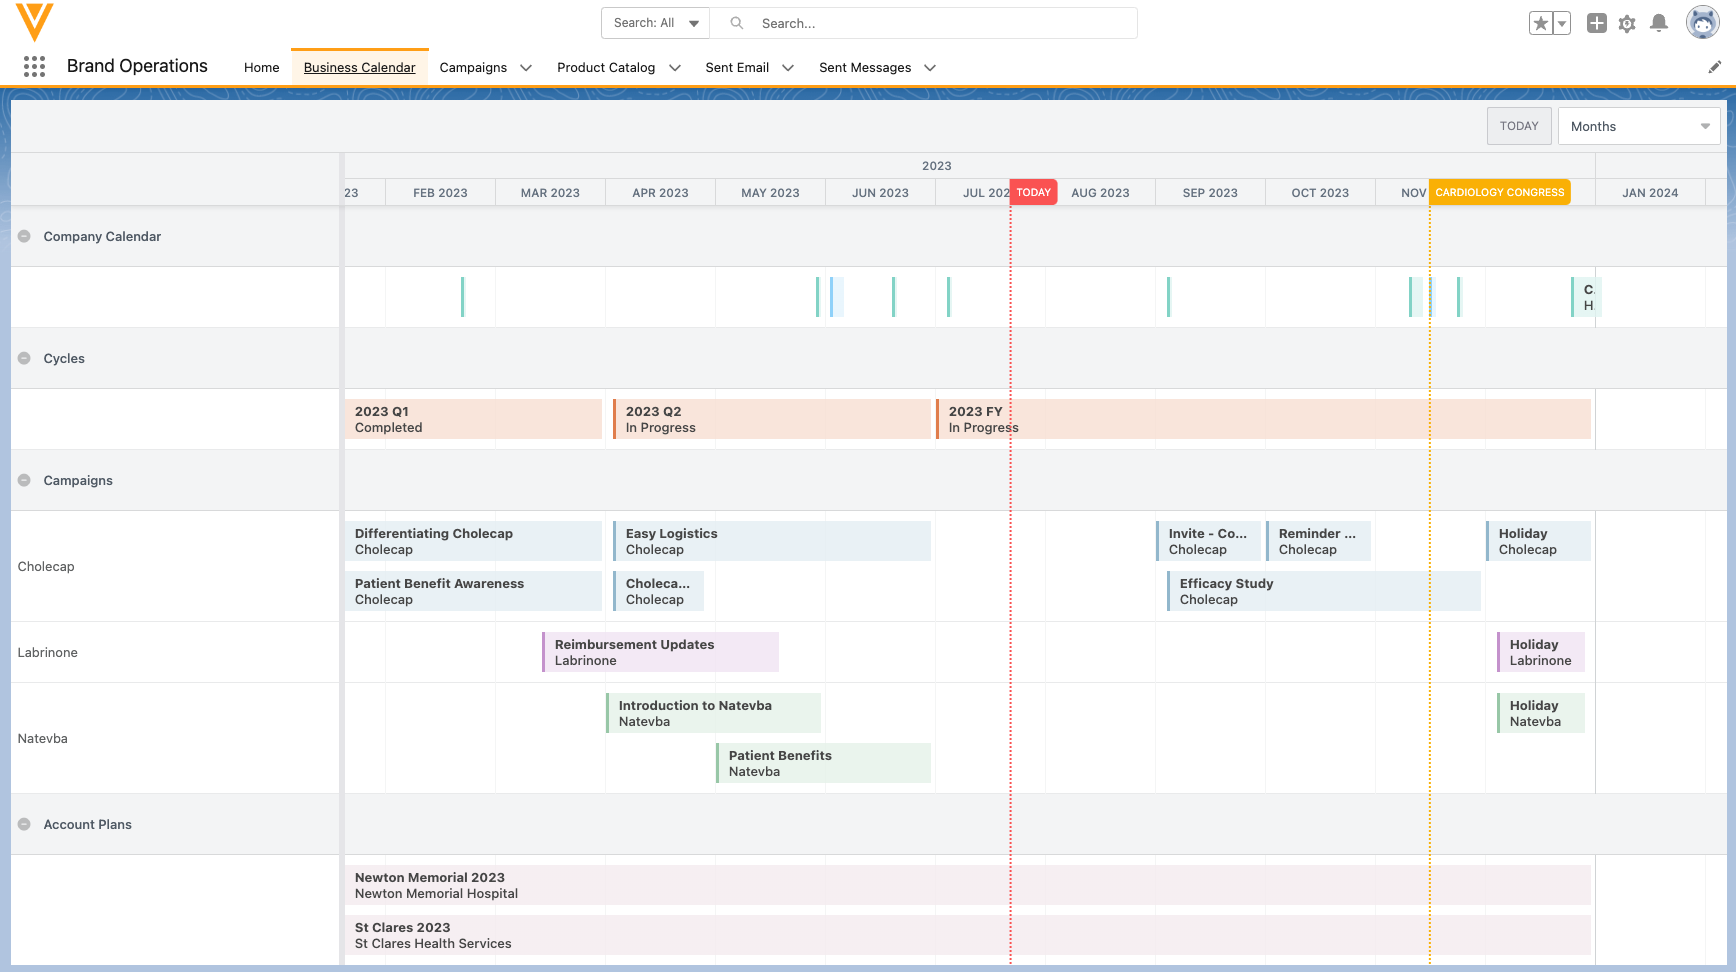
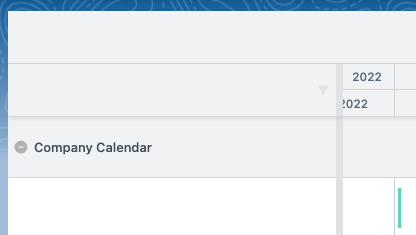
Viewing the Business Calendar
End users can view the business calendar by navigating to the Business_Calendar_vod tab.
Use Sharing Rules to control which records on the business calendar the user can view.
Users can collapse or expand relevant calendars using the navigation panel on the left side of the tab.
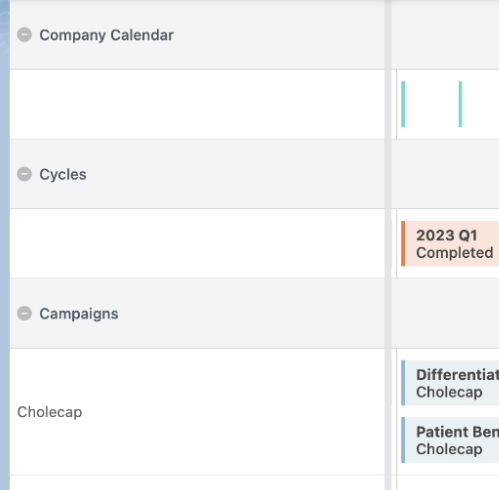
Available sections are:
- Company Calendar – Displays all defined company calendar events, including industry-level events and company or national holidays. See Creating Company Calendars for more information.
-
Cycles – Displays MC_Cycle_vod records based on their Start_Date_vod and End_Date_vod fields. Cycles display as light red on the calendar.

-
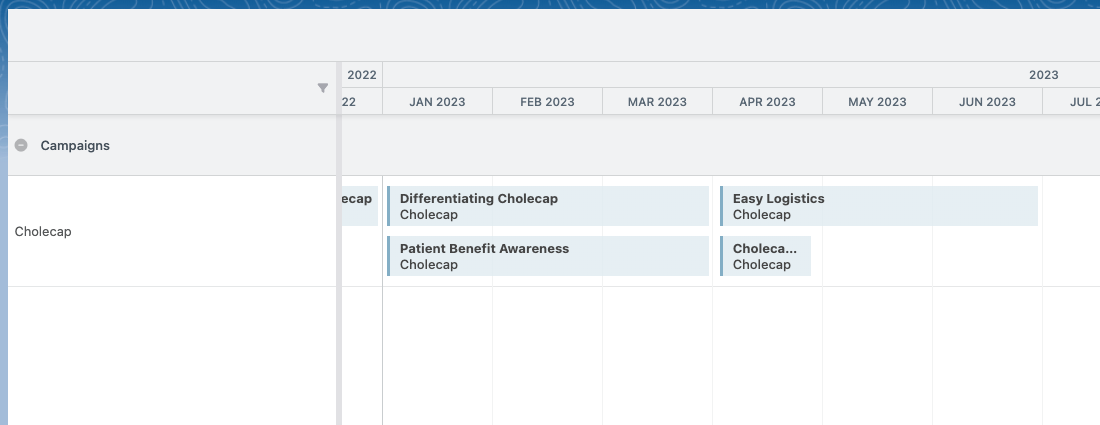
Campaigns – Displays Campaign_vod records based on their Start_Date and End_Date_vod fields. Campaigns for each product display as subsections.
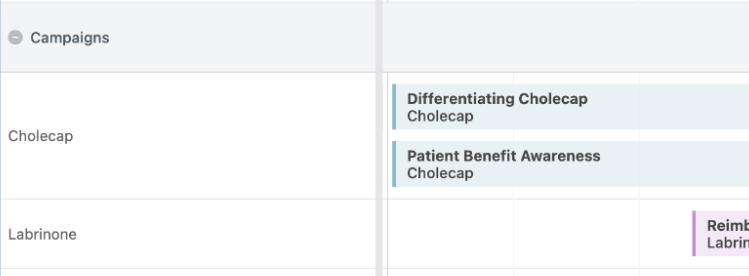
By default, campaigns display as orange on the calendar, though admins can populate the Brand_Color_Code_vod field on Product_vod records with a hex code to override this color for campaigns of a specific product.

-
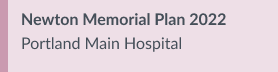
Account Plans – Displays active Account_Plan_vod records based on their Start_Date_vod and End_Date_vod fields. Account plans display as light purple on the calendar.
Displaying Event Details
Hover over an event in the calendar to display a modal with details about the event.
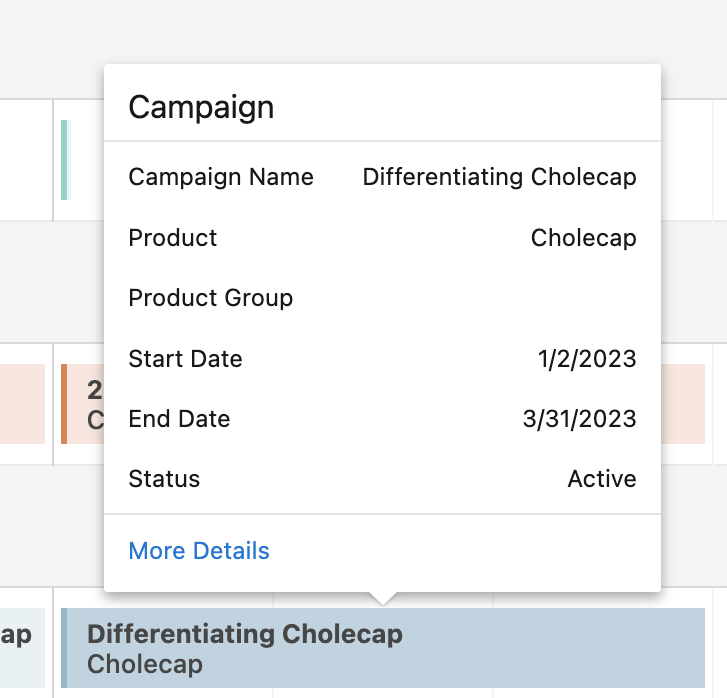
Select the More Details link in the modal to display the record associated with the event, for example, the Campaign_vod or Account_Plan_vod record.
Changing the View of the Business Calendar
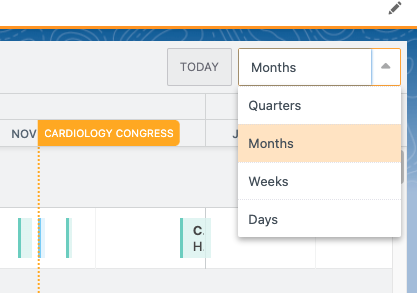
Select the View picklist in the top right corner of the calendar to change the calendar’s view. The current view displays as selected in the picklist.
The following options are available:
- Quarters – Groups events and long-term activities on the calendar based on fiscal quarter
- Months – Groups events and long-term activities on the calendar by month. This is the default selection.
- Weeks – Groups events and long-term activities on the calendar week by week
- Days – Groups events and long-term activities on the calendar on a daily basis
Filtering the Business Calendar
When large numbers of Account Plans, Campaigns, or Cycles are available, users can filter the business calendar to only display relevant events:
-
Navigate to the filter icon in the left column header or right-click anywhere in the left column header.
-
Select Apply Filter.

-
Enter the appropriate term to filter.
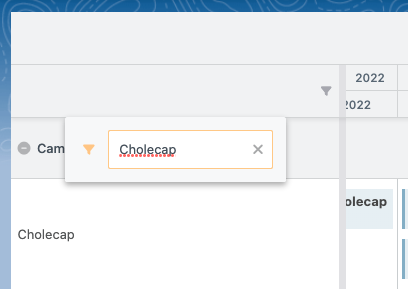
- Select Enter.
Only sections and calendars matching the entered term display. If a section does not contain any matching calendars, the section does not display.
Creating Company Calendars
To create a company calendar used to share events with end users, create a Calendar_vod record with the following fields populated:
- Record Type – The following record types are available:
-
Event_vod – Stores industry and company-level events. Calendar events in Event_vod type calendars display as light blue events on the business calendar.

-
Holiday_vod – Stores company and national-level holidays. Calendar events in Holiday_vod type calendars display as light green events on the business calendar.

- Country_Code_vod – Defines the country the calendar applies to
- Status_vod – The following values are available for selection:
- Draft_vod – Does not display the events associated with this calendar to attendees. This is the recommended value when initially creating calendars.
- Active_vod – Displays the events associated with this calendar to users
- Inactive_vod – Inactivates the record
You can also set up Sharing Rules to control which calendars users can view.
Creating Calendar Events
To create calendar events for custom company calendars:
- Navigate to the appropriate Calendar_vod record.
- Navigate to the Calendar Events related list.
- Select New.
-
Create a new Calendar_Event_vod record with the following fields populated:
- Name – The name of the event that displays on the business calendar
- Start_Date_vod – The start date of the event
If only a Start date or End date is supplied, the record is not valid. Users must enter both, or leave both fields blank.
- Start_Time_Local_vod – The local start time of the event
- End_Date_vod – The end date of the event
- End_Time_Local_vod – The local end date of the event
- Time_Zone_vod – The time zone of the event
- Description_vod – The event’s description that displays on the business calendar
-
Important_vod – Selecting this check box causes the event’s placement on the business calendar to be highlighted with a dotted line signifying the event’s start.
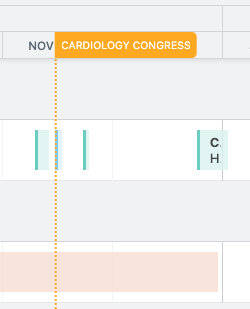
Do not designate more than one event starting on the same day as important.
- Select Save.
Suggestions
Channel, Time, and Date for Call Suggestions
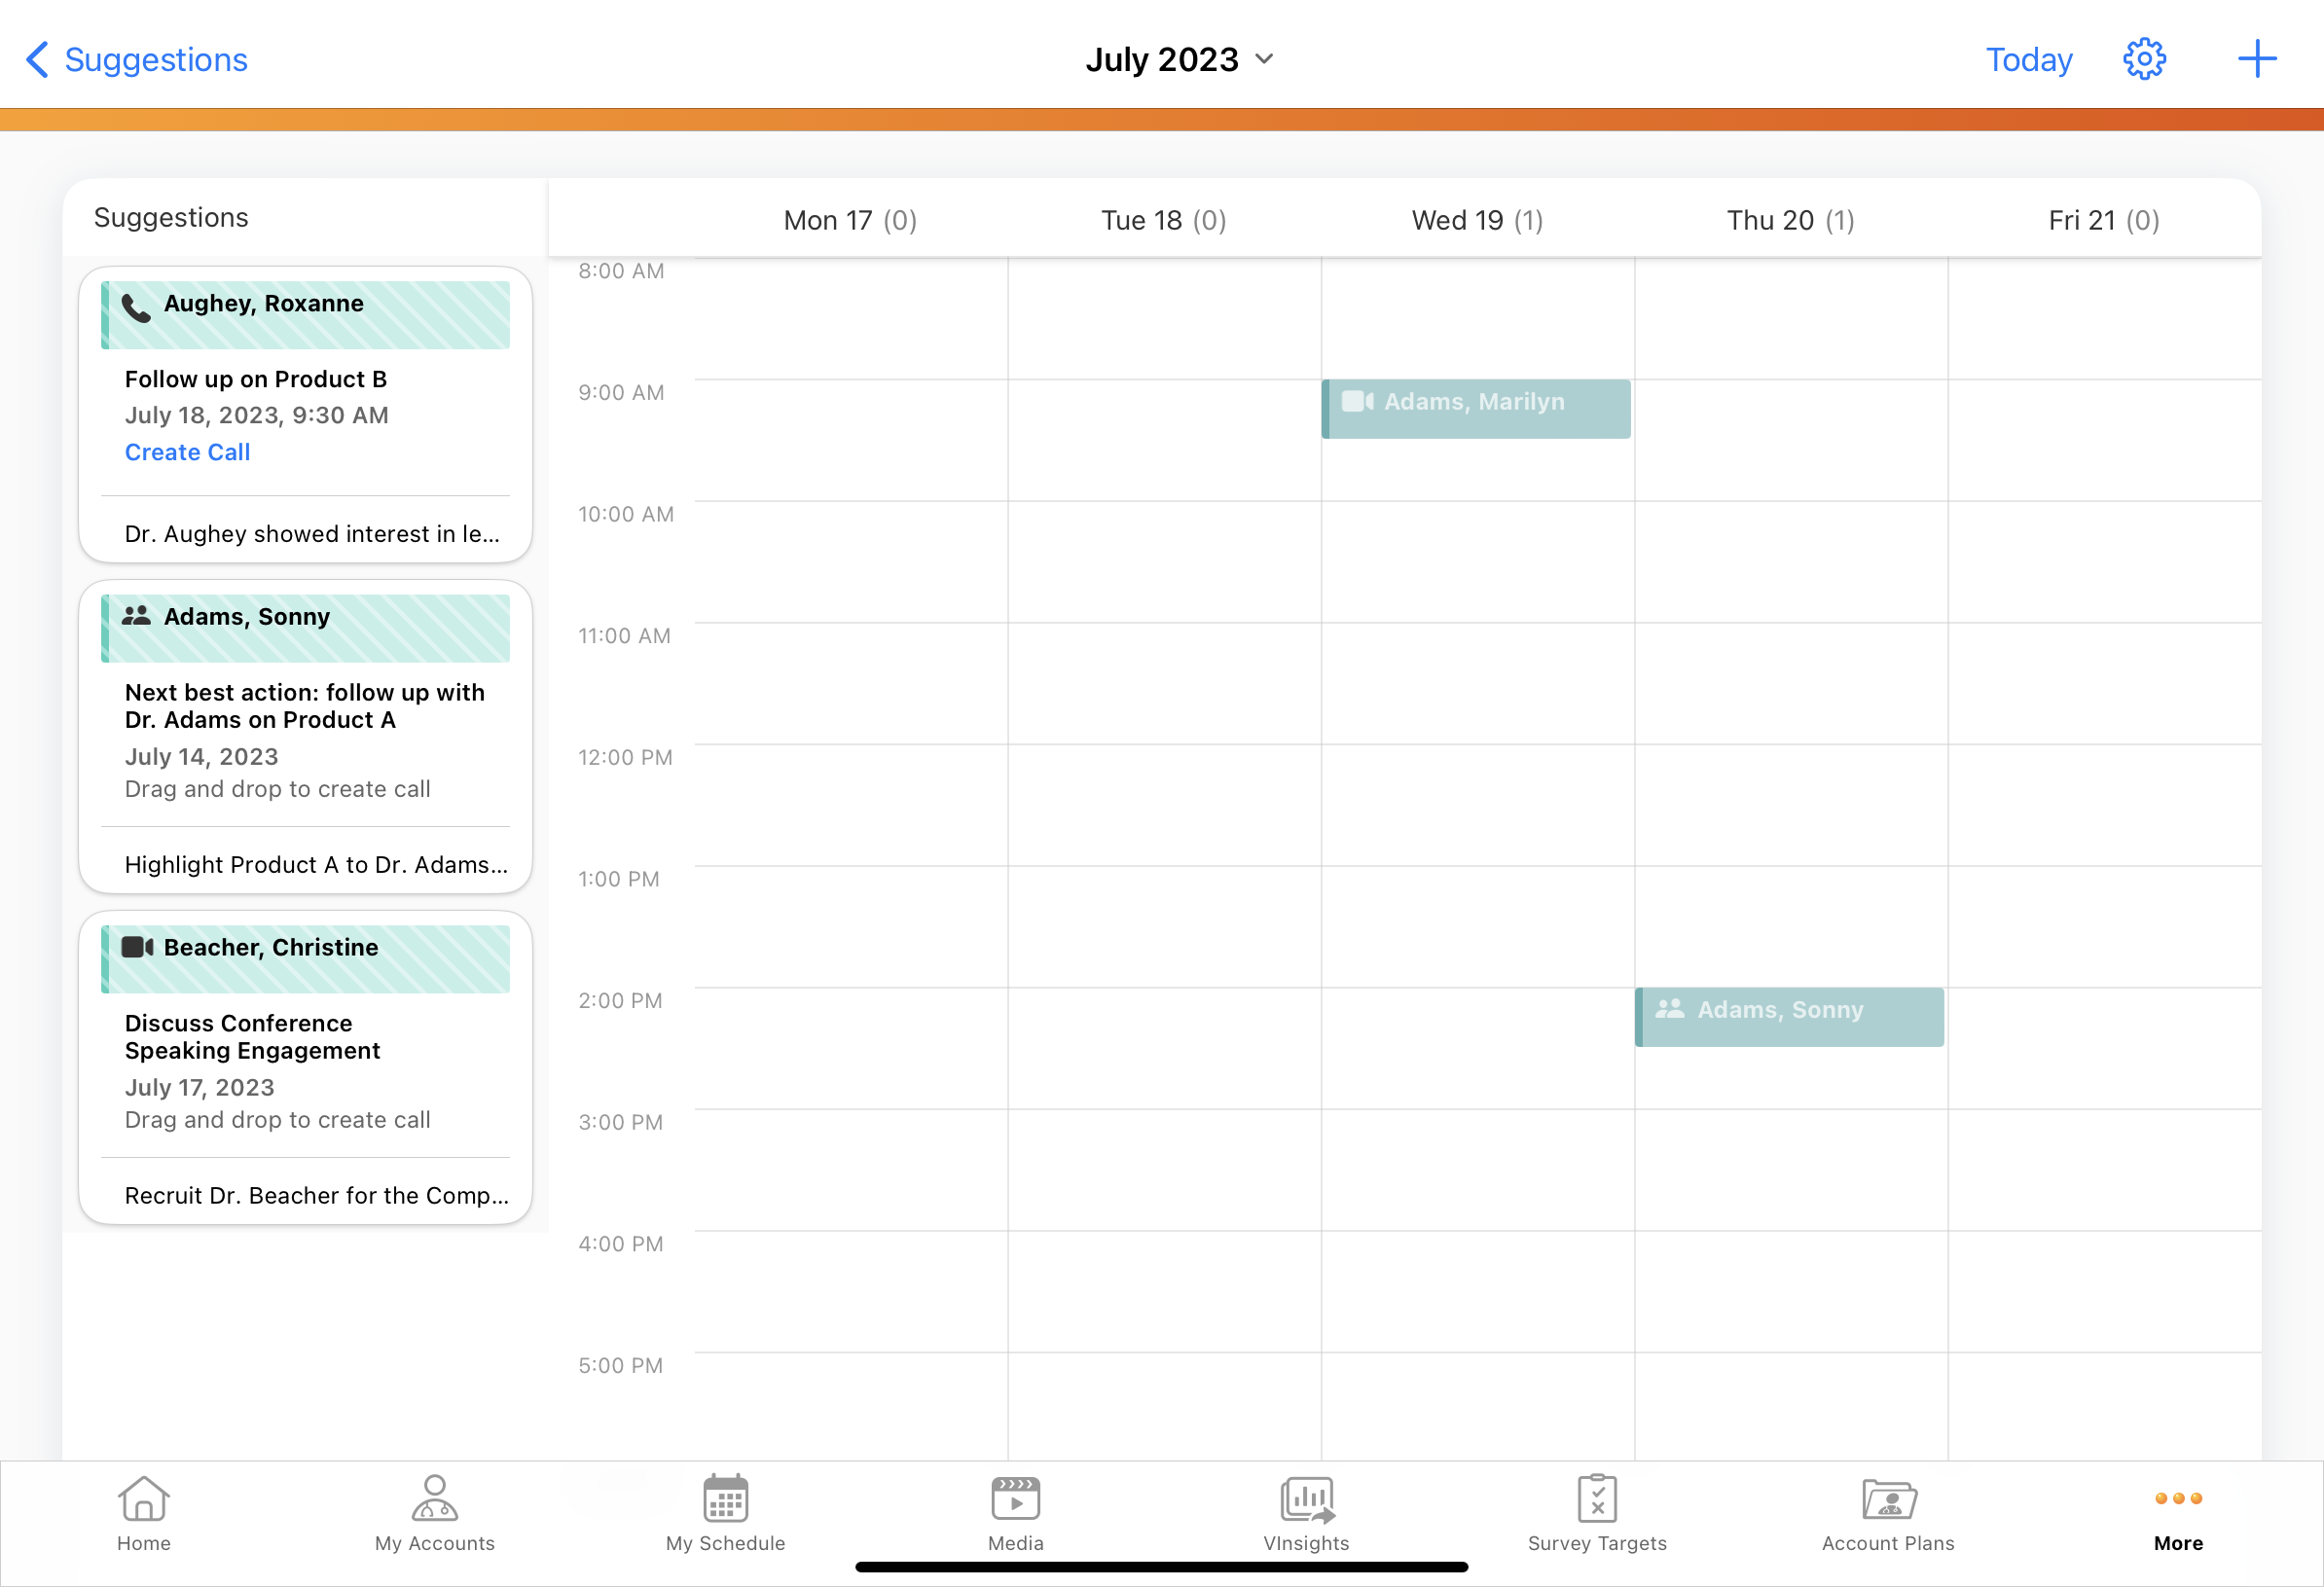
To tailor outreach for individual HCPs, suggestion creators can highlight the ideal channel, time, and date for users to meet with an HCP. When users schedule a call from a suggestion with a planned datetime or date and a planned call channel, the planned time slot is highlighted on the calendar and the planned channel is populated on the new call report.
Highlighting a Call Channel
To recommend a specific channel for a call suggestion, admins populate the Planned_Call_Channel_vod field on the Suggestion_vod record.
If Restricting Call Channels is enabled, do not populate the Planned_Call_Channel_vod field with a restricted channel.
The value in the Planned_Call_Channel_vod field must be an exact match for one of the six supported Call Channel Picklist Value API names.
In the Suggestions list, the icon for the planned call channel displays next to the account name.
When users create a call from a suggestion with a planned call channel, the Call_Channel_vod field on the Call2_vod record is automatically populated with the planned call channel.
To enable admins to track whether users follow the planned call channel when scheduling calls, the Suggested_Call_Channel_vod field on the Call2_vod record is automatically stamped with the value from the Planned_Call_Channel_vod field when users create the call. If the Planned_Call_Channel_vod field is populated with a restricted channel, the call report is still created and the Suggested_Call_Channel_vod field is stamped, but the Call_Channel_vod field is empty.
If Auto-Populating the Call Channel is enabled, the Call_Channel_vod field on the Call2_vod object is automatically populated with the planned call channel when users create a call from the suggestion. To change the call channel on the call report, users follow the process their organization configured for setting the call channel as usual—for example, selecting a value from a custom field to trigger a change to the Call_Channel_vod field.
Highlighting a Call Datetime
To recommend a specific datetime for a call suggestion, admins populate the Planned_Call_DateTime_vod field on the Suggestion_vod record. In the Suggestions list, the planned datetime displays below the account name. When users select the account card, the planned call datetime is highlighted to provide a visual indicator of when they should schedule the call.
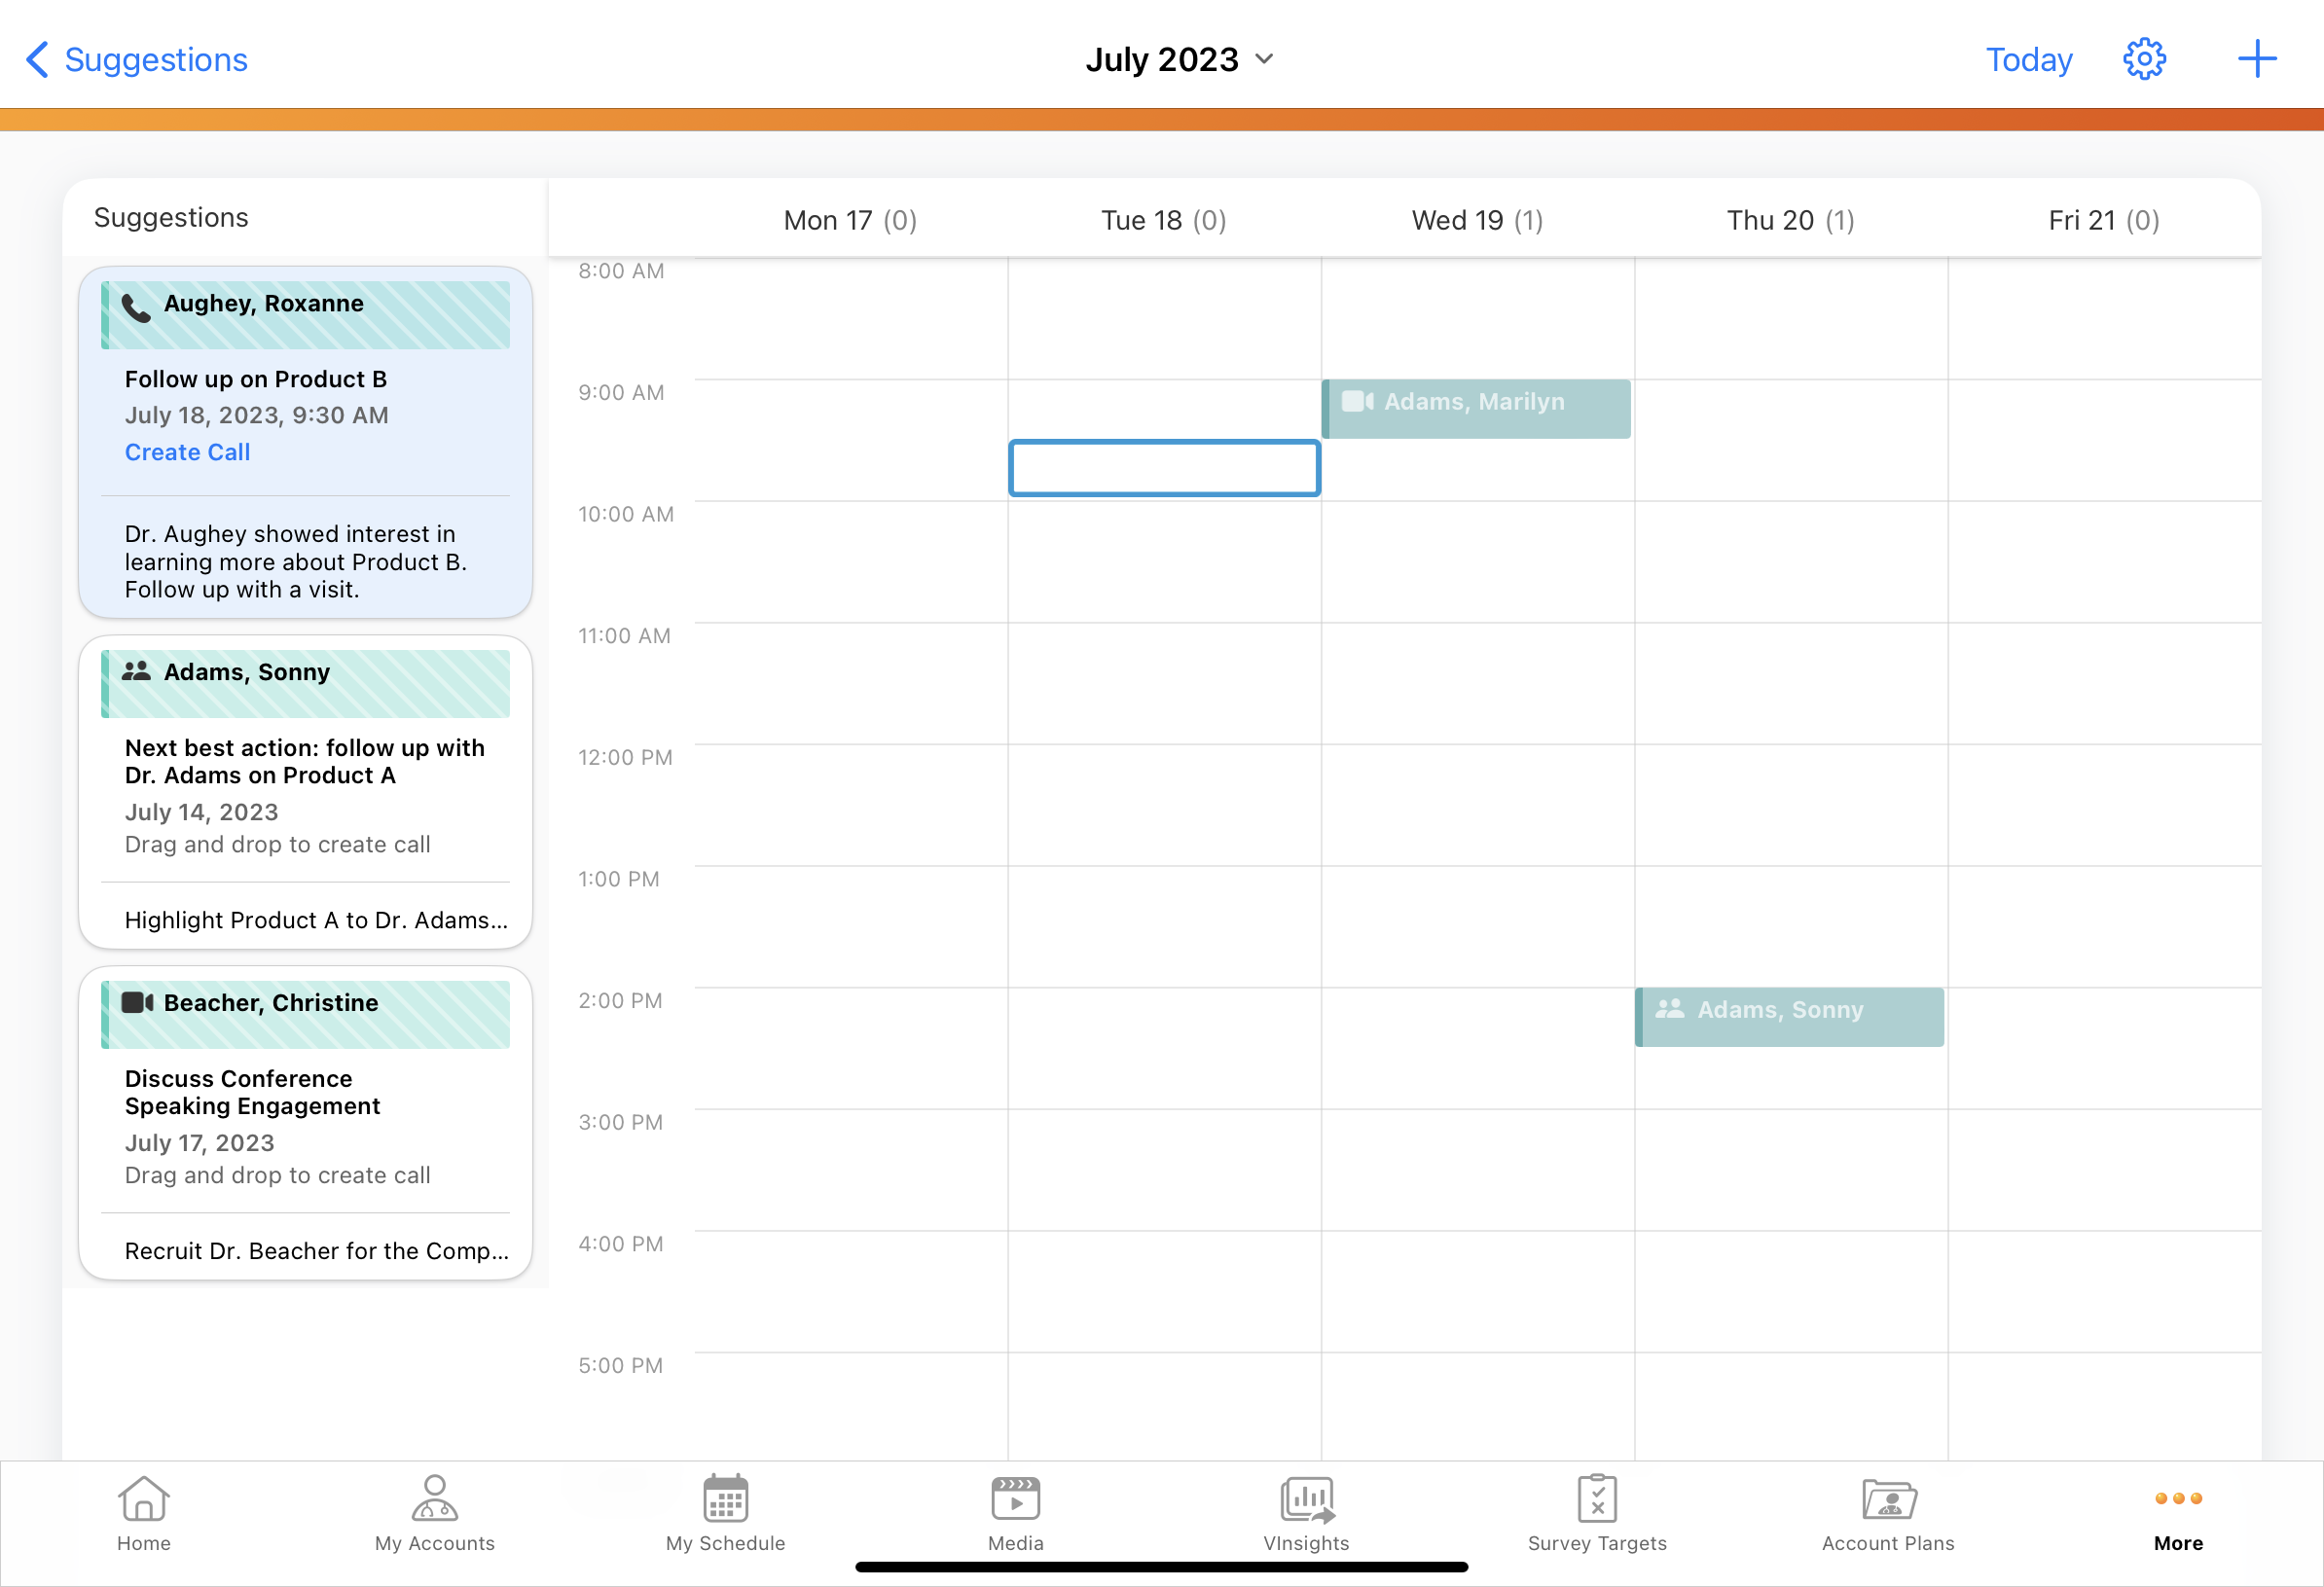
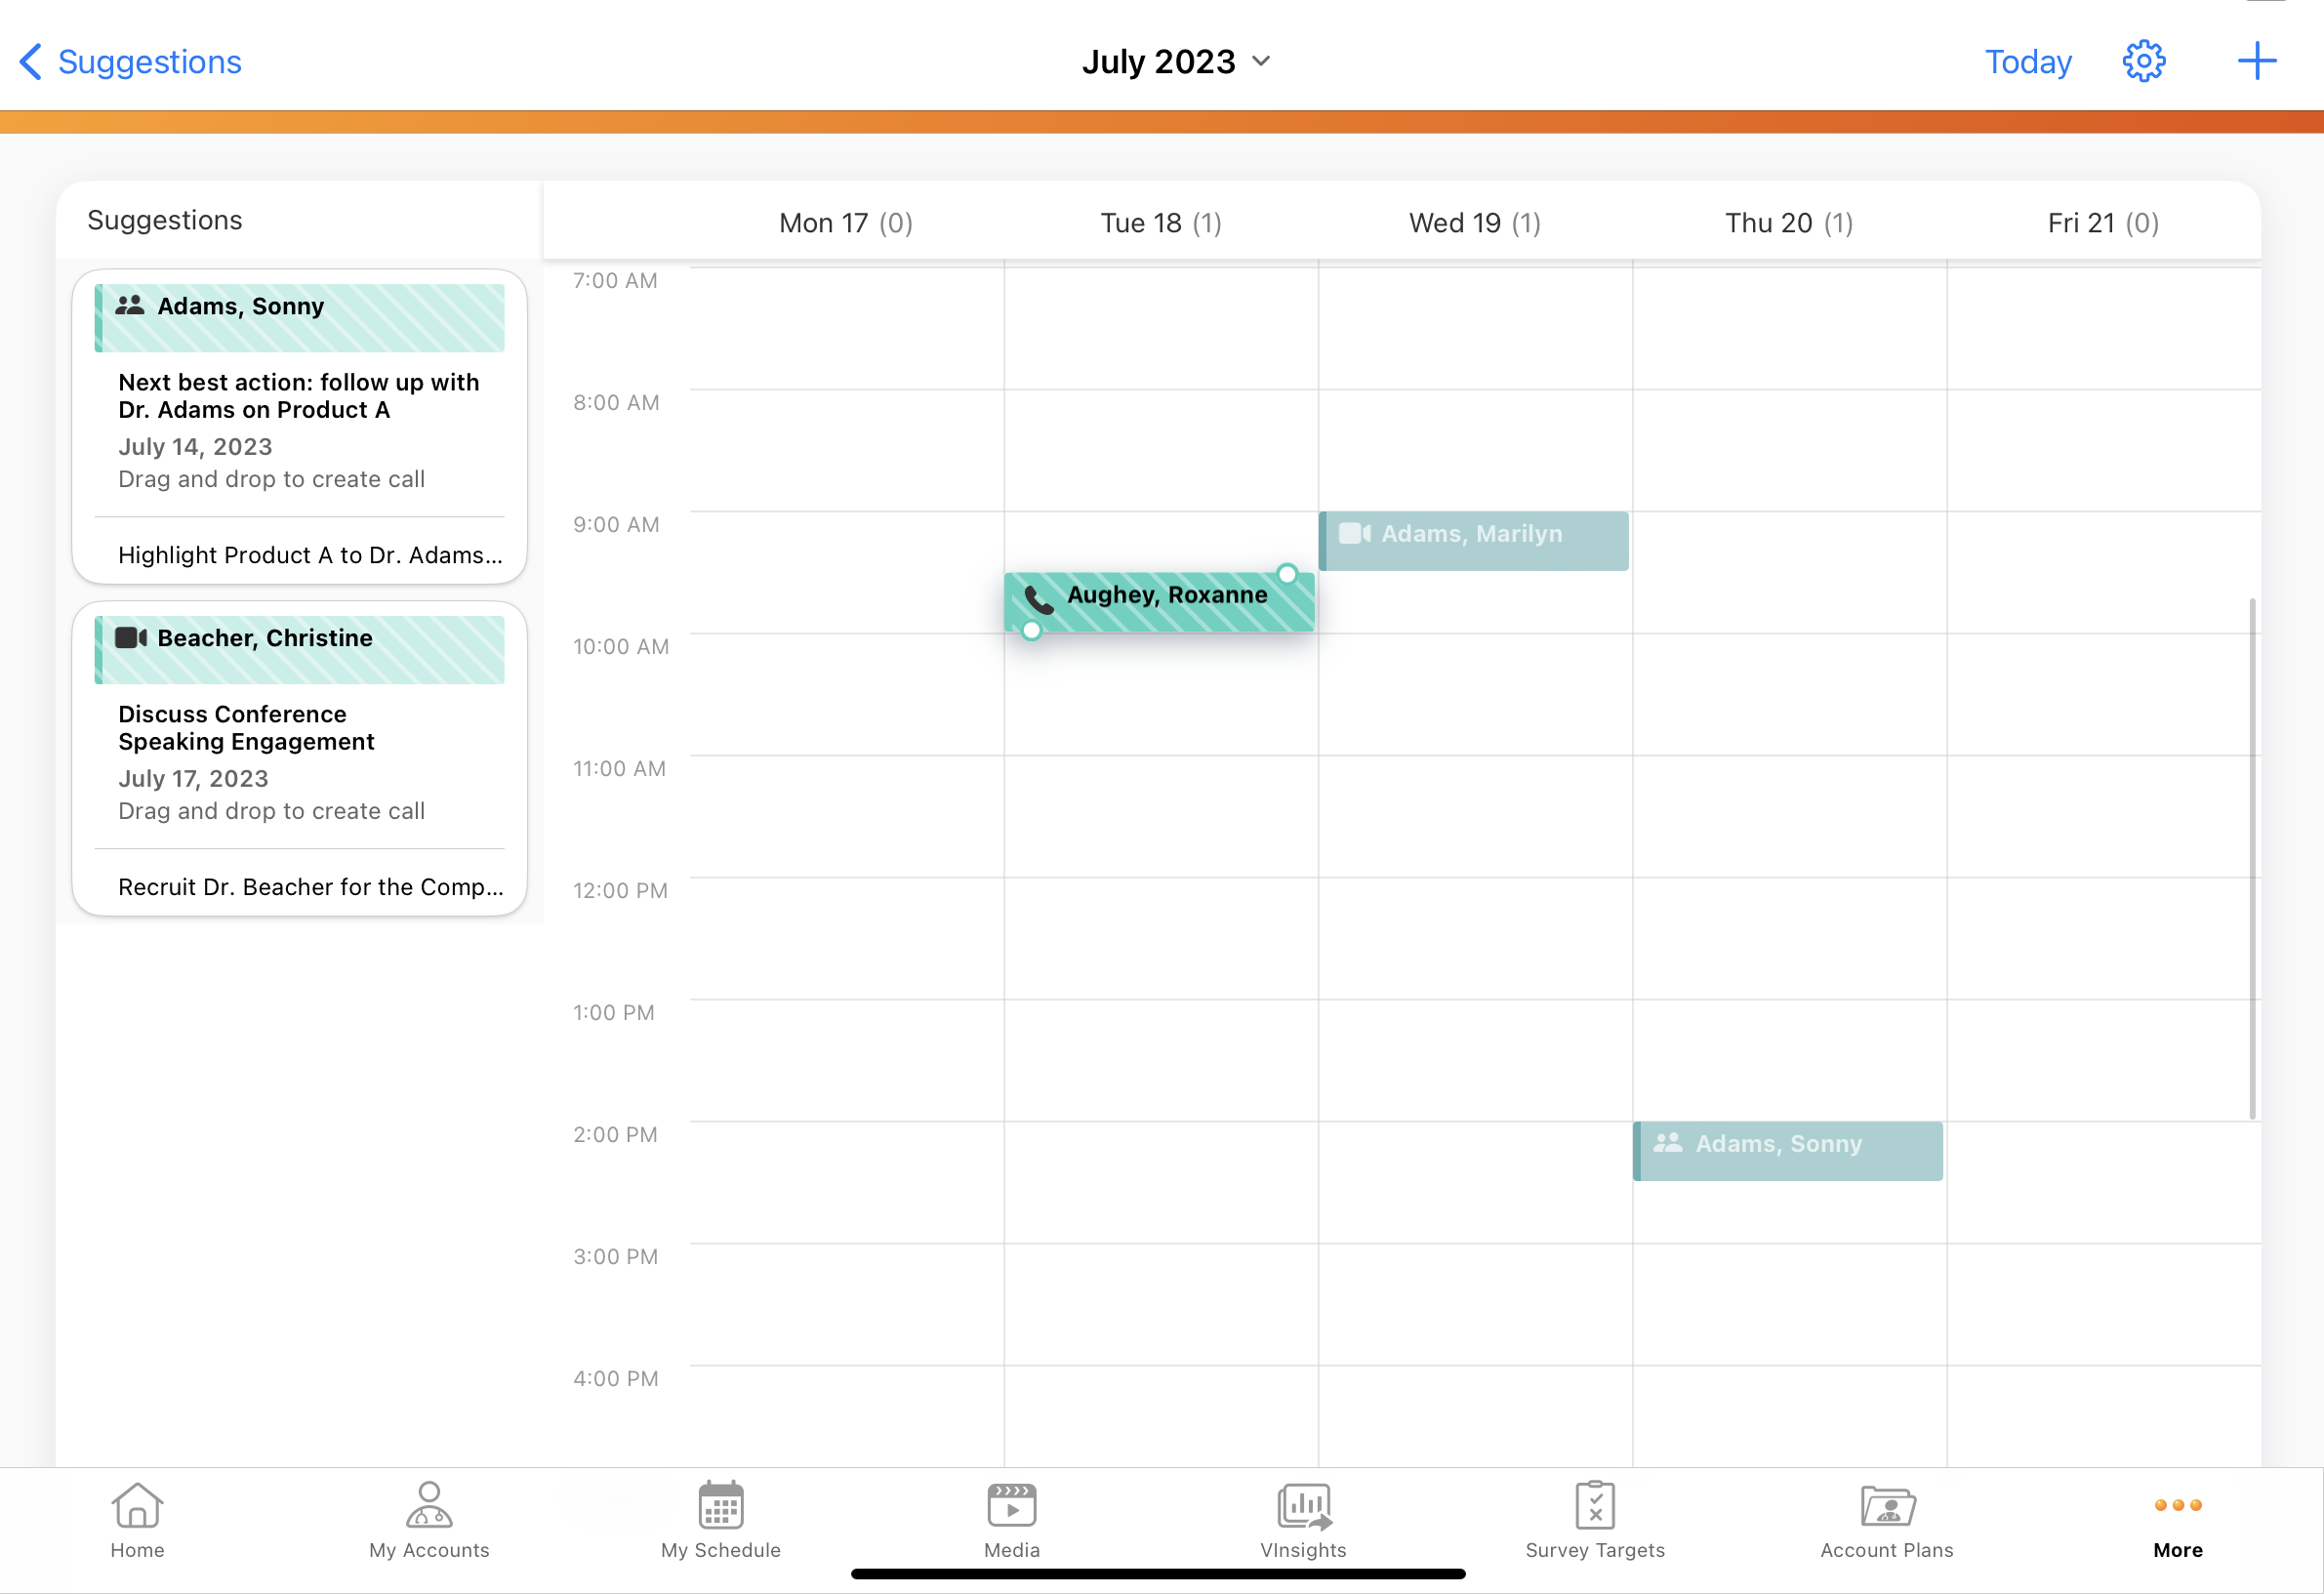
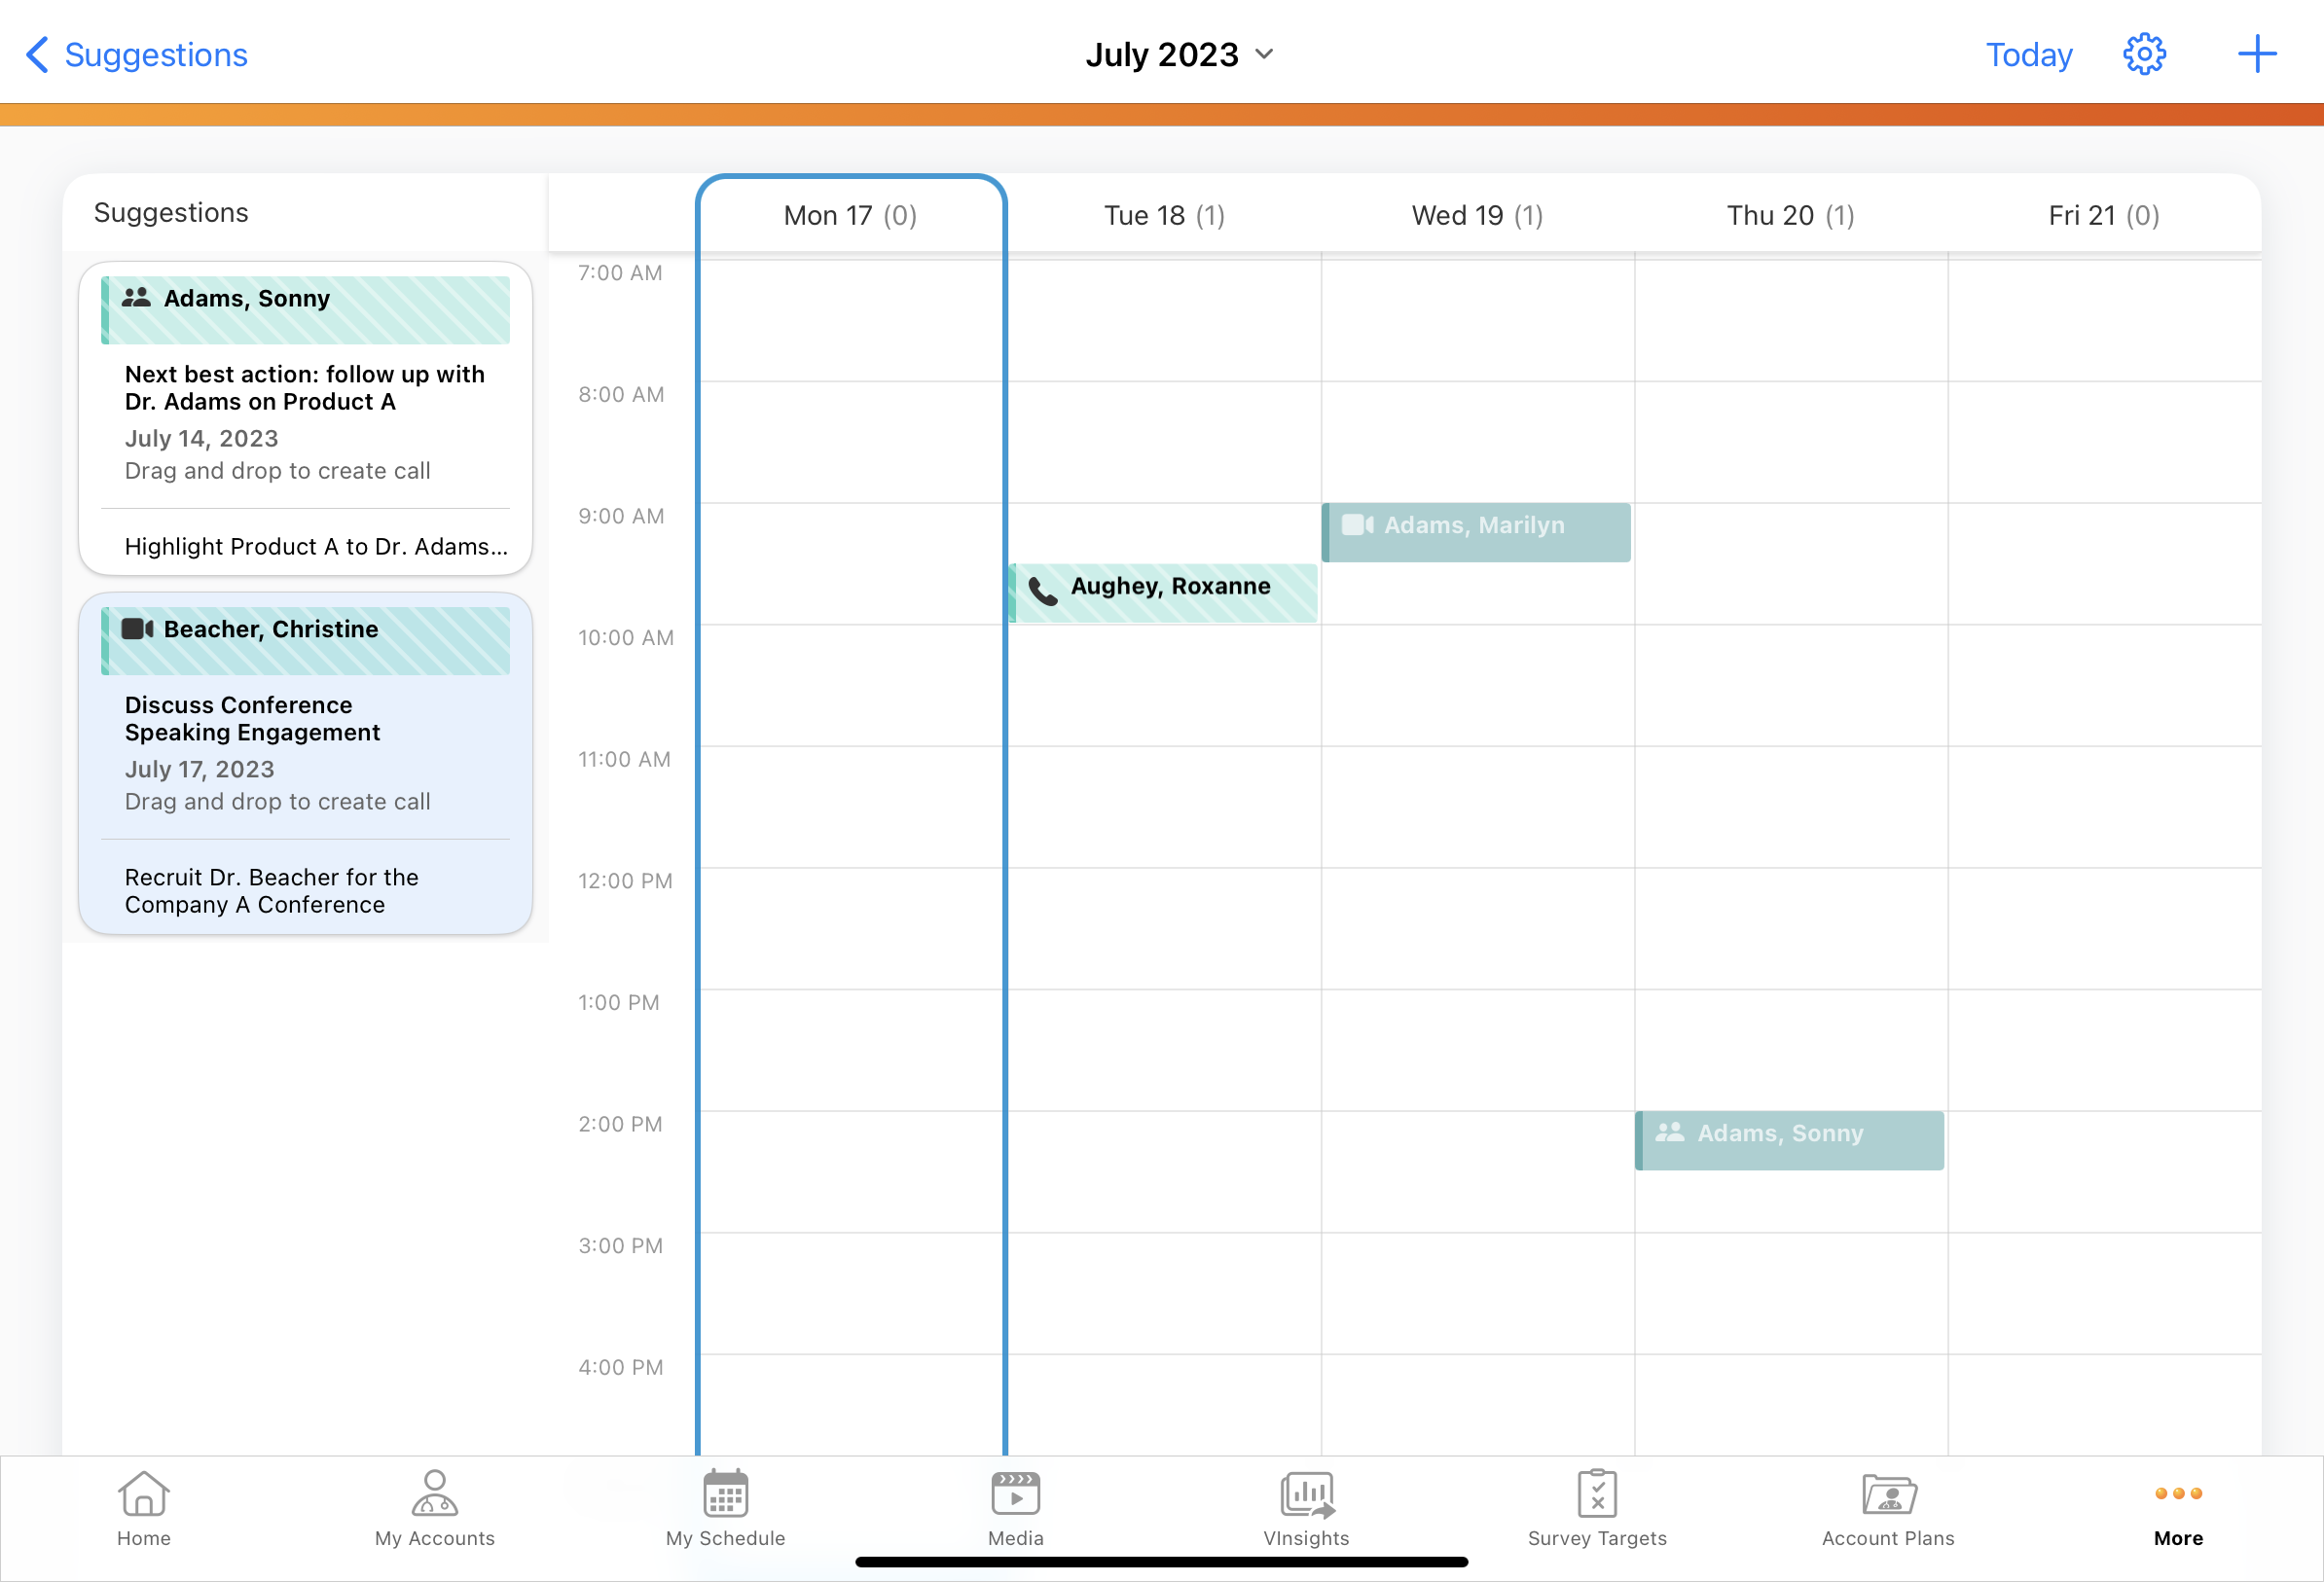
To schedule a call for the planned datetime, either drag and drop the account card onto the highlighted time slot or select the Create Call button to schedule the call directly at the planned time slot.
To enable admins to track whether users follow the planned datetime when scheduling calls, the Suggested_DateTime_vod field on the new Call2_vod record is automatically stamped with the value from the Planned_Call_DateTime_vod.
Highlighting a Call Date
To recommend a date for a call suggestion instead of a datetime, admins populate the Planned_Call_Date_vod field on the Suggestion_vod record. In the Suggestions list, the planned date displays below the account name. When users select the account card, the planned call date is highlighted.
If both the Planned_Call_DateTime_vod and Planned_Call_Date_vod fields are populated on the same Suggestion_vod record, the datetime is used instead of the date.
To enable admins to track whether users follow the planned call date when scheduling calls, the Suggested_Date_vod field on the Call2_vod record is automatically stamped with the value from the Planned_Call_Date_vod field when users create the call.
