

Enabling Engage Chat in CRM
- Android
- iPad
- iPhone
Users chat with HCPs directly from Veeva CRM in the Engage tab. Engage chat is a convenient, secure, and compliant communication channel for users to interact and share information with HCPs outside of calls.
The Engage tab is only available in the Veeva CRM app available from the App Store either by direct download or managed through an MDM. See Installing CRM via the App Store for more information.
Enabling the Engage Tab in CRM
The Engage tab displays in CRM for users who meet one of the following conditions:
- The user is assigned to an Engage Connect group
- The user is not assigned to an Engage Connect group but the org-wide Communication Channel setting for Engage users is set to PING or CHAT
Users with Ping enabled can only receive messages in the Engage tab.
See Configuring Engage Connect for more information about Engage Connect groups and settings.
Filtering Approved Content and Samples to Share in Engage Chat
Admins can define content filters for Engage Connect groups to restrict the approved content CRM users can share via Engage chat in the Engage tab in Veeva CRM or in Engage Connect, and the samples and materials HCPs can request from those users in Engage. Content filters work in conjunction with a user's country, user type, and assigned brands to determine which content is available to share. For example, there may be multiple indications for a product, but users in a particular Engage Connect group only have permission to share approved content for a specific indication via Engage chat.
Configuring Content Filters
To configure content filters for approved content and samples and materials, admins must define the content filters in both the company configuration file and the appropriate Engage Connect group setting. Filters are defined by customers and do not need to follow any specific format, as long as they match in the company configuration file and in the Engage Connect group settings. Multiple filters are supported and can be listed in any order.
If filters are not defined for a given piece of content on the company configuration file, it is available to all users regardless of whether their Engage Connect group specifies any filters. For example, an admin defines Filter A for the Engage Connect group. The admin then includes Filter A in the company configuration file for an approved content file, but not for a specific sample. Users in the Engage Connect group can share the approved content file in chat, and HCPs can still request the sample from users.
In another example, an admin defines Filter A and Filter B for the Engage Connect group, and includes Filter B and Filter C in the company configuration file for an approved content file. Users in the Engage Connect group can share the approved content file because Filter B is configured in both the group setting and the company configuration file.
To update the company configuration file:
- Navigate to the Engage Connect Administration tab.
- Navigate to the Company Data Import/Export section.
- Select Export Data to download the formatted company configuration file.
- Open the downloaded file.
- Navigate to the Content Tab to define filters for approved content, and the Sample Tab to define filters for samples and materials.
- Populate the Content Filters column appropriately with a semicolon delimited list of filters. The Content Filters column displays immediately before the Active? column in both the Content Tab and the Sample Tab.
The column is limited to 80 characters. Leading and trailing spaces are not supported.
- Save the file.
- Navigate back to the Company Data Import/Export section of the Engage Connect Administration tab.
- Select Choose File to upload the edited company configuration file.
- Select Import Data.
To update the Engage Connect Group settings:
- Navigate to the Engage Connect Administration tab.
- Select Edit for the appropriate Engage Connect Group.
- Populate the Content Filters field appropriately with a semicolon delimited list of filters.
The field is limited to 80 characters. Leading and trailing spaces are not supported.
- Select Save.
Using the Engage Tab
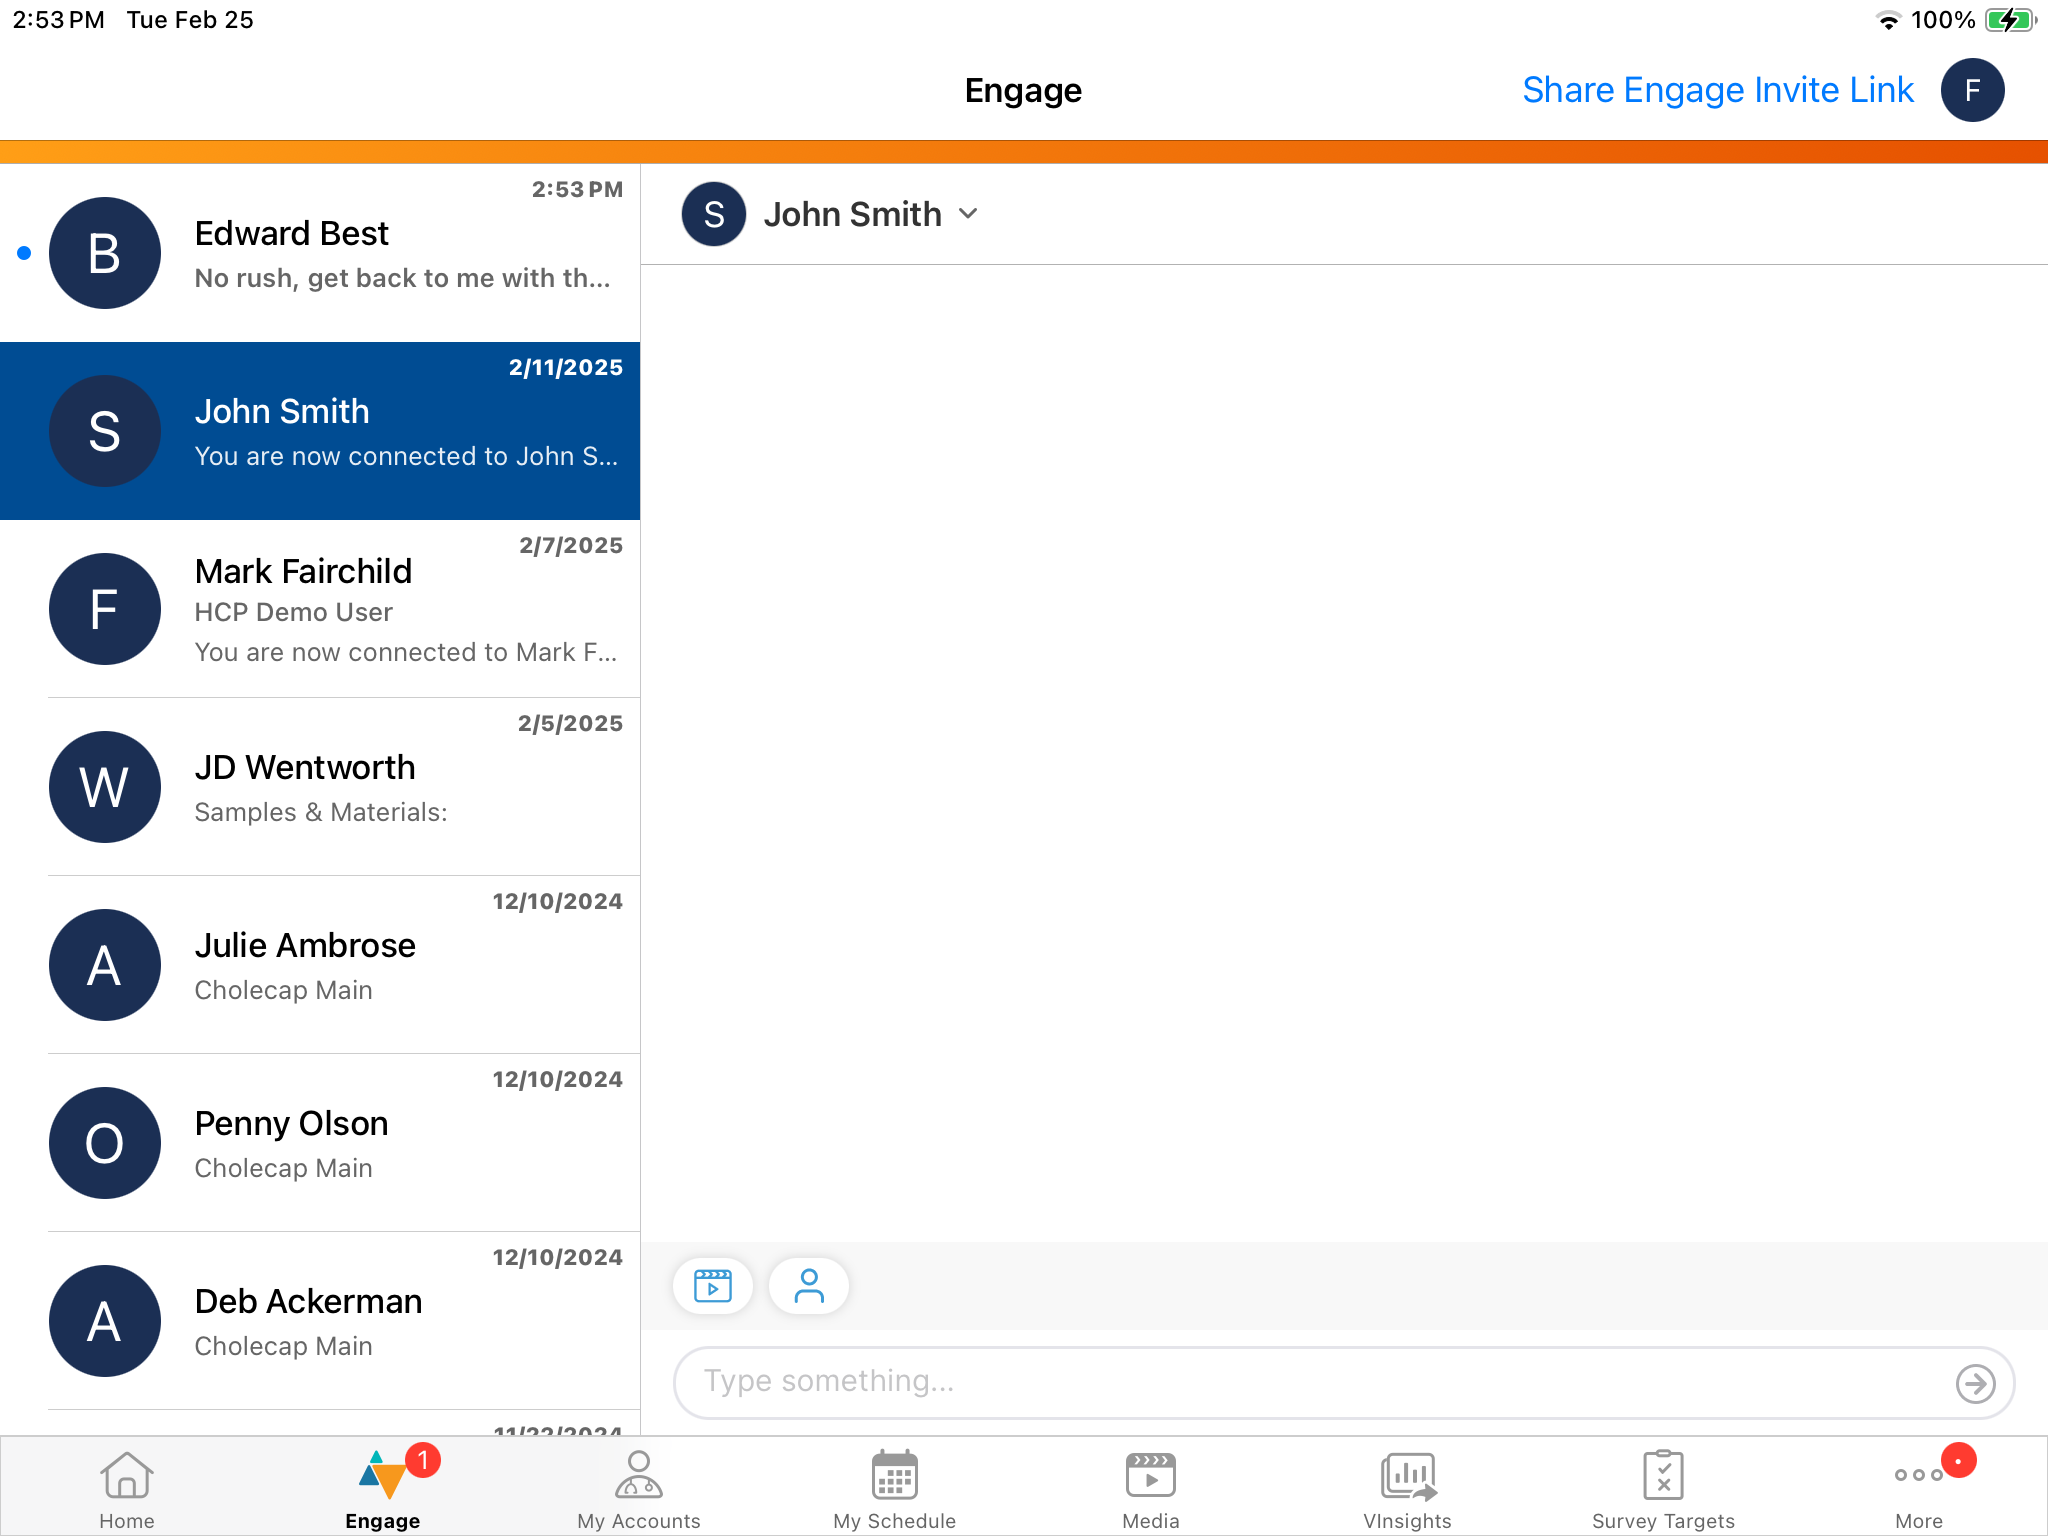
The Engage tab always displays as the second tab, to the right of the Home tab, and cannot be reordered. See Managing Tab Visibility and Display Order for more information about the tabs on the navigation bar.
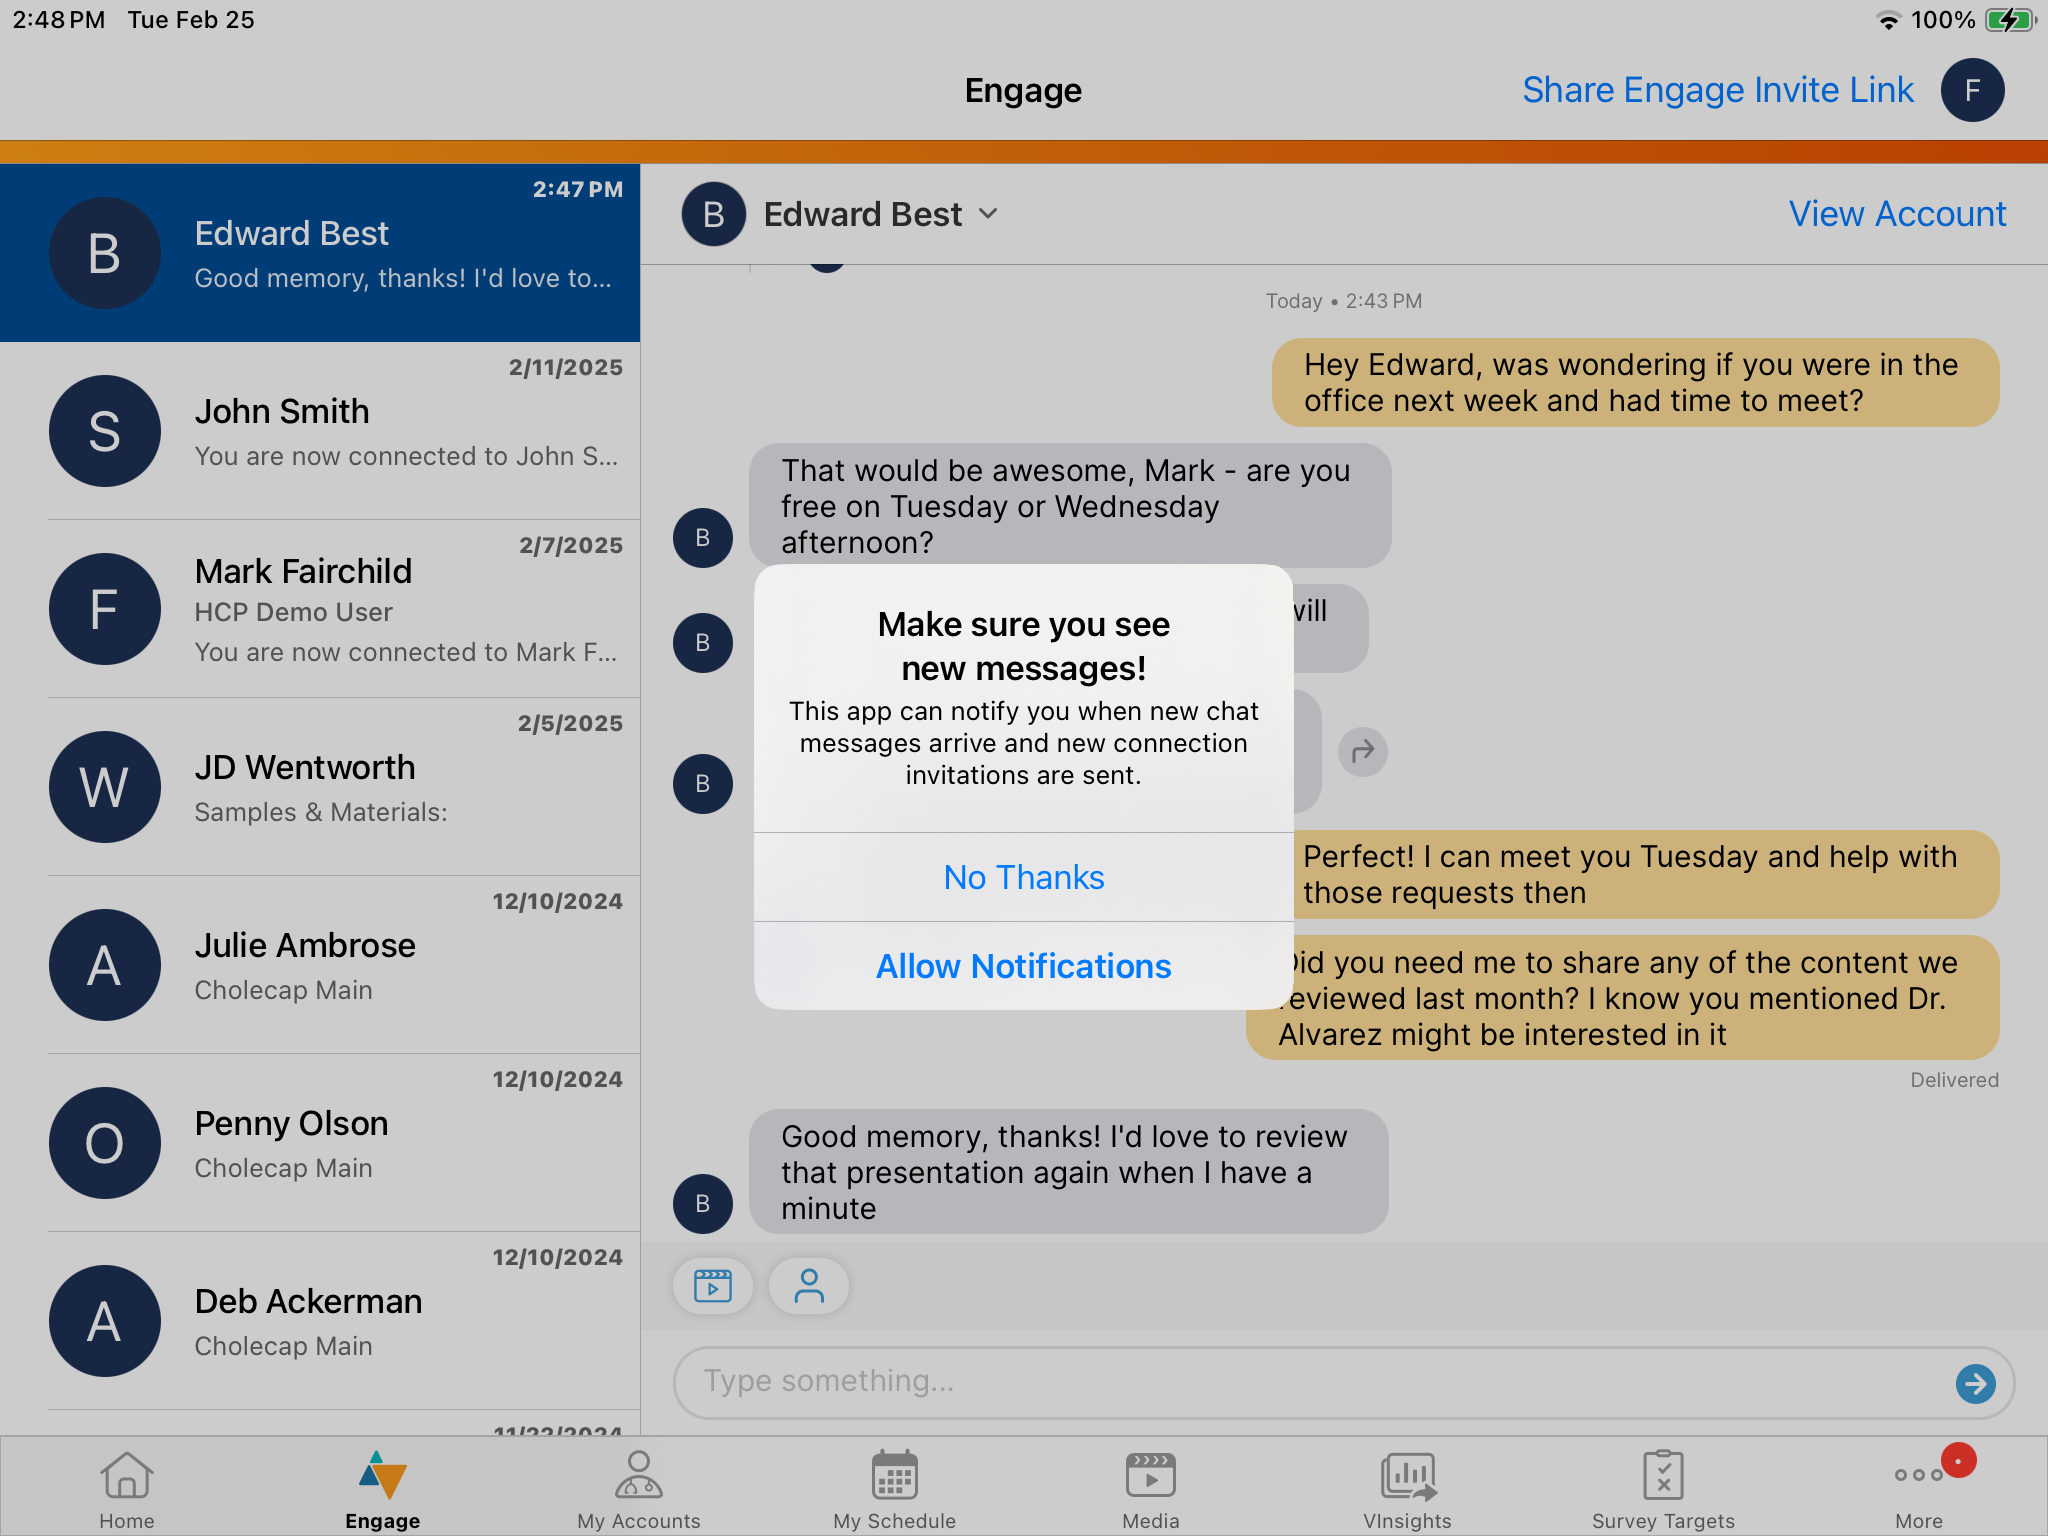
When users navigate to the Engage tab for the first time, a modal about push notifications displays. Users can select Allow Notifications to receive push notifications about new chat messages, or No Thanks to dismiss the modal.
Users can manage push notifications for Veeva CRM by launching the Settings app on their devices and navigating to Veeva CRM > Notifications.
You can only register for push applications for one Veeva application per device. If you have Veeva CRM, Engage, and Engage Connect installed on the same device, you receive push notifications for whichever app you are logged in to and most recently opened.
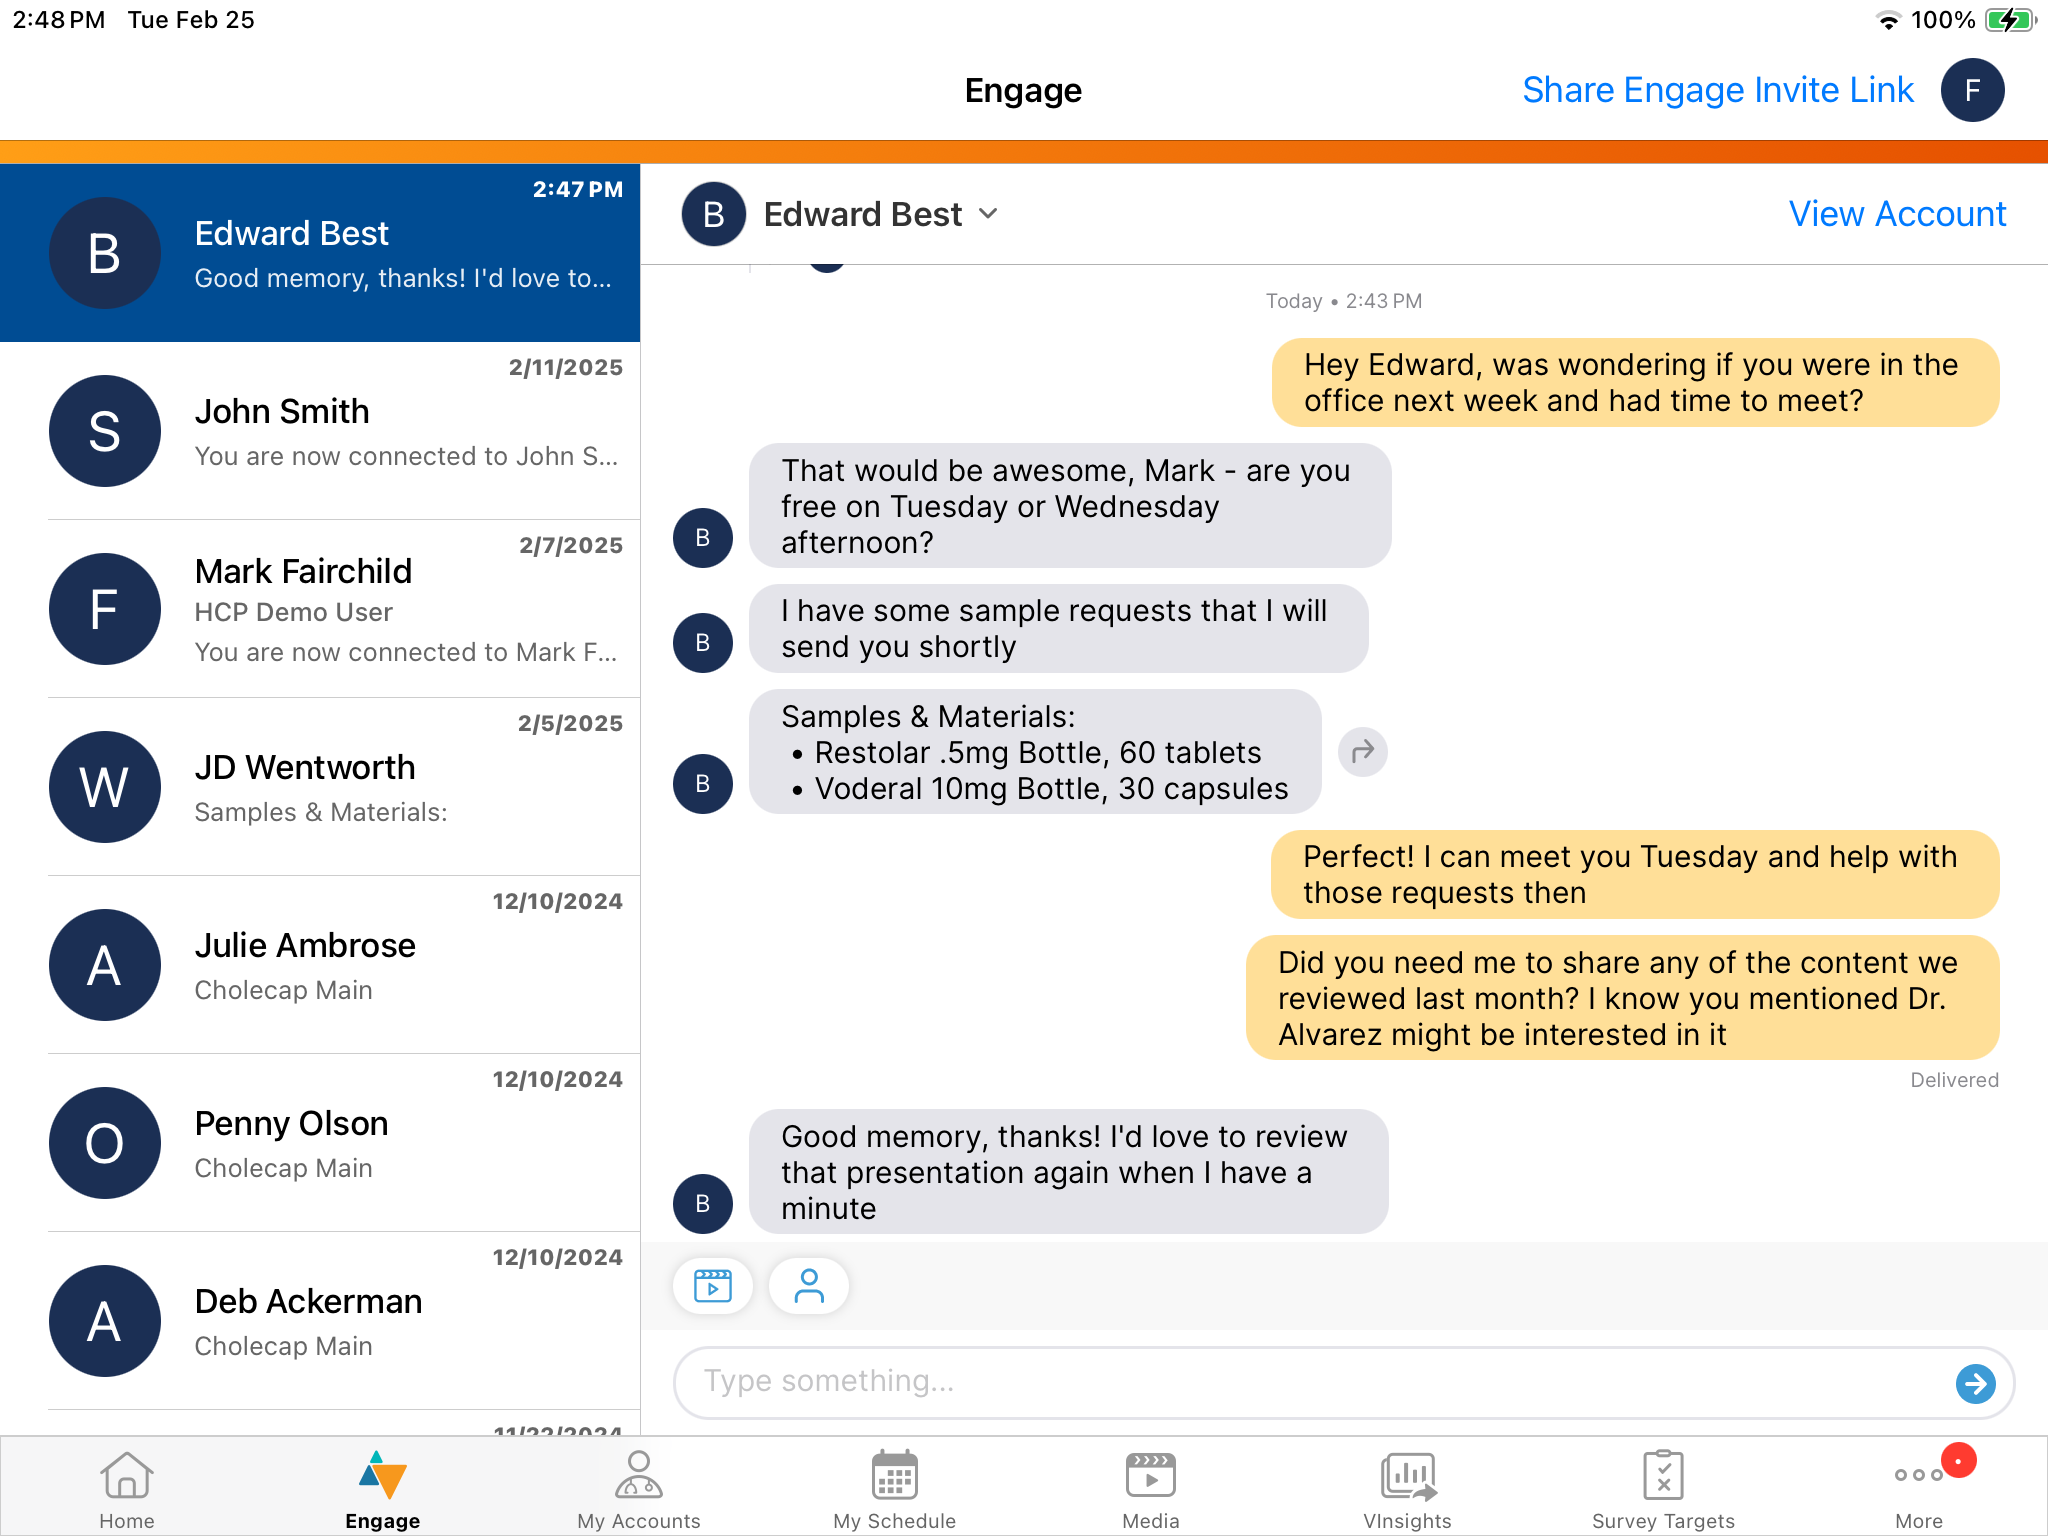
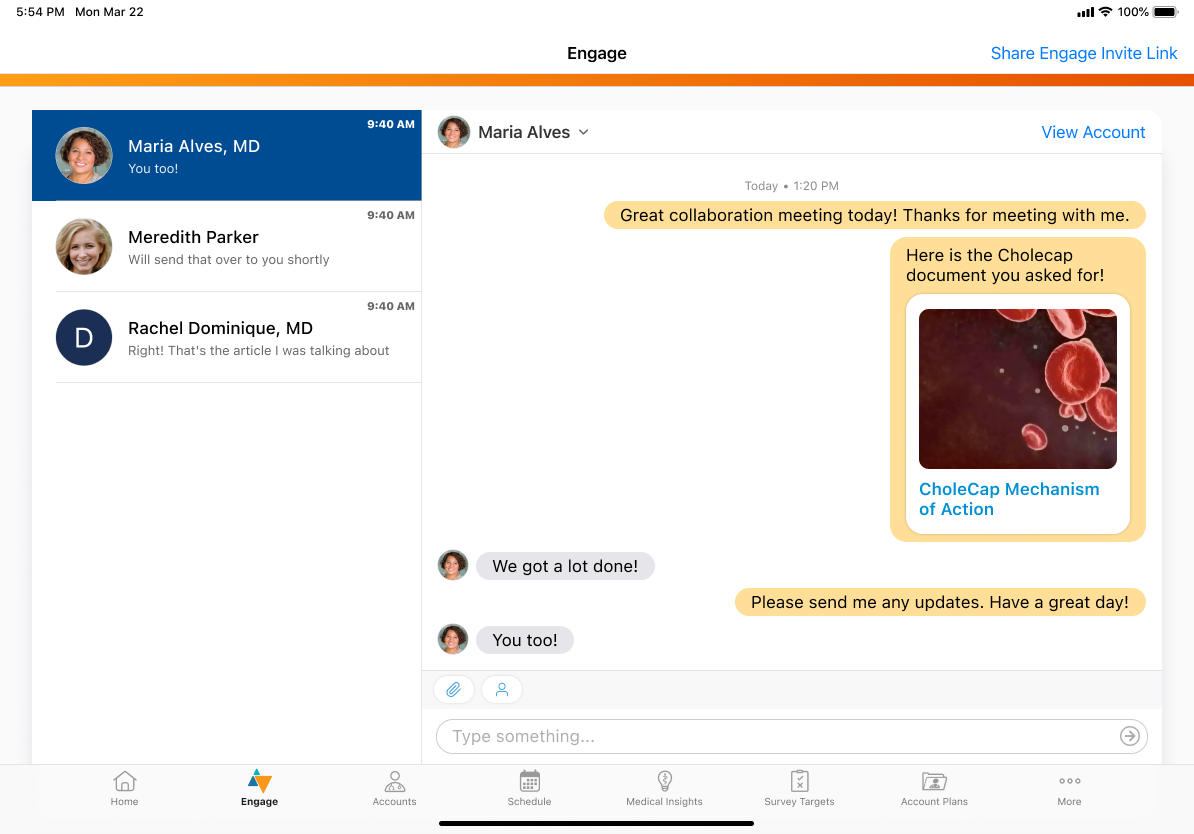
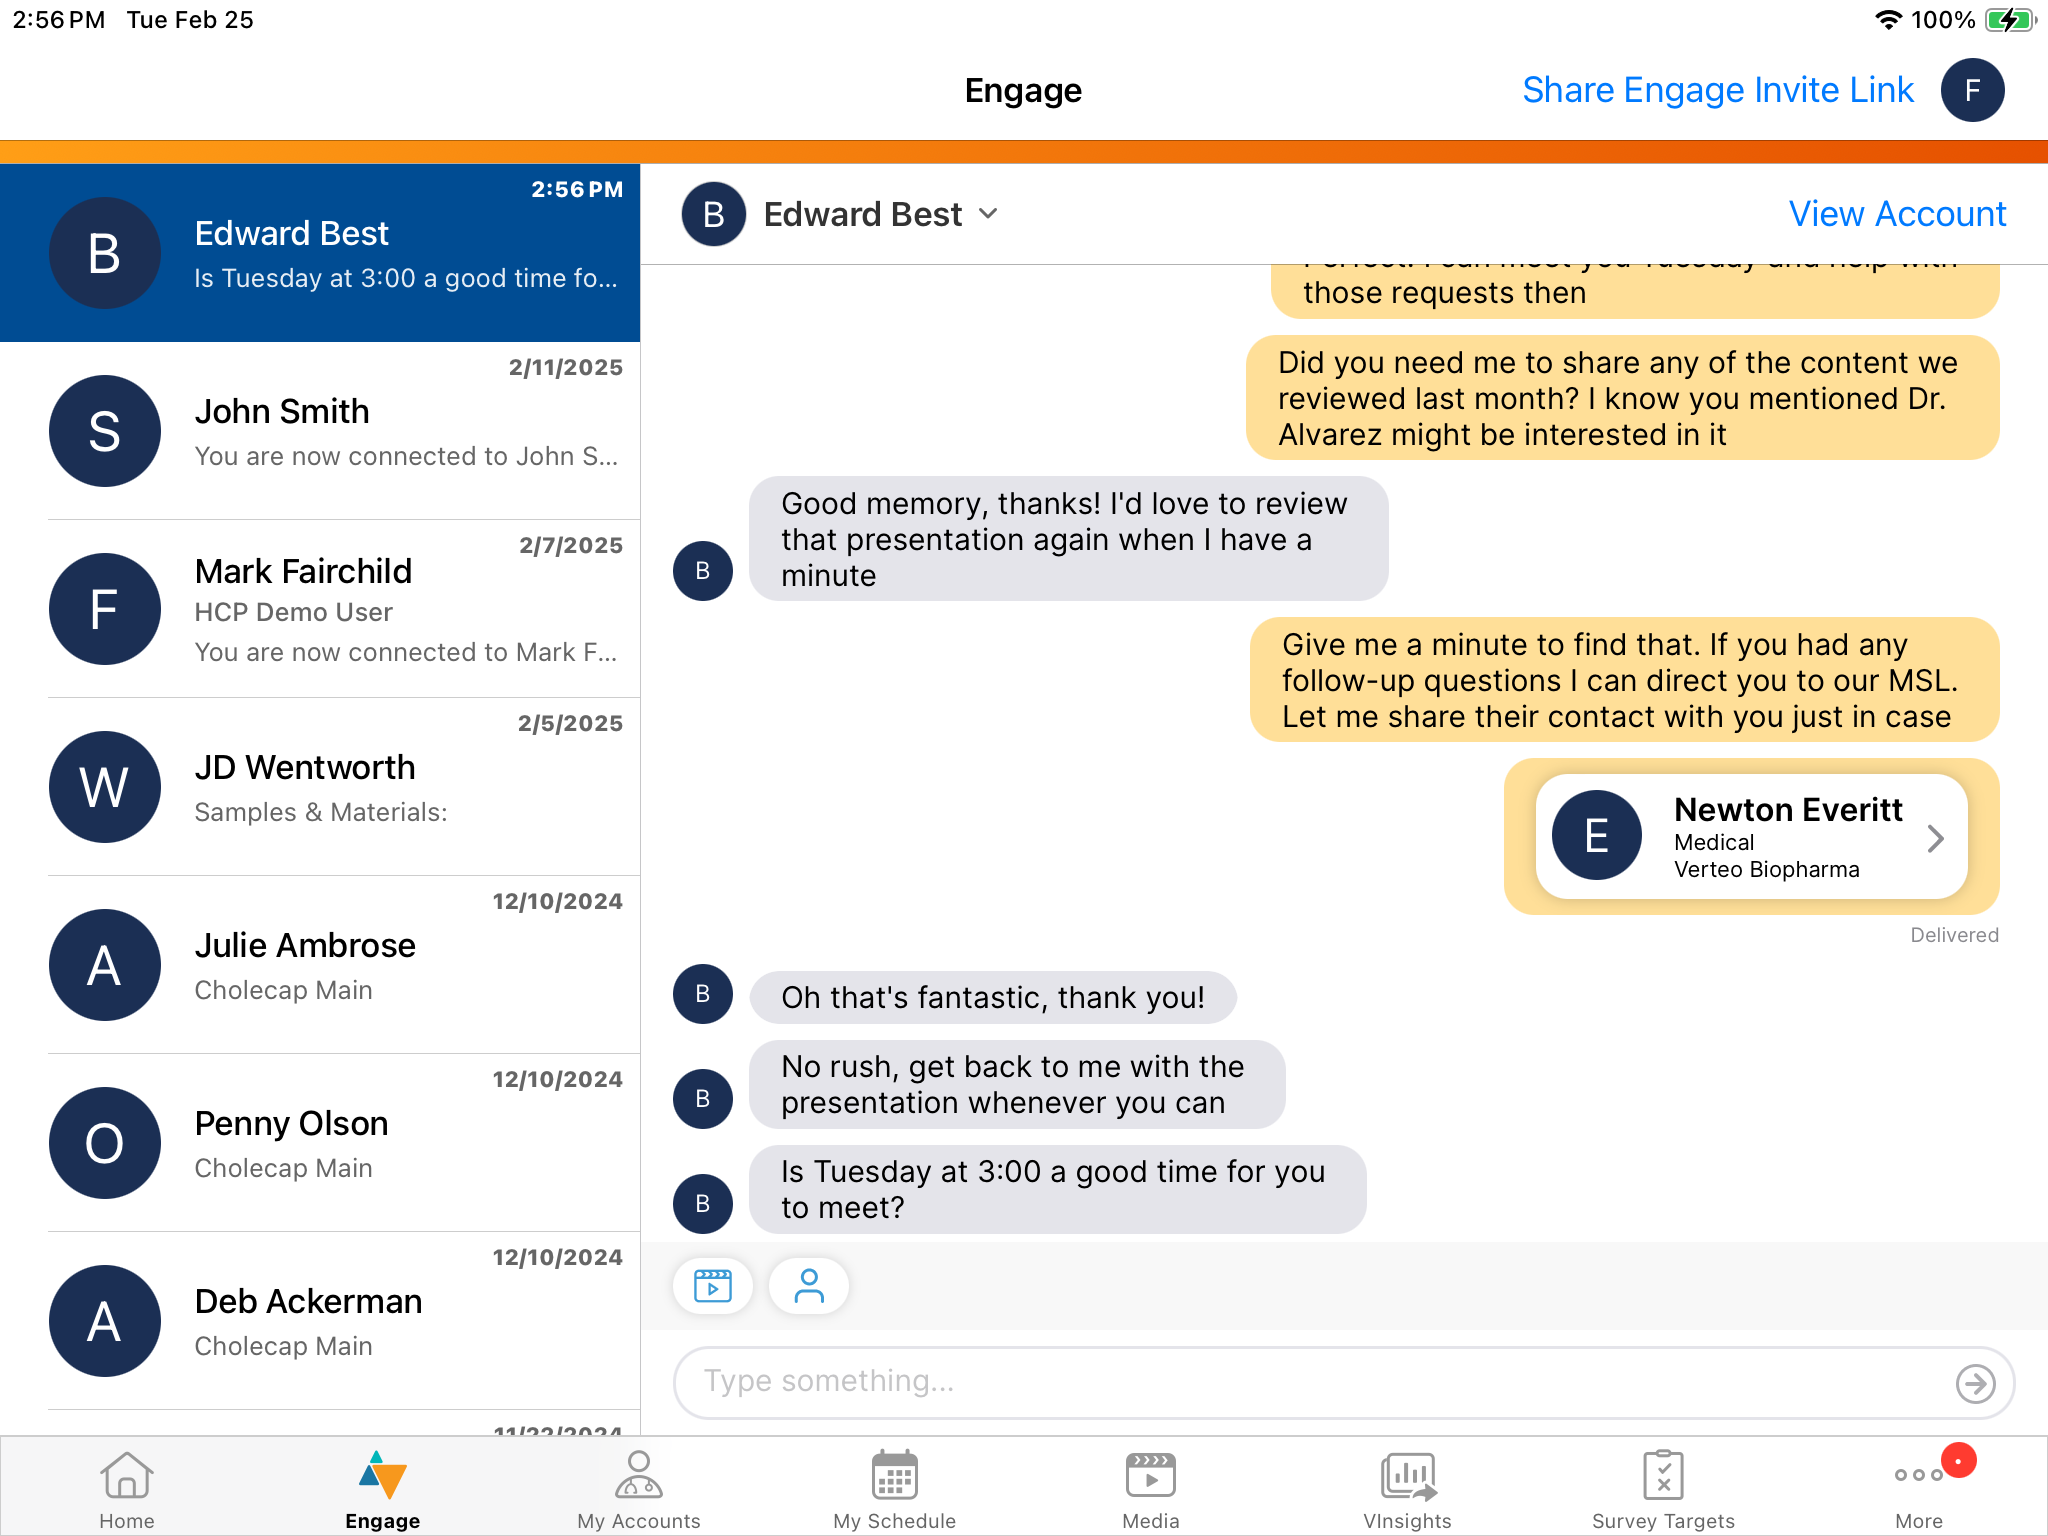
In the Engage tab, users can view their Engage chat threads, and chat with connected CRM users and HCPs directly from CRM. Users must have an active internet connection to load chat threads, and to send and receive chat messages. In a chat thread, users can:
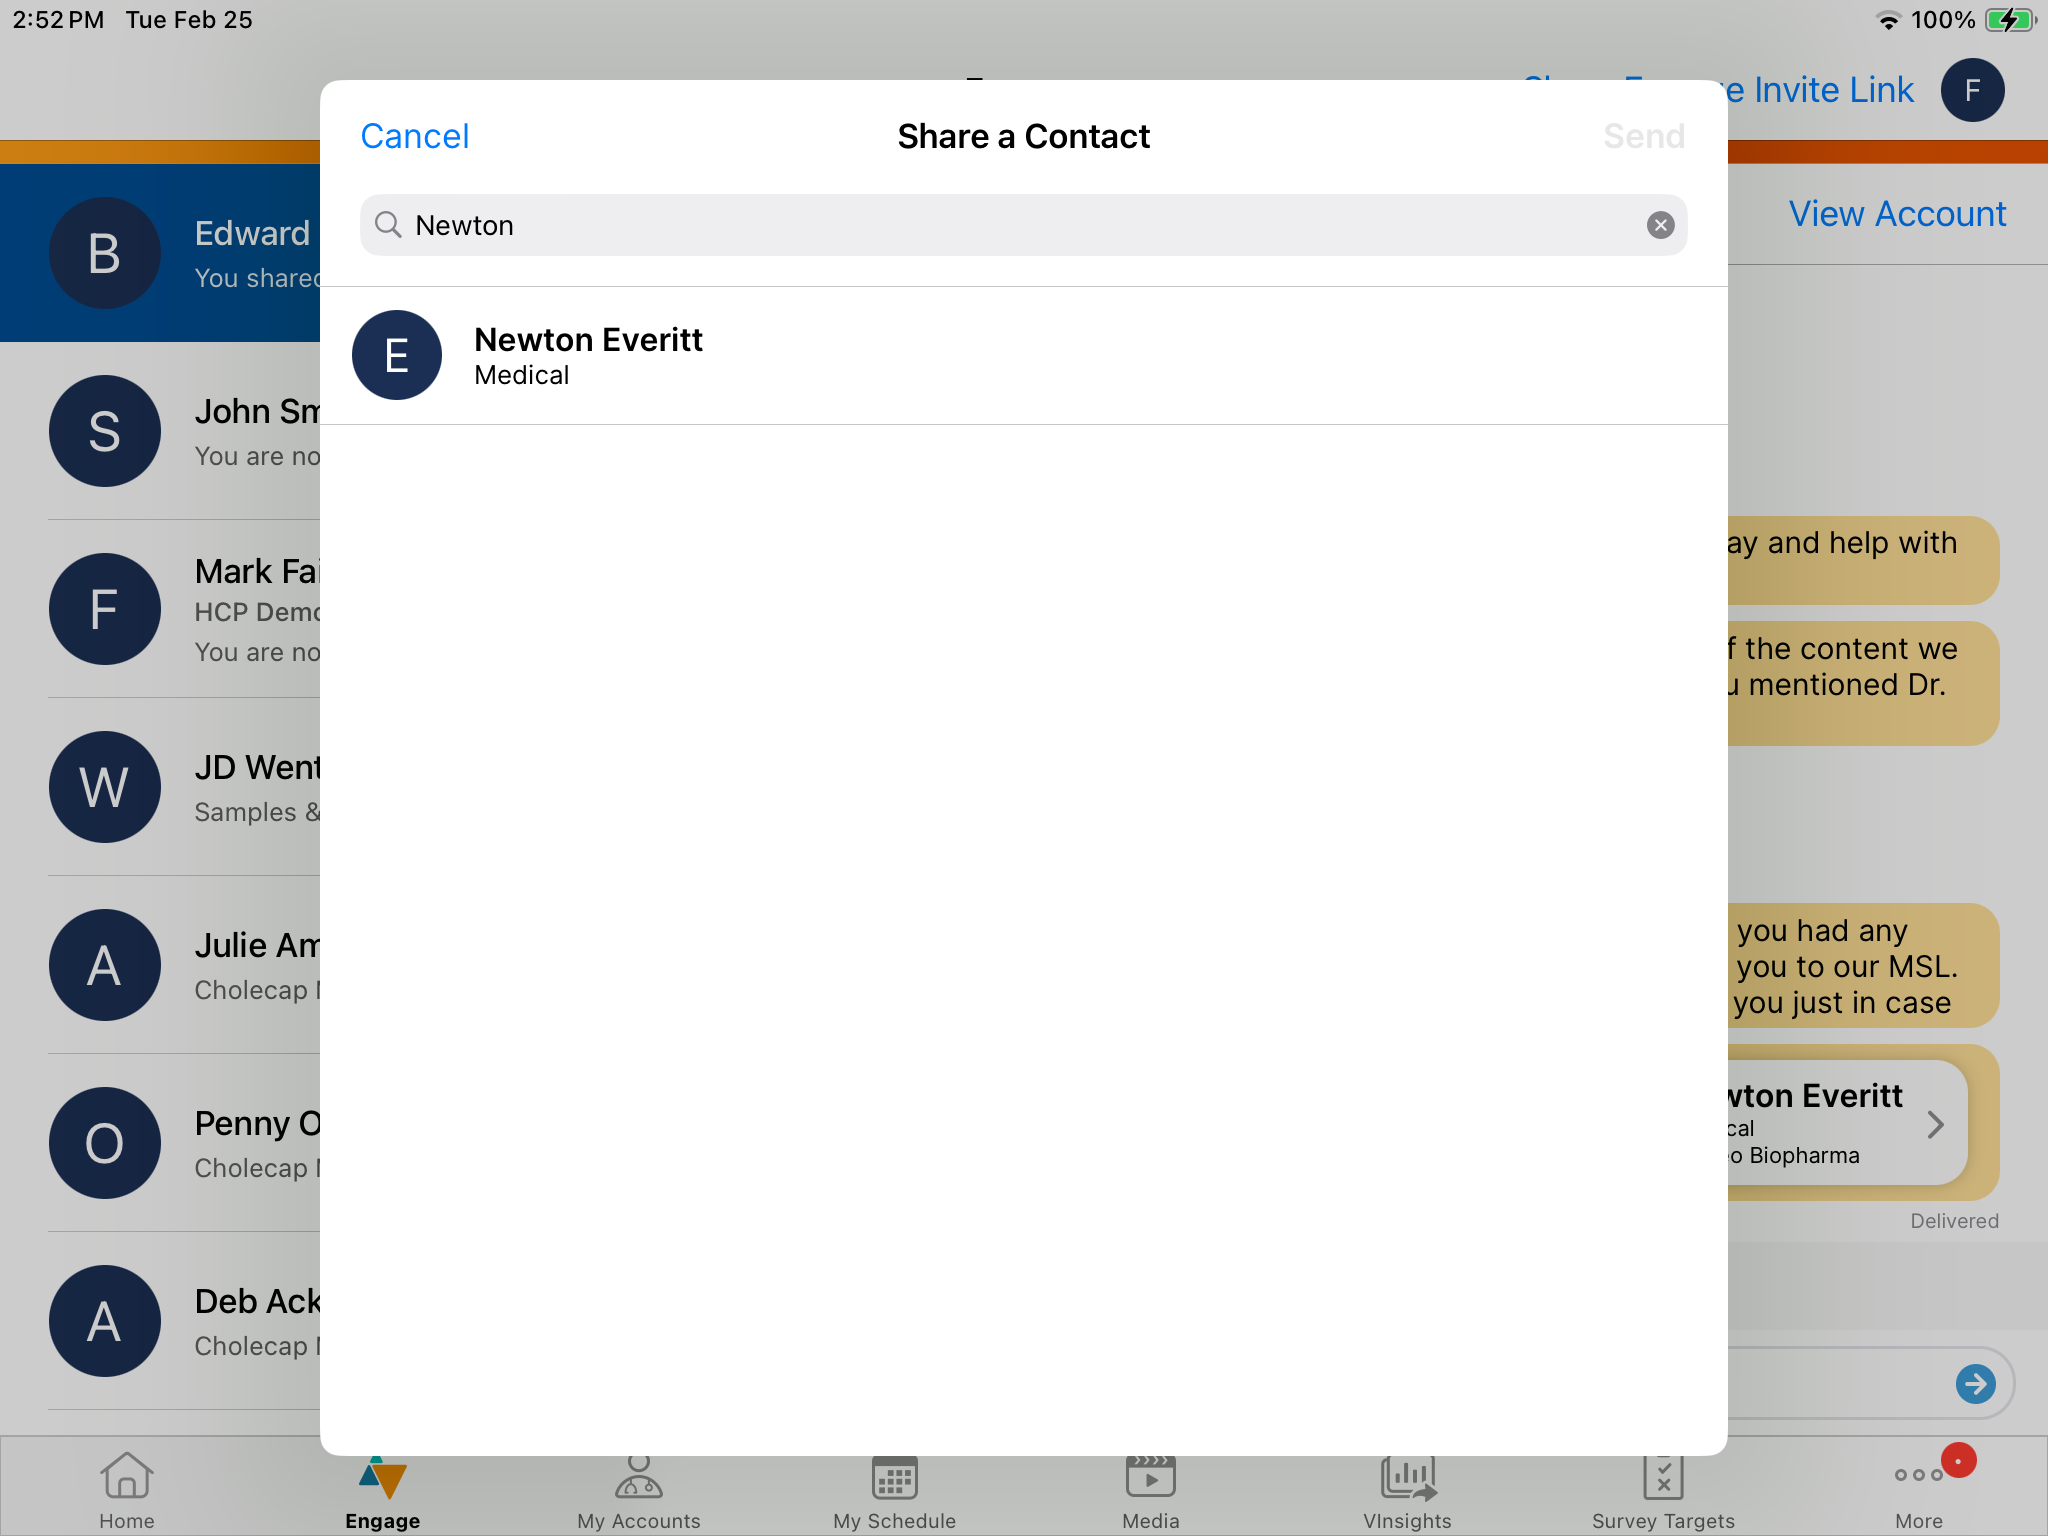
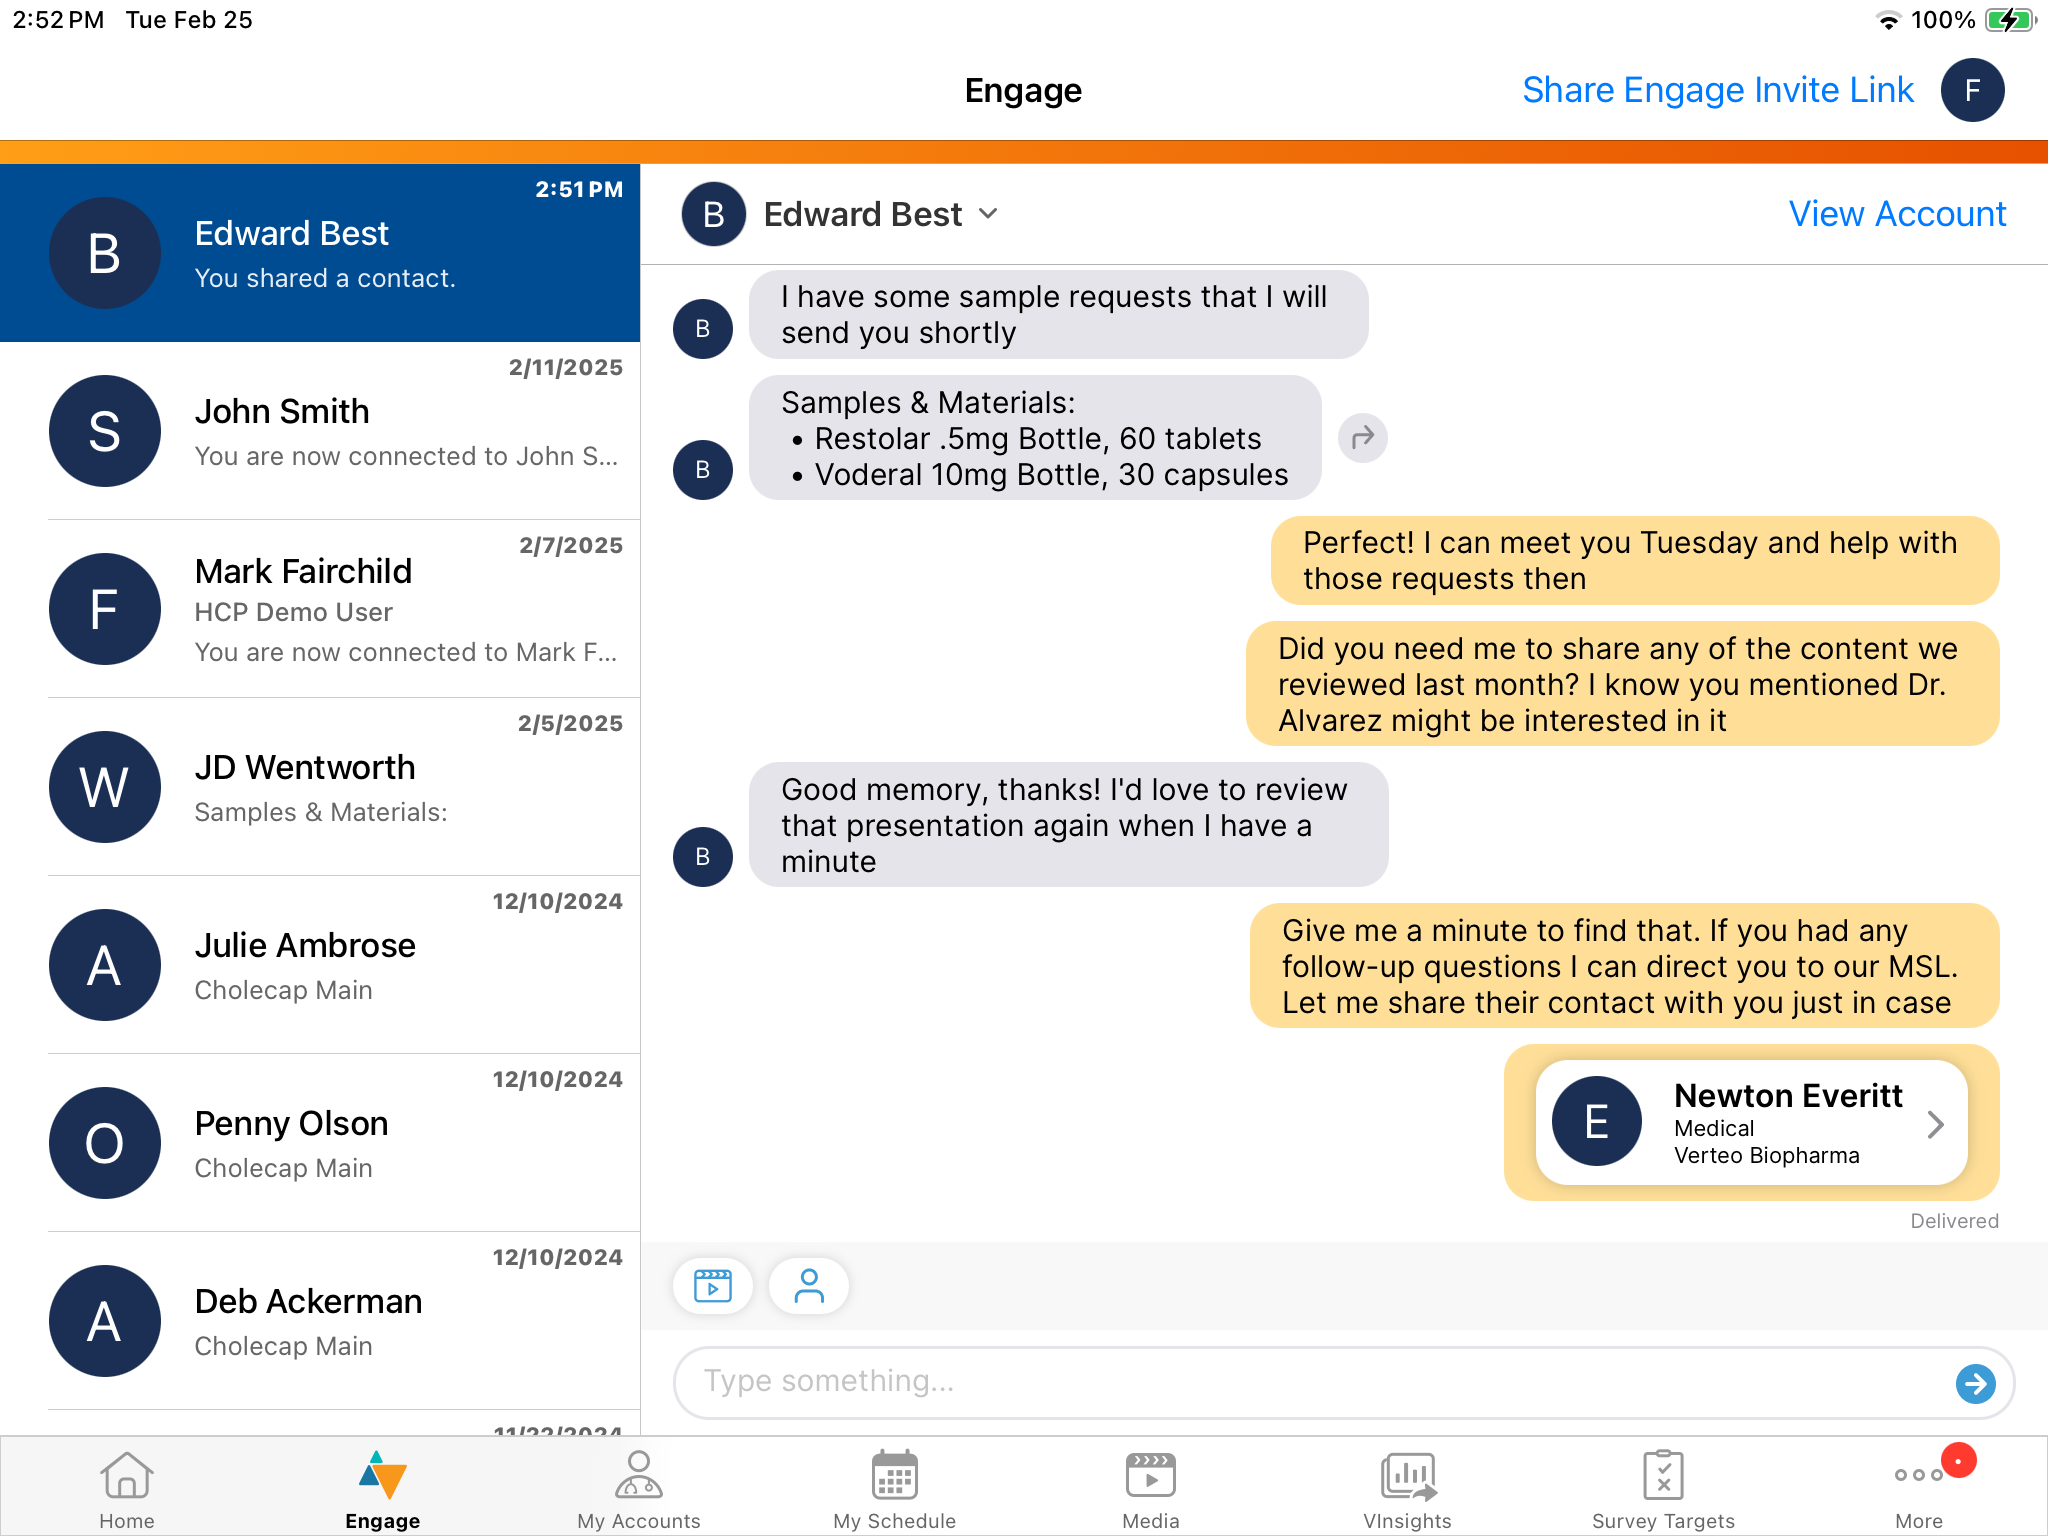
- Share contacts
- Send approved content

- Send web links for content. See Sending Auto-Published CLM Content via Web Link or QR Code® and Sending Websites via Web Link or QR Code® for more information.
- Receive requests for samples and materials
- Forward messages. See Copying and Forwarding Chat Messages in Engage Connect for more information.
- Select View Account to display the account record associated with the HCP connection . The View Account button does not display if an account record associated with the HCP connection does not exist.
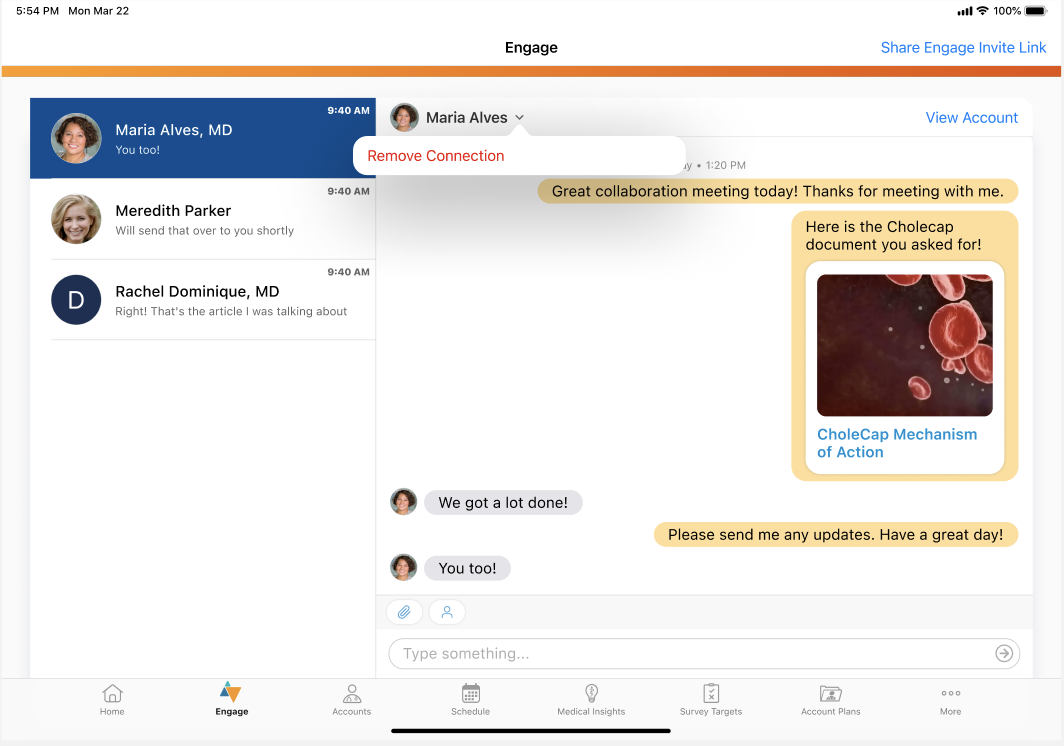
- To disconnect from an HCP connection, select the HCP's name from the chat thread header and select Remove Connection. The chat thread becomes inactive. To reconnect after removing a connection, select the HCP's name from the chat thread header and select Connect. The HCP receives an in-app notification and an email notification informing them of the connection invite.
A badge counter displays on the Engage tab when users receive new chat messages.
If users have push notifications enabled, they also receive a push notification for each new message.
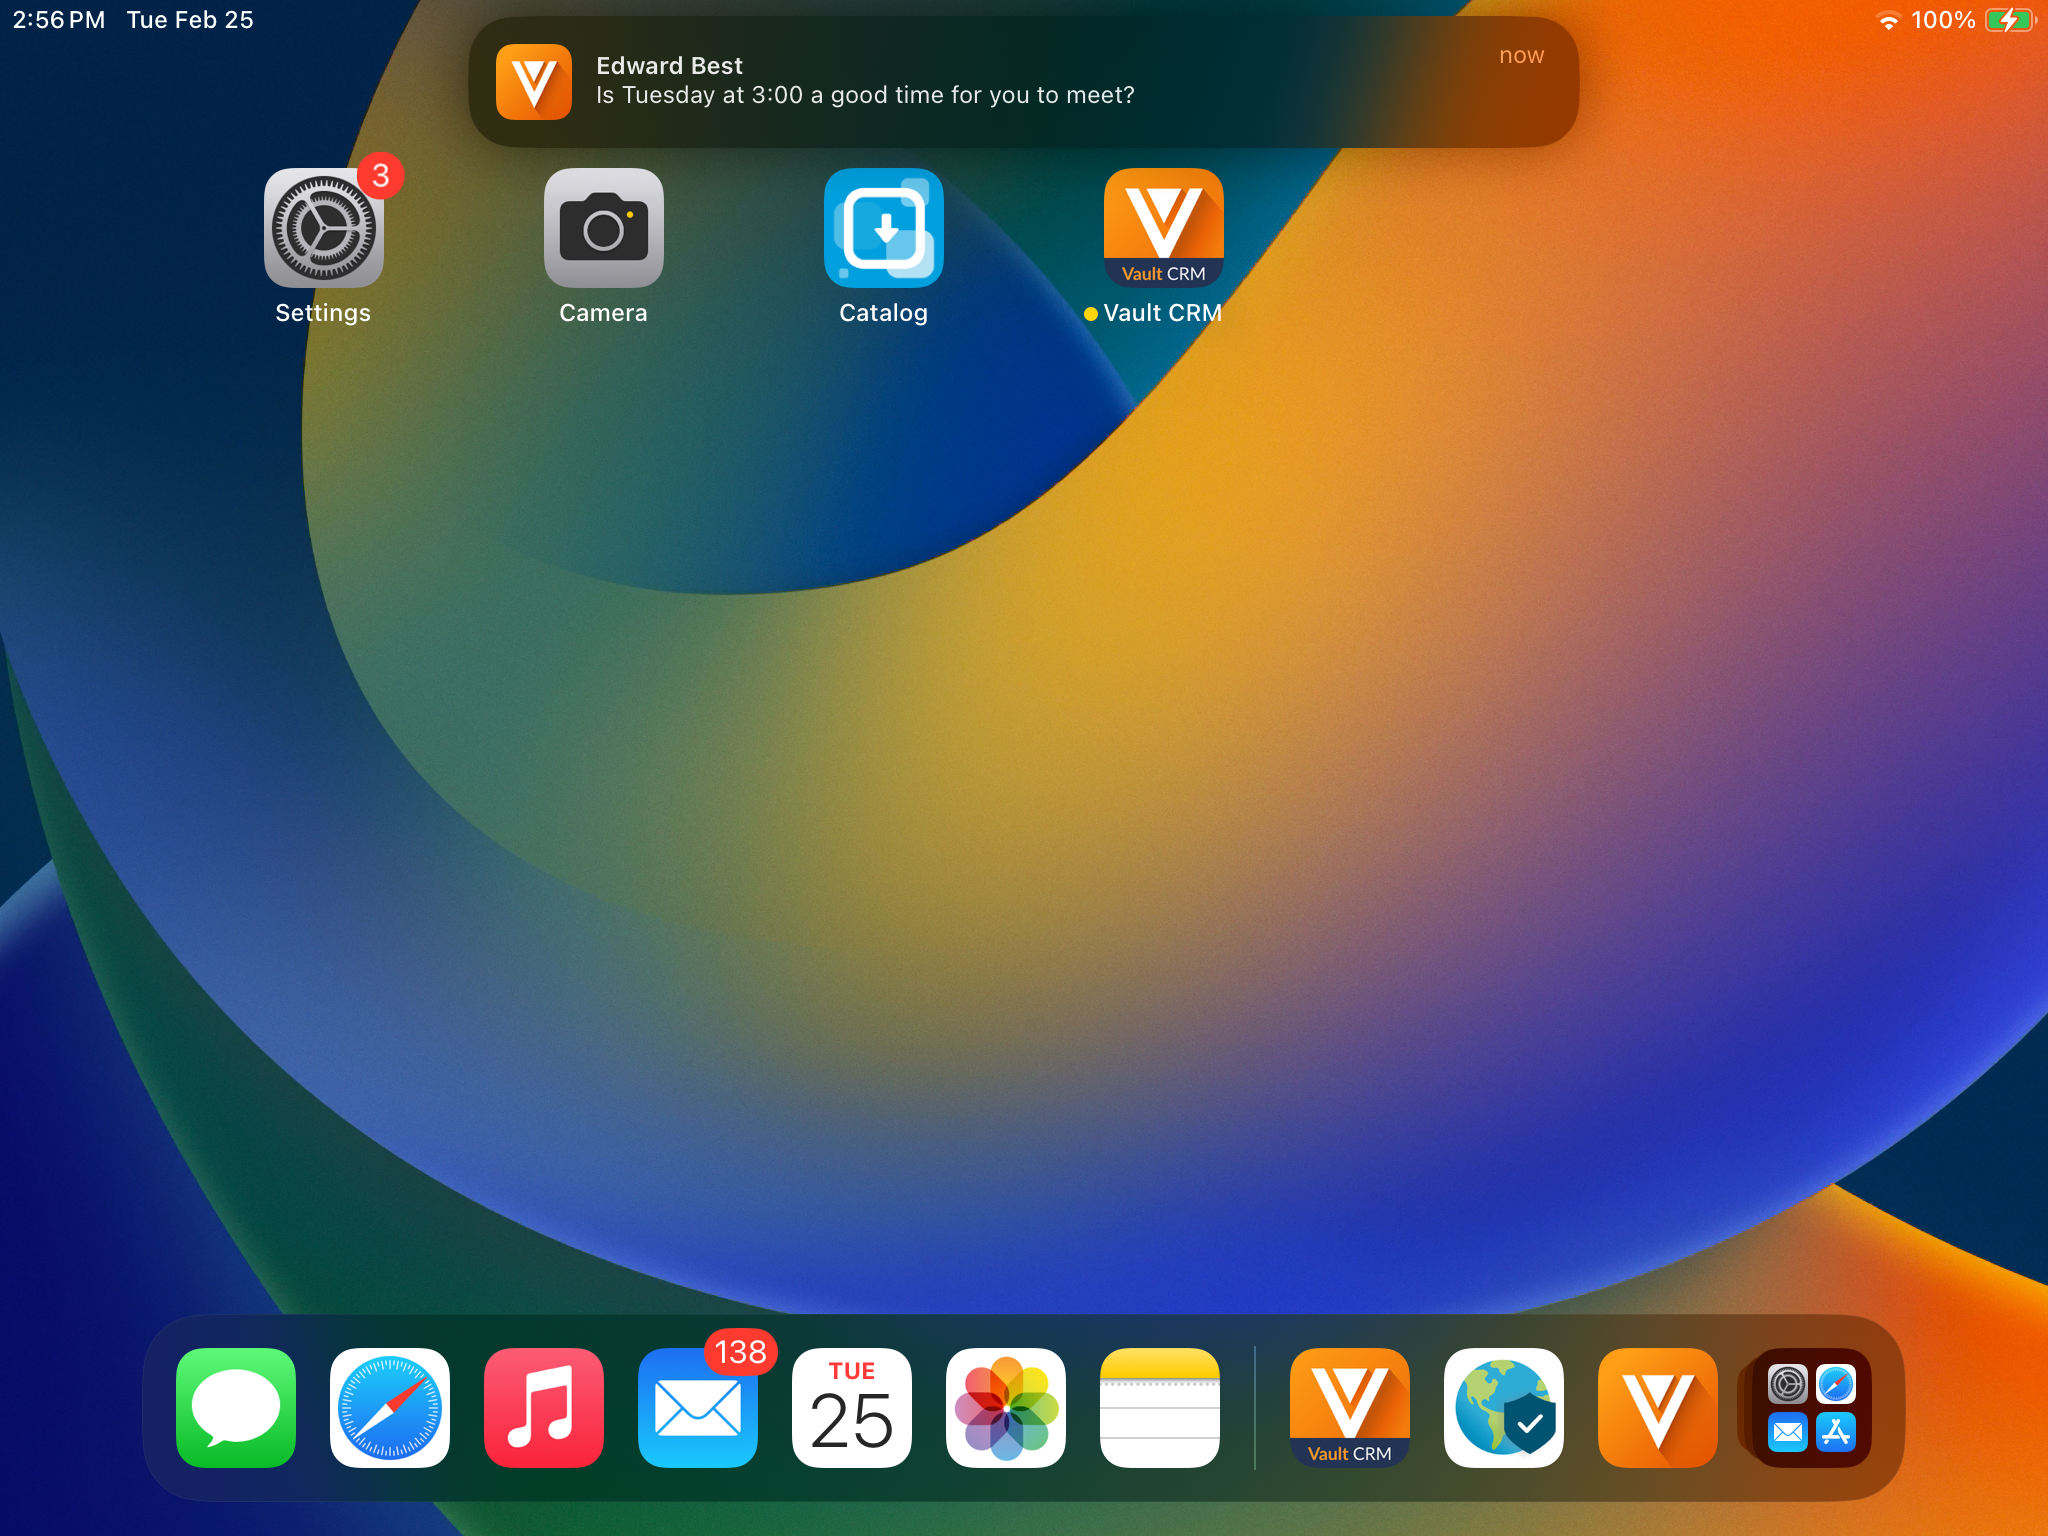
Selecting a push notification displays the chat thread for the new message.
Users can also navigate to a specific chat thread from the Engage profile indicator on an account. See Displaying the Engage Profile Indicator on Accounts for more information.
Customers can use Approved Notes to monitor these chat messages. See Importing Engage Connect Chat Logs into CRM as Chat Messages for more information.
