

Using the Timeline View
- iPad
- Browser
To aid in planning calls and to view account activity, users can view historical data in a timeline. This is viewed from the Account Detail page. The Timeline button displays in the Account header. Selecting the button displays the Timeline view in full screen.
Ensure initial configuration is complete to use this functionality.
Using the Timeline View
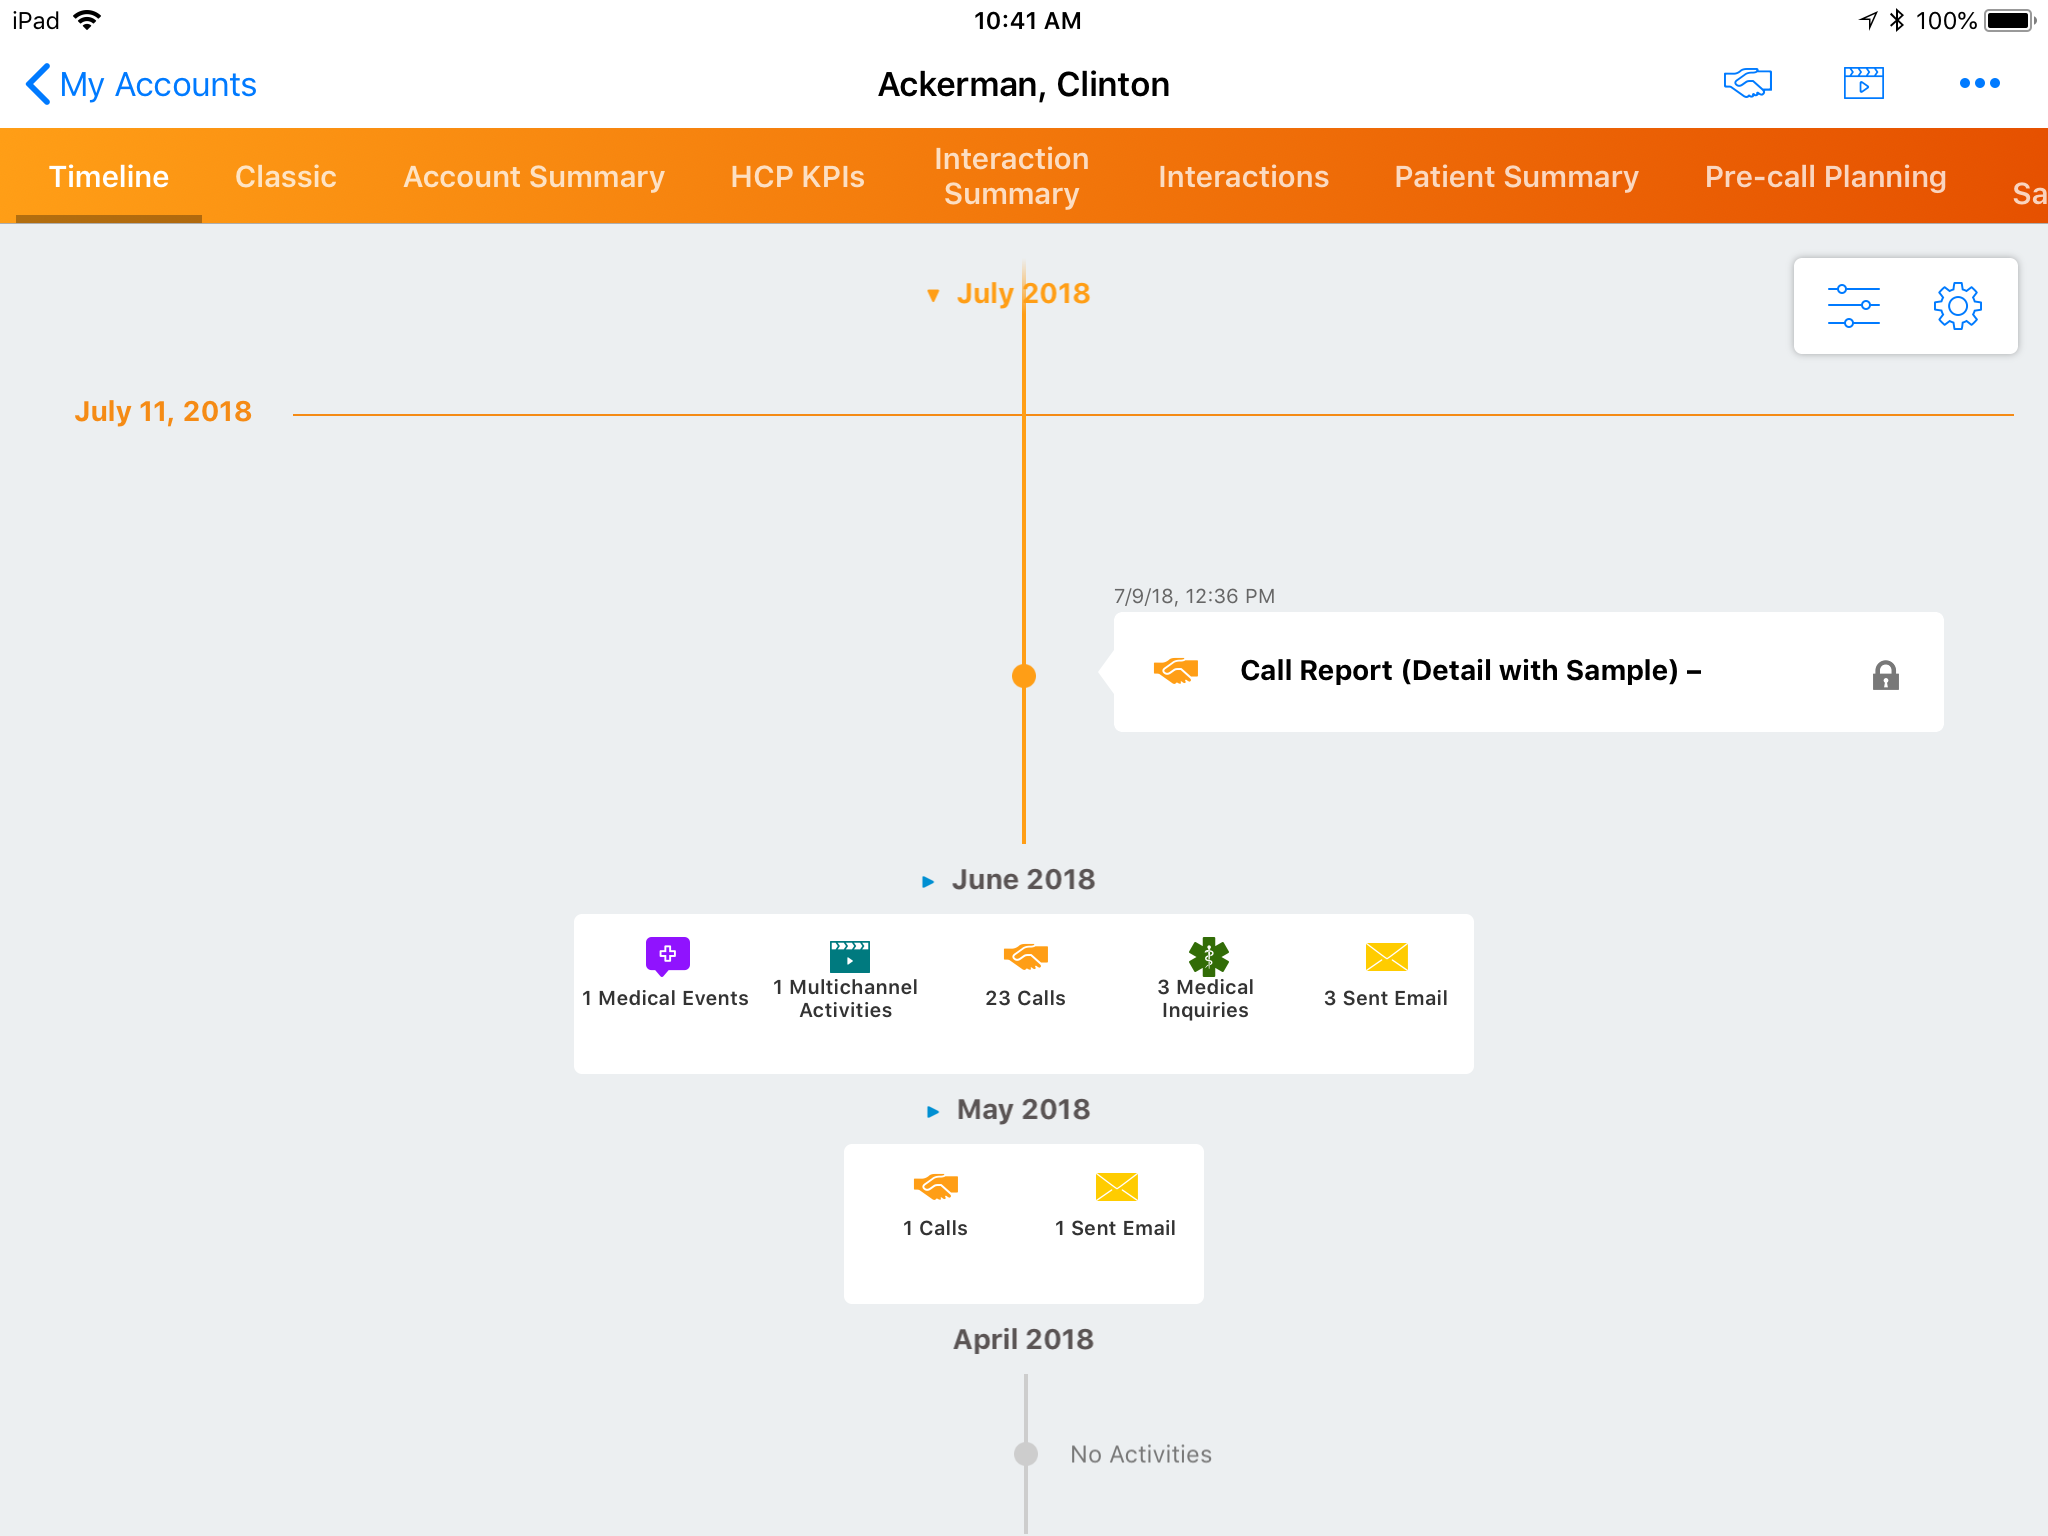
Activities in the Timeline display in reverse chronological order with the newest activities displaying first. Up to three months of historical activity and one month of planned activity displays by default. Users can swipe up or down on mobile devices to dynamically load three additional months of data at a time. Days in the Timeline display in a descending order while activities display in ascending order.
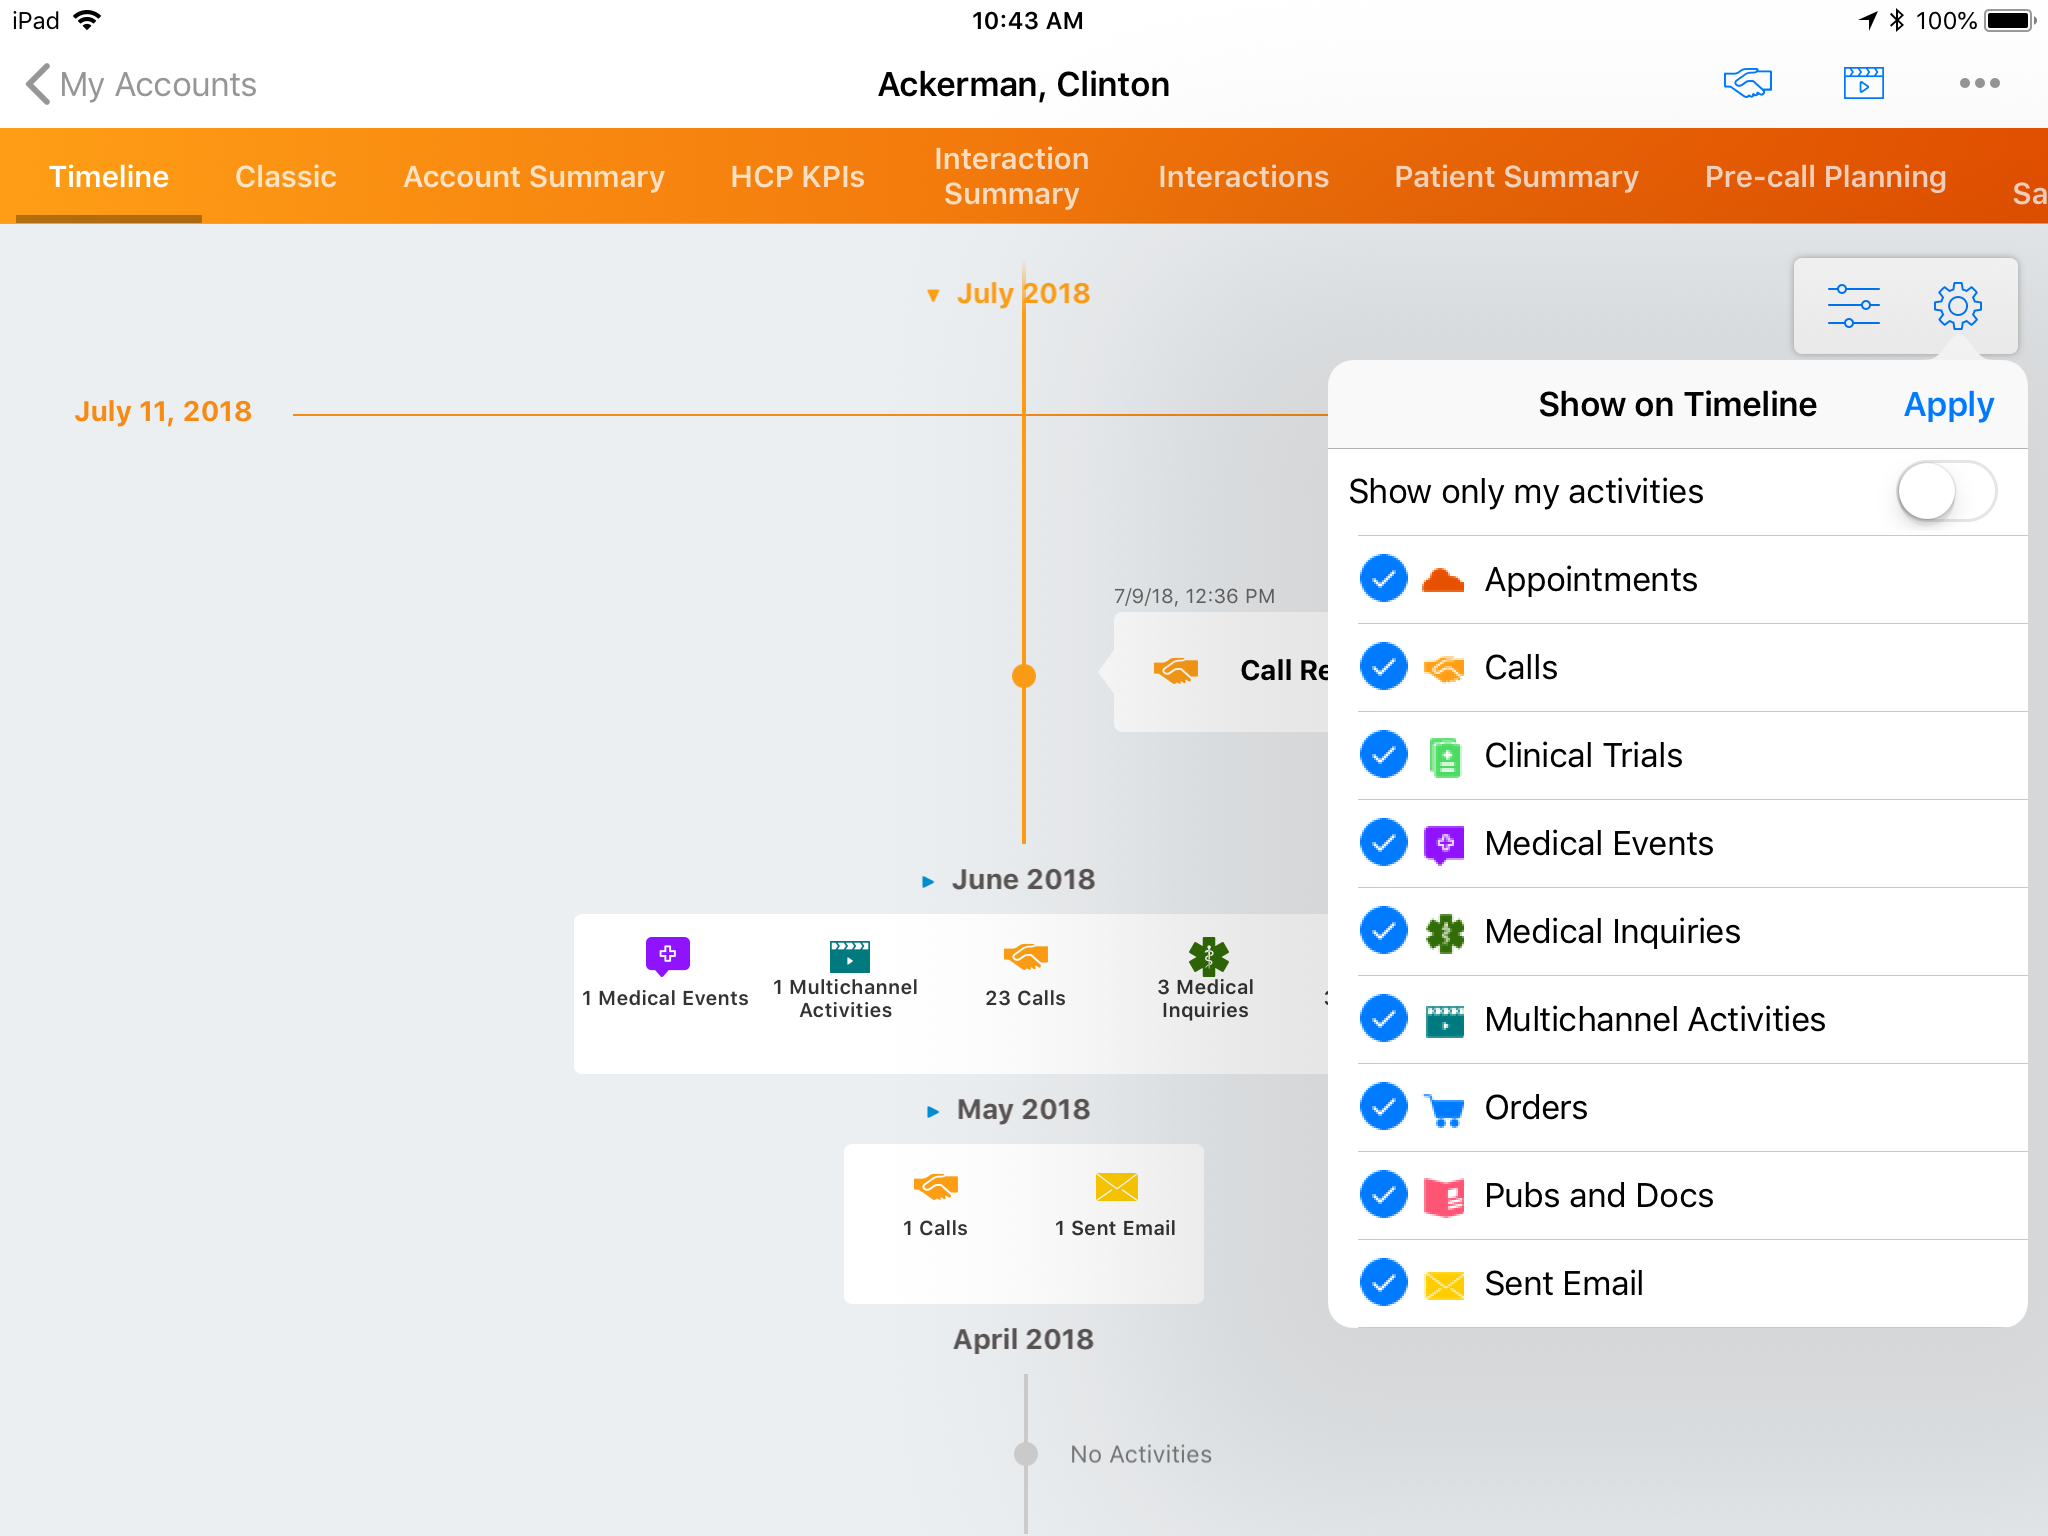
Activity types display if the user has Read access to the Activity object and the appropriate page layout contains the corresponding zvod marker field. Users can select which type of activities to display by selecting the Configure button.
The following Activity Types are available to display in the Timeline:
|
Activity Type |
Marker Field |
Associated Object |
|---|---|---|
|
Call |
zvod_Timeline_Calls_vod |
Call2_vod |
|
Sent Email |
zvod_Timeline_Email_vod |
Sent_Email_vod |
|
Events Management Events |
zvod_Timeline_ME_vod |
Medical_Event__vod (EM events are included via the associated Medical Event) |
|
Medical Events |
zvod_Timeline_ME_vod |
Medical_Event_vod (includes associated EM_Event_vod) |
|
Medical Inquiries |
zvod_Timeline_MI |
Medical_Inquiry_vod |
|
Calendar Events |
zvod_Timeline_Events_vod |
Event |
|
Orders |
zvod_Timeline_Orders_vod |
Order_vod |
|
Inventory Monitorings |
zvod_Timeline_IM_vod |
Inventory_Monitoring_vod |
|
Sent Messages |
zvod_Timeline_Message_vod |
Sent_Message_vod |
The default set of available activities can be configured by account record type. For example, HCPs can display Approved Emails activities while Pharmacies can display orders. Sent email displays only if an open or click event is created.
Displaying Activities by Record Type
The Account_Overview_Layout_vod object contains record types mirroring those configured on the Account object. To display different activities by account record type (and profile), create unique page layouts and use page layout assignments to associate to the different record types and profiles. When accessing the Timeline View, the system matches the account record type with the record type in the Account_Overview_Layout_vod object and displays the activities on the appropriate page layout. This behavior works if you use custom account record types as well.
To view Detailed Product information for the Call in the Timeline, add the zvod_Detailing_vod marker field to the Call page layout.
In addition to the page layout configuration, a VMobile Object Configuration record must be active for the Account_Overview_Layout_vod object.
|
Object |
Type |
Metadata Only |
Device |
Active |
|---|---|---|---|---|
|
Account_Overview_Layout_vod |
Full Sync |
TRUE |
iPad_vod |
TRUE |
| Email_Activity_vod | Related to Top Level | TRUE | iPad_vod | TRUE |
Users can select an activity in the Timeline to expand and display more details. All activities are displayed collapsed by default.
Users can display a summary of activities by month and expand the month to display each activity on the Timeline. There is a summary and detail mode for each month. The summary mode displays the count of each activity type occurring during that month.
Account Timeline Activity Details
To make it easier to view the details of an activity on the timeline, users can select the activity from the timeline and navigate to the detail screen of the activity. Activity types include the following:
- Calls
- Sent Emails
- Sent Messages
- Events Management Events
- Medical Events
- Medical Inquiries
- Calendar Events
- Orders
- Inventory Monitory
- Custom Activities
A View More link displays in the expanded view of the activity. Selecting this link navigates the user to the activity. Activities with a Submitted status that are unlocked, open in Edit mode. If the Activity is locked, it opens in View only mode.
Online, to navigate back to the Timeline, users must select the browser back button. If any changes are made to the activity, the Timeline is updated accordingly. For offline devices, select the Timeline link or back arrow. The Timeline displays in the same place from where the user started for offline devices.
If users sync offline devices from the activity detail screen, navigation back to the Timeline is lost.
Enhanced Navigation on the Timeline View
The Timeline View has toggle buttons to make it easier for the user to navigate between Timeline View, Sphere of Influence, Account Hierarchy, and Account Summary/Formulary. Toggle buttons display on the Account Hierarchy, Sphere of Influence, Account Summary, and Formulary pages. The user can select these buttons to toggle the view of the current Account in the various pages.
A single icon displays for Account Summary/Formulary. If the user has both configured, a sub menu displays, allowing the user to select which icon to toggle to. If only one is configured, the user automatically navigates to that page.
Selecting any of the toggle buttons while in that respective page resets the view.
Toggle buttons display by default on iPad depending on the existing configuration of the Account Details page.
