

22R2.1 Functionality Guide
The Functionality Guide is intended for Sales Operations, Business Administrators, System Integrators, and others responsible for making decisions about what features are needed for end users to be successful and deciding which features work together with existing customer configurations.
CRM Desktop
Assembling Custom Presentations in the Veeva CRM Desktop App
To allow for additional training preparation ahead of the 22R2.1 release, this feature is available in the eval app.
Users can create and assemble customized presentations from the existing presentation slides in their media libraries to deliver specifically tailored messages to targeted accounts.
Users do not need an active internet connection to assemble custom presentations. Any custom presentations created offline automatically sync when the user connects to the internet.
A custom presentation is defined by the value Custom in the Type_vod picklist on the CLM_Presentation_vod object record.
This Type_vod value is set automatically and must not be modified. Admins should not add the Type_vod field to the CLM_Presentation_vod page layout where it is visible to end users.
Users can perform the following actions:
- Creating a custom presentation
- Making a copy of an existing read-only presentation
Read-only presentations are HQ presentations and cannot be created or deleted by users. The presentation window for a read-only presentation displays Read Only next to the slide counter.
- Making a copy of an existing custom presentation
- Deleting a custom presentation
Users cannot modify the content in the slides.
Enhanced sub-presentations are not supported with custom presentations in Veeva CRM on Desktop. Enhanced sub-presentations allow users to control the order of required slides in a sub-presentation along with the sub-presentation's target slide. When enhanced sub-presentations are enabled, users cannot create custom presentations.
Creating and Assembling Custom Presentations
When creating or assembling a custom presentation, users can add slides from other presentations with different products.
Creating a Custom Presentation
To create a custom presentation:
- Open presentations containing the slides for the custom presentation.
- Select the + button.
- Select and drag the appropriate slides from the open presentations to the blank custom presentation.
- Select the Edit menu to edit the slides or use the appropriate keyboard shortcuts.
- Drag and drop or copy and paste slides to reorder them, including multiple slides at a time.
- Select the File menu.
- Select Save.
- Enter the name, product, and language of the presentation and any desired labels. Selecting the Labels text field displays the Add Labels modal. See Labeling Presentations for more information.
Users on CRM Desktop (Mac) can also manage custom presentation labels when renaming the presentation.
- Select Save.
Users can create multiple custom presentations at the same time.
The Slide Sorter allows users to view all the slides in the presentation and easily rearrange the order of the slides. Users can switch between Normal View and the Slide Sorter from the button next to the slide counter.
Users must save the custom presentation before closing or navigating away from the custom presentation window.
When a user selects Apply Updates in the media library, they must review or discard the unsaved changes for each open presentation before they can continue. Once all the presentations are reviewed and saved, the media library syncs and applies the updates.
Duplicating an Existing Presentation
To make a copy of an existing presentation:
- Open the appropriate presentation and select the File menu. Alternatively, select the More Actions button for the presentation in the media library.
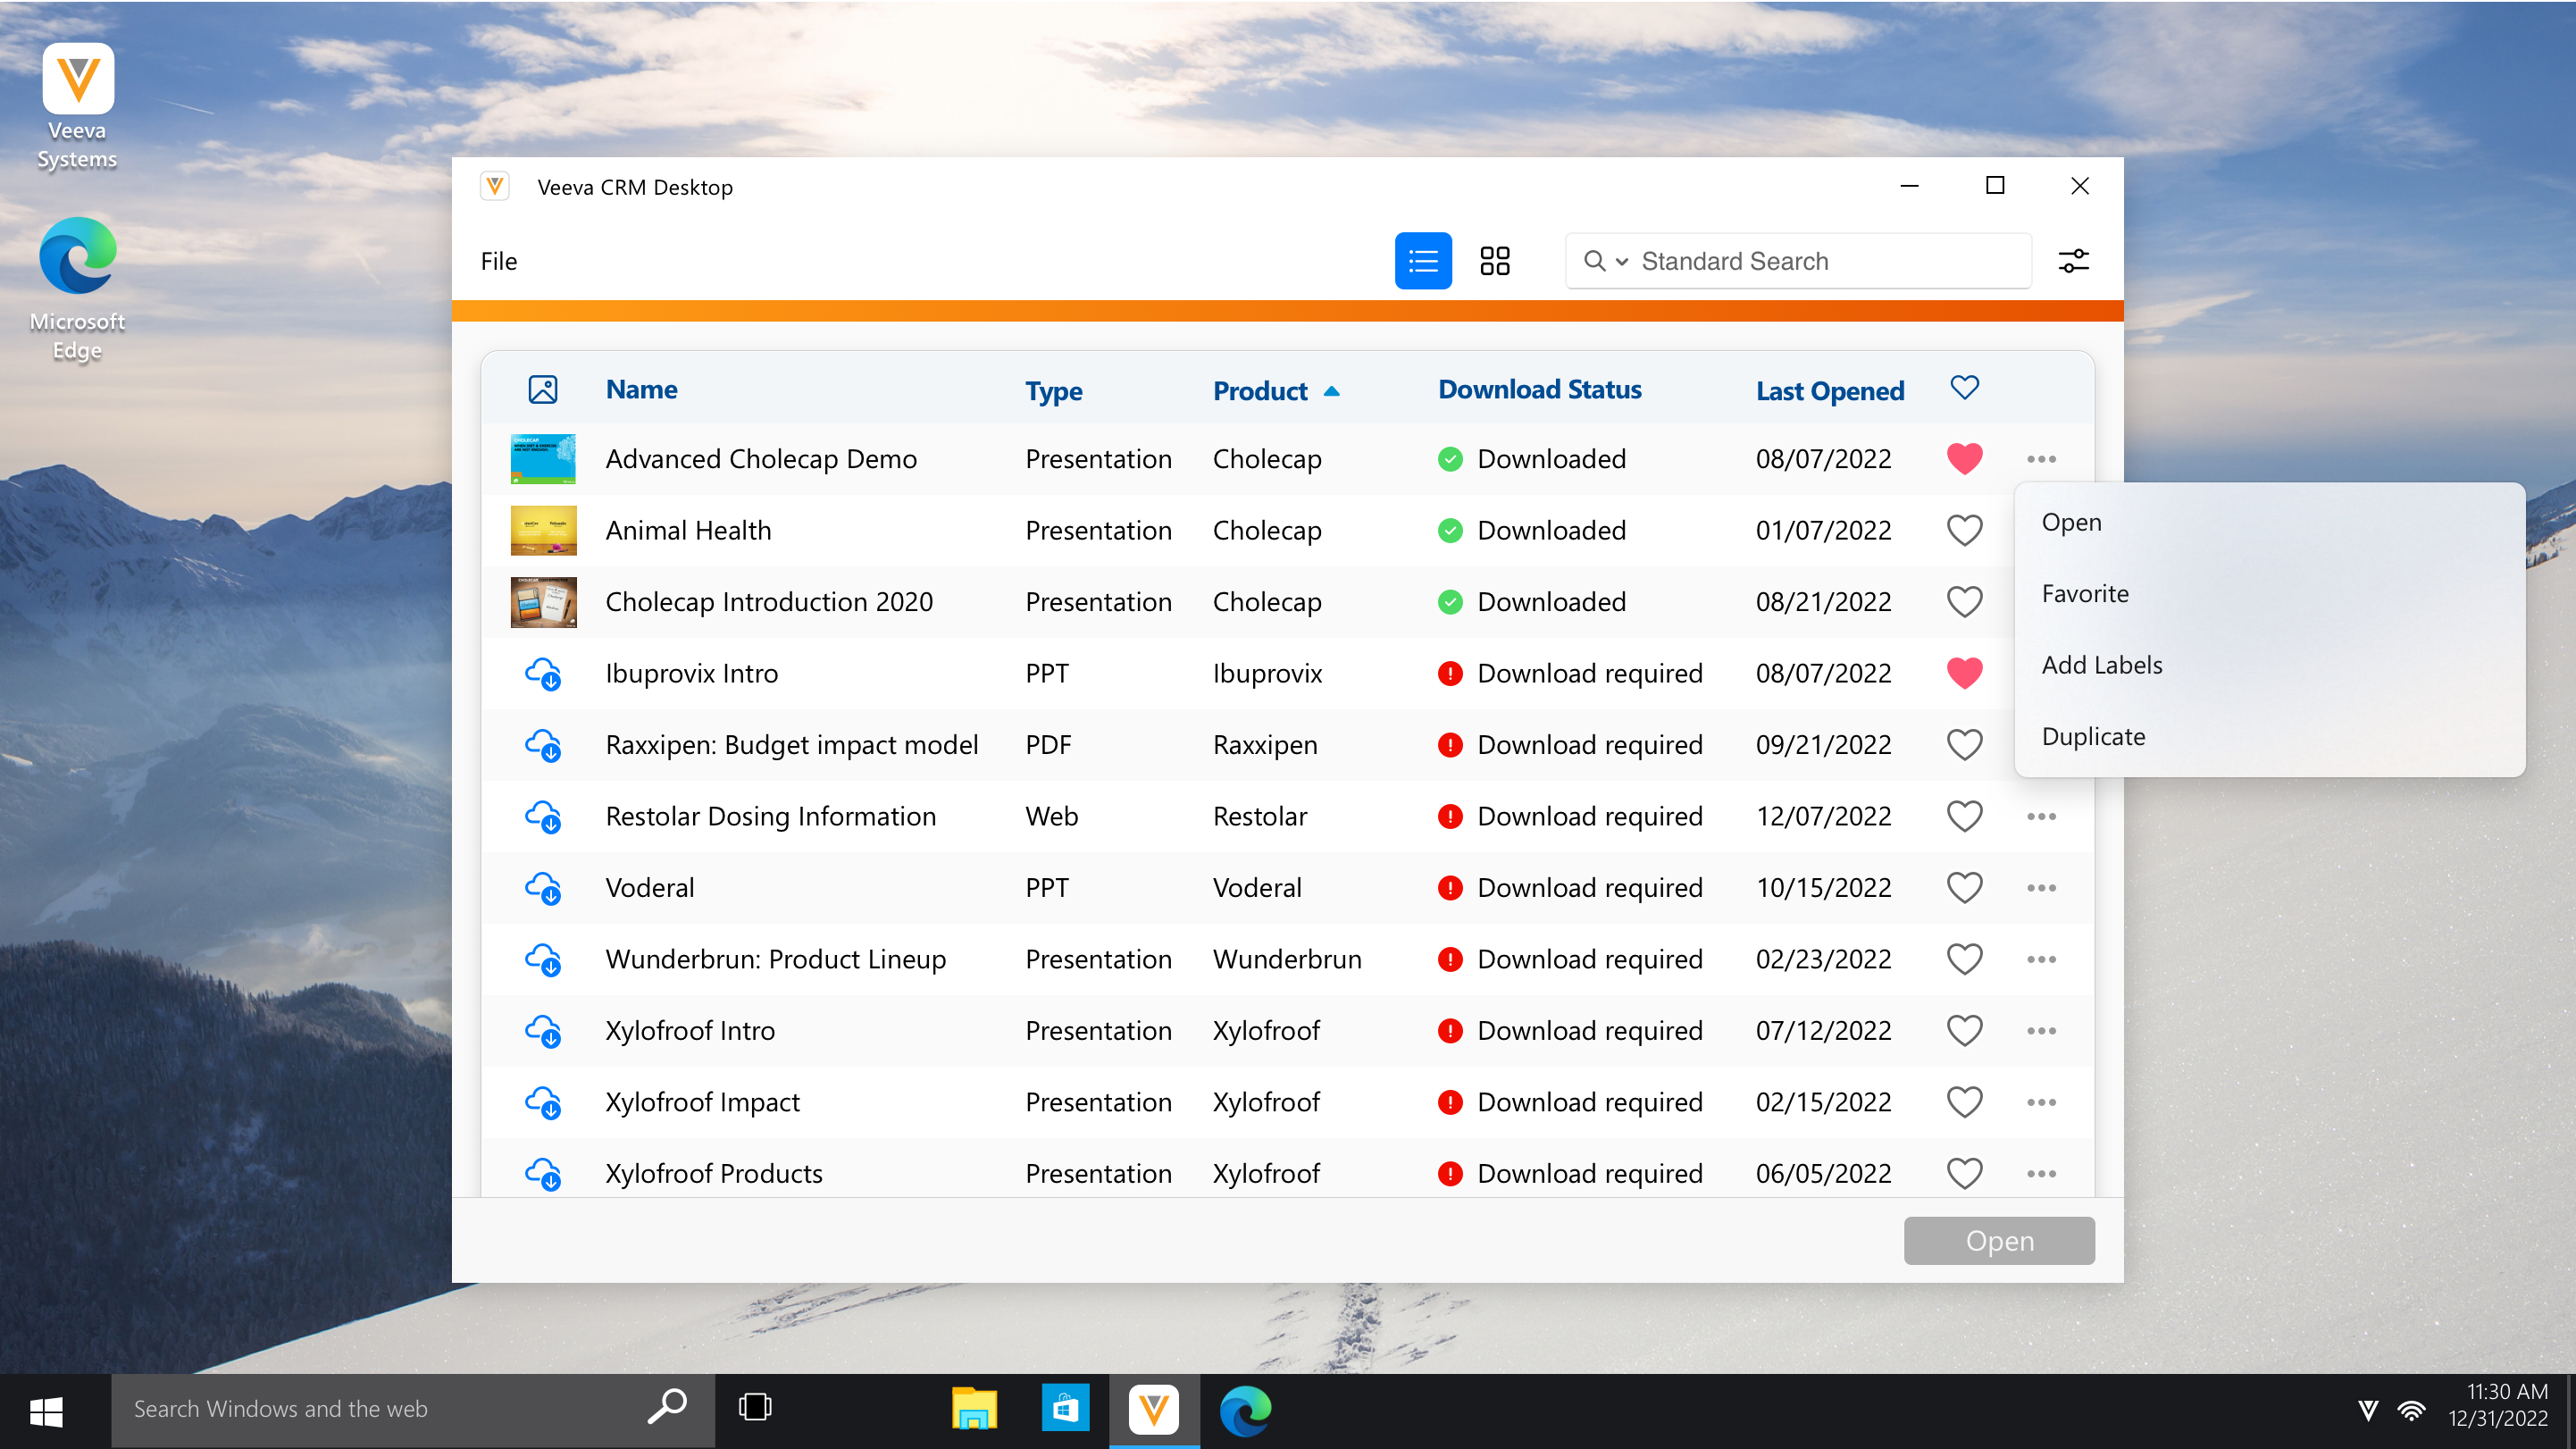
Users on the CRM Desktop (Windows) platform can also use the right-select context menu in the media library.
- Select Duplicate.
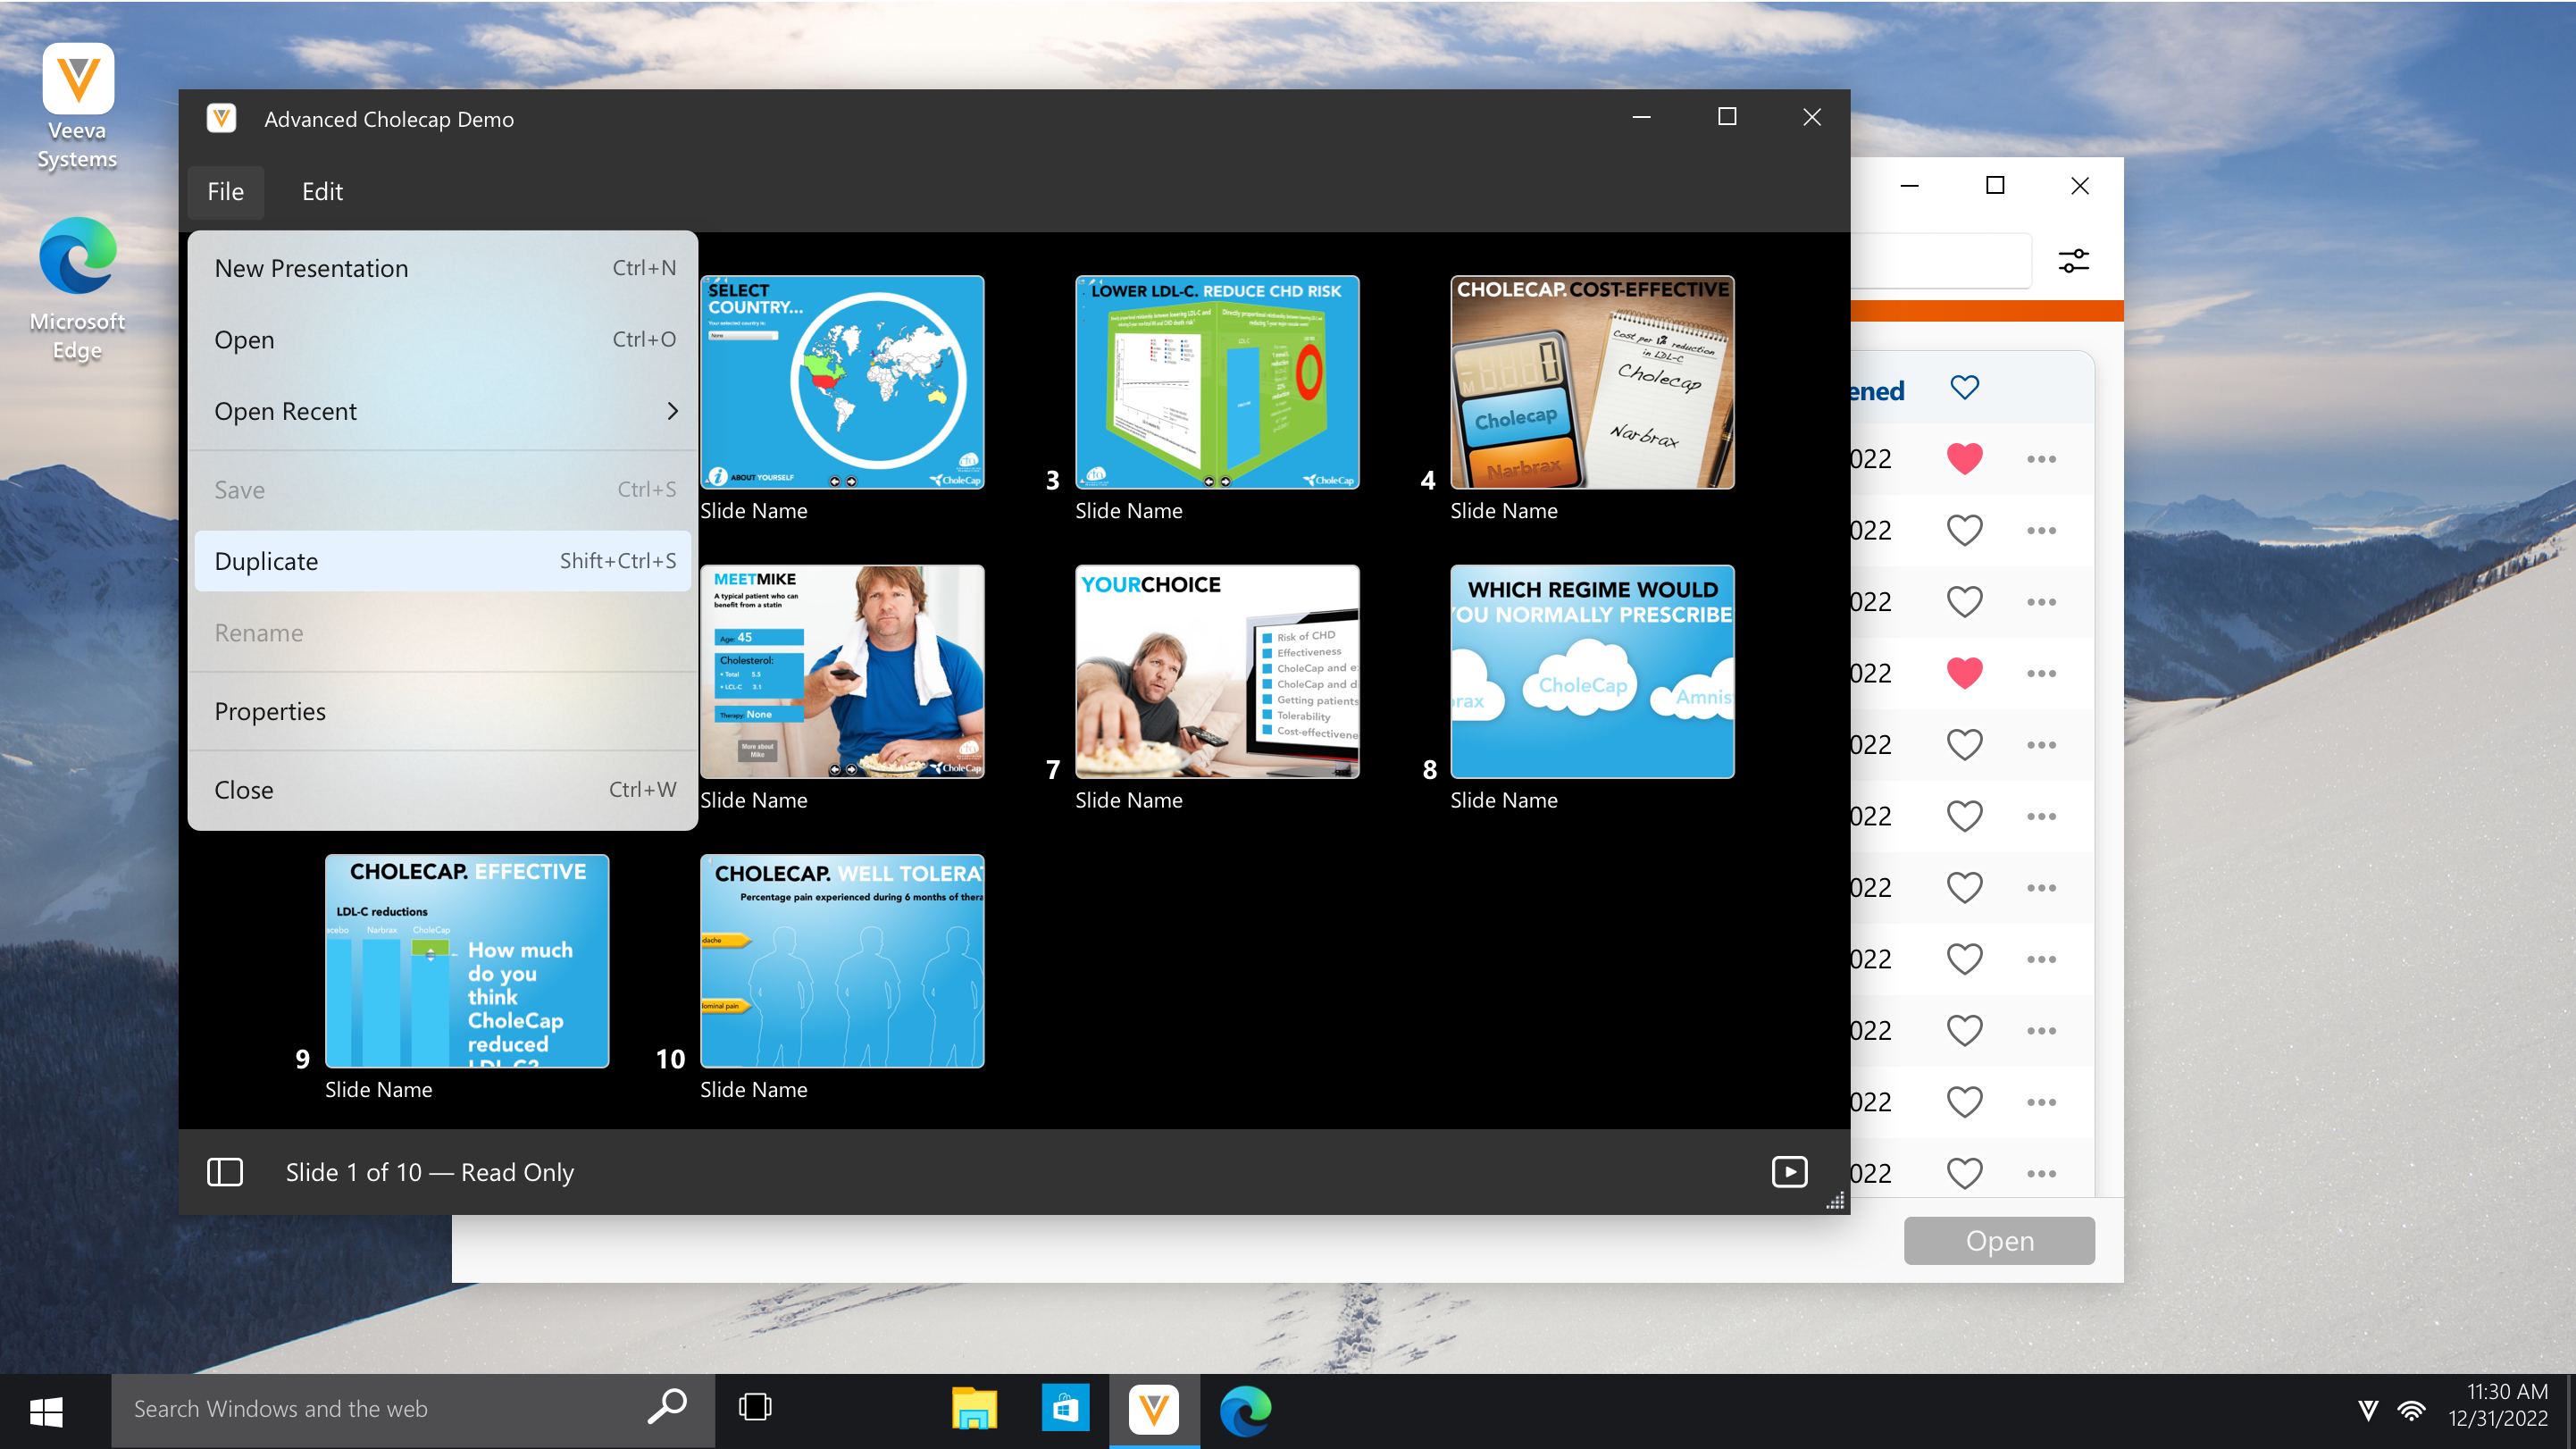
- Select the Edit menu to edit the slides or use the appropriate keyboard shortcuts. Drag and drop or copy and paste slides to reorder them, including multiple slides at a time.
- Select the File menu.
- Select Save.
- Enter the name of the presentation and any desired labels. Selecting the Labels text field displays the Add Labels modal.
- Select Save.
Deleting a Custom Presentation
Users can delete custom presentations to ensure the media library only contains up-to-date content. Deleting a custom presentation expires the CLM_Presentation_vod record and removes it from the library.
To delete a custom presentation:
- Select the More Actions button for the appropriate presentation in the media library.
- Select Delete.
- Select Delete in the confirmation popup.
Managing Custom Presentation Properties
Users can only edit the properties for a custom presentation if there is at least one slide. To edit the properties of a custom presentation:
- Open the custom presentation.
- Select the File menu.
- Select Properties.
- Edit the appropriate properties:
- Name
- Product
- Language
- Keywords
- Description
If customers set required fields on the CLM_Presentation_vod object, users will encounter sync errors when syncing the media library as the required fields may not be populated.
- Select Save.
Engage
Sending Auto-Published CLM Content via Web Link
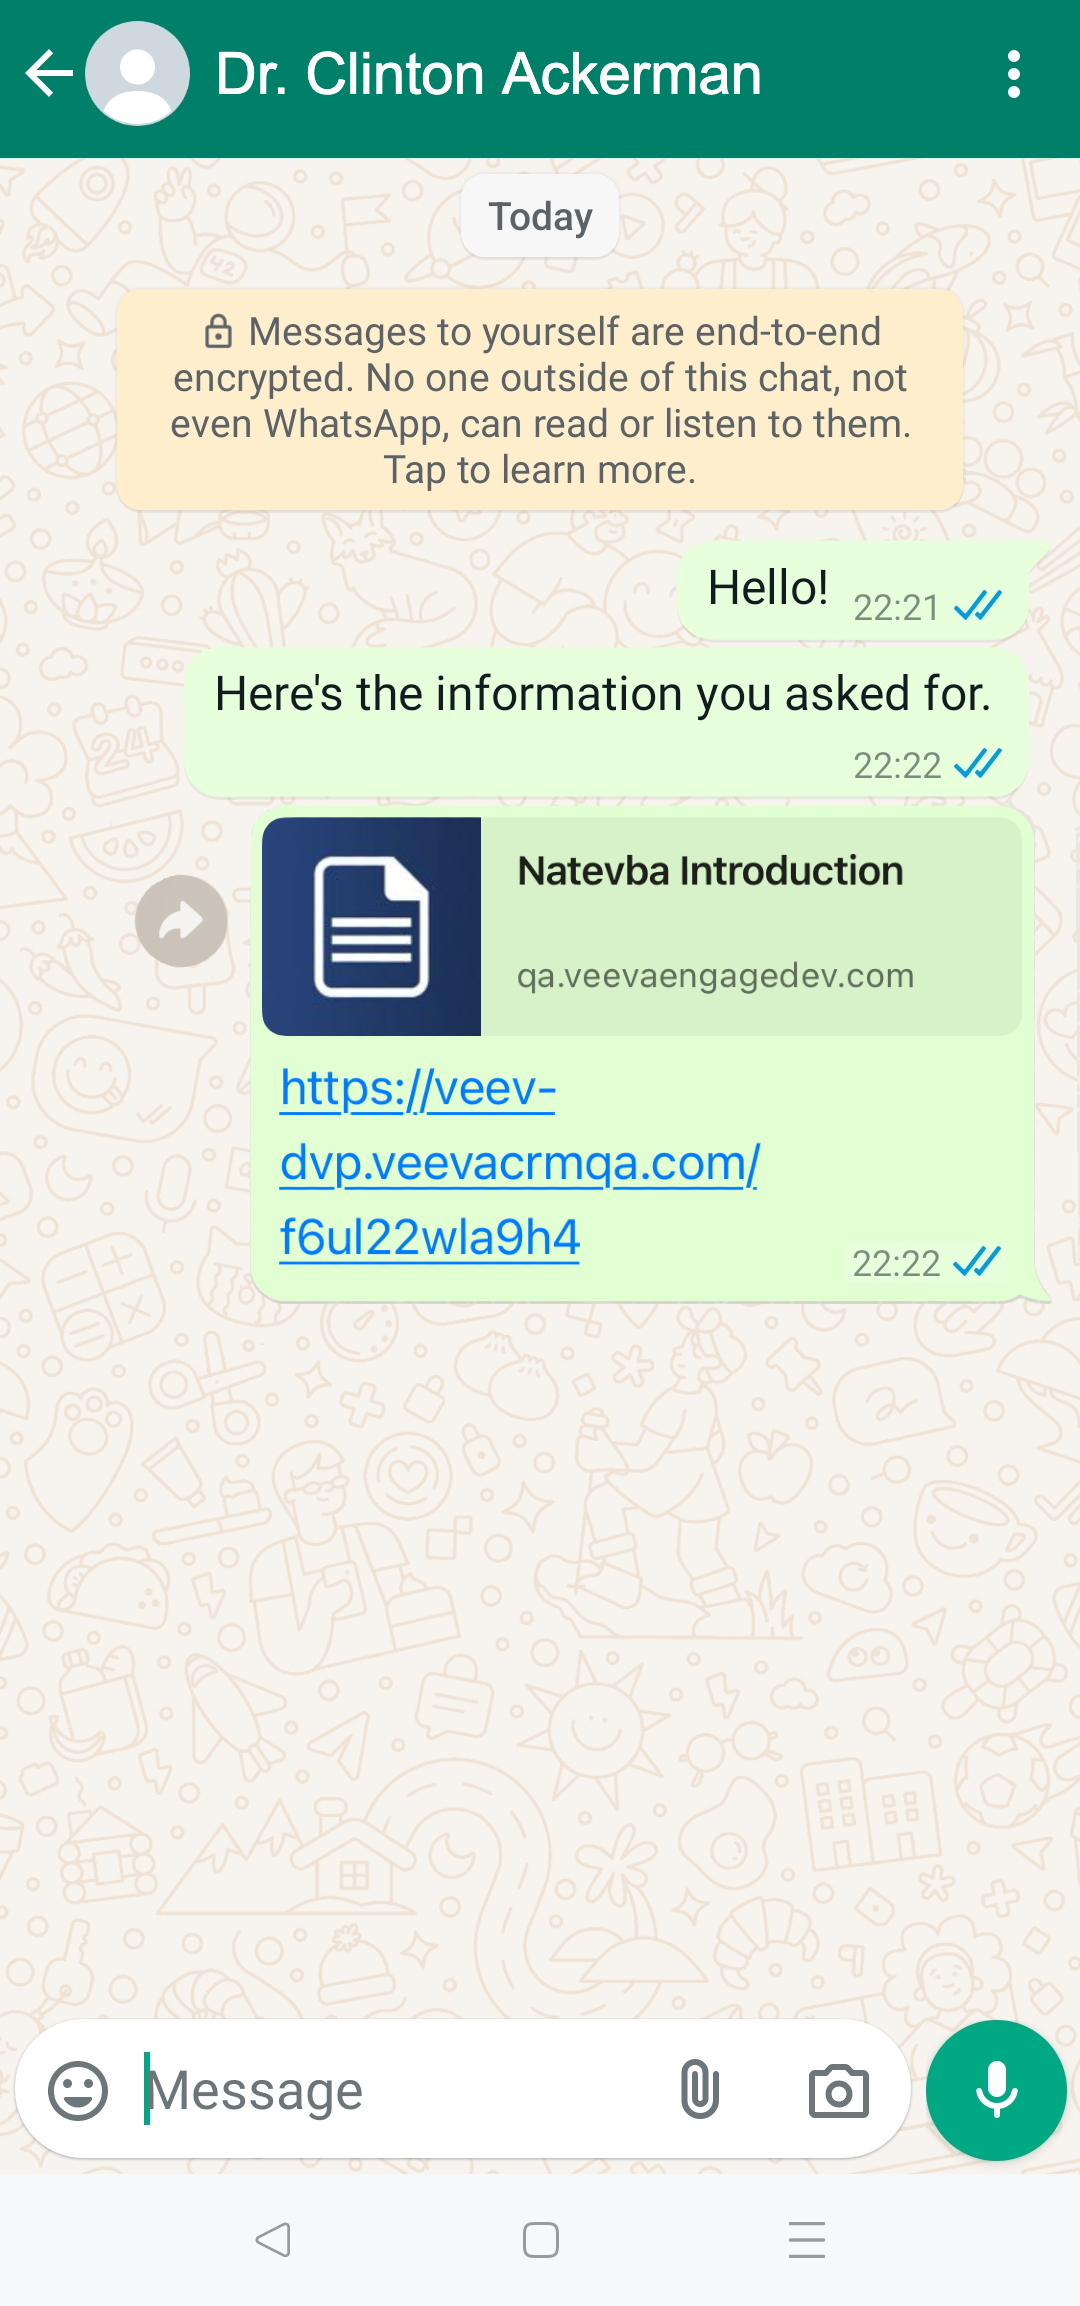
Users can use social messaging apps to share links for CLM content published in Vault, including auto-published content, binders and slides, and custom presentations. Content accessed from a web link displays in the HCP Content Player. Any action the recipient takes on the link is tracked, allowing admins to analyze engagement with specific presentations to improve CLM content.
Admins can also expire links after they are sent to encourage HCPs to contact users for updated links. If the content for a link expires after the link is generated, selecting the link displays an error message. If users attempt to send a link to expired content, the link is not generated and an error message displays.
Web links are not supported for content published as single slide PowerPoint Presentations. Additionally, content uploaded to CRM via FTP and content using Shared Resources are not supported.
Allowing Auto-Published CLM Content to Be Sent as Links
To allow an auto-published CLM presentation or a binder and slide presentation to be sent as a link in CRM, Vault content admins must ensure the Publish for Veeva CRM (Web Link) (publish_for_veeva_crm_web_link__v) field is set to Yes on the presentation or binder.
Defining SMS and WhatsApp Phone Numbers
Admins can define the SMS and WhatsApp phone numbers for an account. This automatically populates the recipient phone number when users send links to the account using Messages and WhatsApp.
On CRM Desktop (Mac, Windows) and iPad, if a phone number is populated for an account, it is automatically populated in the messaging app, regardless of the ENGAGE_LINK_ACCOUNT_SELECTION_vod Engage Setting. If the phone number is not populated for an account, the ENGAGE_LINK_ACCOUNT_SELECTION_vod Engage Setting determines the account selection behavior.
To define the SMS/WhatsApp phone number for an account:
- Grant end users FLS read permission to the following fields on the Account object:
- SMS_vod
- WhatsApp_vod
Since WhatsApp does not have an iPad app, WhatsApp Web launches in the browser on the iPad platform. Veeva does not control the behavior of WhatsApp Web.
- Navigate to the appropriate Account record.
- Select Edit.
- Populate the SMS_vod or WhatsApp_vod fields.
A phone number must be only digits (no symbols), including the country code, and must not contain any leading zeros, for example, 11234567890.
Sending Links to Auto-Published CLM Content
In the media library, users can share the link for a presentation from the More Actions button:
- Select the More Actions menu above the appropriate presentation thumbnail.
- Select Share to view the available sharing options.
If the ENGAGE_LINK_ACCOUNT_SELECTION_vod Engage Link Setting is set to 0, users are prompted to select an account before the sharing options display. Allowed products, restricted products, and segmentations are respected for selected accounts. If the setting is set to 1, users are never prompted to select an account.

- Select the appropriate app or sharing option.
If users select Engage Chat, the following steps are different. See Sharing Web Links via Engage Chat for more information.
- Select the recipient in the app, if applicable and not already populated. The recipient field is automatically populated if the following are true:
- The user selected the account before selecting the sharing option
- The user navigated to the media library from a specific account
- The selected sharing option is Messages and the SMS_vod field for the account is populated
- The selected sharing option is WhatsApp and the WhatsApp_vod field for the is populated
- Select Send.
Every time a user shares a web link for a custom presentation, the CLM_Presentation_vod record for the custom presentation is cloned, with the Type_vod field set to Transactional_vod. This ensures a copy of the custom presentation shared with the HCP at the time is saved in Veeva CRM, so updates to the custom presentation do not affect the content displayed to the HCP when they access the link.
Sharing Web Links via Engage Chat
- Select the More Actions menu above the appropriate presentation thumbnail.
- Select Share to view the available sharing options.
If the ENGAGE_LINK_ACCOUNT_SELECTION_vod Engage Link Setting is set to 0, users are prompted to select an account before the sharing options display. Allowed products, restricted products, and segmentations are respected for selected accounts. If the setting is set to 1, users are never prompted to select an account.
- Select Engage Chat.
- Select the recipient in the app, if applicable and not already populated. The recipient field is automatically populated if the selected account only has one Engage profile you are connected to.
If the recipient is not automatically populated, the Select Connection modal displays. The list of available connections depends on whether you previously selected an account:
- You already selected an account and the selected account has more than one Engage profile you are connected to. The Select Connection modal displays with the list of available connections for the account.
- You already selected an account and the selected account does not have any Engage profiles you are connected to. The Select Connection modal displays with a list of all available connections. Selecting a connection automatically links the Engage profile to the account.
- You did not select an account, so the Select Connection modal displays with a list of all available connections
- Preview the message before sending.
- Select Send.
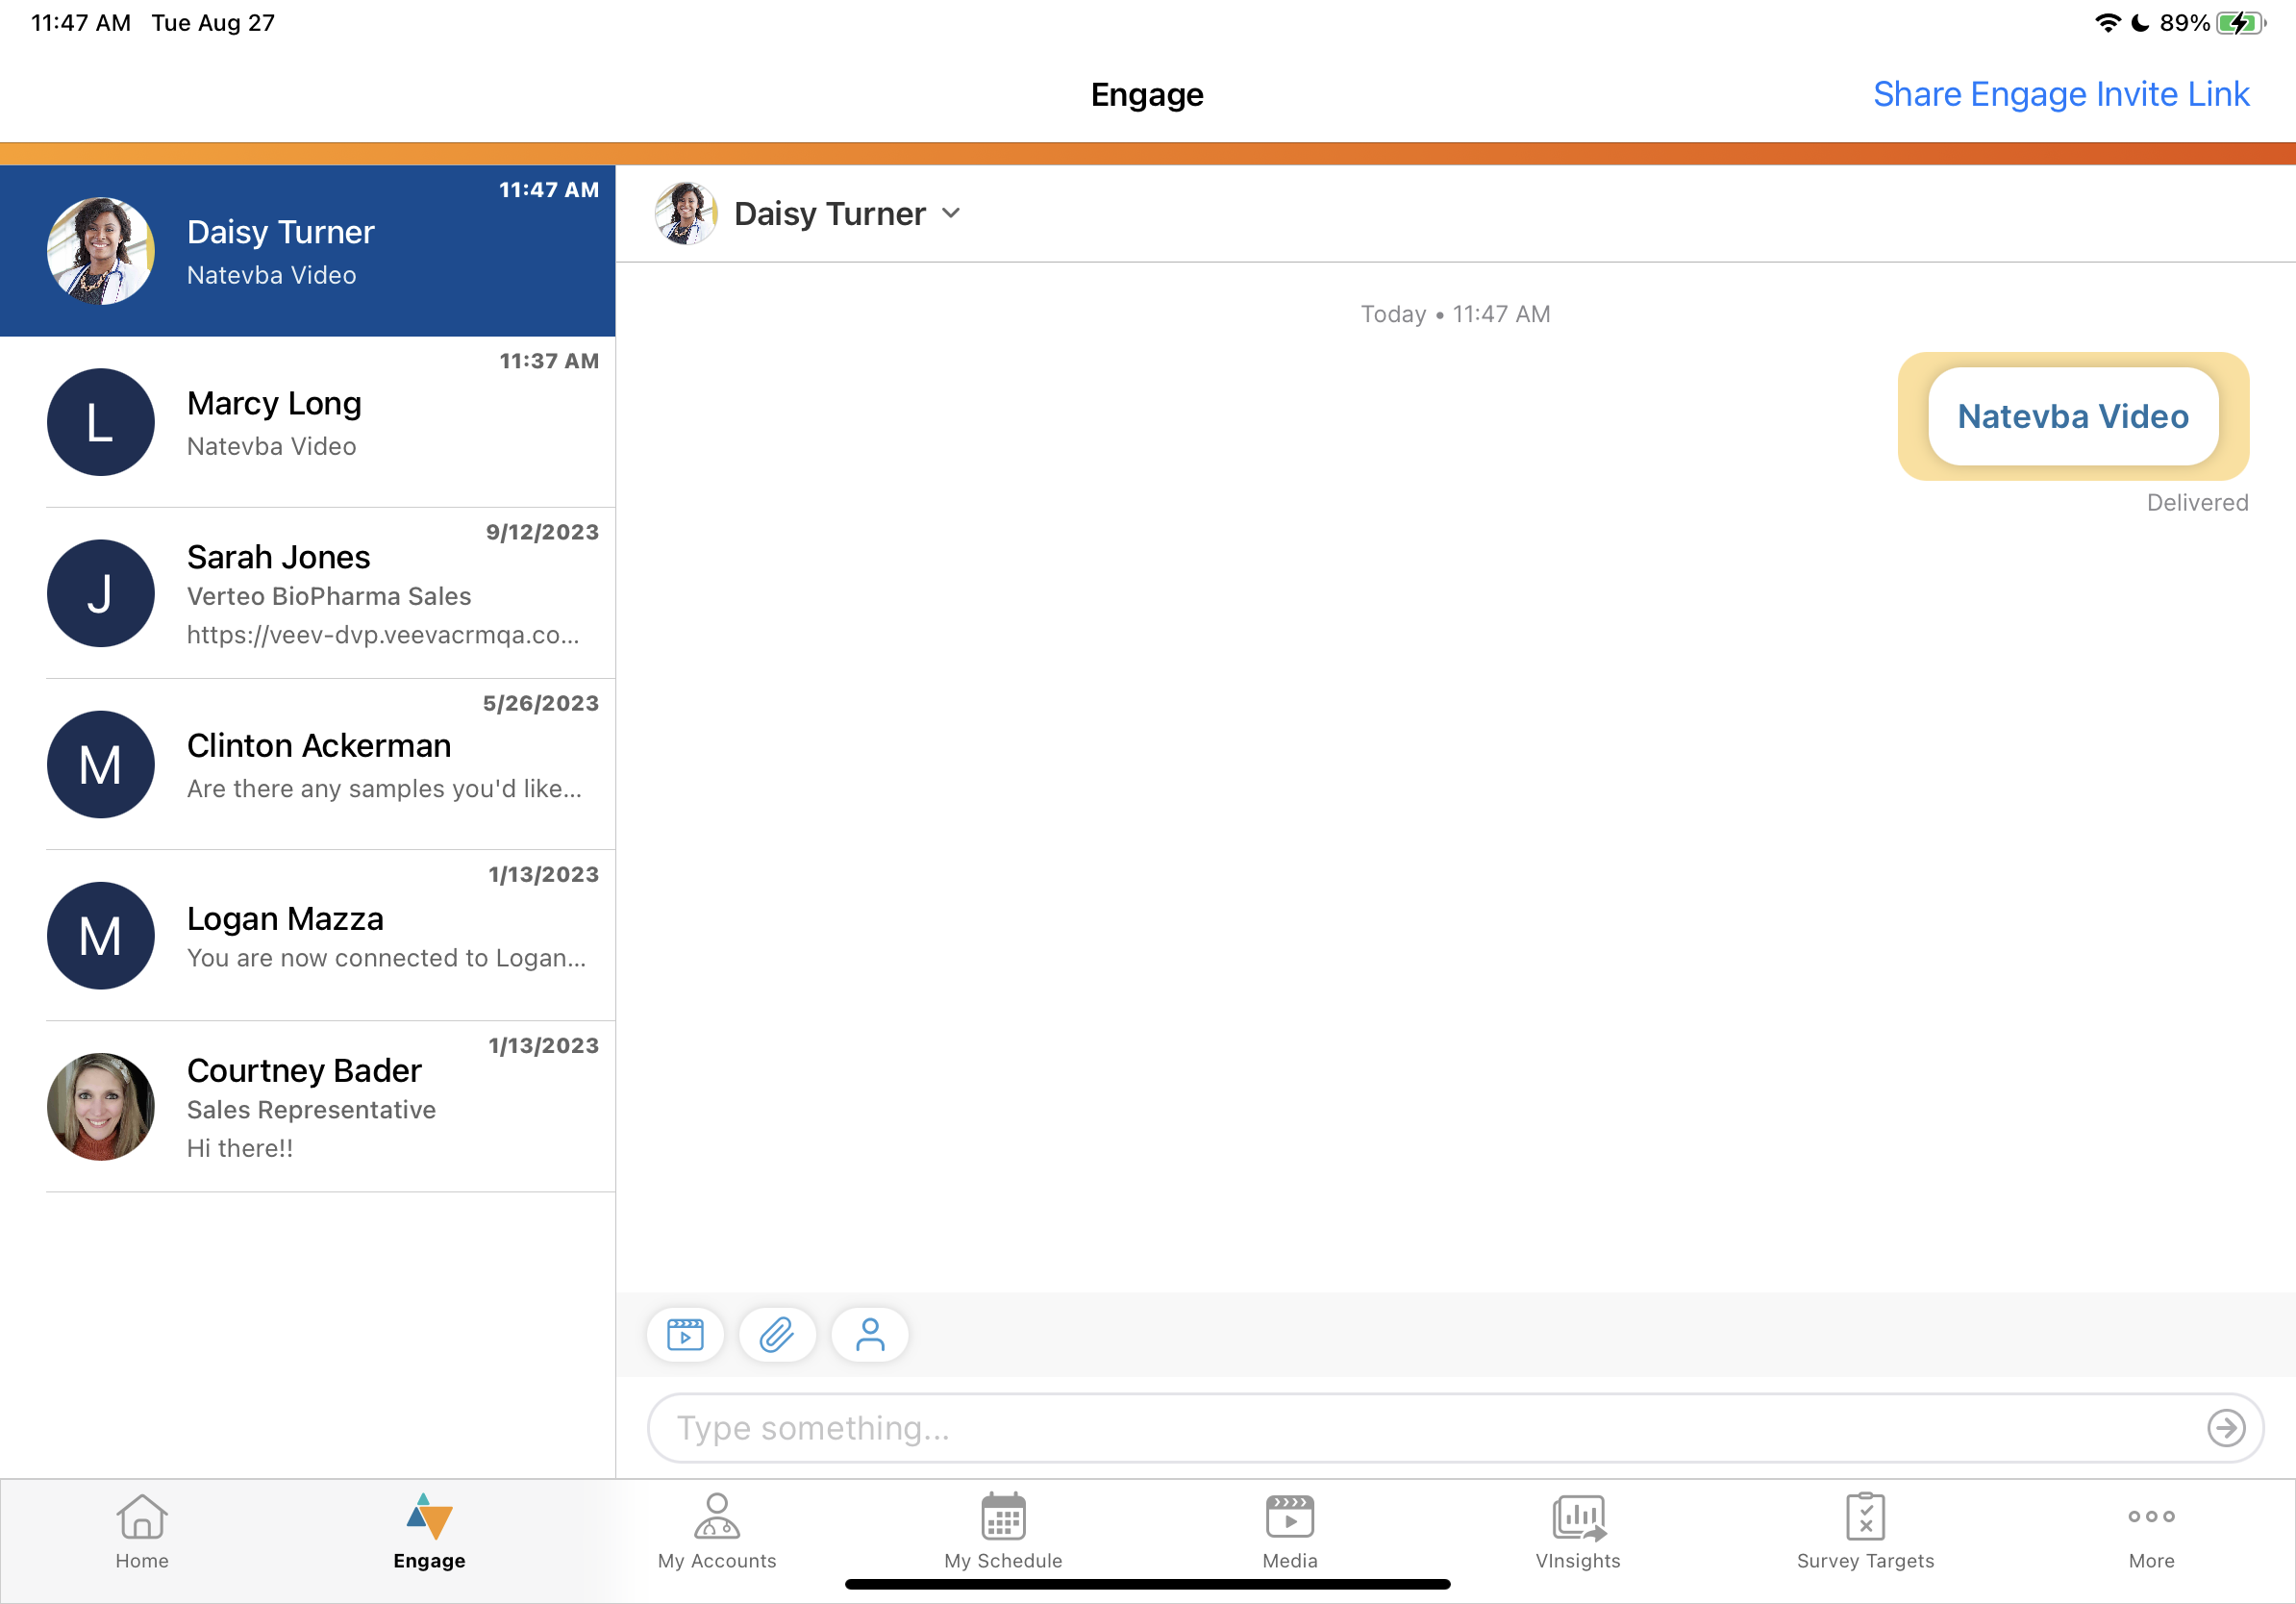
In addition to the More Actions menu, users can share web links via Engage Chat directly in a chat thread in the Engage tab. To share a web link in a chat thread:
- Navigate to the appropriate chat thread in the Engage tab.

- Select the media button in the action bar.
- Select the appropriate account using the account search.
If the ENGAGE_LINK_ACCOUNT_SELECTION_vod Engage Link Setting is set to 1, account selection is skipped.
- Select the appropriate presentation from the media library.
- Select Send.
Web links sent via Engage Chat are tracked in the Engage Connect reports and can be forwarded. See Engage Connect Reports and Copying and Forwarding Chat Messages in Engage Connect for more information.
Tracking Auto-Published CLM Content Links
Once a link is sent, a Sent_Message_vod record is automatically created with the following fields populated:
If the full URL for an auto-published presentation is sent instead of the shortened URL, the reason is stamped in the Details_vod field on the Sent_Message_vod record. The full URL is generally sent when the shortened URL is not generated within a few seconds.
|
Field |
Value |
|---|---|
|
Record Type |
Content_vod |
|
Account |
Lookup to the account, if selected |
|
User |
Lookup to the user who sent the link |
|
CLM Presentation |
Lookup to the CLM_Presentation_vod record |
|
Shortened Engage Link |
The shortened version of the Engage Link |
|
Capture Datetime |
The datetime at which the sharing option was selected |
|
To |
The phone number or ID of the app to which the link was sent (populated only if a number or ID was available when the Send Presentation button was selected) |
|
Sent from Platform |
The platform from which the link was sent |
|
Sent Via |
The app/sharing option used to send the link |
|
Transaction Type |
|
|
Call |
Lookup to the appropriate Call2_vod record, if the link was launched from a call and an attendee account was selected |
|
Product |
The product on the CLM_Presentation_vod record |
|
Detail Group |
The detail group on the CLM_Presentation_vod record |
|
Mobile Id |
System-generated Id |
|
VExternal Id |
The unique identifier of the shortened URL |
Users can view the sent message details, including the tracked activities of the sent message, for an account on the account timeline. Select View More to display the Sent_Message_vod record detail.
Each time CLM content is accessed from its shortened URL, a Message_Activity_vod record is created with the following fields populated:
Some social messaging apps generate previews of sent links. The preview is generated by accessing the shortened link, which creates a Message_Activity_vod record. Veeva CRM cannot prevent link previews from being generated.
|
Field |
Value |
|---|---|
|
Record Type |
Message_Activity_vod |
|
Activity |
Clicked_vod |
|
Activity Datetime |
The datetime at which the click occurred |
|
IP Address |
The IP address of the server/device which accessed the URL |
|
User Agent |
The User Agent details returned from the IP address |
|
Client Name |
The name of the client software |
|
Client OS |
The name of the OS family running the client software |
|
Client Type |
The type of software used to access the URL |
|
Client Device Type |
The type of device used to access the URL |
Additionally, a Message_Activity_vod record is created for each slide or PDF page viewed for more than two seconds with the following fields populated:
|
Field |
Description for Views |
Description for Downloads |
|---|---|---|
|
Record Type |
Veeva_Content_Player_Activity_vod |
Veeva_Content_Player_Activity_vod |
|
Key Message |
The Key_Message_vod record for the viewed slide |
The Key_Message_vod record for the downloaded slide |
|
Activity |
Viewed_vod |
Downloaded_vod |
|
Activity Datetime |
The datetime at which the slide was viewed |
The datetime at which the slide was downloaded |
|
CLM Presentation |
The CLM_Presentation_vod record for which the web link was sent
|
|
|
Media Type |
The media type of the slide. Available values include:
|
n/a |
|
Downloaded Rendition |
n/a |
The rendition type of the downloaded content. Available values include:
|
|
Session ID |
Unique ID for each session. A session begins when the HCP Content Player loads and ends when the player is closed or times out. A session times out after five minutes of inactivity.
|
|
|
View Order |
The order in which the slide was viewed during the session |
n/a |
|
Duration |
The total time spent on the slide, in seconds |
n/a |
|
Detail Group |
The detail group of the Key_Message_vod record
|
|
|
Product |
The product of the Key_Message_vod record
|
|
|
Video Last Viewed Time |
The timestamp of the furthest viewed frame in the video |
n/a |
|
Video Total Time Spent |
The total time the video was played during the session, in seconds |
n/a |
|
Video Length |
The length of the video, in seconds |
n/a |
|
Page Number |
The page number of the PDF
|
|
|
Slide Number |
The display order of the CLM_Presentation_Slide_vod record
|
|
|
Slide Version |
The slide version of the Key_Message_vod record
|
|
|
Sent Message |
The Sent_Message_vod record for the web link sent for the presentation
|
|
|
User Agent |
The User Agent details returned from the IP address
|
|
|
Client Name |
The name of the client software
|
|
|
Client OS |
The name of the OS family running the client software
|
|
|
Client Type |
The type of software used to access the URL
|
|
|
Device Type |
The type of device used to access the URL
|
|
Considerations
- Customers must have Engage licenses for the users who are sending links
- Restricted products, allowed products, and segmentations for accounts control which content users can send to each account
- CLM content shared via link only supports the goToSlide and goToSlideV2 JavaScript functions. See Using the HCP Content Player for more information.
- Content marked as Training content cannot be sent from the media library. See Using Training Presentations for more information.
- Customers can create message templates for users to send with web links. See Using Message Templates When Sharing Web Links for more information.
- Customers can associate Important Safety Information (ISI) and Prescribing Information (PI) documents with CLM content and allows HCPs to access them from the HCP Content Player. See Accessing ISI and PI Documents for CLM Content in the HCP Content Player for more information.
- The HCP Content Player only supports downloading auto-published CLM presentations. Downloading binders/slides and custom presentations is not supported
Events Management
Managing Speaker Nomination Approvals
Admins can configure a Salesforce Approval Process that enables Speaker Nominations to be reviewed, approved, or rejected by the necessary users as part of a nomination process. This enables admins to customize the nomination workflow based on the needs of each organization.
For example, Sarah Jones creates a Speaker Nomination record for Dr. Clinton Ackerman and selects Submit for Approval. Amy Adams, the admin at Verteo Biopharma, previously configured a Salesforce Approval Process to automatically assign the record to medical approvers for approval and tiering. Larry Lakes, a member of the medical team, is notified about the approval request, reviews the record, and approves the nomination.
Using the Approval Process for Speaker Nominations
When a user selects the Submit for Approval button on a EM_Speaker_Nomination_vod record, the approval process for the speaker nomination is initiated.
When a New_Speaker_vod type nomination is submitted for approval, a new EM_Speaker_vod record is created with a status of Nominated_vod. The fields of this record are populated based on the field of the created EM_Speaker_Nomination_vod record.
Depending on how the Approval Process is configured, the user may be prompted to select a User or Queue to serve as the next approver.
Users can view the approval history of an EM_Speaker_Nomination_vod record via the Approval History related list.
Recalling Submitted Speaker Nominations
If a user has permission to recall a submitted nominations:
- Navigate to the appropriate EM_Speaker_Nomination_vod record.
- Navigate to the Approval History related list.
-
Select the More Actions button.
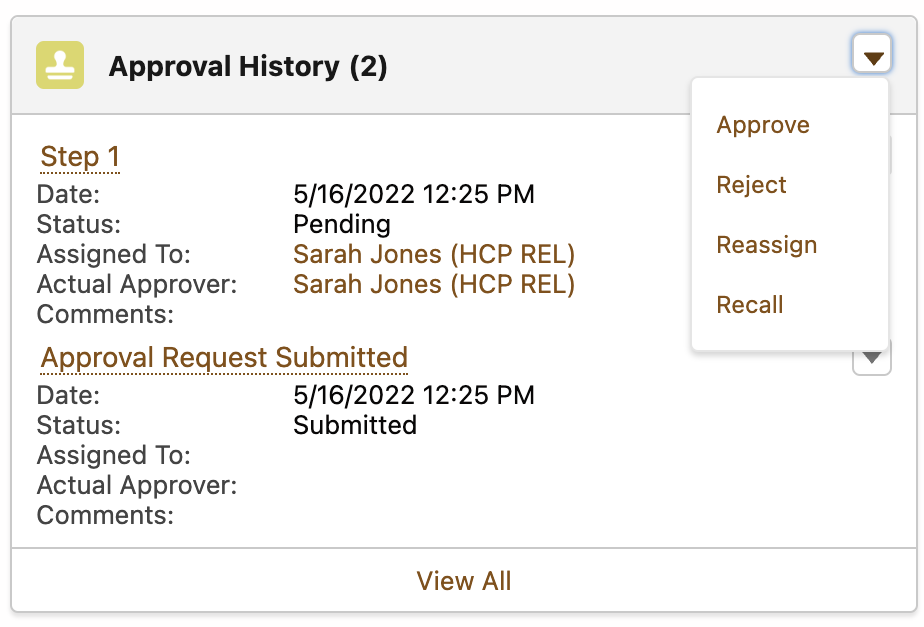
- Select Recall.
- Enter the appropriate comments explaining why the approval request is being recalled.
- Select Recall.
Reviewing Submitted Speaker Nominations
Designated approvers in the Approval Process can review the nomination via standard Salesforce Approved and Reject actions.
Approving and rejecting nominations is not supported on mobile.
When a New_Speaker_vod type nomination is either approved or rejected via the Approval Process, the Status_vod field of the associated EM_Speaker_vod record automatically updates to match the nomination’s status.
When a nomination is approved, the record becomes locked.
Syncing Events Metadata with Vault
To allow admins to avoid updating records in multiple systems, Event administrators can configure the CRM Vault Metadata Sync process to sync Event Configuration and Event Topic information between CRM and Vault. During each sync, newly created records in CRM are automatically created as new records in Vault, while deleted or inactivated records in CRM are automatically inactivated in Vault.
For example, the admin configures the CRM Vault Metadata Sync to sync specified EM_Event_Configuration_vod records to Vault. When the next sync occurs, a new crm_em_event_configuration__v record is created in Vault with information from the Event Configuration record in CRM automatically populated.
Territory Management
Displaying Territory Feedback Metrics via MyInsights
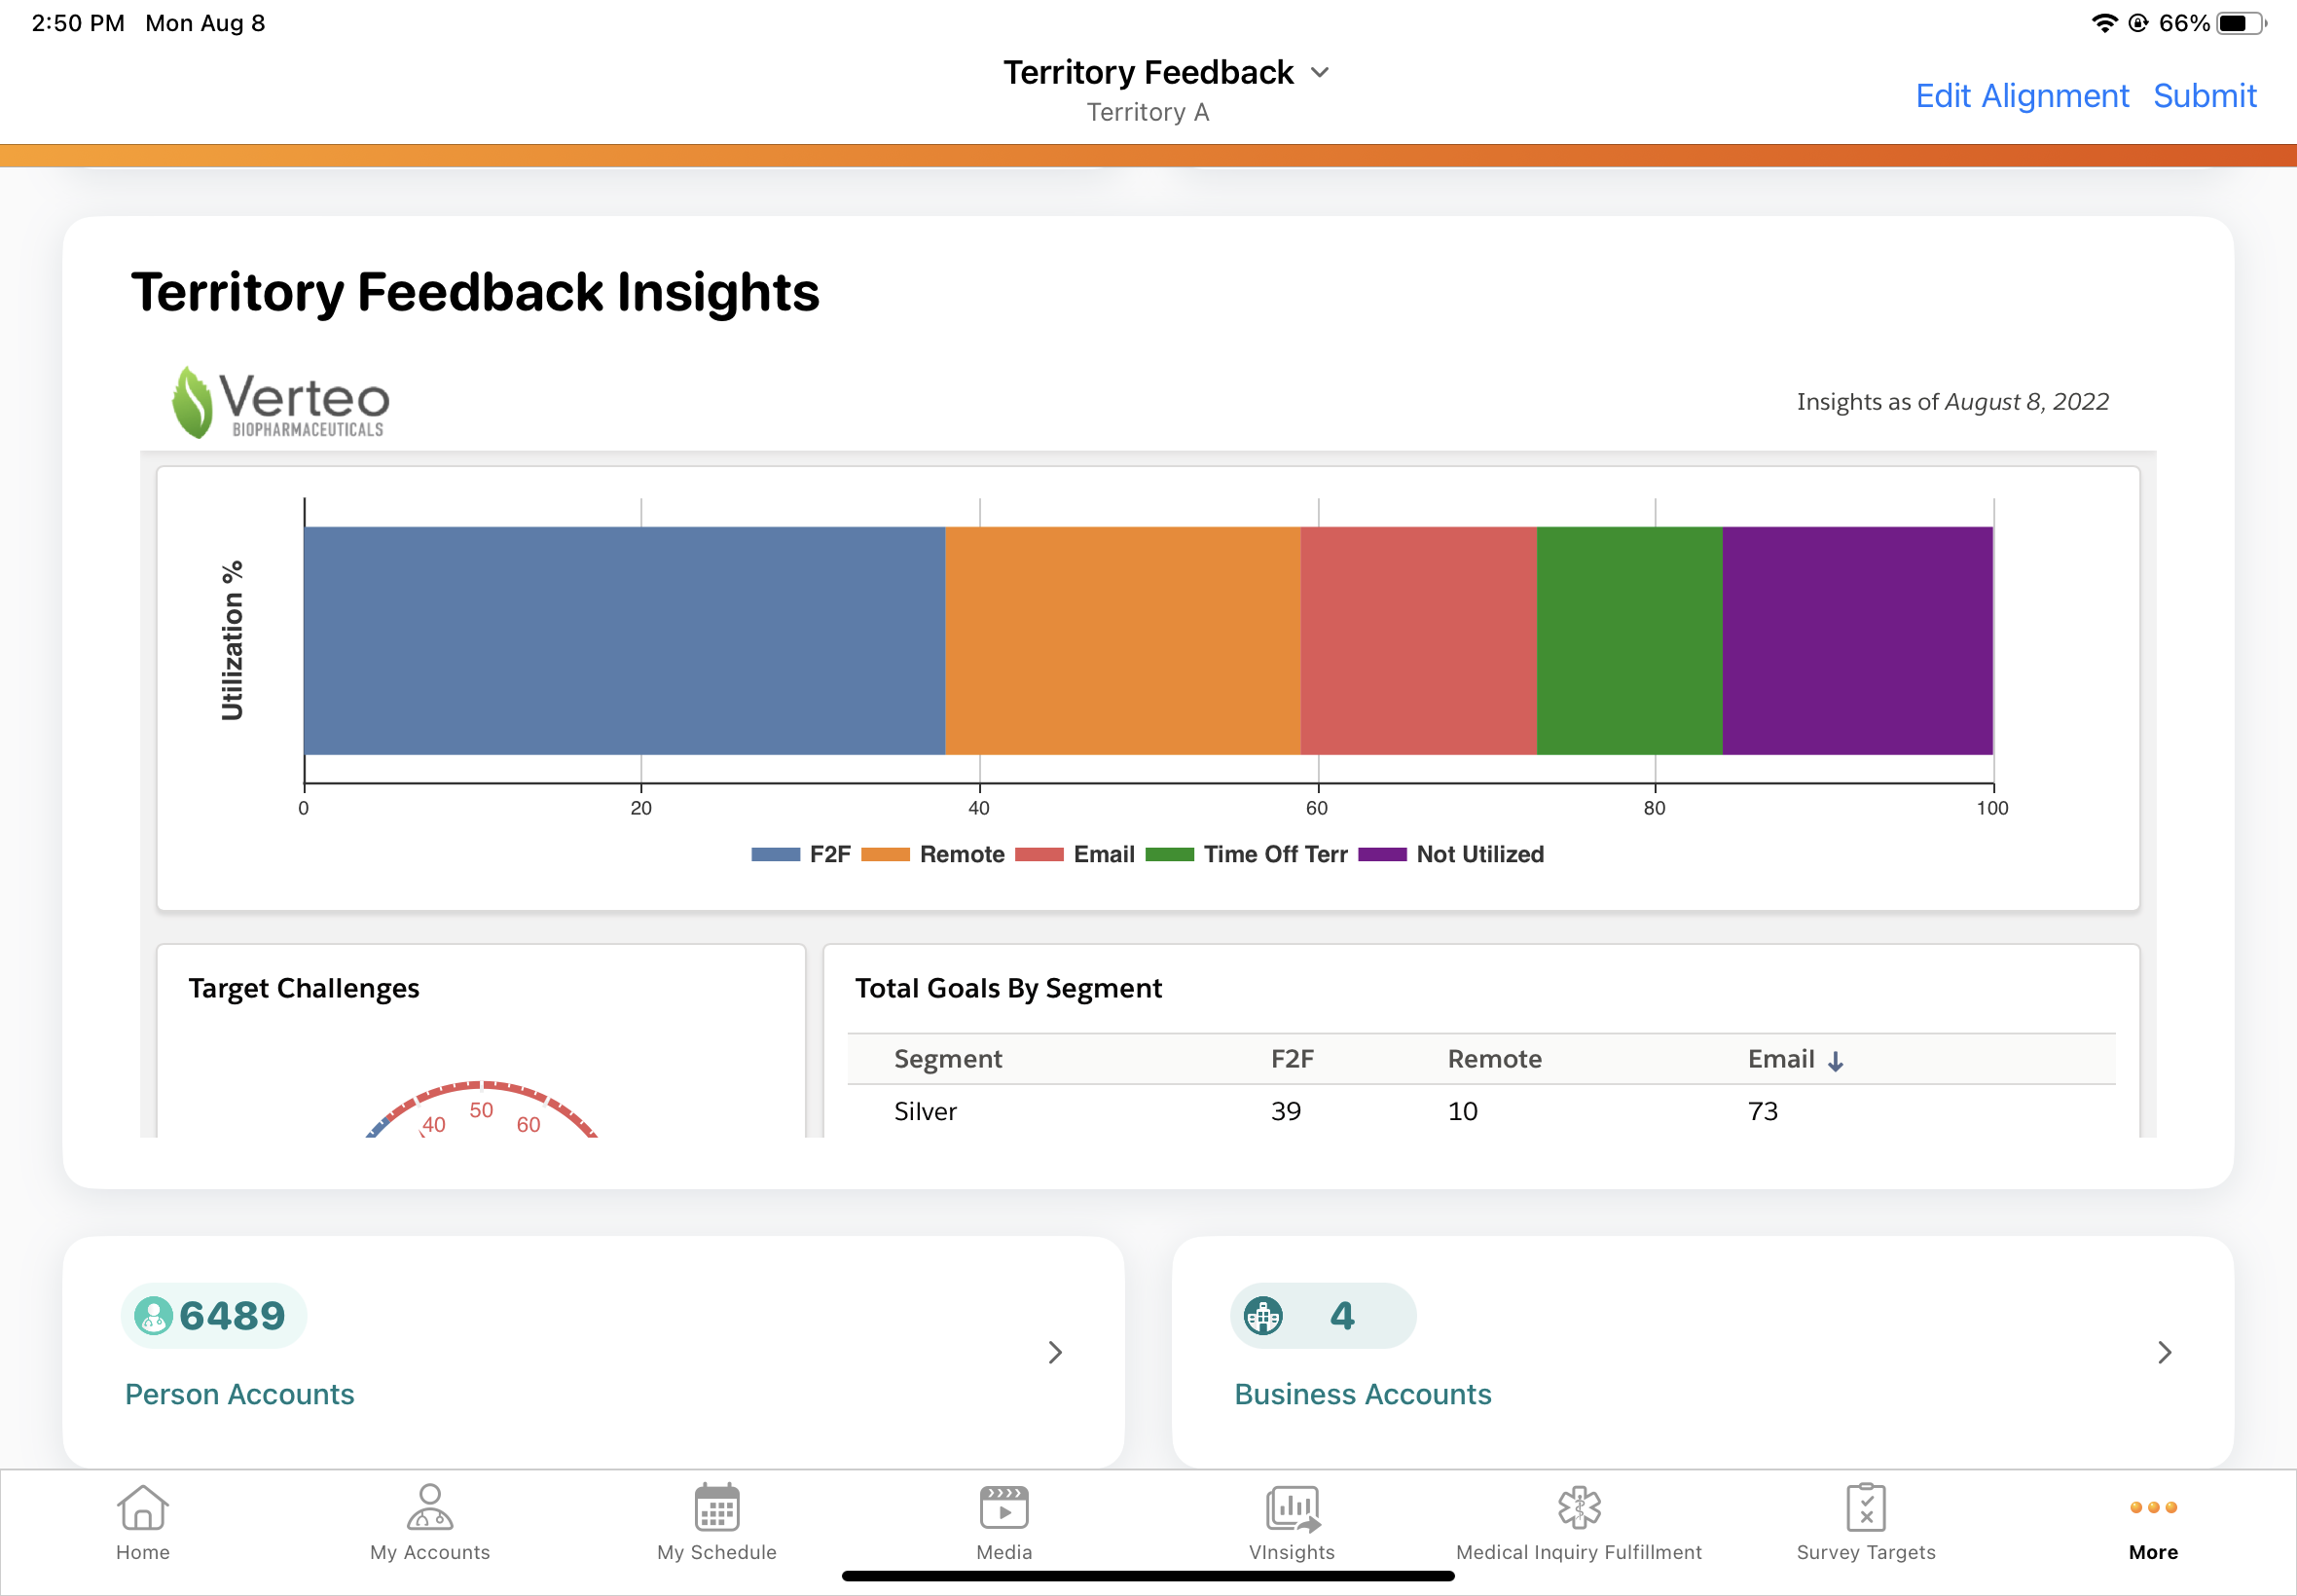
To visualize data, admins can create and link MyInsights visualizations to Territory Feedback. MyInsights visualizations in Territory Feedback enable end users to visualize upcoming changes to their territories, as well as provide a place for admins to give written guidance to end users about how they should review and leave feedback on upcoming changes to their territory.
For example, leadership at Verteo BioPharma decides that at least 60% of the targets for the Cardiology field force should belong to Segment A for Cholecap. A MyInsights visualization displays in Territory Feedback for Sarah Jones that displays the percentage of her targets that are Segment A for Cholecap, as well as brief instructions informing Sarah about the 60% guidance. Sarah uses this information to adjust her territory accordingly.
Creating the MyInsights Visualization to Use in Territory Feedback
To create a MyInsights visualization to use in Territory Feedback:
-
Create the .zip file to serve as the visualization. The file should reference the getFeedbackData() method, which enables the visualization to retrieve a variety of information about the territory.
- Create a new HTML_Report_vod record with a record type of Territory_Feedback_vod.
Linking MyInsights Visualizations in Align
After the MyInsights visualization is created in CRM, the feature must be linked in Align before the visualization displays in Territory Feedback:
-
Populate the myinsights_report__aln field of the appropriate Align Settings record with the External_Id_vod field of the created HTML_Report_vod record in CRM.
This setting supports field-force specific settings, enabling different field forces to use different MyInsights visualizations.
- Specify the height of the widget in Territory Feedback, in pixels, by appending : and the desired height to the myinsights_dashboard__aln setting. For example, feedback_report:500 specifies a height of 500 pixels.
- Refresh the Feedback Cache.
Viewing MyInsights Visualizations in Territory Feedback
The linked MyInsights visualization displays in Territory Feedback as a widget. The widget’s title reflects the name of the corresponding HTML_Report_vod record.
If Translating MyInsights Tab Names is enabled, the title of the widget correctly translates into the user’s language.
