

24R2.0 Functionality Guide
The Functionality Guide is intended for Sales Operations, Business Administrators, System Integrators, and others responsible for making decisions about what features are needed for end users to be successful and deciding which features work together with existing customer configurations.
Account Management
DCR Attachments
DCR Attachments streamline the Data Change Request (DCR) process for sales representatives by allowing them to attach supporting documents to their requests, which may help verify the changes which are being requested.
DCR Attachments allow users to upload documents; for example business card images, screenshots of HCP listings on hospital websites, or photos of the HCP's practice location. By including this supporting evidence, DCRs are more likely to be approved, saving valuable time and effort for both Sales and data management teams.
Using DCR Attachments
End users can upload a supporting attachment when creating a DCR for a new account, address, or child account, or when creating a DCR for updates to an existing account. The Attachment section displays below the Notes section on the DCR Header.
When the Account Preview During Creation Veeva Setting and Network Setting are enabled, the upload attachment button displays on the Account preview page (Browser) or the DCR modal on the Account Preview page (iPad).
Adding a DCR Attachment
To add an attachment to a DCR:
- Select the Plus button on the DCR.
- Select Upload Photo to open the camera (iPad only) or Upload File to open the file selection dialog.
Up to three files can be attached to a DCR. The maximum file size is 10MB per uploaded file.
The PHOTO_QUALITY_vod and Camera_Roll_vod Veeva Settings are respected, and may impact image quality and the ability to upload photos.
- Enter up to 1,000 characters in the Description field. (Optional).
- Select Submit when all information for the DCR is entered.
For organizations using Network, attachments are sent to the Network as part of the DCR so that data stewards can view the attachments when validating the request.
Only photo file types will be accepted by Veeva Network. Other file types should not be attached to DCRs.
Call Sampling
Capturing Remote Signatures for Acknowledgement of Content
To quickly resolve overdue Acknowledgements of Contents (AOCs), users can send HCPs remote signature requests for AOC. HCPs review and sign the AOC to indicate they received BRCs (Business Reply Cards).
In some organizations, HCPs cannot continue to receive more samples until they acknowledge they received samples they previously requested. When users send a remote AOC signature request, HCPs review the AOC details and sign remotely, resolving the overdue record. This enables users to continue sampling to the HCP without making an in-person visit in organizations where fulfillment for new sample requests is held while there are overdue AOCs.
For example, an HCP requests a BRC during a remote meeting, but he has an overdue AOC which you must resolve before disbursing new samples. When you send the HCP a remote signature request for the overdue AOC, the HCP reviews the details and provides his signature.
Using Remote Signatures for Acknowledgement of Content
To capture a remote signature for AOC:
- Select the Acknowledgment of Content option from the More Actions menu on the call report or from the More Actions menu on the account detail page. The Acknowledgment of Content option only displays when there is at least one open AOC record for the current user and account. For unique activities group calls, the alert displays on child calls only.
AOC signature capture from the call report is only supported on individual calls or unique activities group calls. It is not supported for standard group calls.
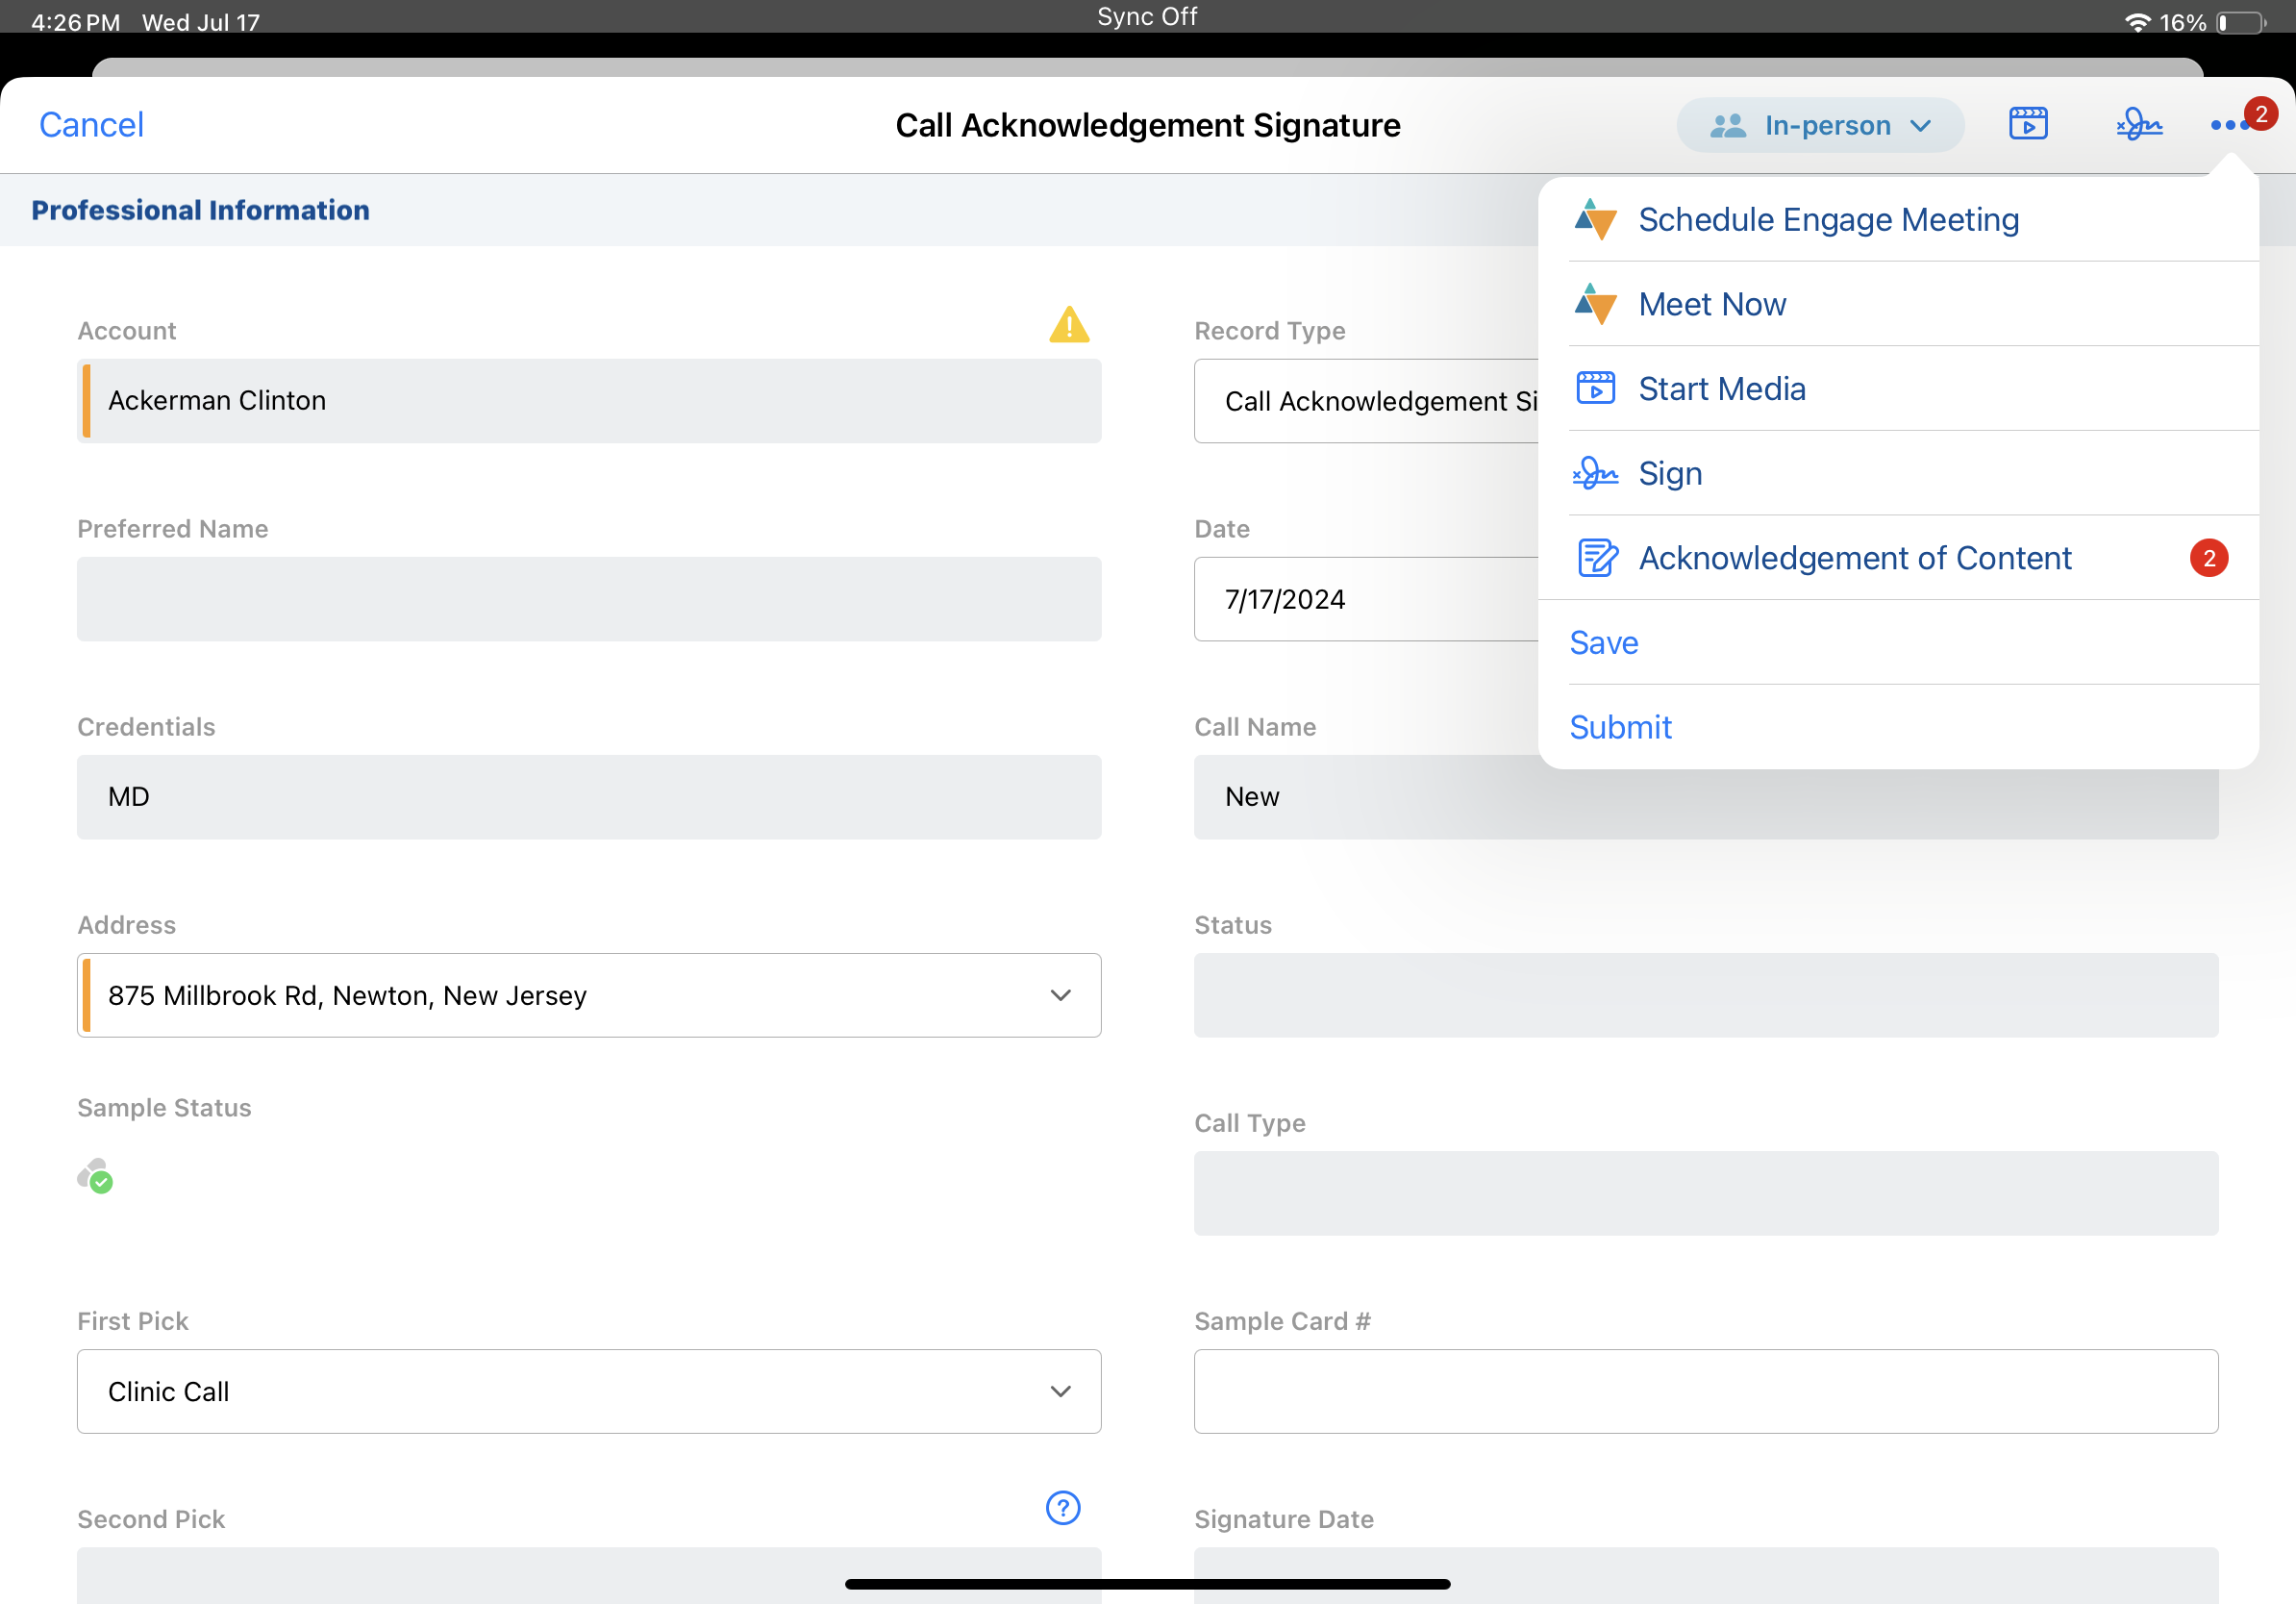
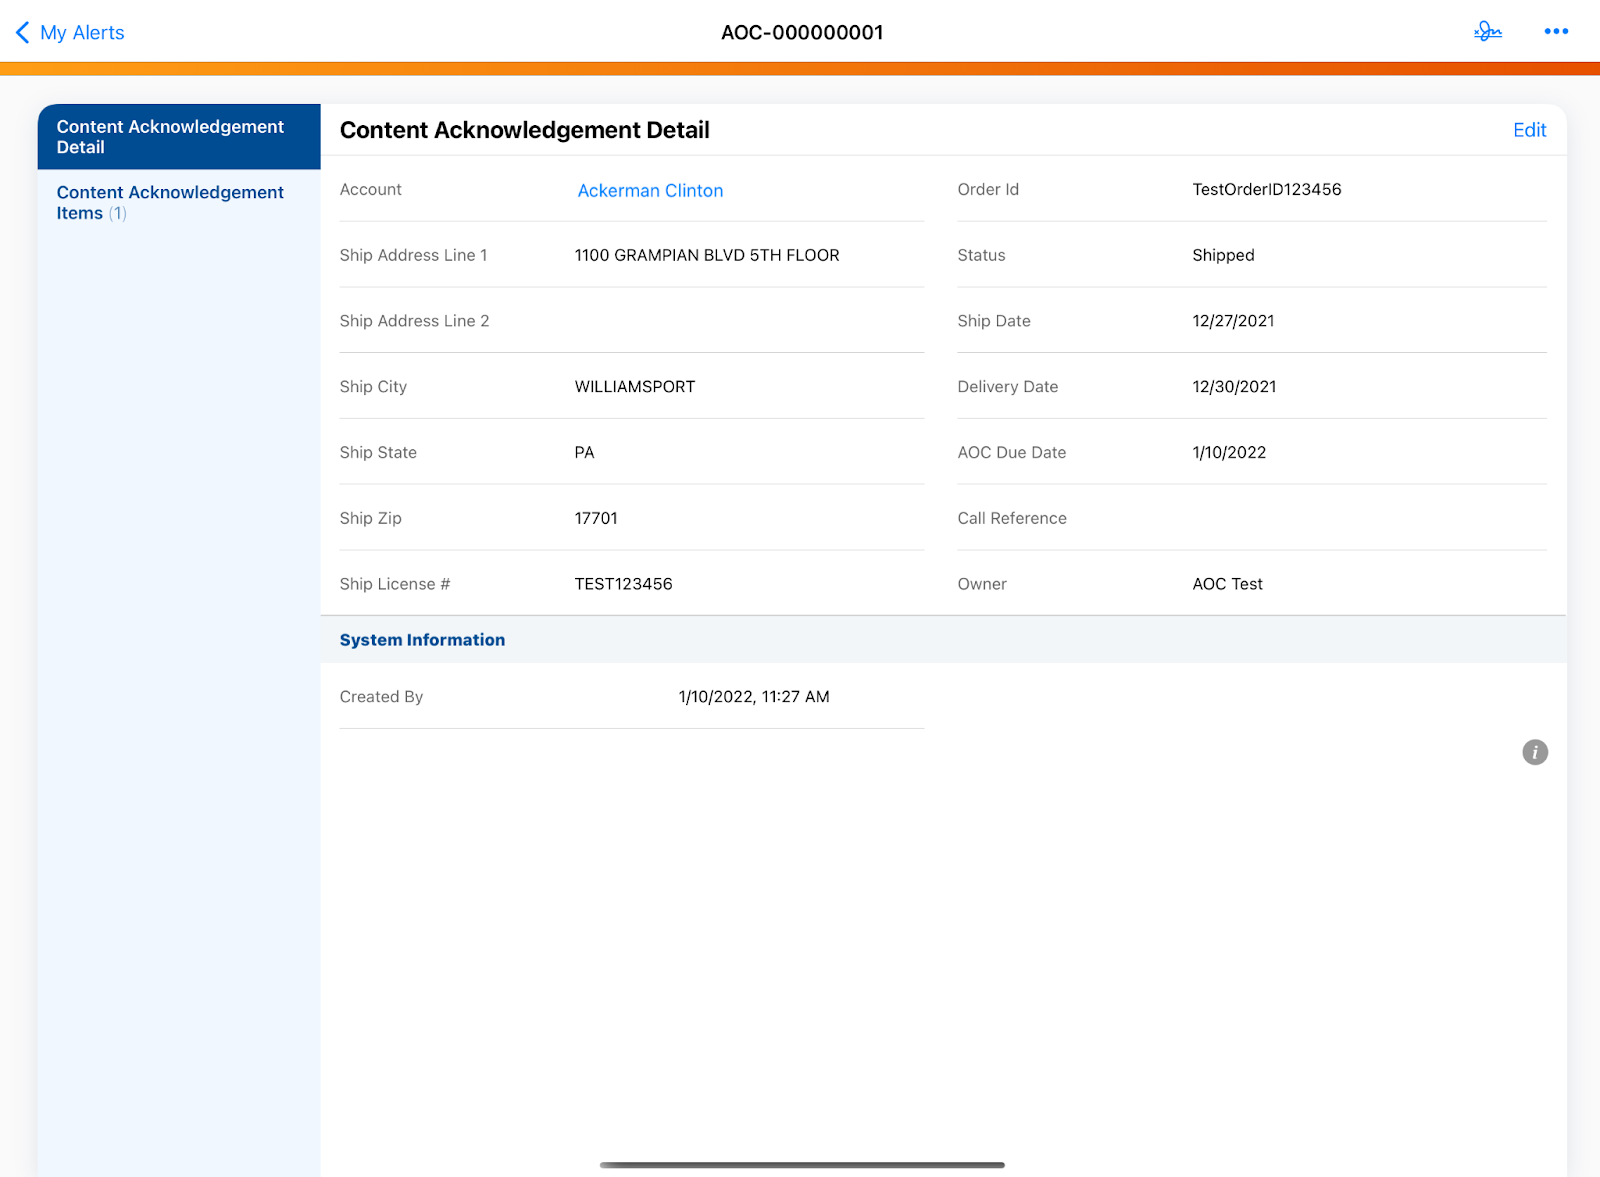
Alternatively, select the Sign icon from the header on a Content Acknowledgment detail page.
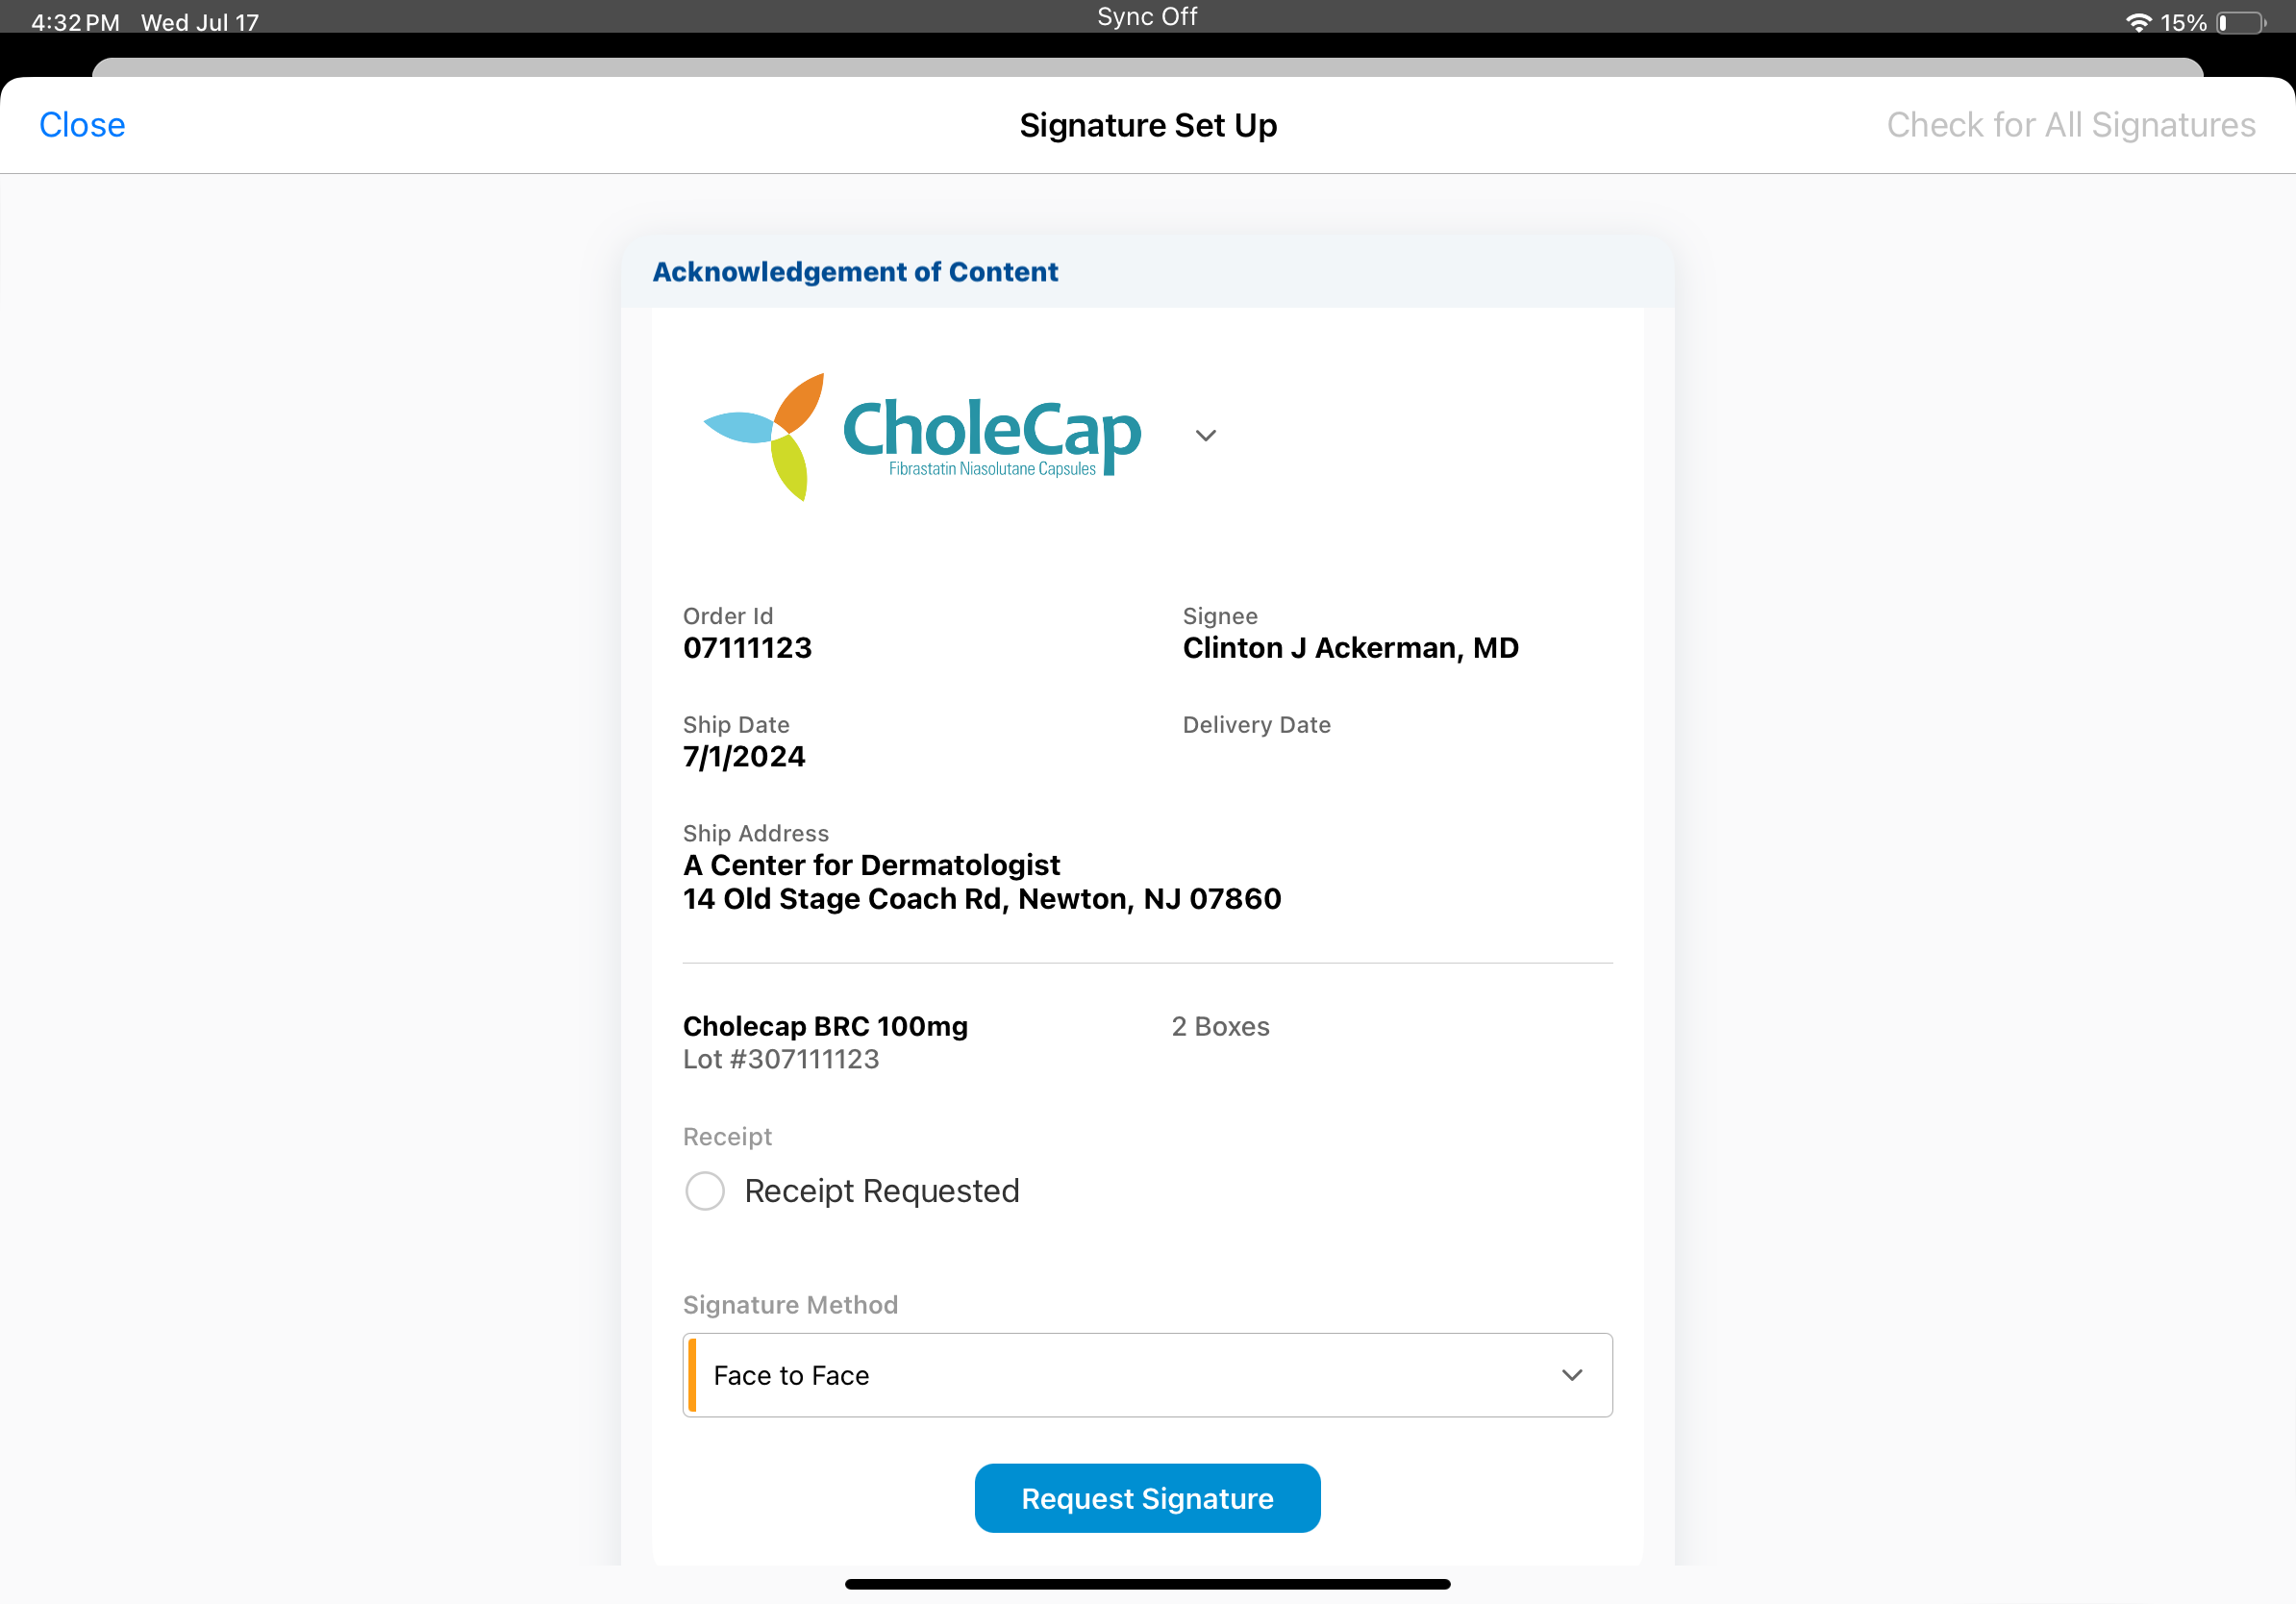
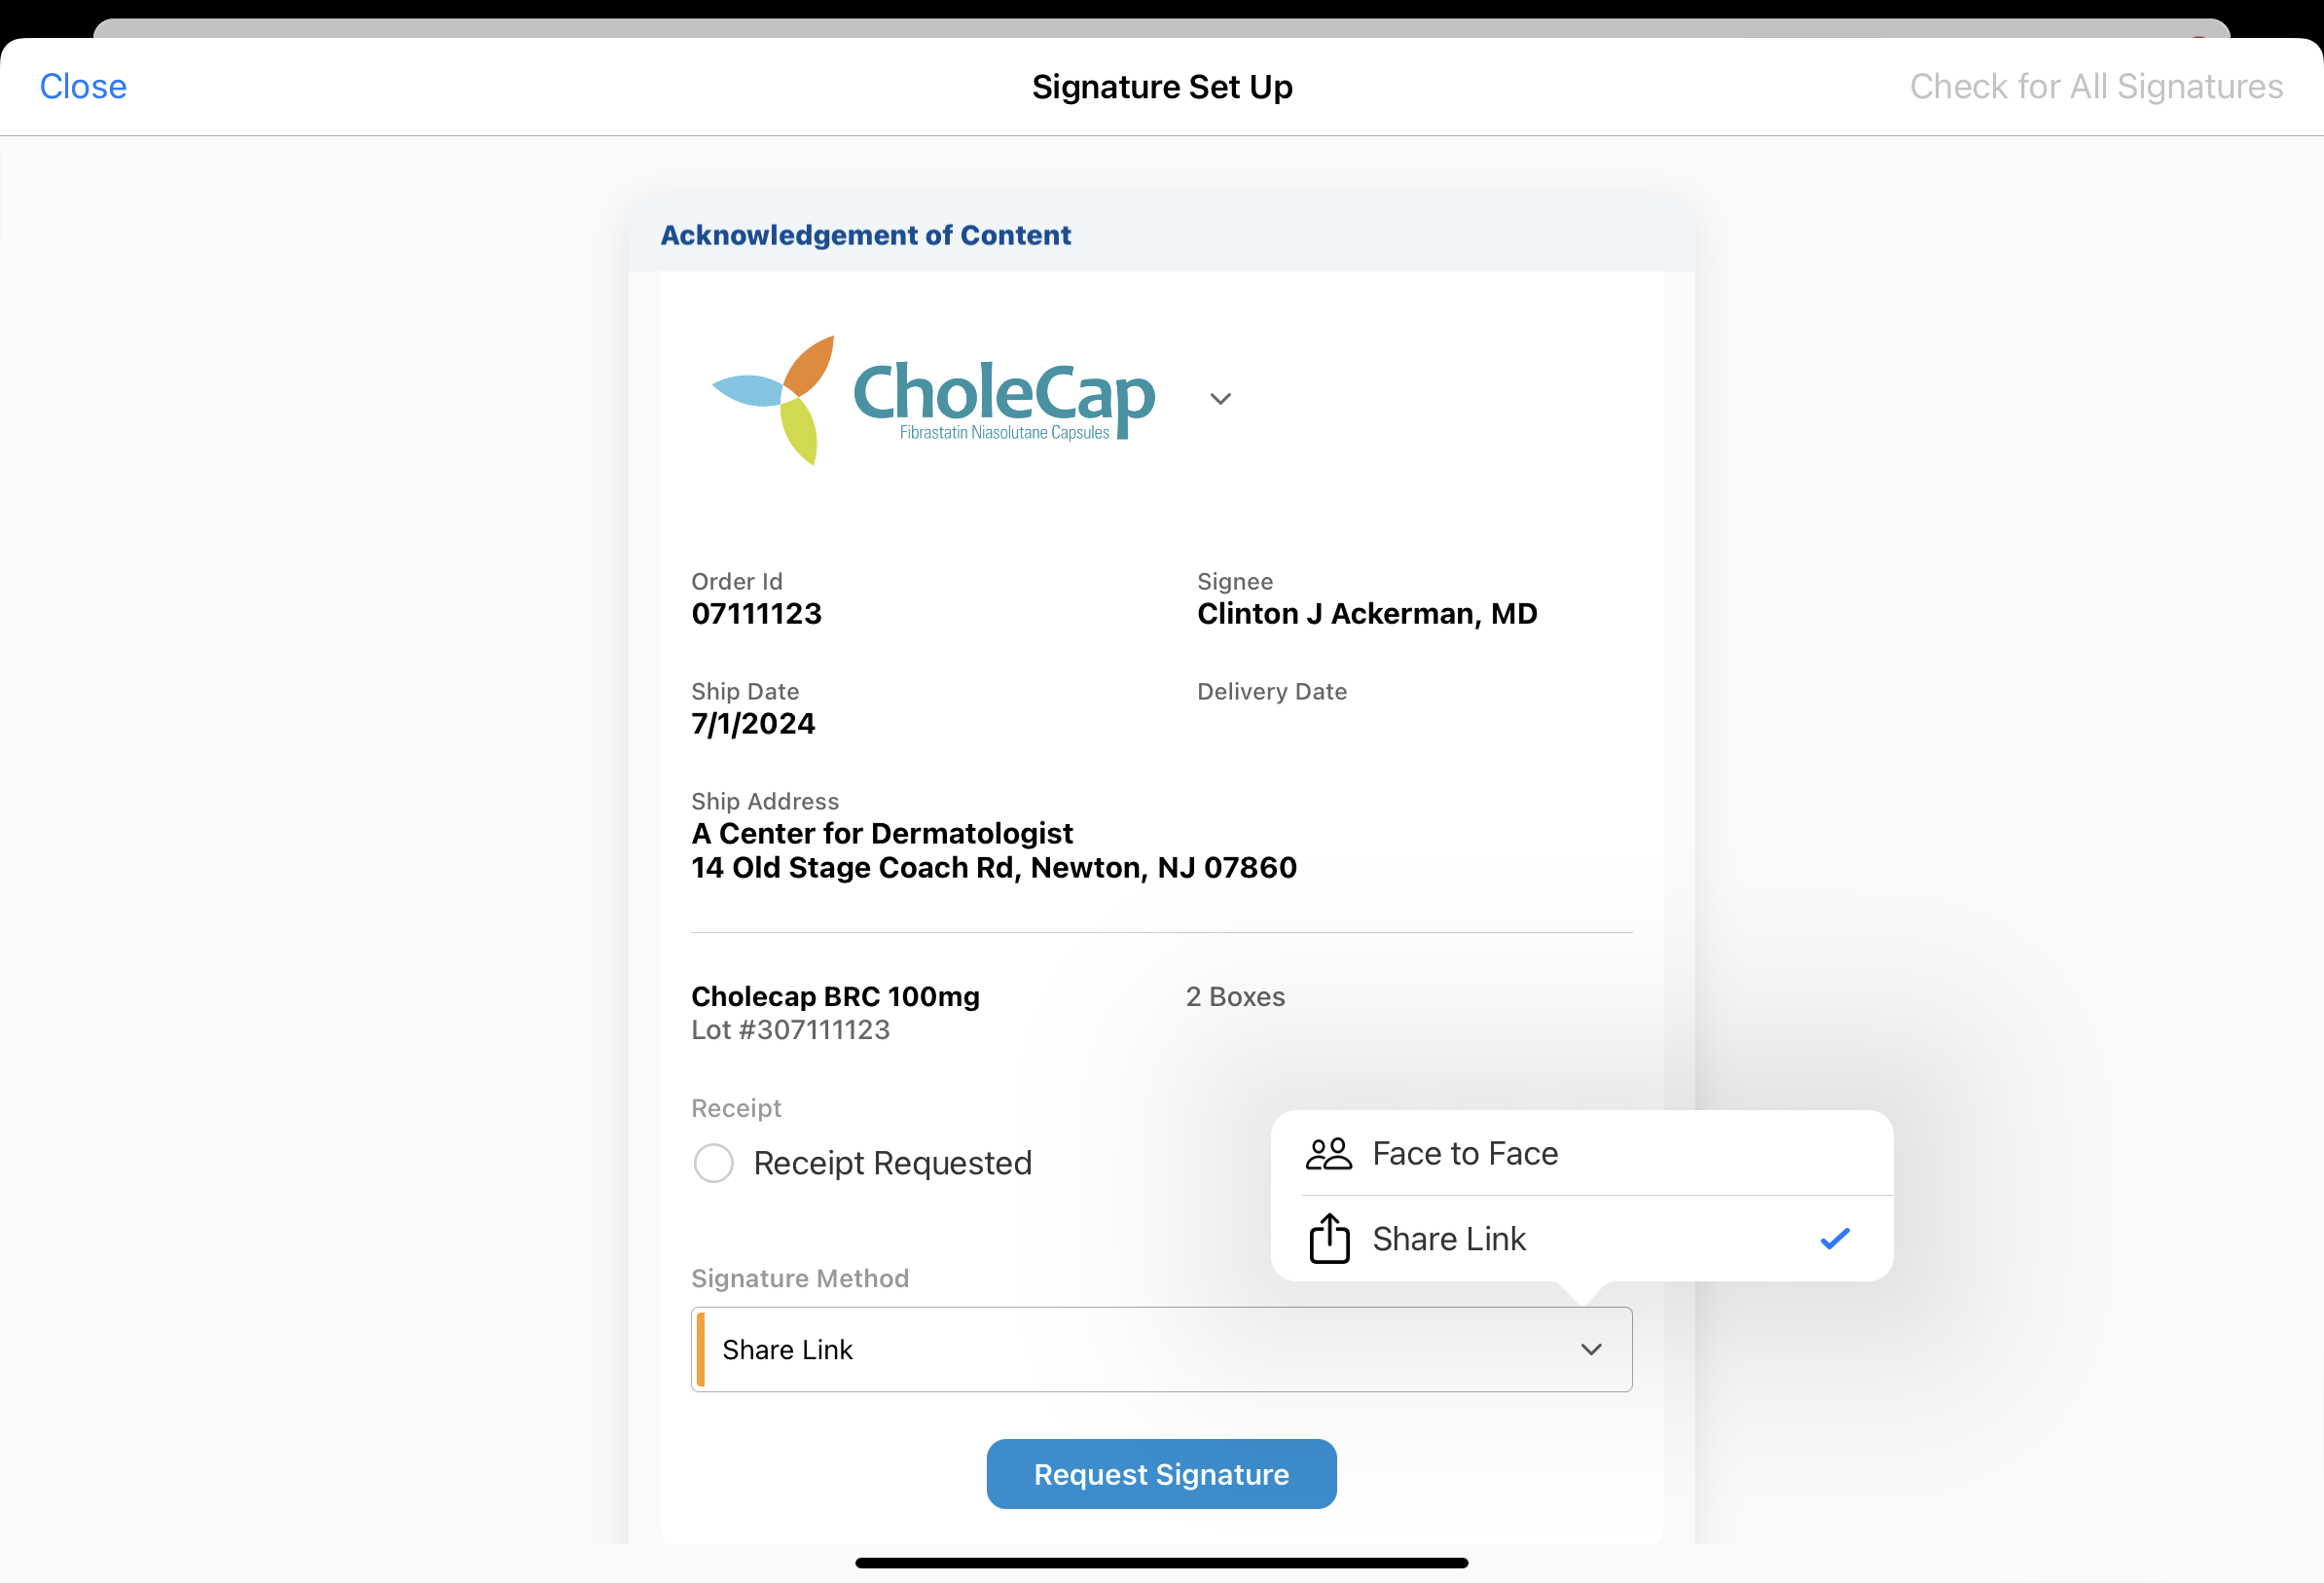
- Select the appropriate signature method from the Request Signature Method picklist on the Signature Setup page.

- Complete the selected signature request process:
Once the HCP submits their signature, the end user receives an email notification from Veeva CRM.
Remote AOC signatures are automatically accepted. Users do not need to review and accept the HCP signature.
Approved Email receipts are not available for AOC signatures.
While there is a pending signature request, the Content_Acknowledgment_vod record for the AOC is locked. Users and admins cannot edit or delete Content_Acknowledgement_vod records with pending signature requests until the HCP provides a signature or the user cancels the signature request.
Face to Face Signature Capture
To request a signature using Face to Face signature capture:
-
Select Face to Face from the Request Signature Method picklist for the appropriate AOC record.
-
Select the Request Signature button.
-
Provide the device to the HCP for signature capture.
-
Select Accept to accept the HCP signature and complete the AOC process.
The Face to Face method is not available on the CRM Desktop (Windows) platform.
Share Link Signature Capture
To request a signature using Share Link signature capture:
-
Select Share Link from the Request Signature Method picklist for the appropriate AOC record.
-
Select Request Signature.
-
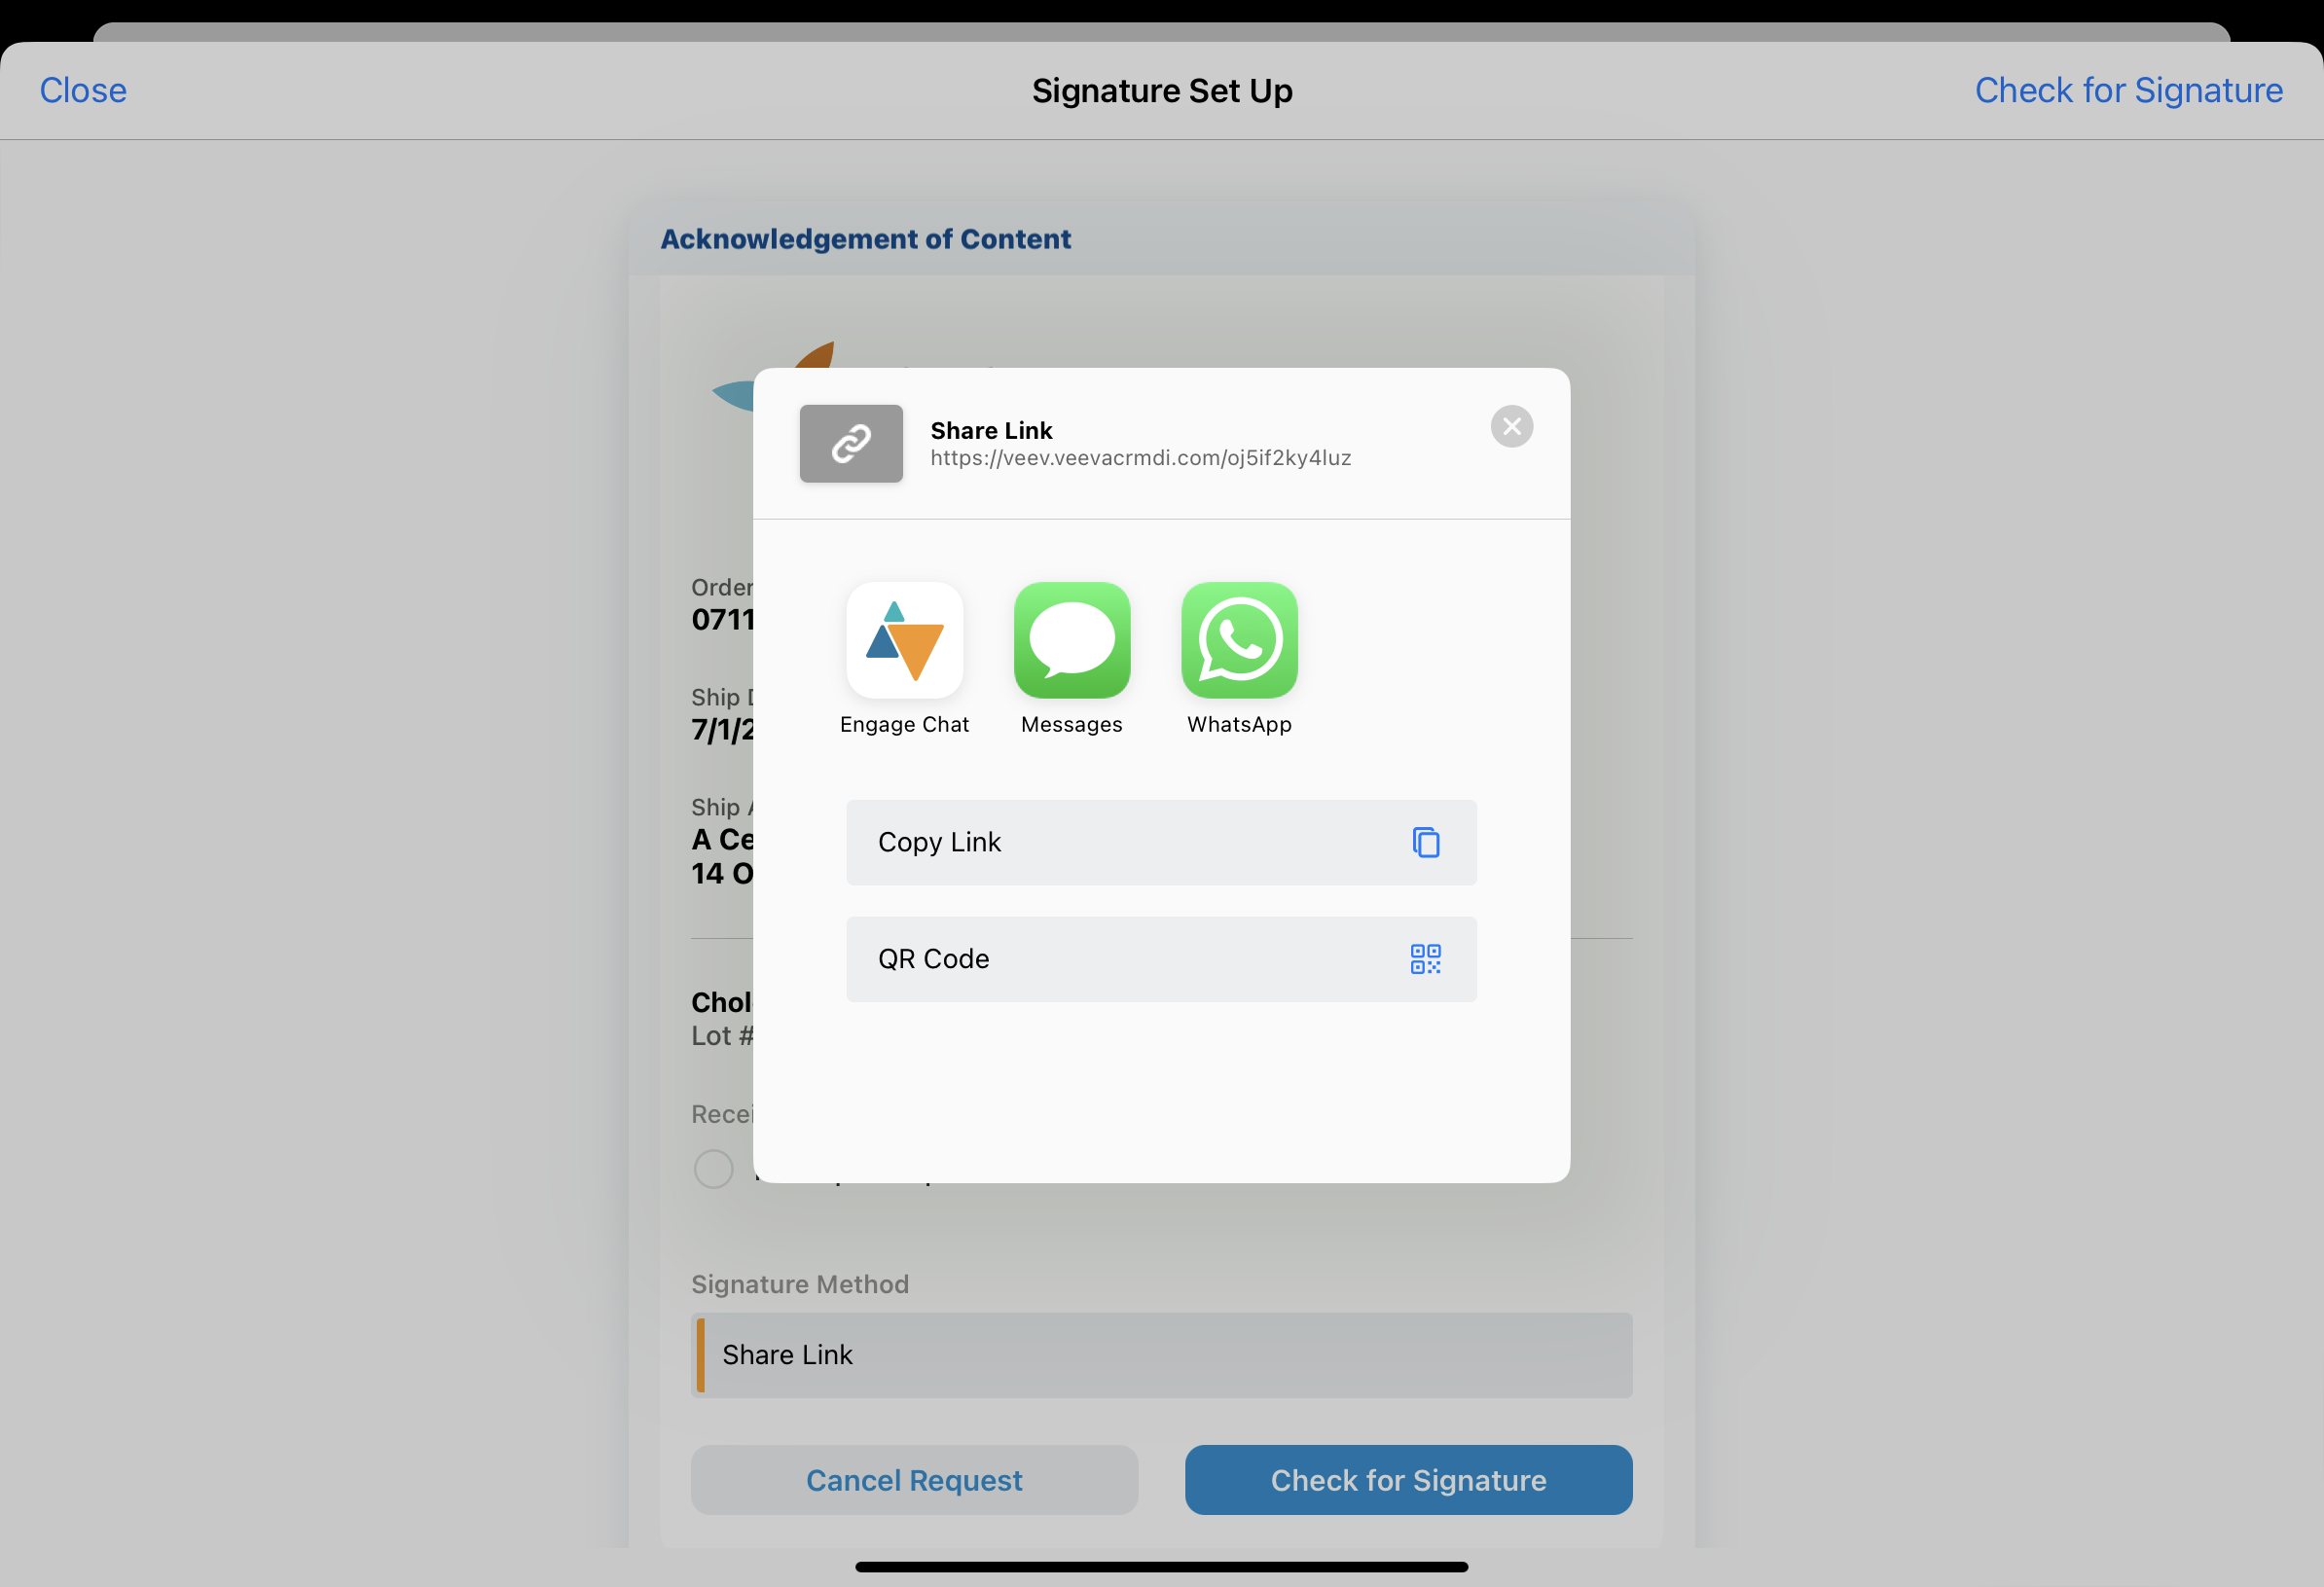
Select the appropriate application from the custom sharing modal to share the generated link with the HCP. Sharing options are defined by the ENGAGE_LINK_APPS;;EngageLink Veeva Message. If an acceptable application is not available, select Copy Link to copy the link to the device’s clipboard, then send it to the HCP through the preferred application.
Users do not need to remain in the Veeva CRM application while waiting to capture the signature.

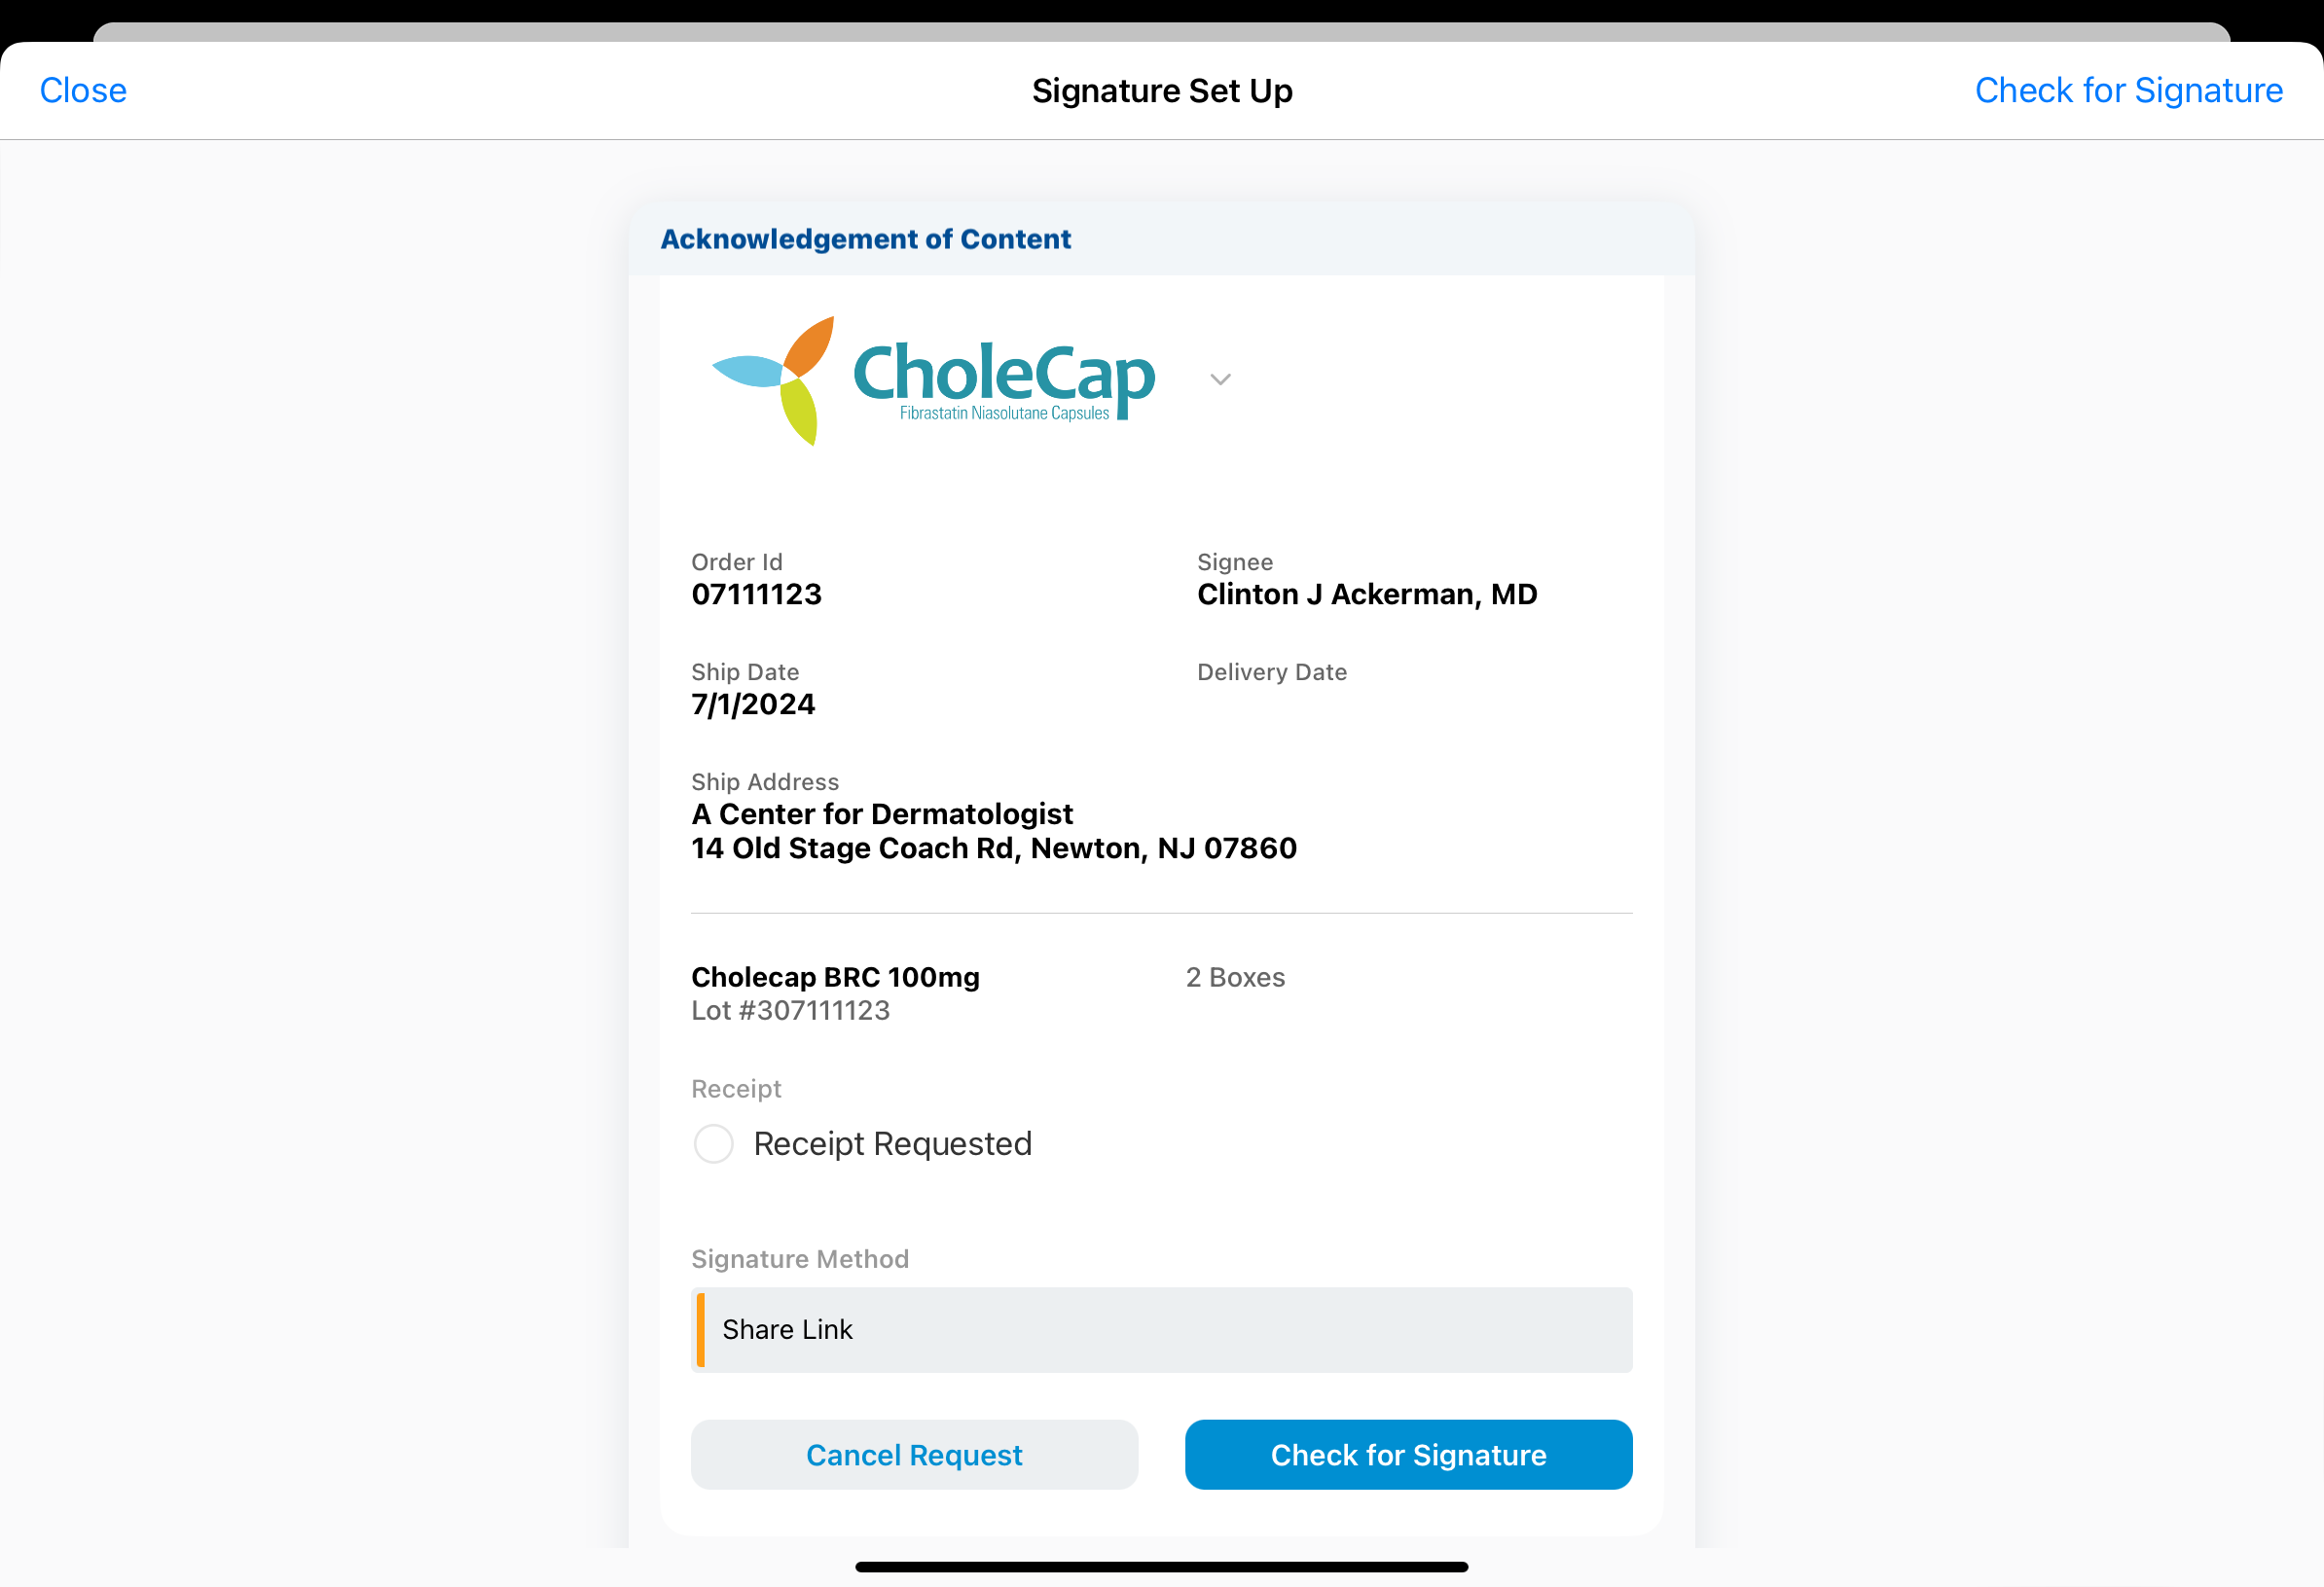
Checking for Pending Signatures
To check for submitted signatures after sending a Share Link signature request, select the Check for Signature or Check for All Signatures button from the upper right corner of the signature page, or from the signature request card. Users access the signature page from the same entry points as they did when requesting a signature--the call report, the Content Acknowledgement detail page, or the account detail page. If there are multiple signature requests pending for the account, the Check for All Signatures button is available in the signature page header.
If the HCP has submitted a signature for one or more outstanding AOC signature requests, a Signature Received message displays.
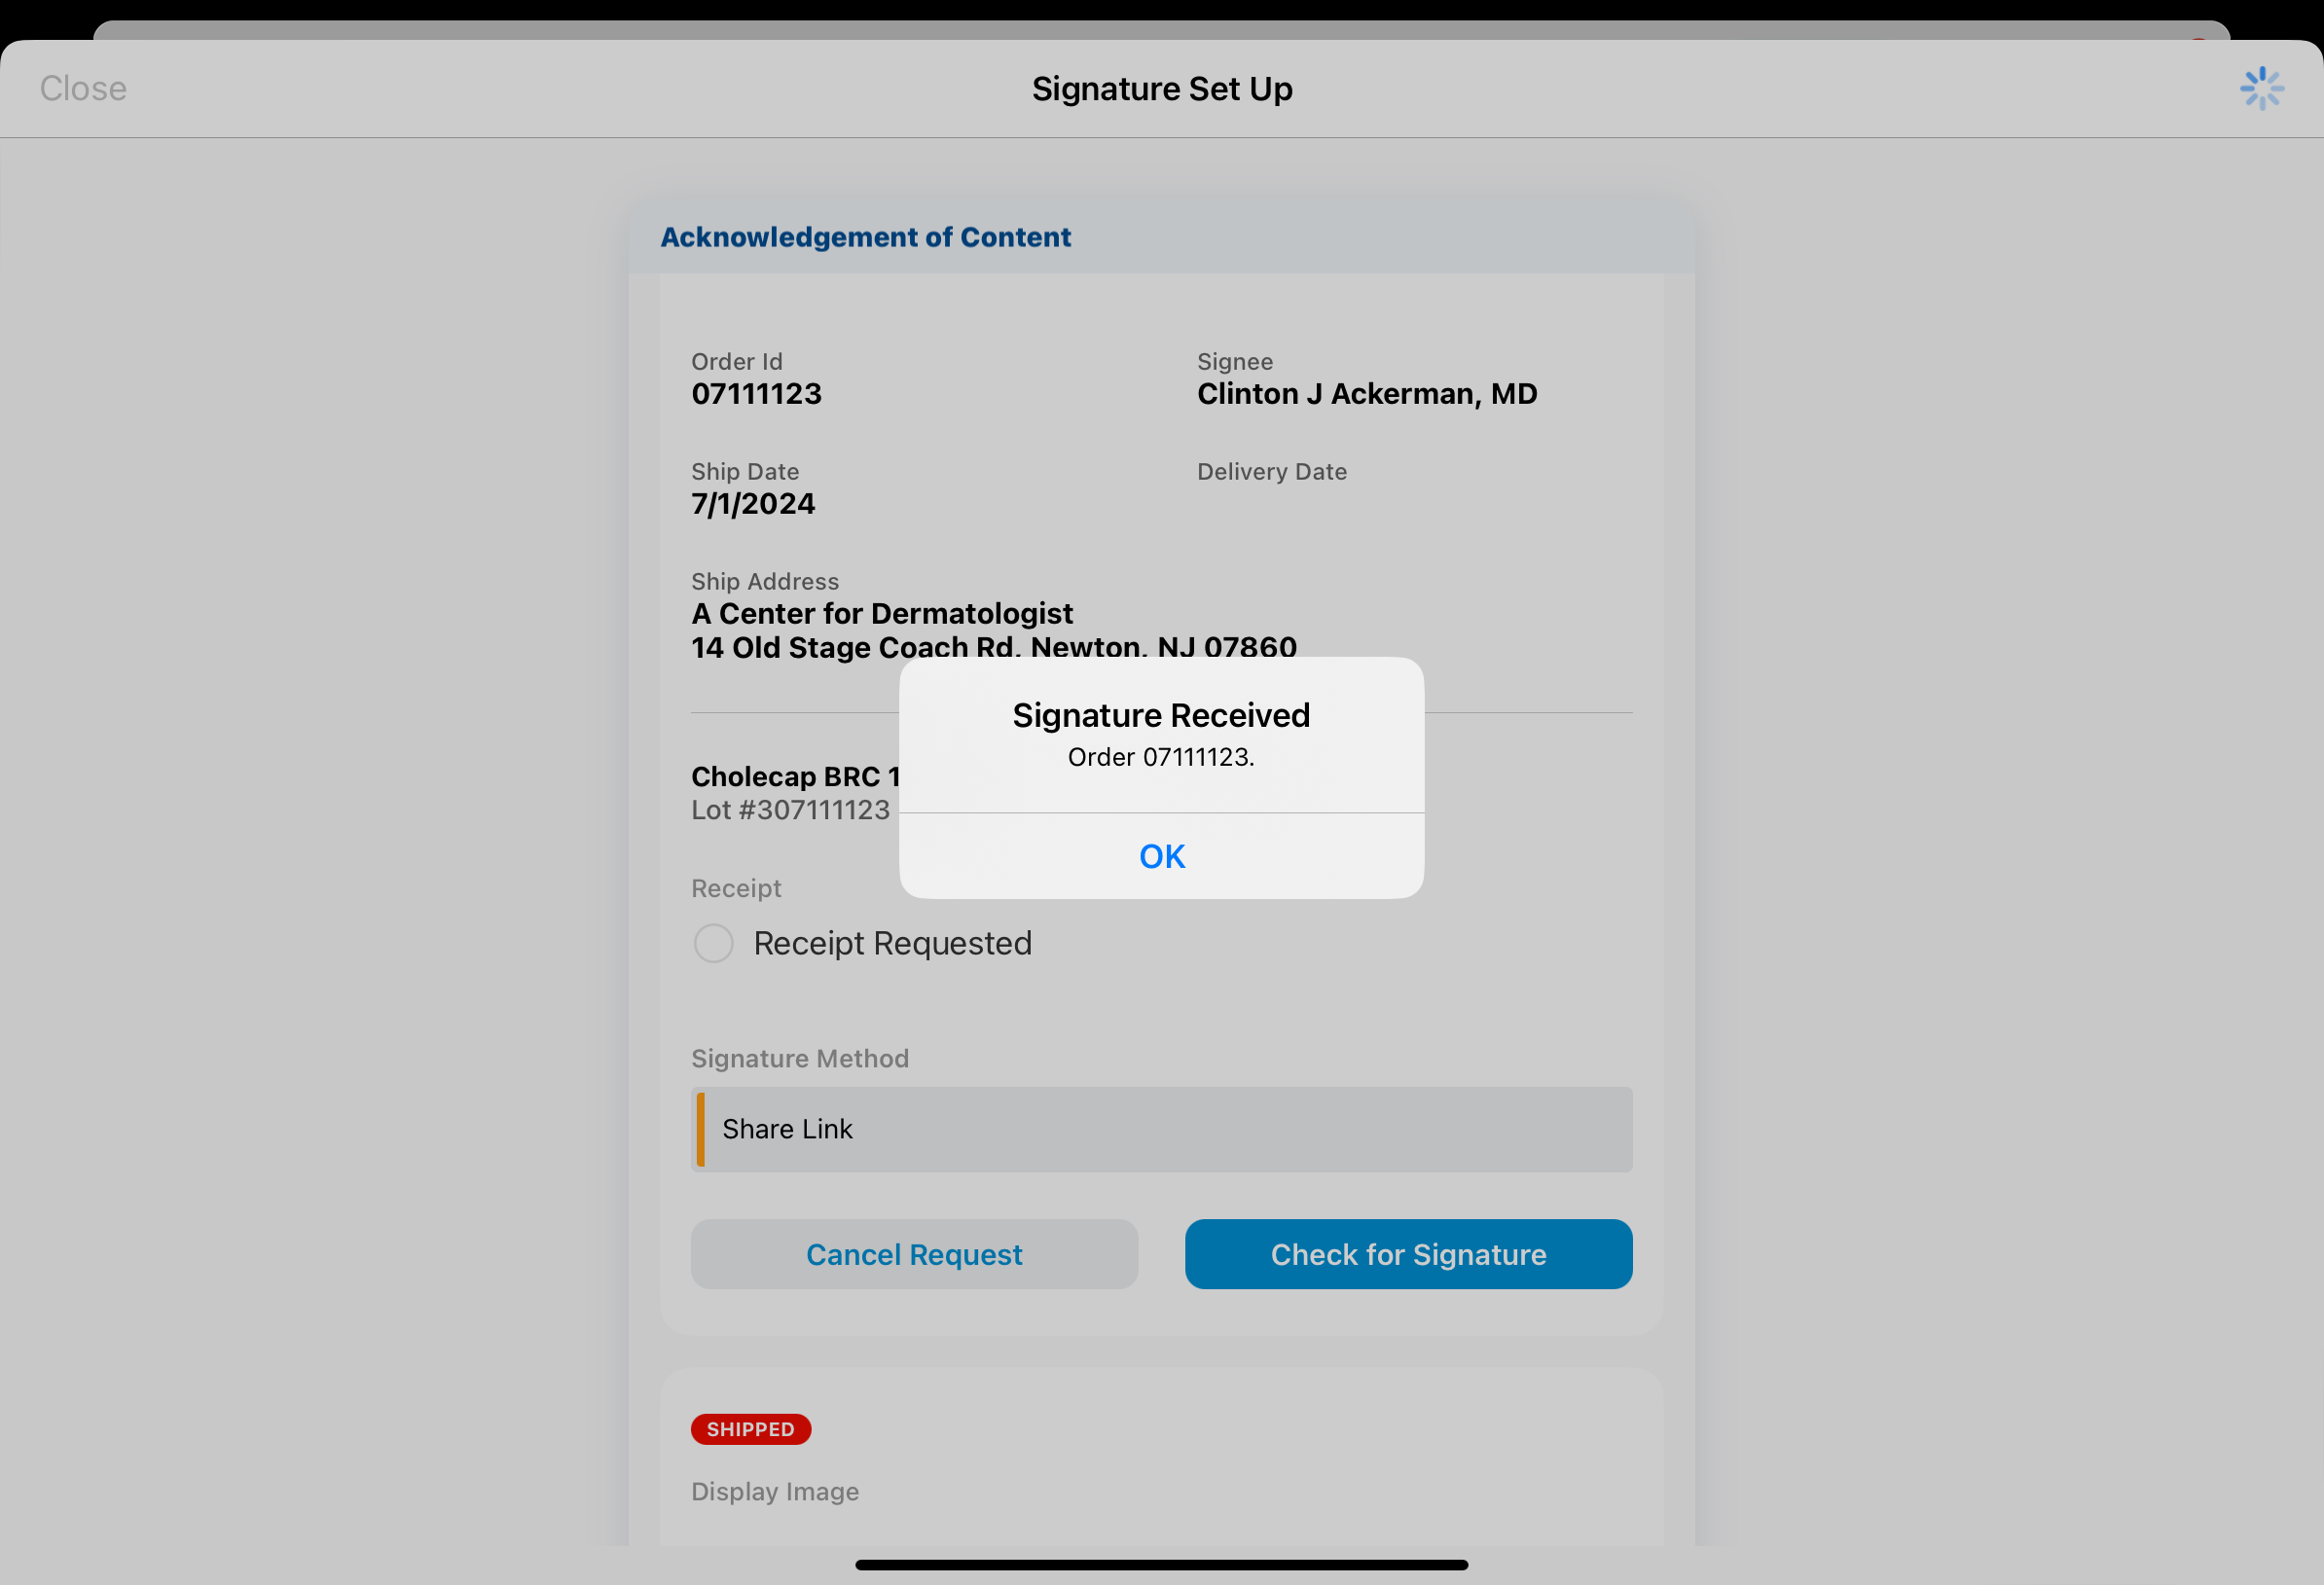
Select OK to return to the Signature Setup page. If all open AOCs are resolved, including AOCs with pending signature requests, the Signature Setup page closes and users are returned to their entry point.
If the HCP has not submitted a signature for any pending request, a No Signature Received message displays.
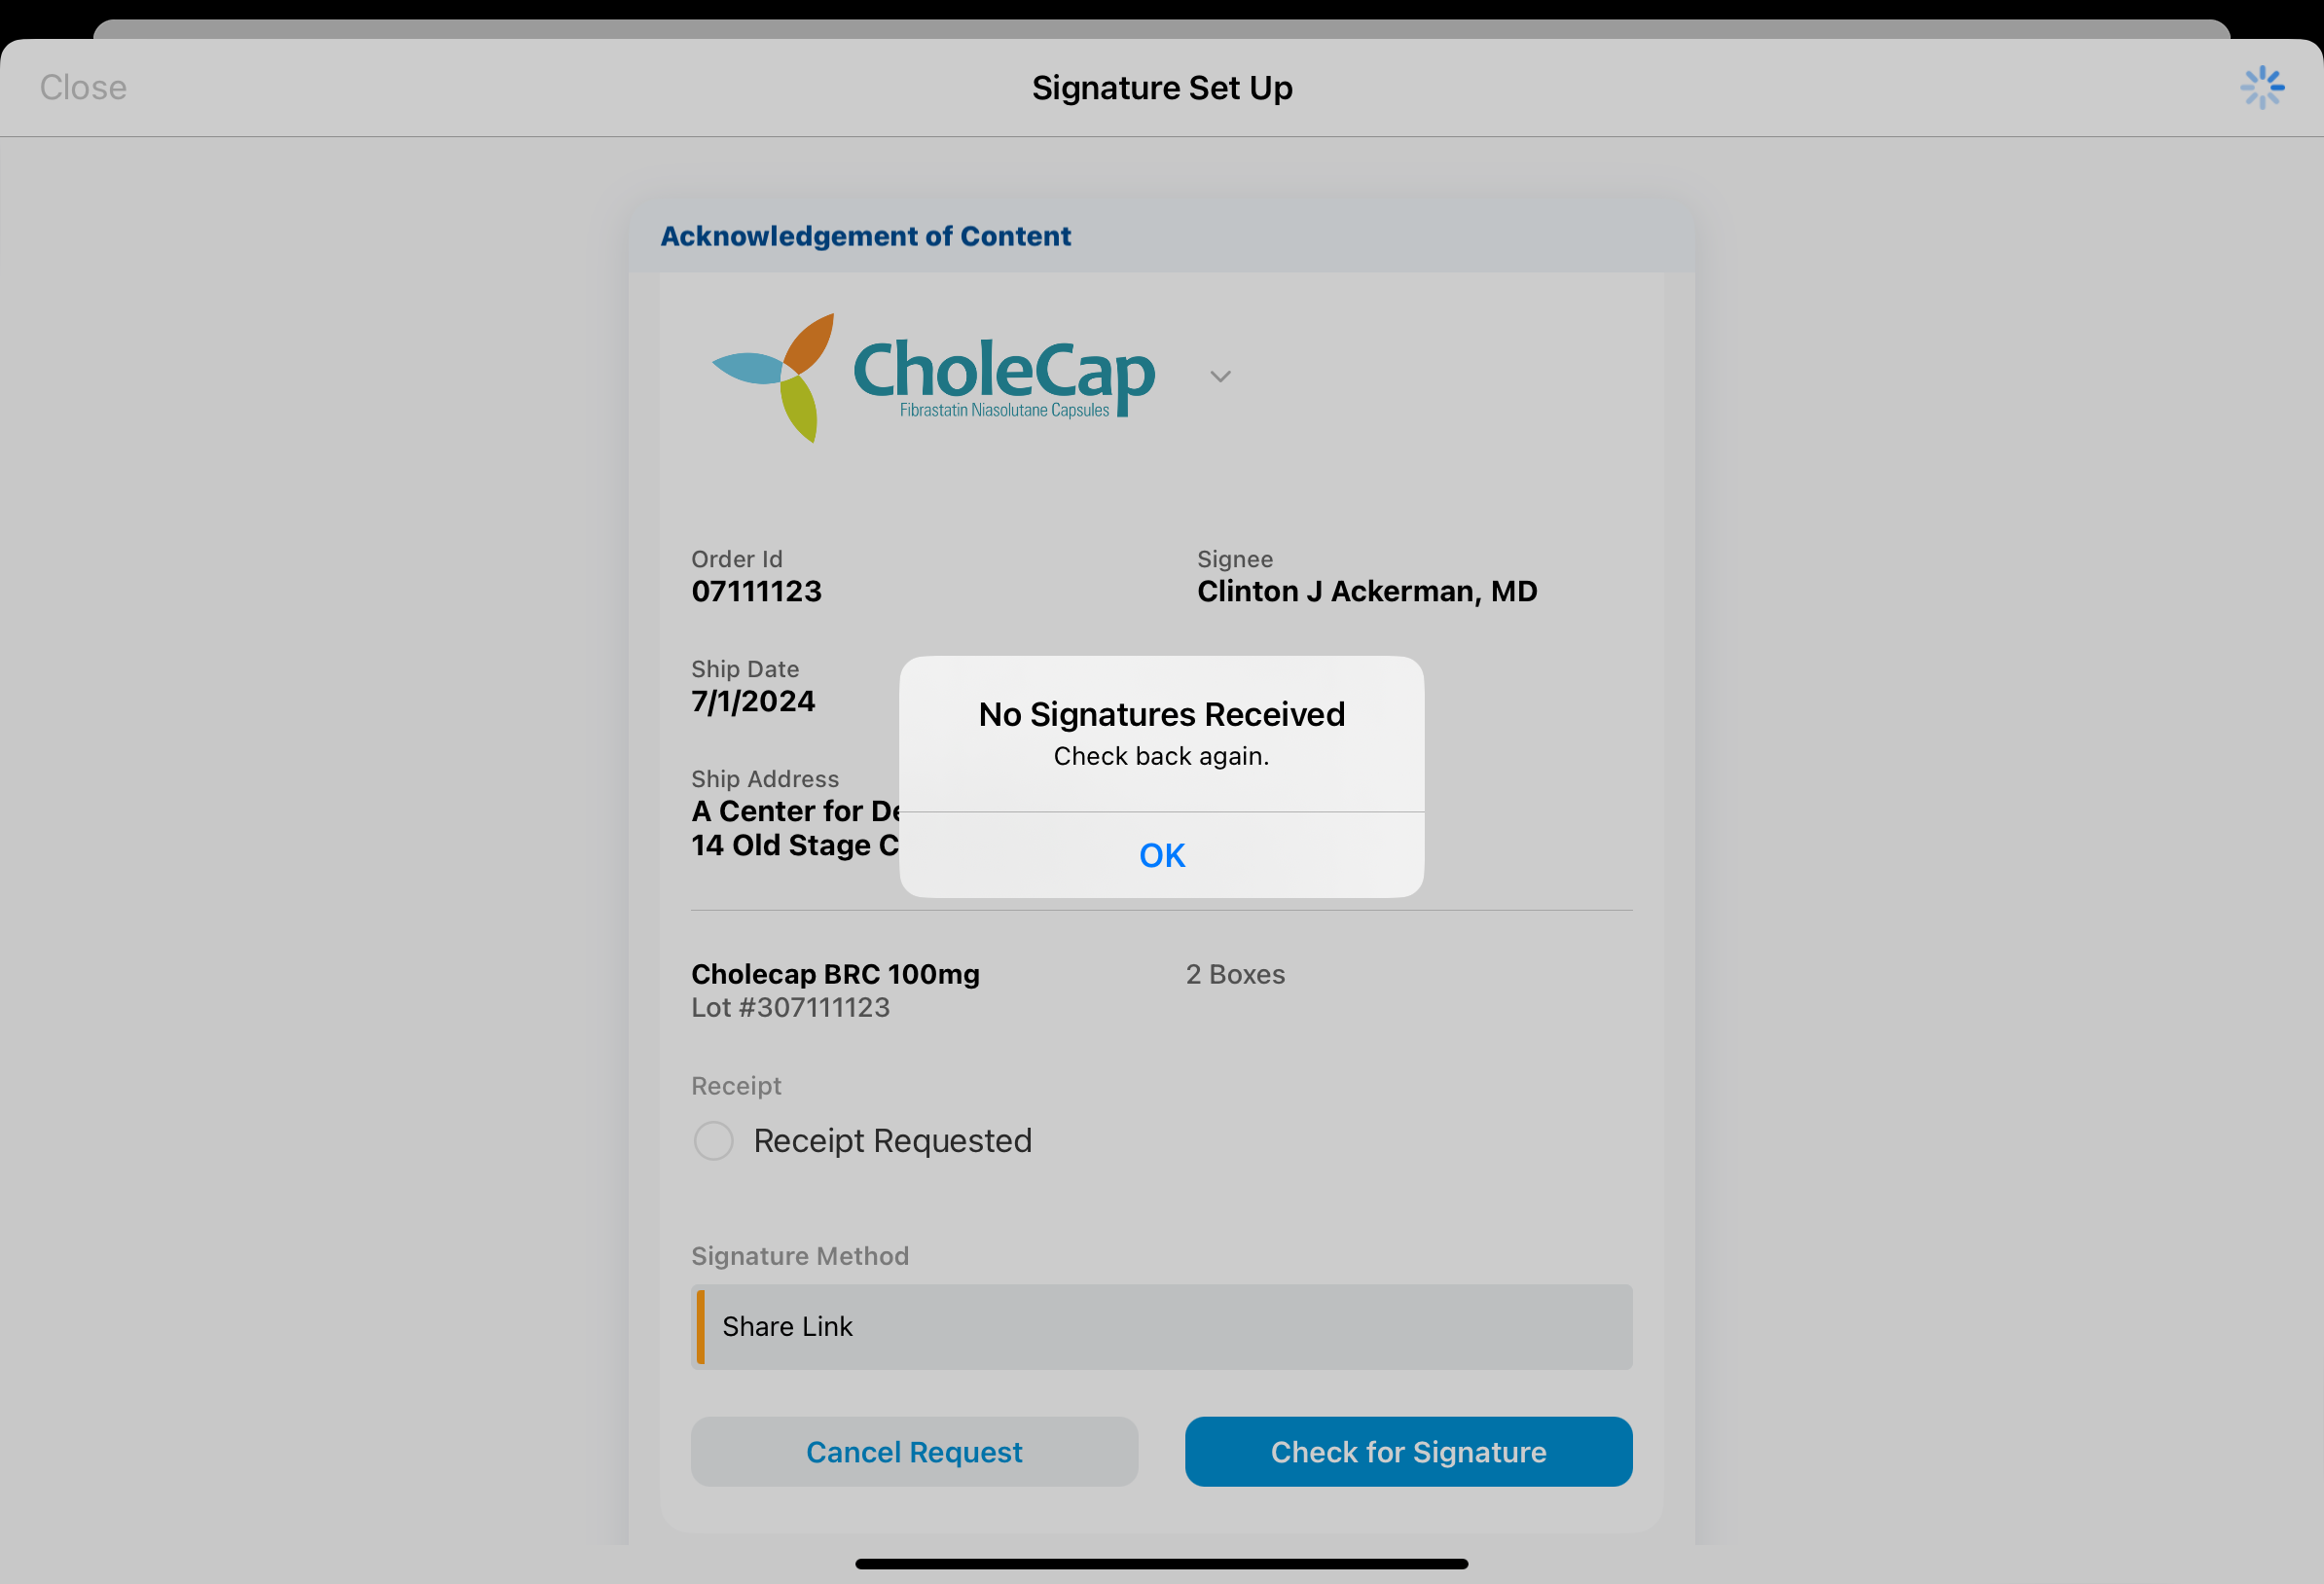
Select OK to return to the Signature Setup page.
Engage Meeting Signature Capture
To request a signature using Engage Meeting signature capture:
-
Select Engage Meeting from the Request Signature Method picklist for the appropriate AOC process.

-
Select Request Signature.
-
Select the appropriate attendee. This step only displays if multiple attendees are using the same Engage meeting ID as the selected account.
A Requesting modal displays to the meeting host until the HCP sends their signature back to the host.
The Engage Meeting method is only available while users are hosting an Engage meeting.
Canceling Pending Signature Requests
To cancel a pending signature request, select the Cancel Request button for the appropriate AOC on the Signature Setup page. If the HCP has not yet submitted a signature and the request is not expired, a confirmation message displays.
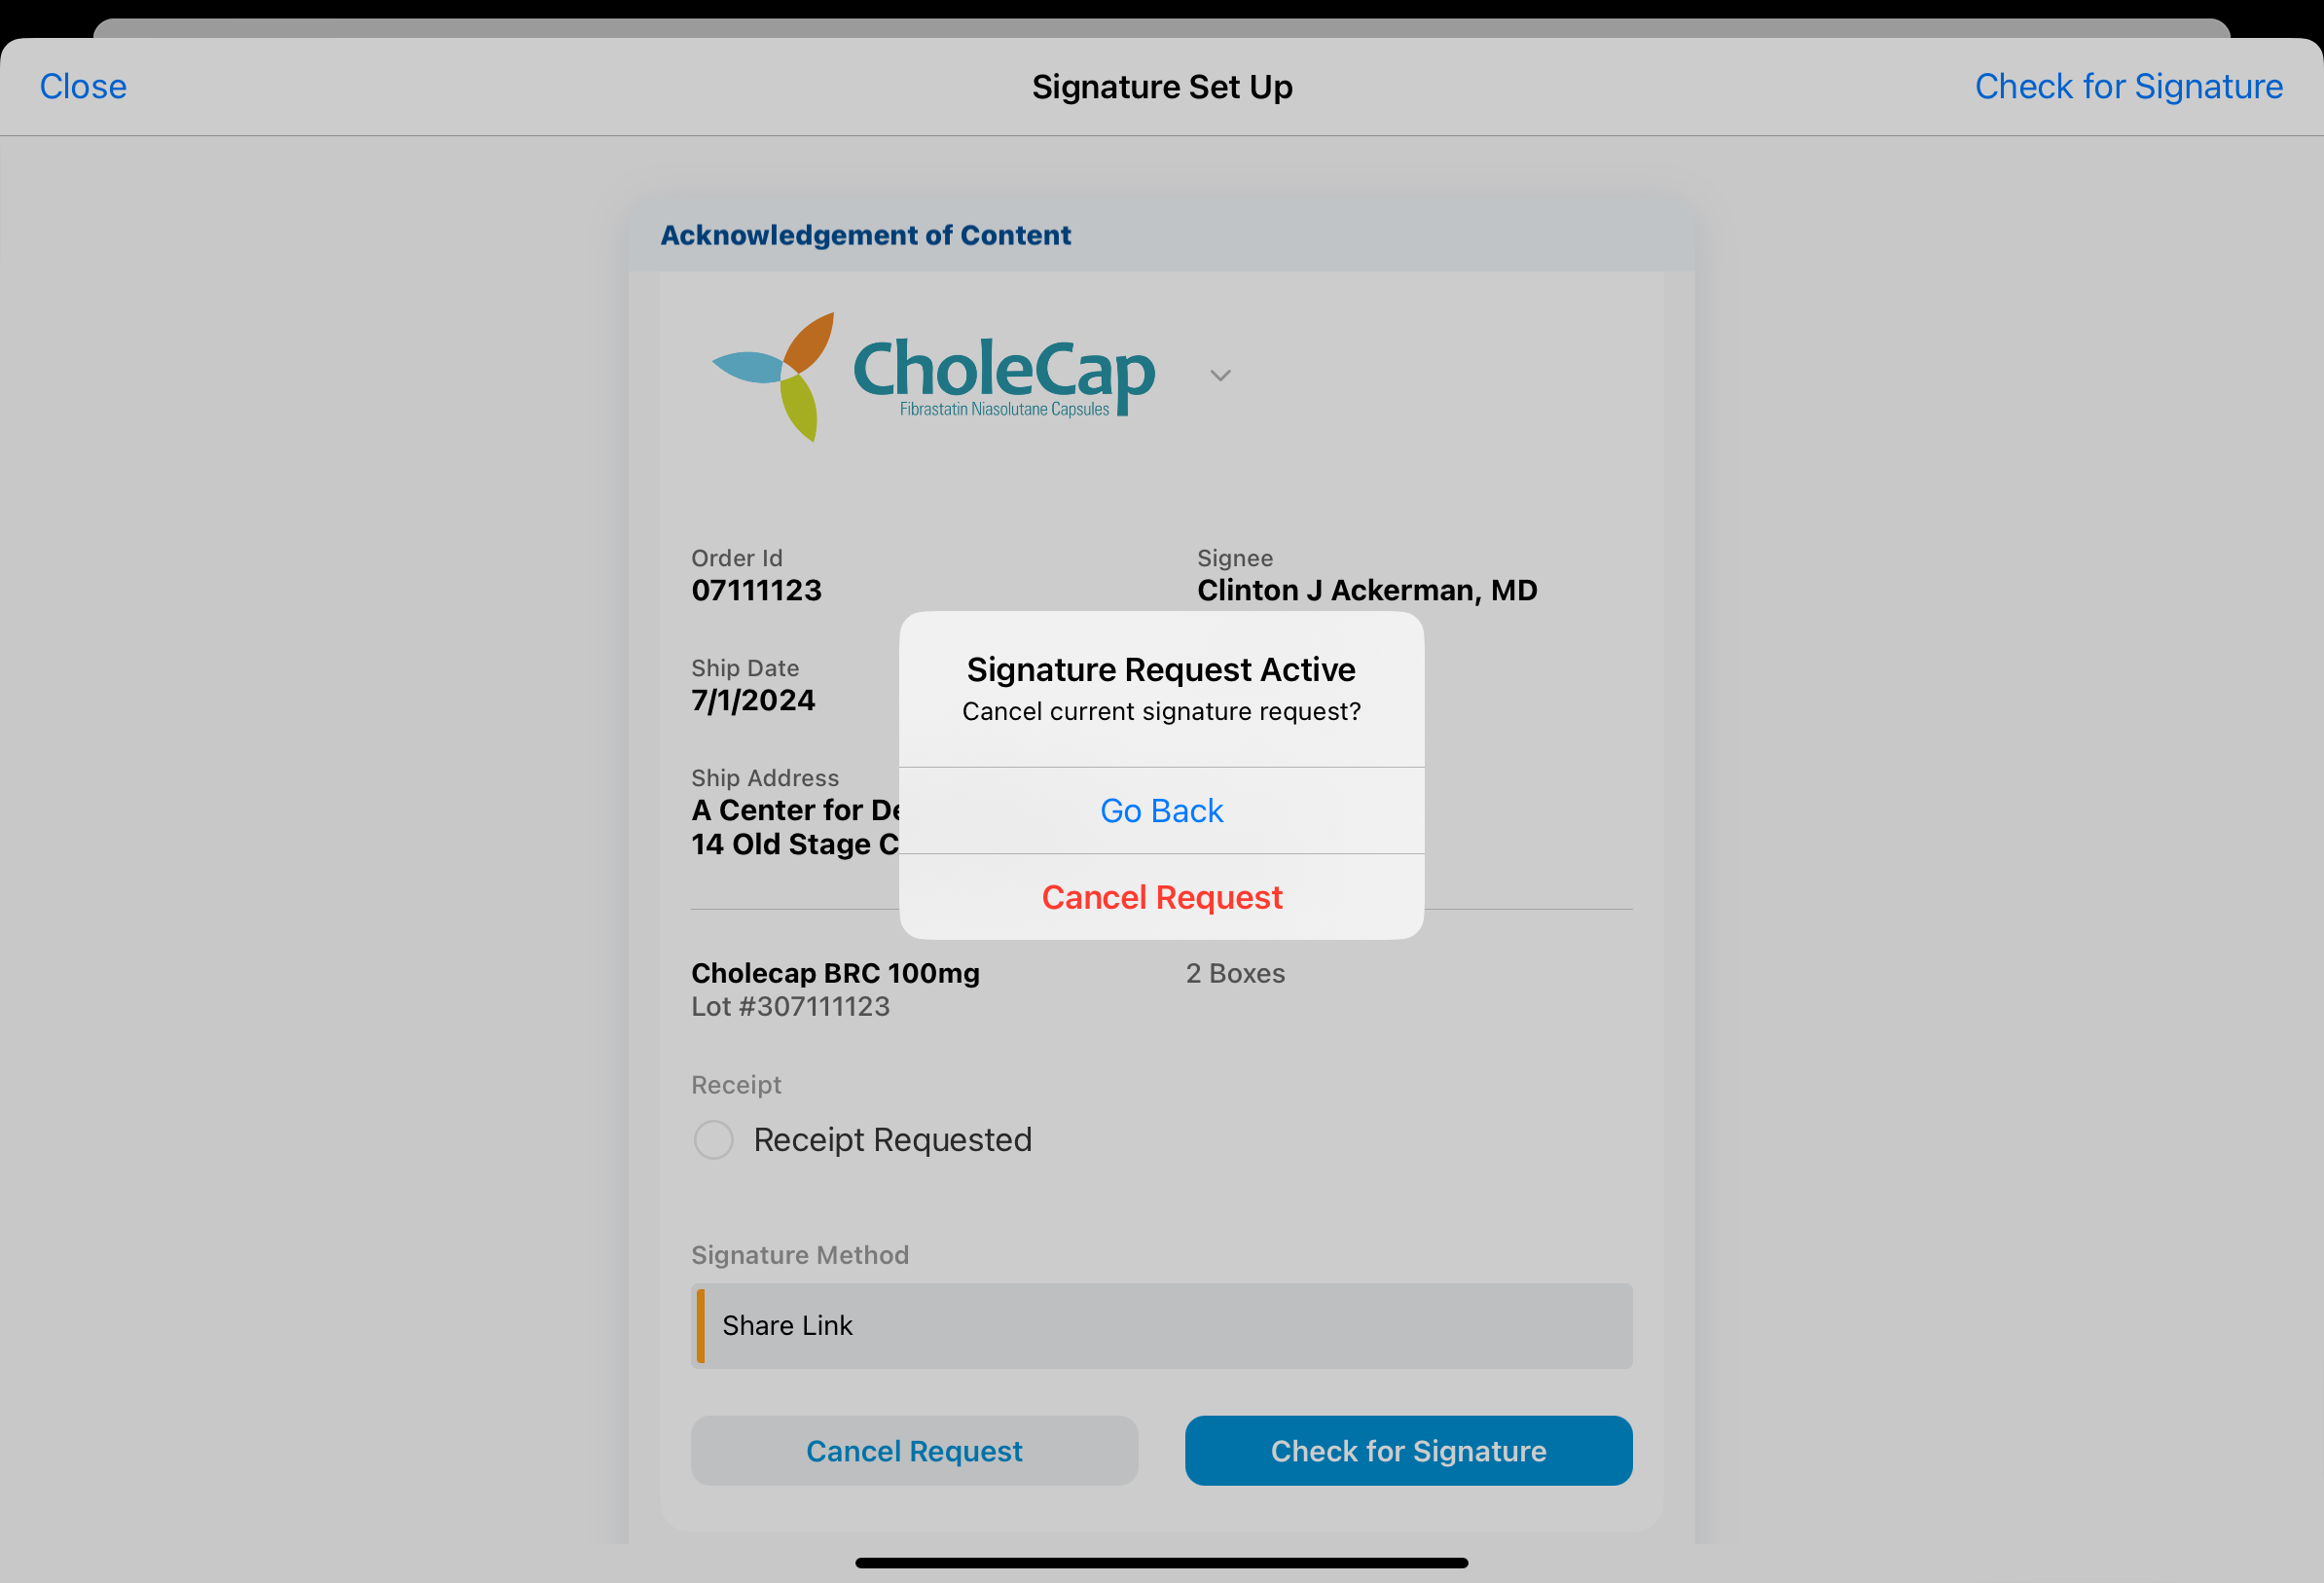
Select Cancel Request to confirm the cancellation.
Canceling a pending signature request is not available for Face to Face signatures.
Providing a Remote Signature for Acknowledgment of Content
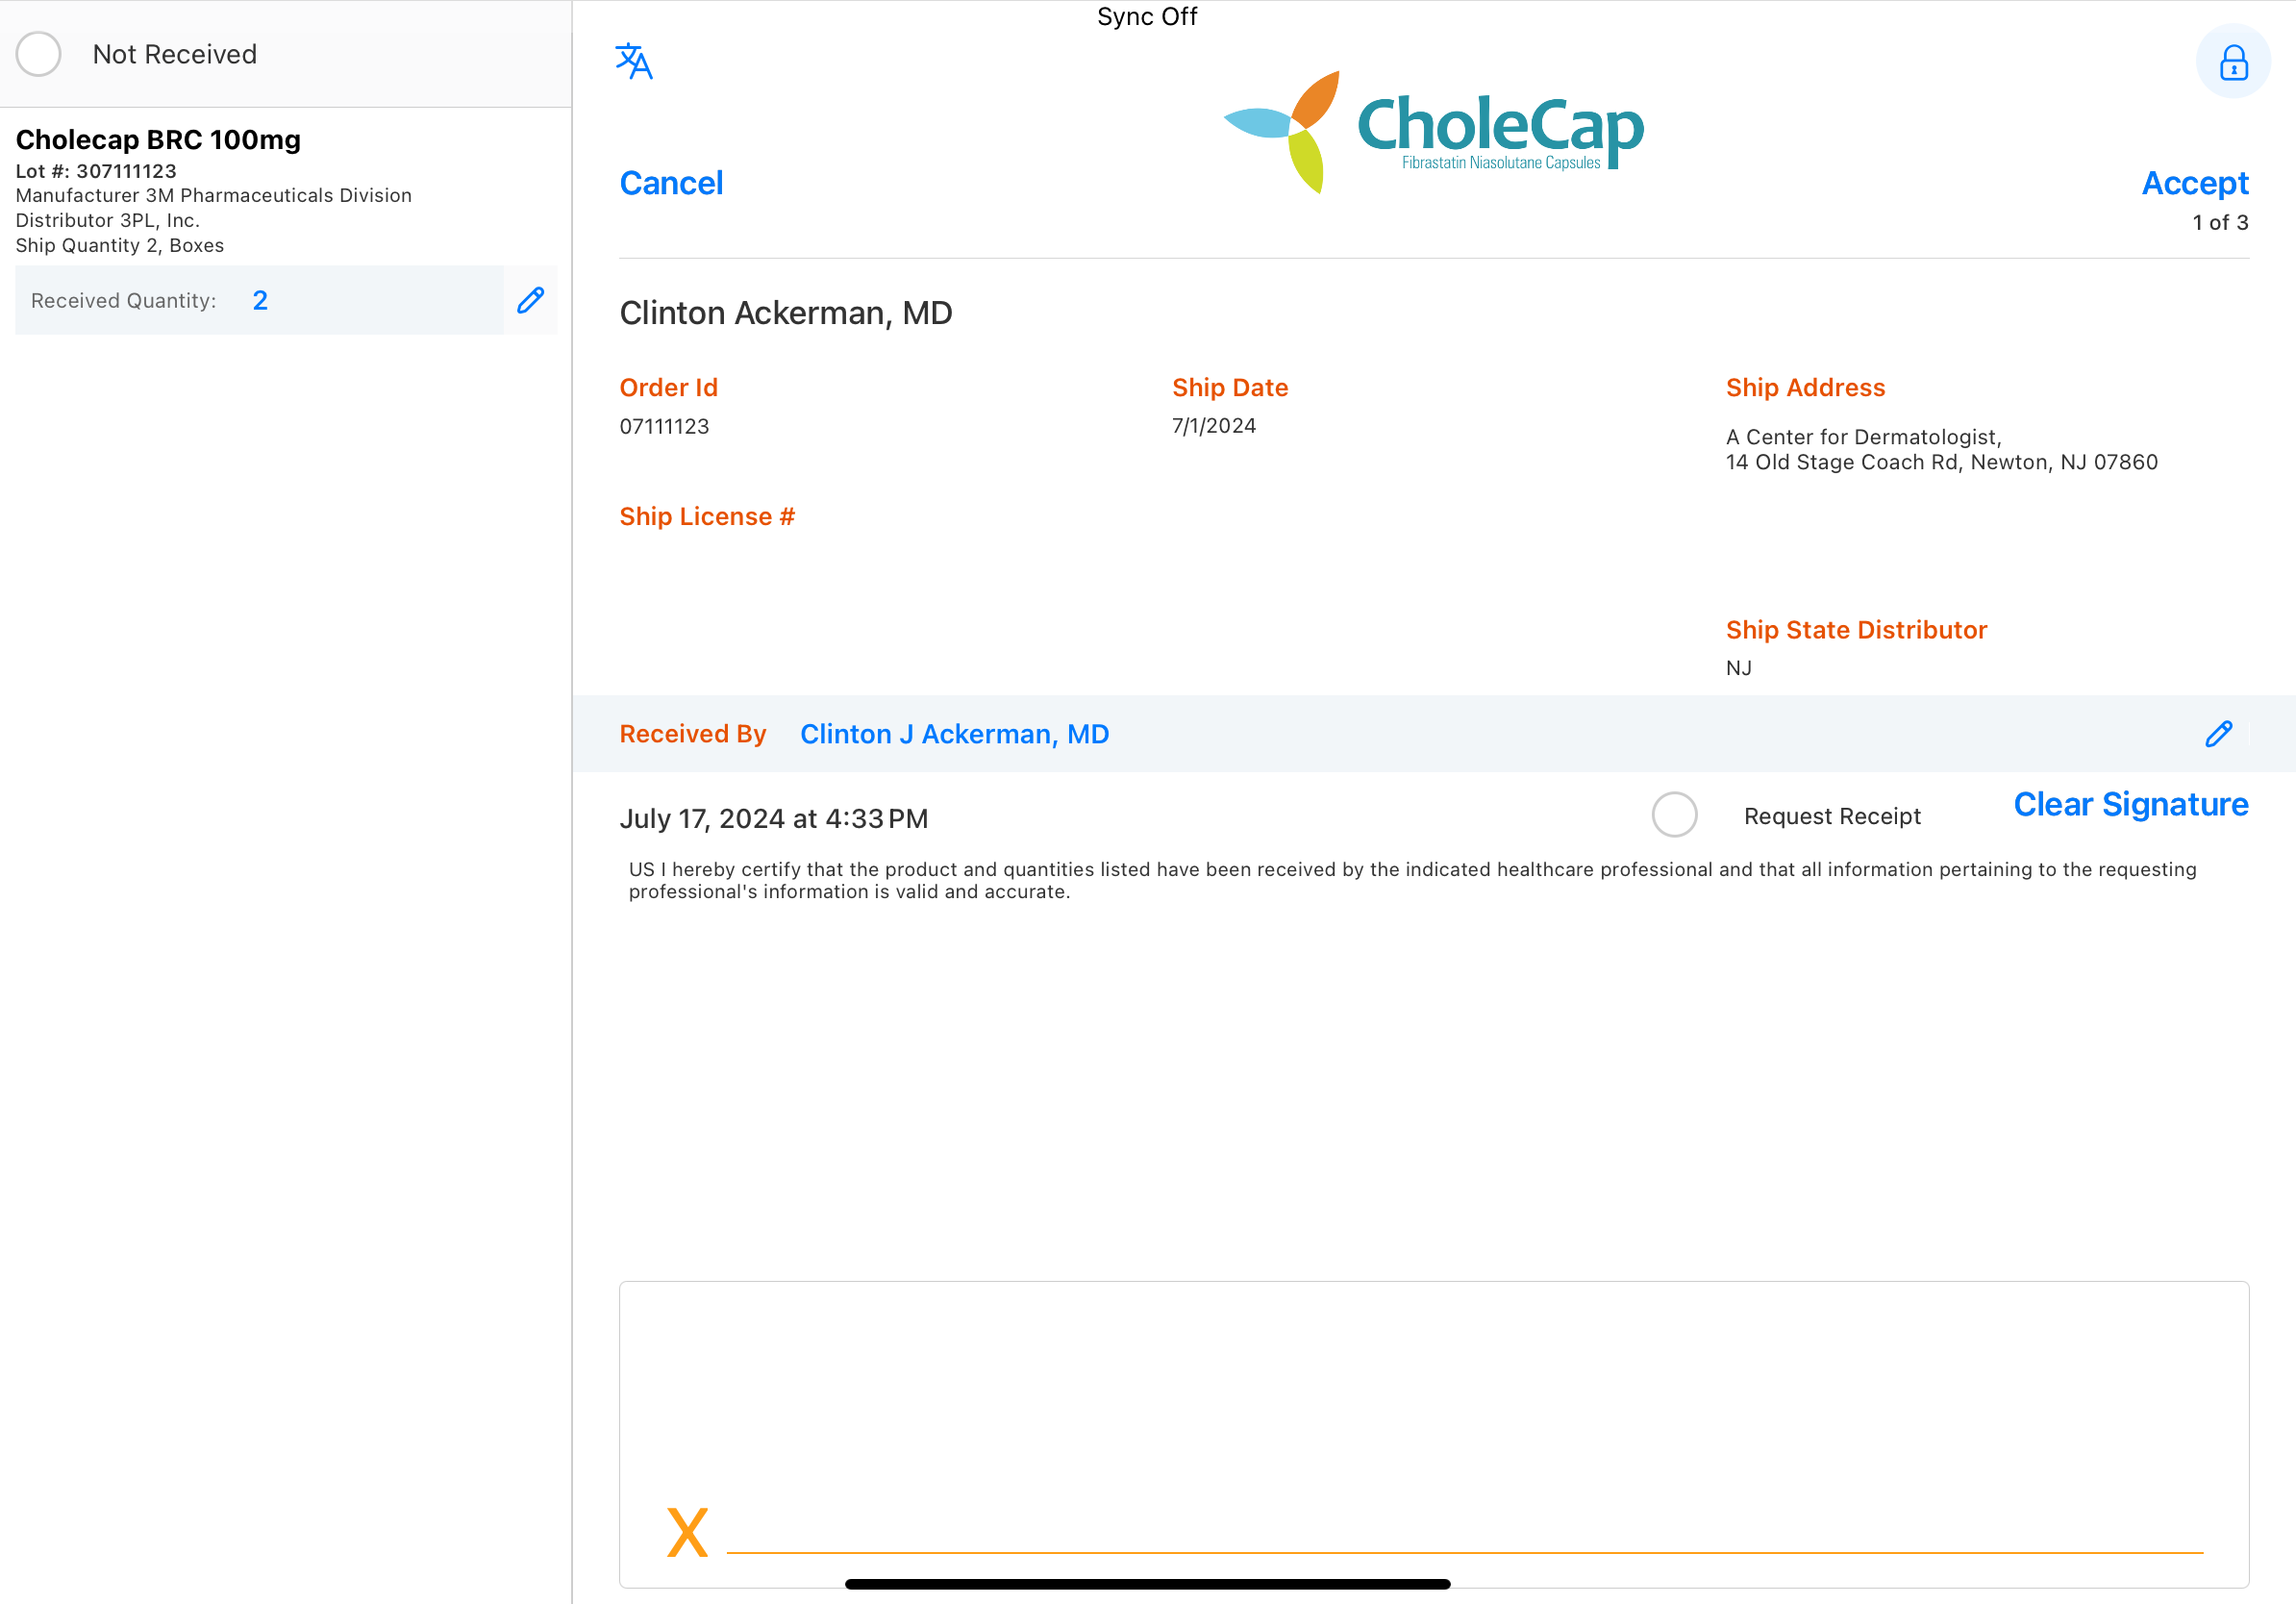
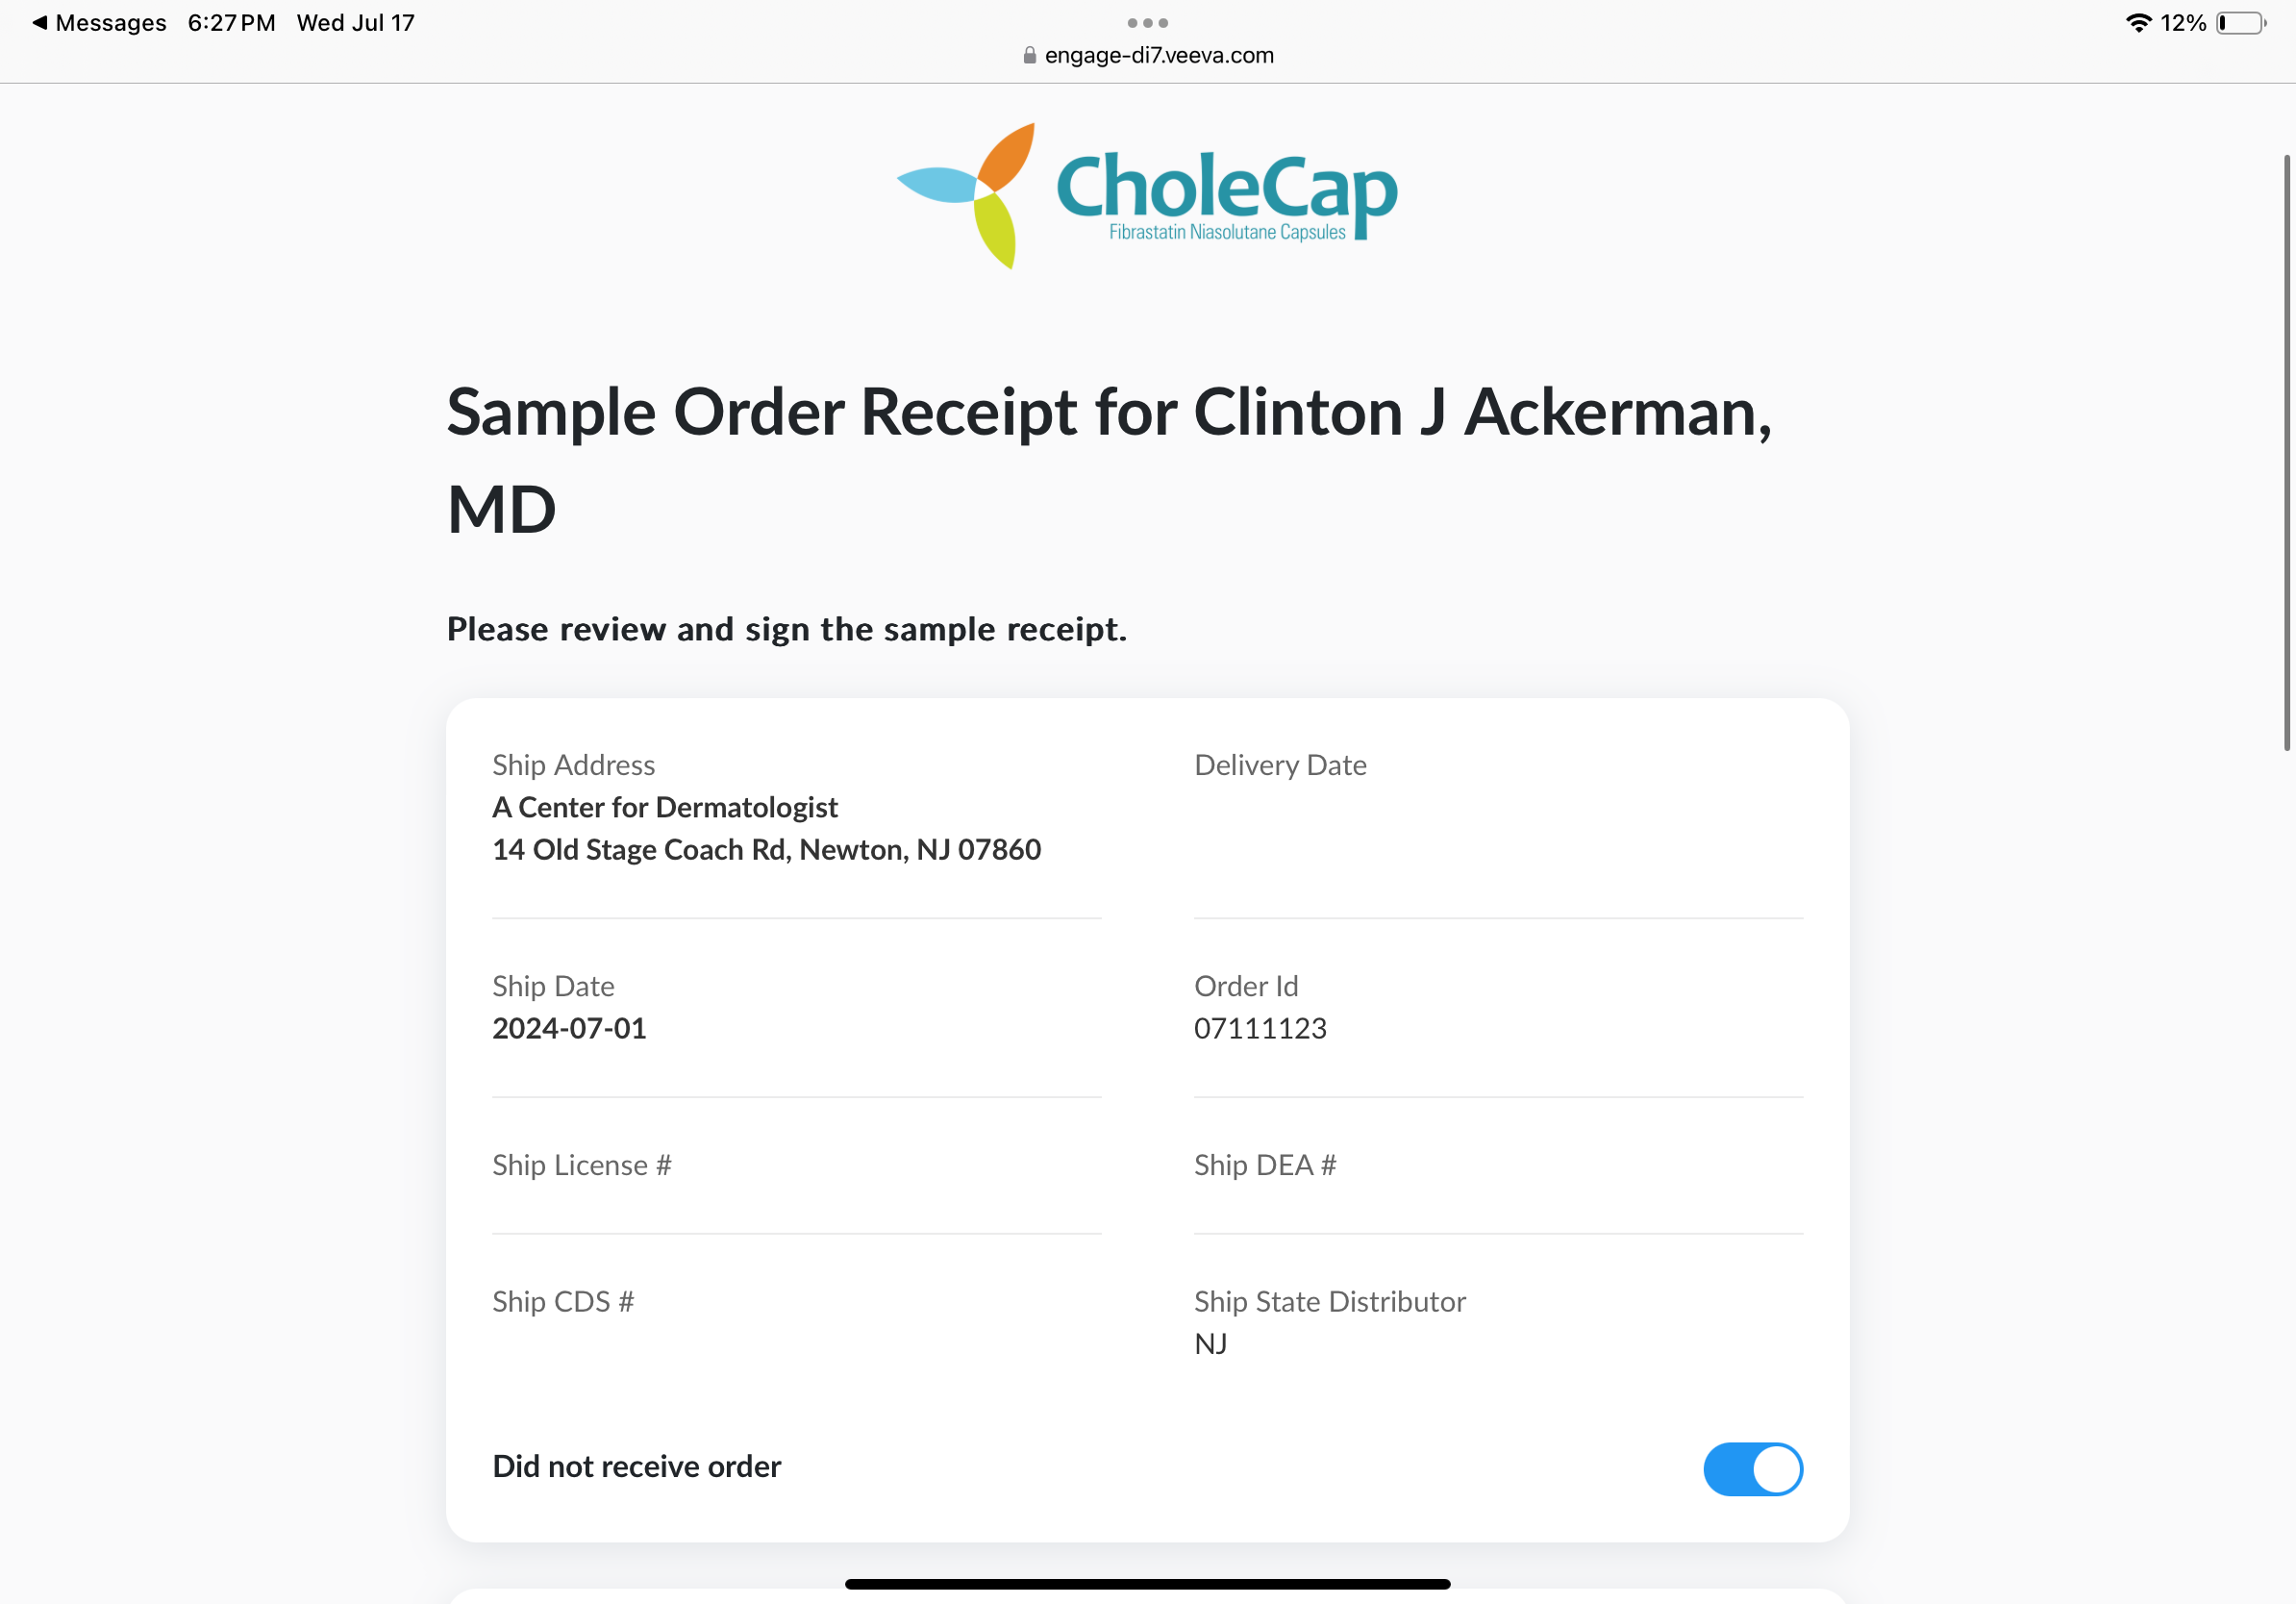
AOC recipients review the signature request, sign, and submit their signatures from the signature capture screen on the end user's device (Face to Face method only) or from the internet browser on their own device. Recipients may edit the received quantity, mark an order as not received, and edit the AOC recipient before submitting their signature.
Editing the Received Quantity
If the actual received quantity differs from the expected quantity, select the edit icon next to the Received_Quantity_vod field and enter the appropriate information.
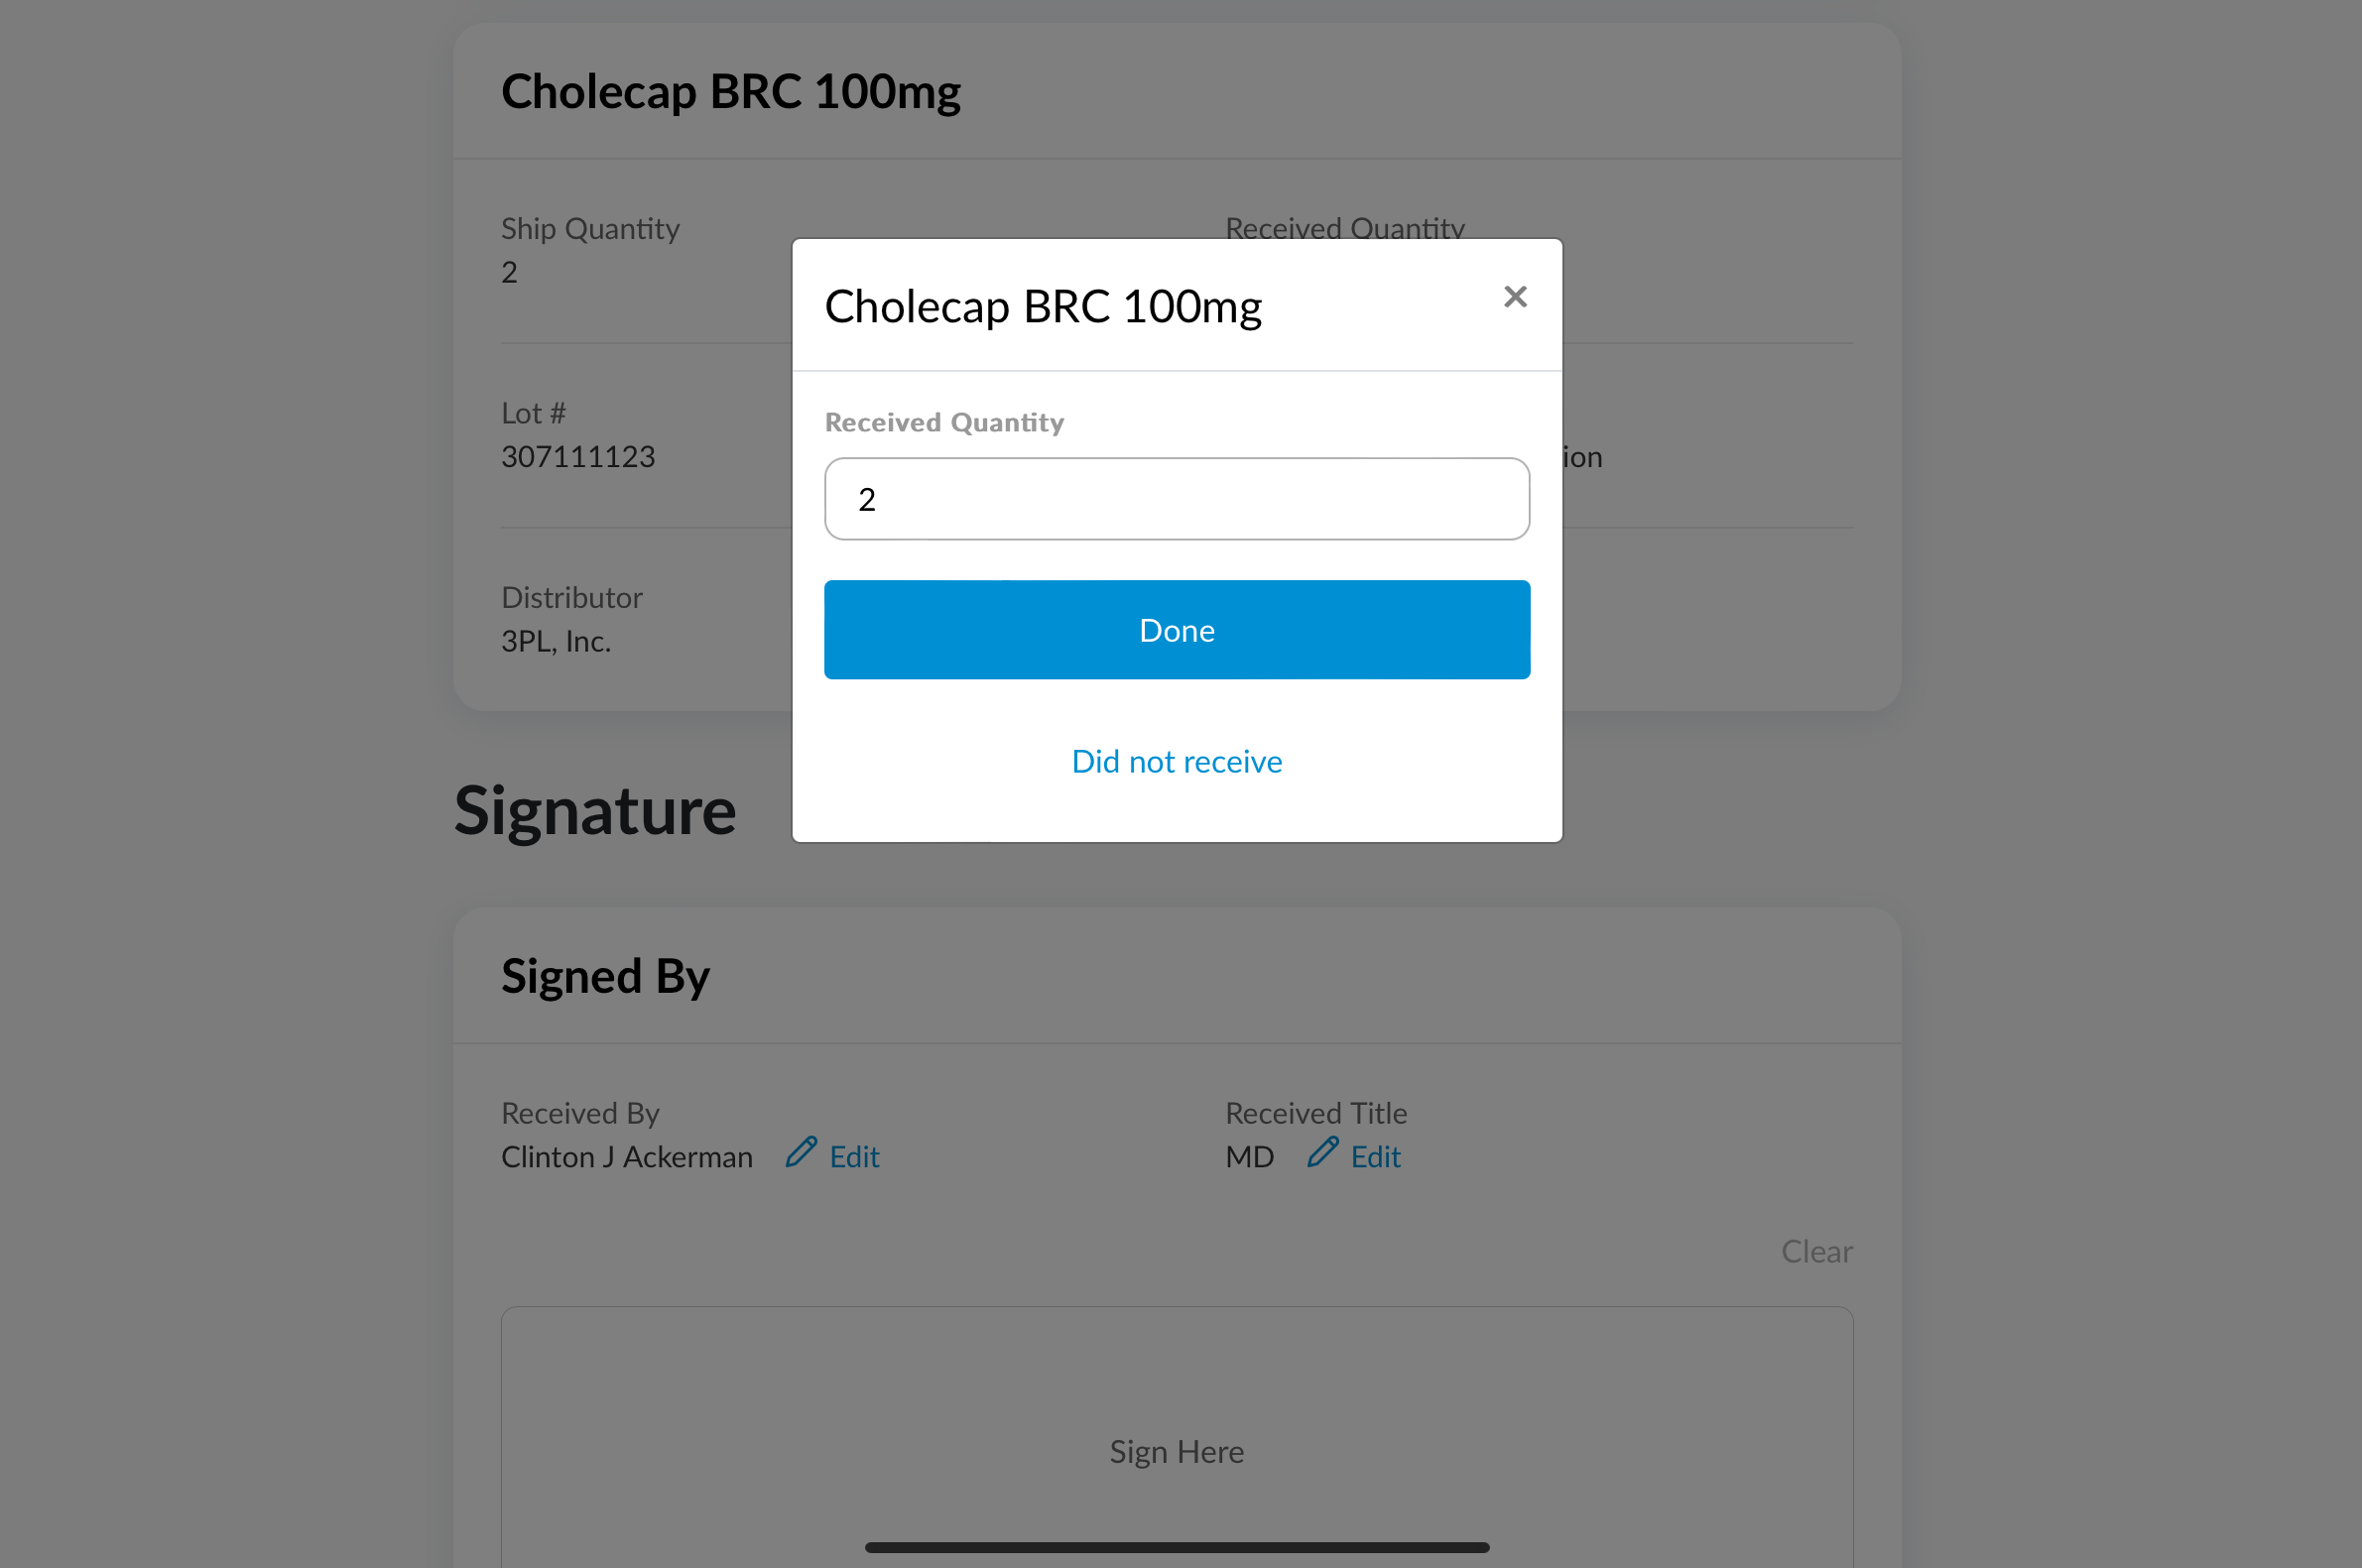
Select Done to save the edited quantity and return to the signature capture screen.
Marking an Order as Not Received
If the entire order was not received, select the Did not receive order toggle. The Receipt_Quantity_vod field for all line items on the AOC record is set to 0 and the Not_Received_vod field is marked on the AOC record.
Editing the AOC Recipient
If the HCP who ordered the shipment did not personally receive the package, the signer must edit the signature capture screen to reflect the actual shipment recipient—for example, an office manager or front desk staff member.
To edit the AOC recipient, select the edit icon next to the name or role and enter the appropriate information.
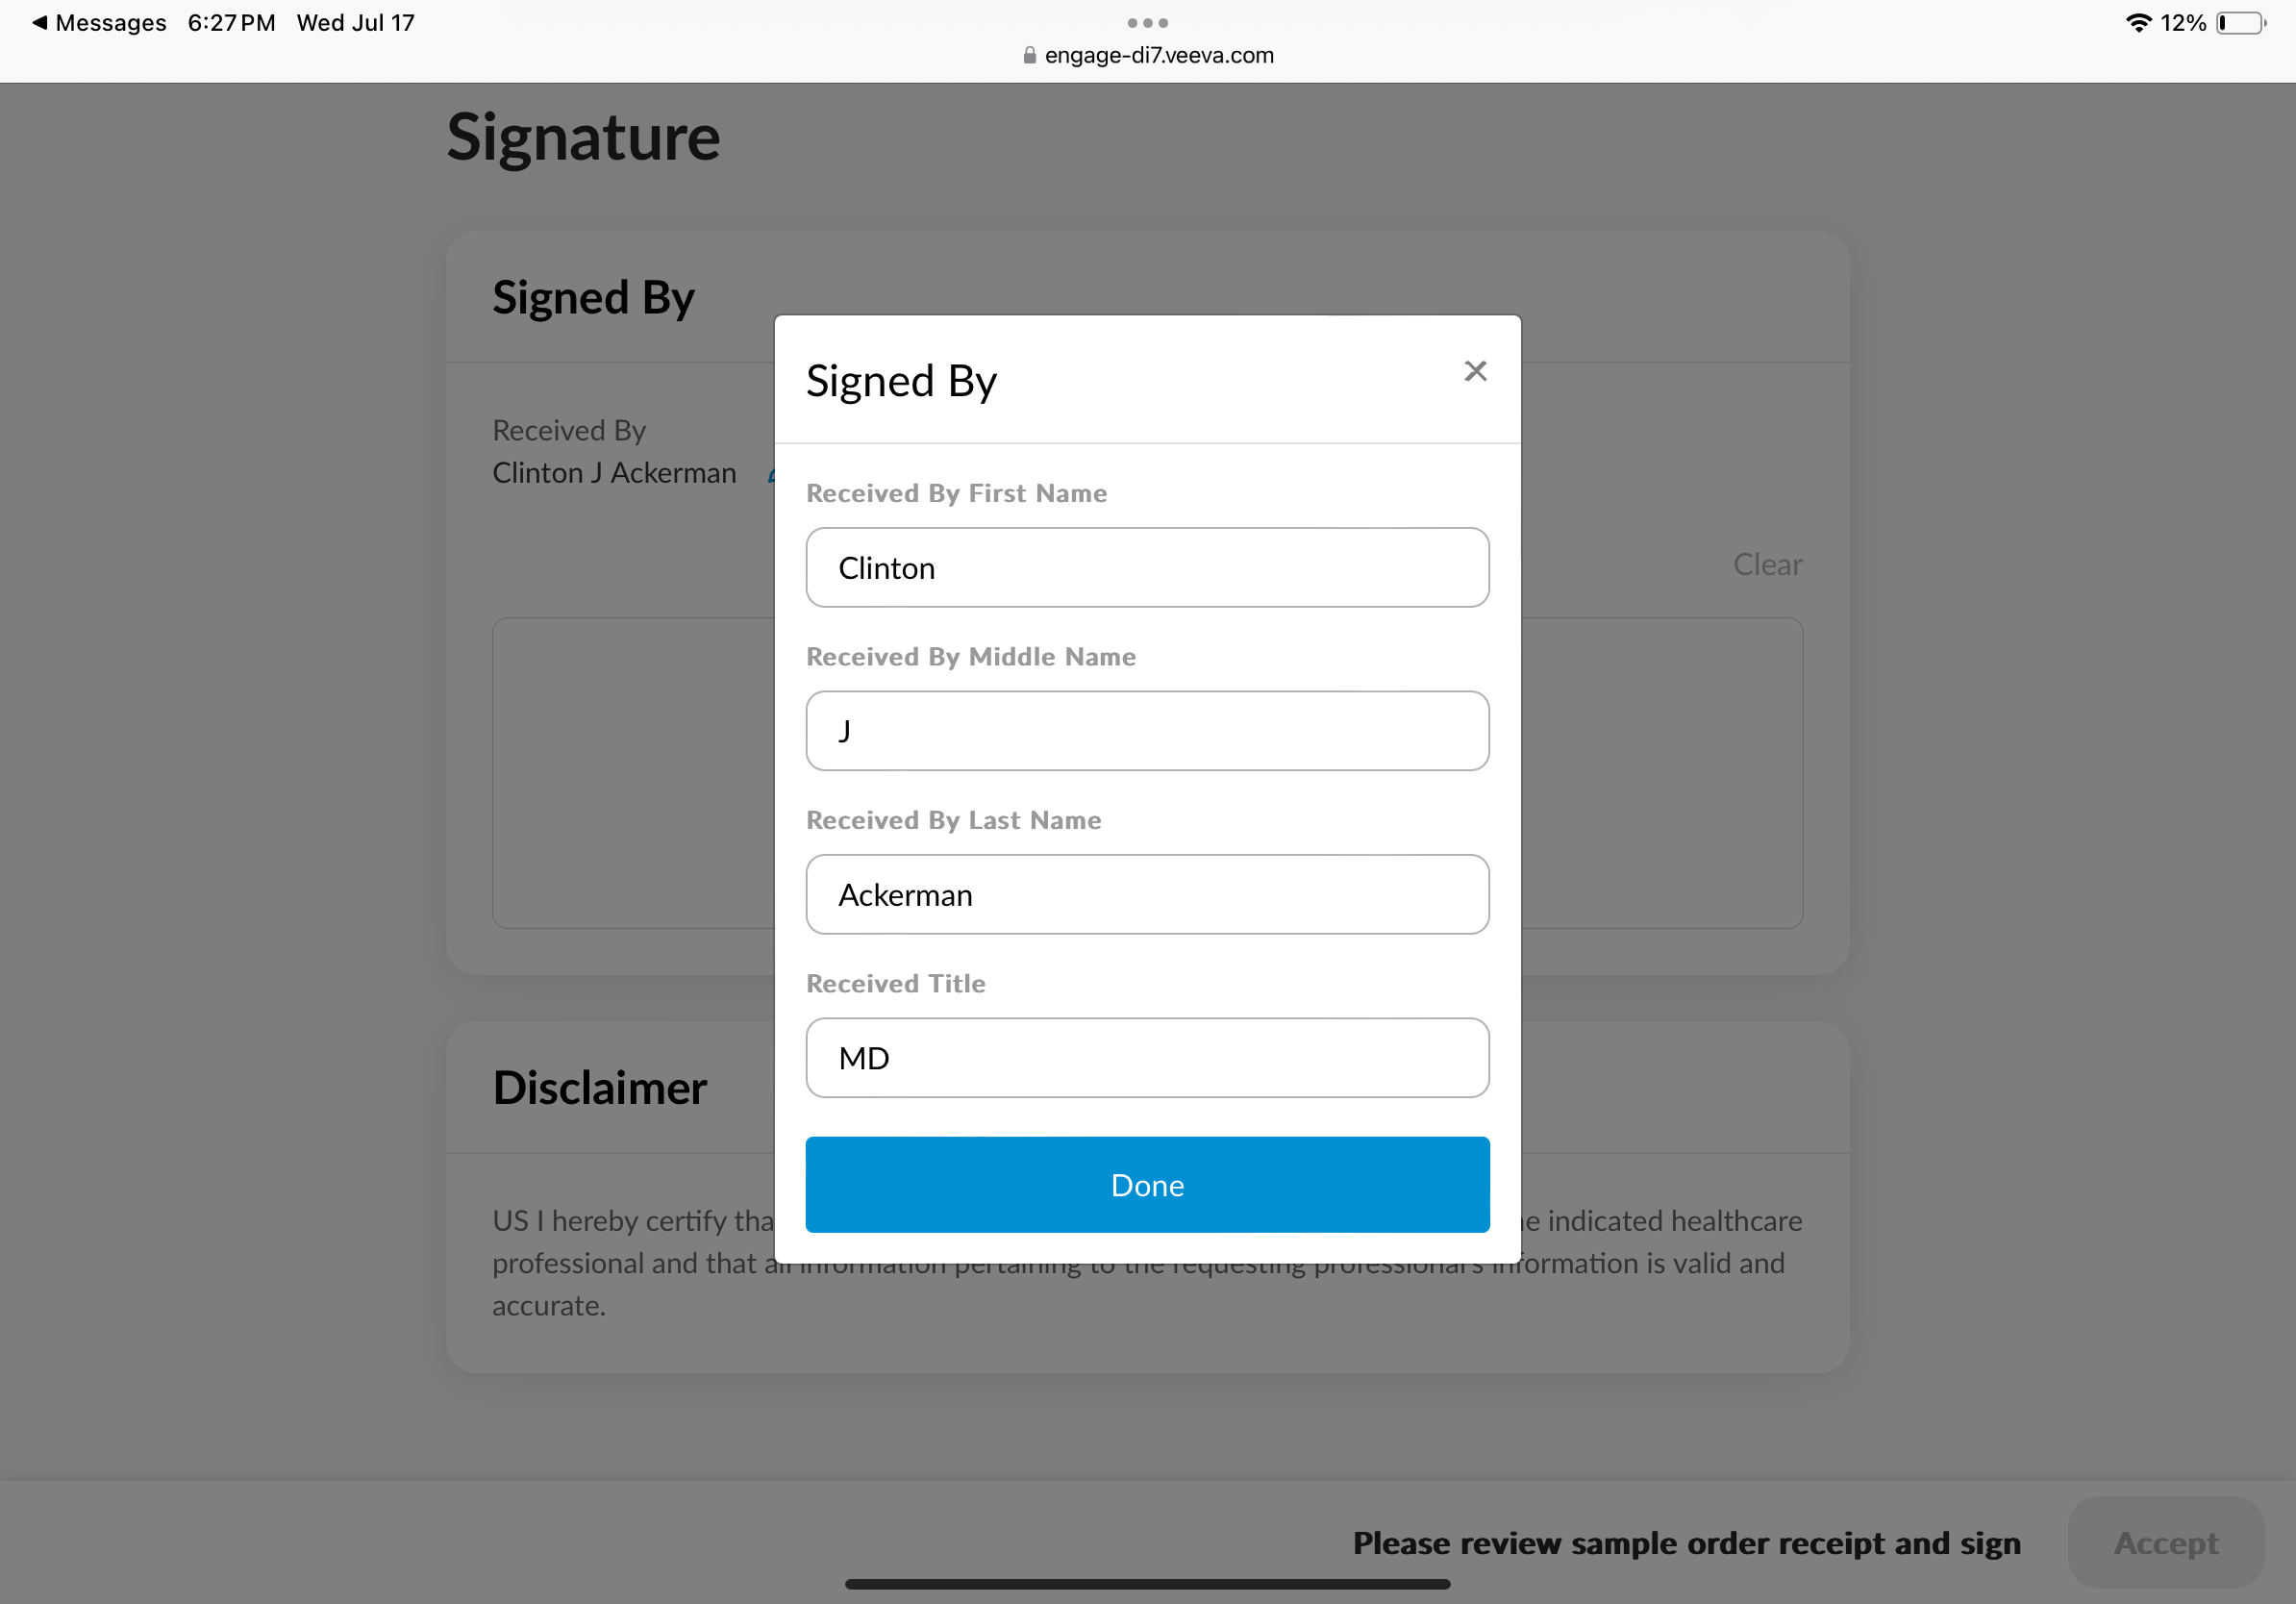
Select Done to save the edited information and return to the signature capture screen.
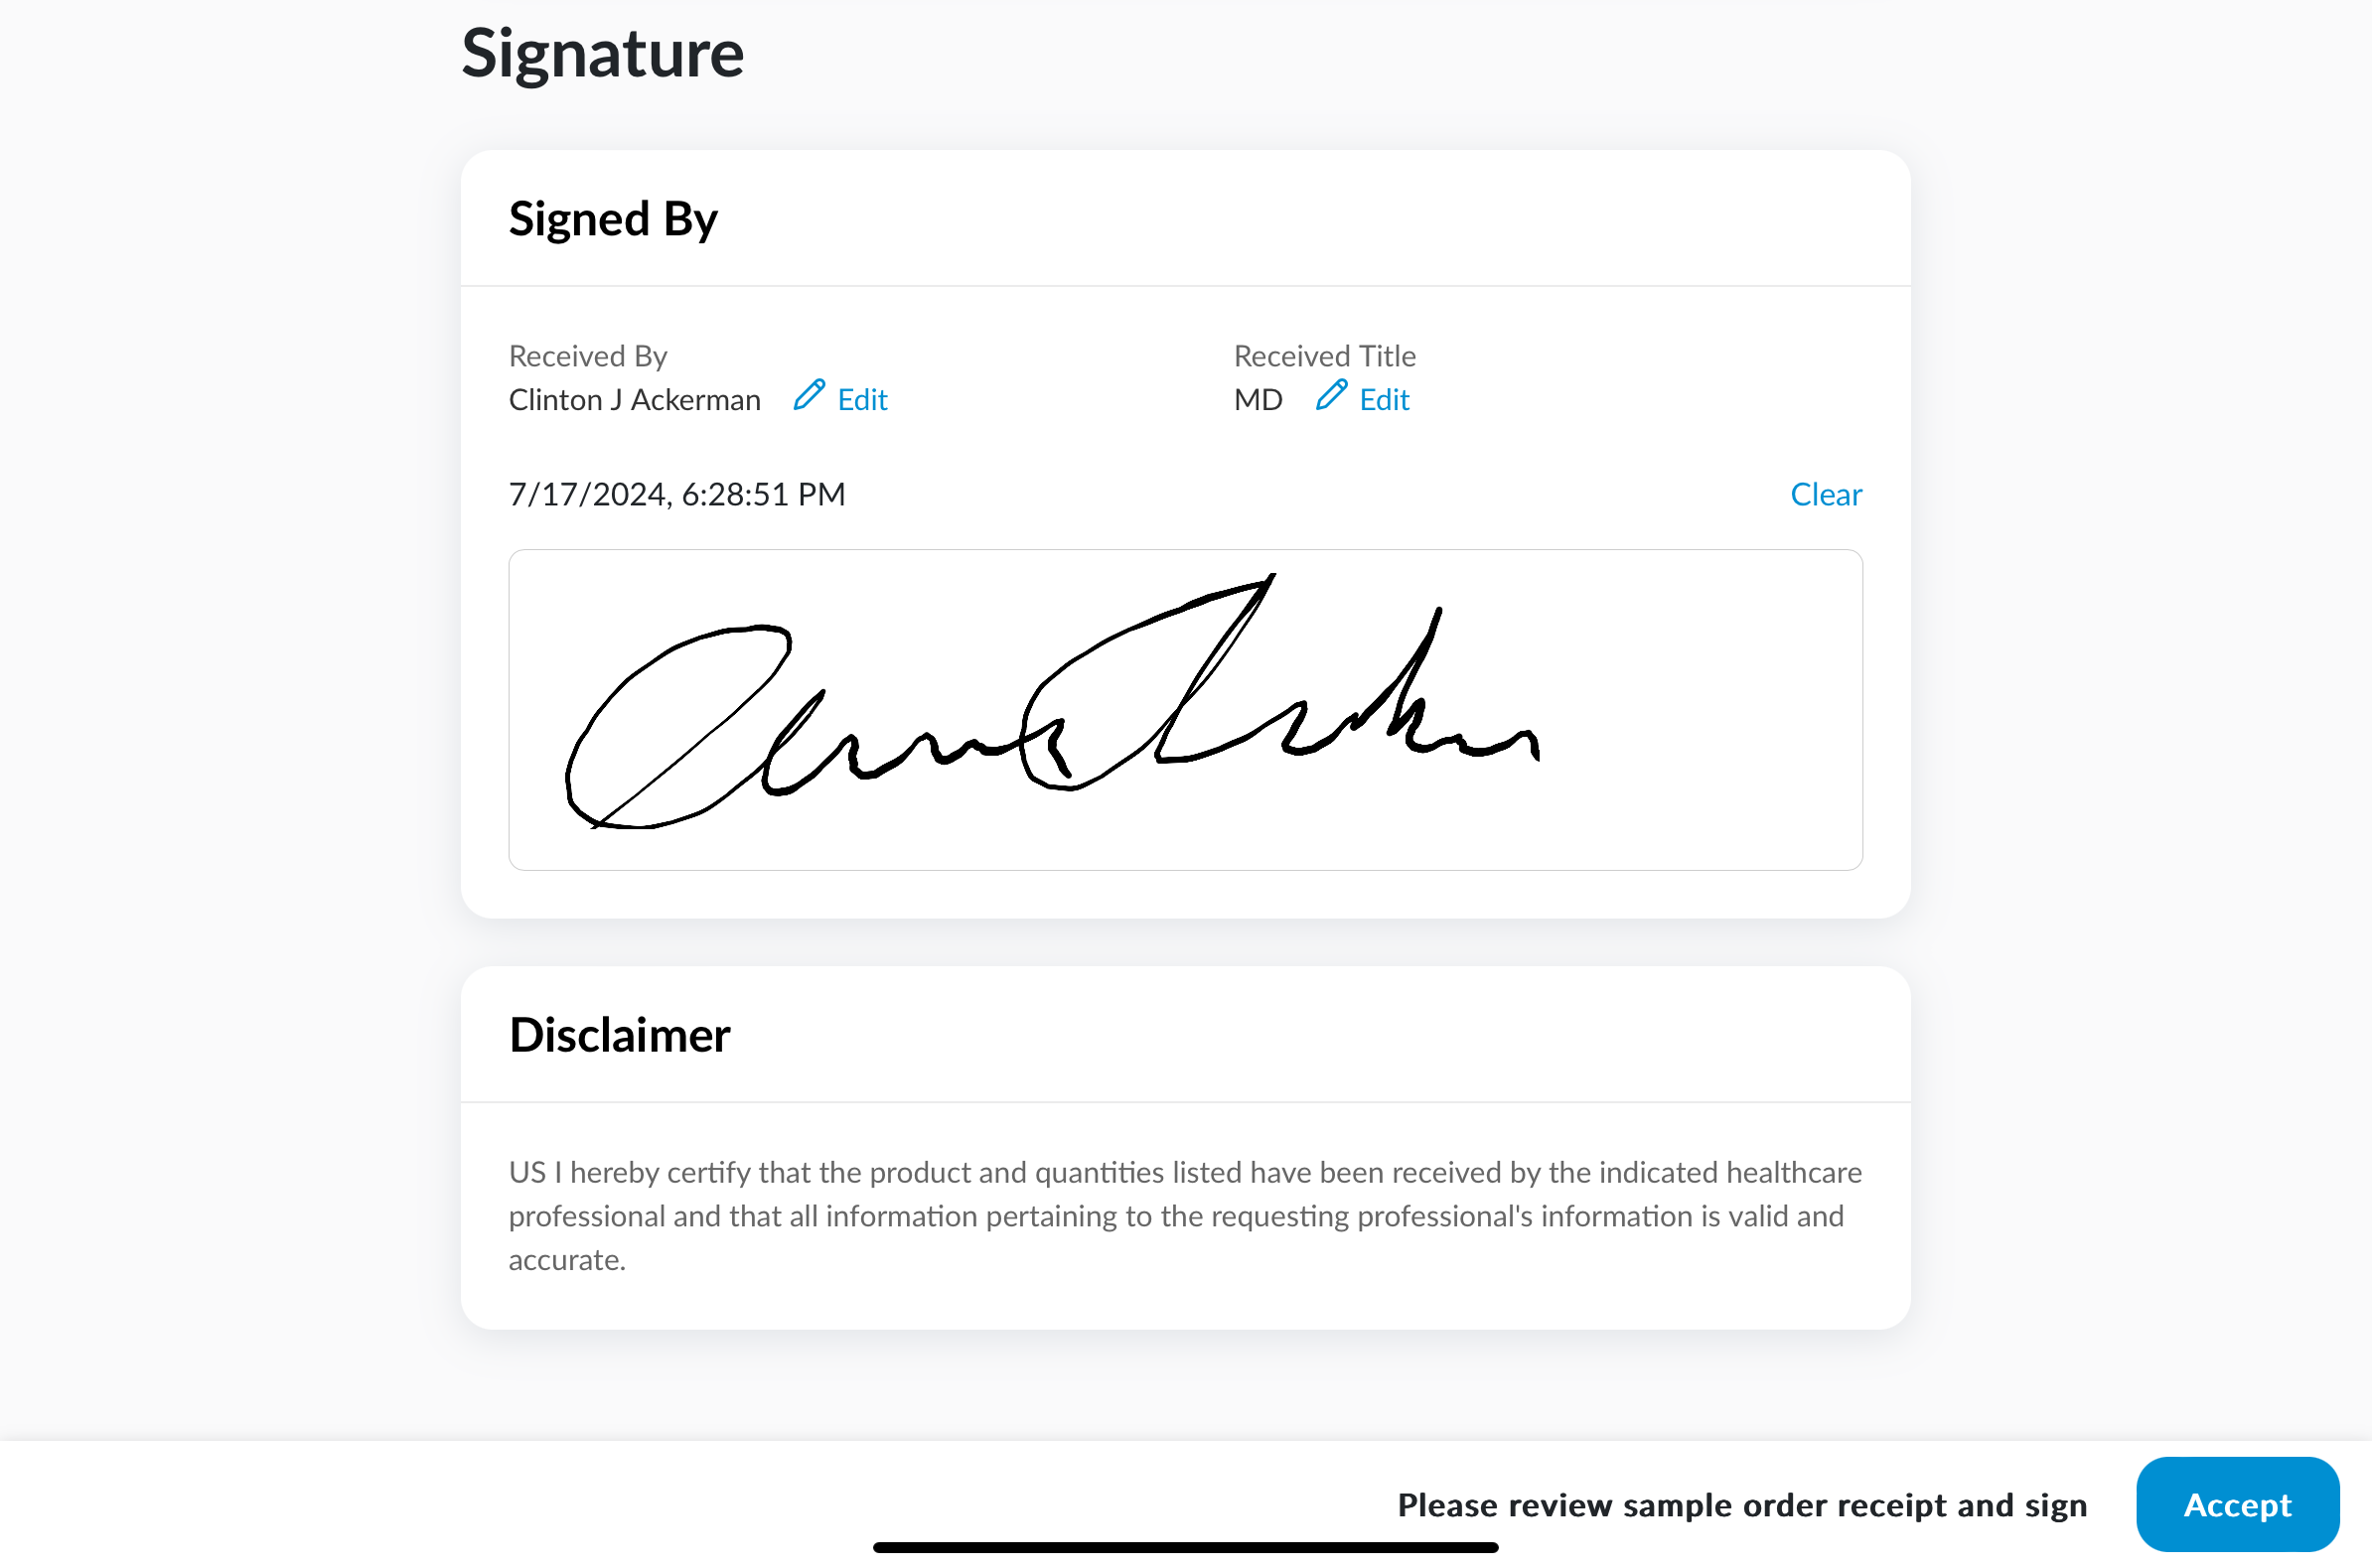
Submitting Signatures
When the AOC information is correct, sign for the shipment, then select the Accept button to submit the signature and complete the AOC process.
Engage
Creating Test HCPs
To allow CRM users to test Engage functionality from the perspective of an HCP, a test HCP account is automatically created for a CRM user the first time they sign into Engage using their email address. The email address must match exactly one active CRM user in Engage Connect. The test HCP account is automatically connected to the CRM user's Engage Connect account.
Creating a Test HCP
When a CRM user signs into the Engage app using the email address associated with their Engage Connect account, a test HCP account is automatically created with the same email address.
CRM users must sign into Engage with unique email addresses to create test HCP accounts. CRM users cannot share an email address and have a test HCP account.
The following profile information is automatically populated for the test HCP:
- Email - The CRM user's email address
- First name - The CRM user's first name
- Last name - The CRM user's last name
- Display name - The name entered during the sign up process. If the user did not enter a name while signing up, this is populated with the CRM user's display name.
- Country - The CRM user's country
- Job title - HCP Demo User, translated in the CRM user's language. The user can edit this field from their profile in Engage.
Using Engage as a Test HCP
All HCP functionality is available to test HCPs, however, each test HCP is restricted to their corresponding CRM user's company. Test HCPs can connect to and chat with other test HCPs and CRM users as long as they are associated with the same company.

Chat threads in the Engage tab in Veeva CRM and in Engage Connect display text indicating that a CRM user is chatting with their own test HCP.
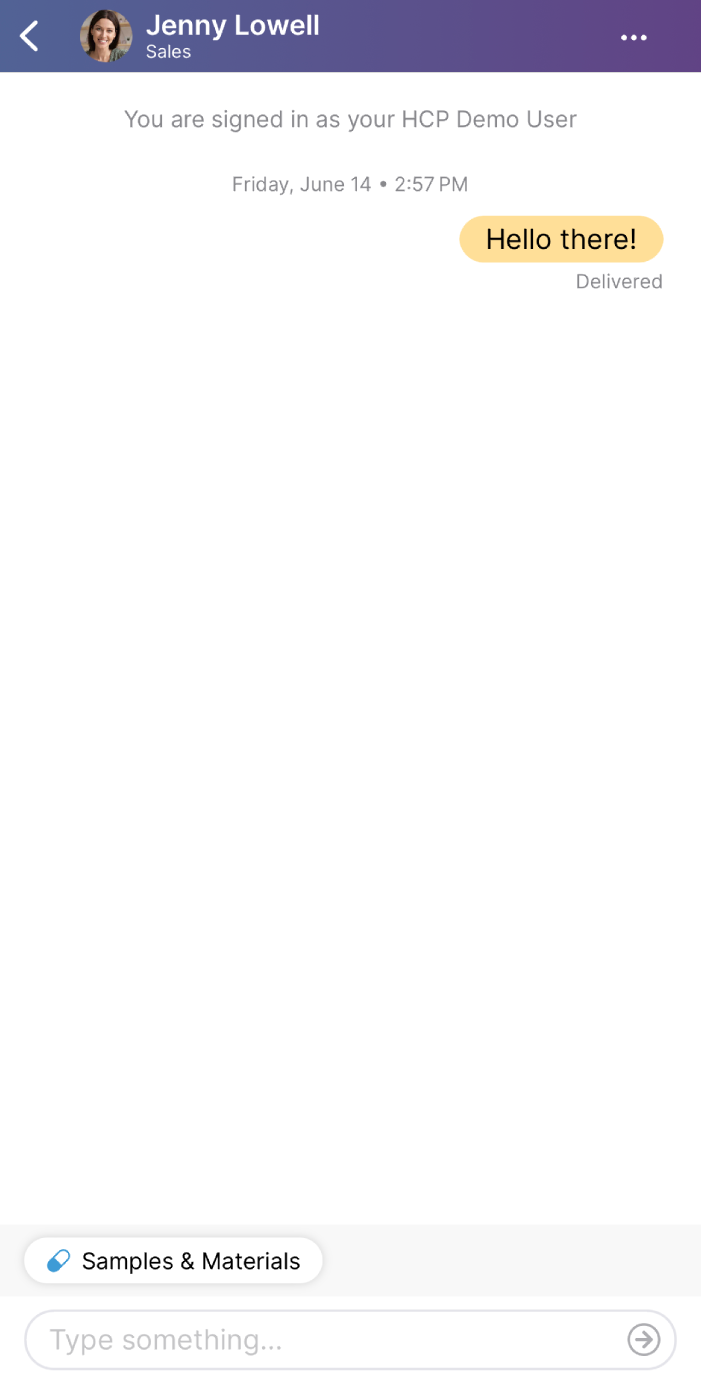
Chat threads in Engage display text indicating a CRM user is signed in as a test HCP user.
Additionally, test HCPs can only view content and brand profile resources from the same company. HCP functionality includes:
Using Restricted Phrase Rules in Engage Chat
Admins can prevent users from sending chat messages with specific phrases by defining restricted phrase rules for chat. This allows compliance teams to restrict phrases in accordance with any relevant regulations.. Customers can also define country-specific and product-specific restricted phrase rules, providing greater control and reducing false-positive violations.
Restricted phrase rules only apply to chat messages sent from the Engage tab in Veeva CRM.
Defining Restricted Phrase Rules for Engage Chat
A restricted phrase rule for Engage chat comprises the following records:
- Monitoring_Rule_vod – Defines how long a rule is active and for which users specific phrases are restricted in Engage chat
- Monitored_Phrase_vod – Defines the specific phrases restricted in Engage chat and the type of text matching. Must be associated with a Monitoring_Rule_vod record.
Multiple Monitored_Phrase_vod records can be associated with a Monitoring_Rule_vod record.
To define a rule for Engage chat:
- Navigate to the Monitoring Rules tab.
- Create a Monitoring_Rule_vod record with the Restricted_Phrase_vod record type.
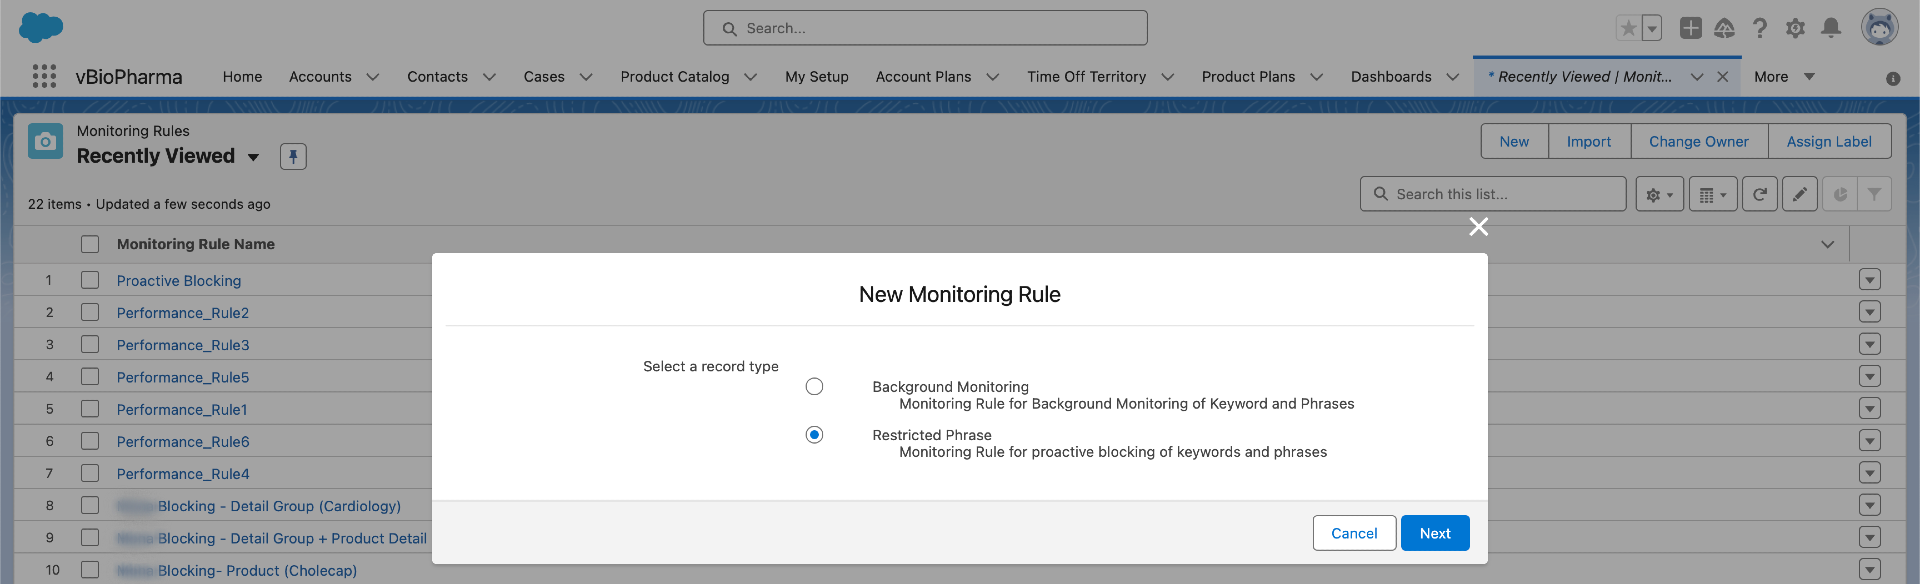
- Select Messaging for the Restricted_Platforms_vod field.
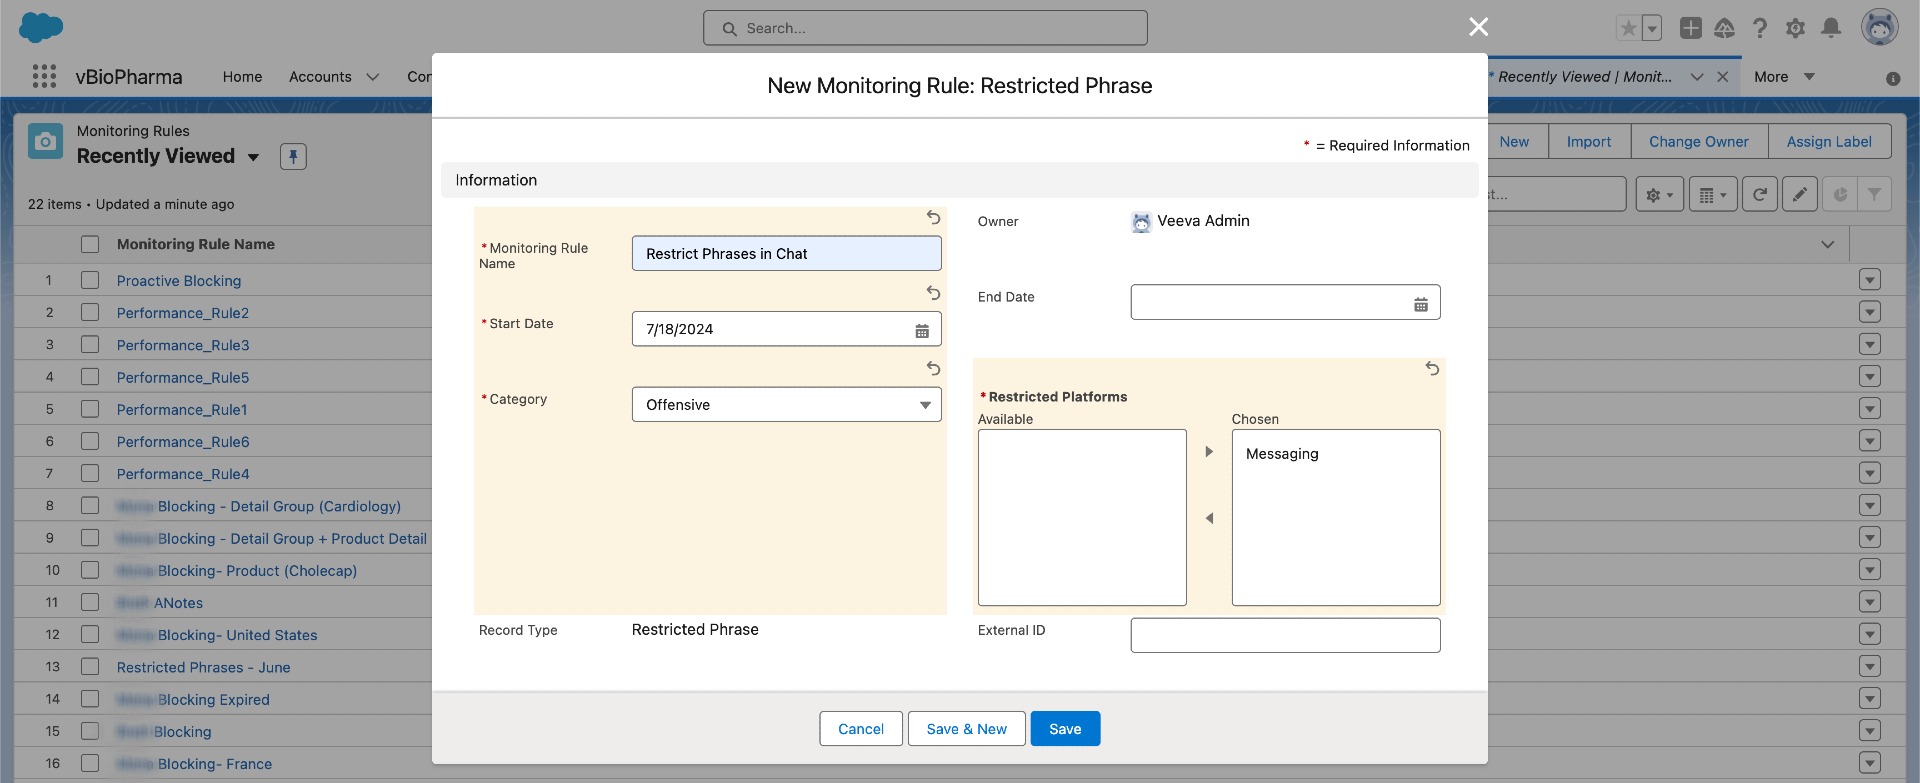
- Populate the Country_Code_vod field to only apply this rule to users with the same Country_Code_vod value on their User records. This step is optional.
Restricted phrase rules with a blank Country_Code_vod field apply to users of all countries.
- Populate the following fields to only apply this rule to users based on their assigned My Setup Products:
- Product_vod – Enables users to select the appropriate product or detail topic
- Detail_Group_vod – Enables users to select the appropriate detail group
This step is optional.
These two fields can be used independently or used together for further specificity.
- Populate the Start_Date_vod and End_Date_vod fields to determine when the restricted phrase rule is active.
To allow a rule to be active indefinitely, do not populate the End_Date_vod field.
- Select Save.
A restricted phrase rule can be country-specific and product-specific. For example, a rule defined for US and for users with Cholecap assigned via My Setup only applies to end users satisfying both conditions.
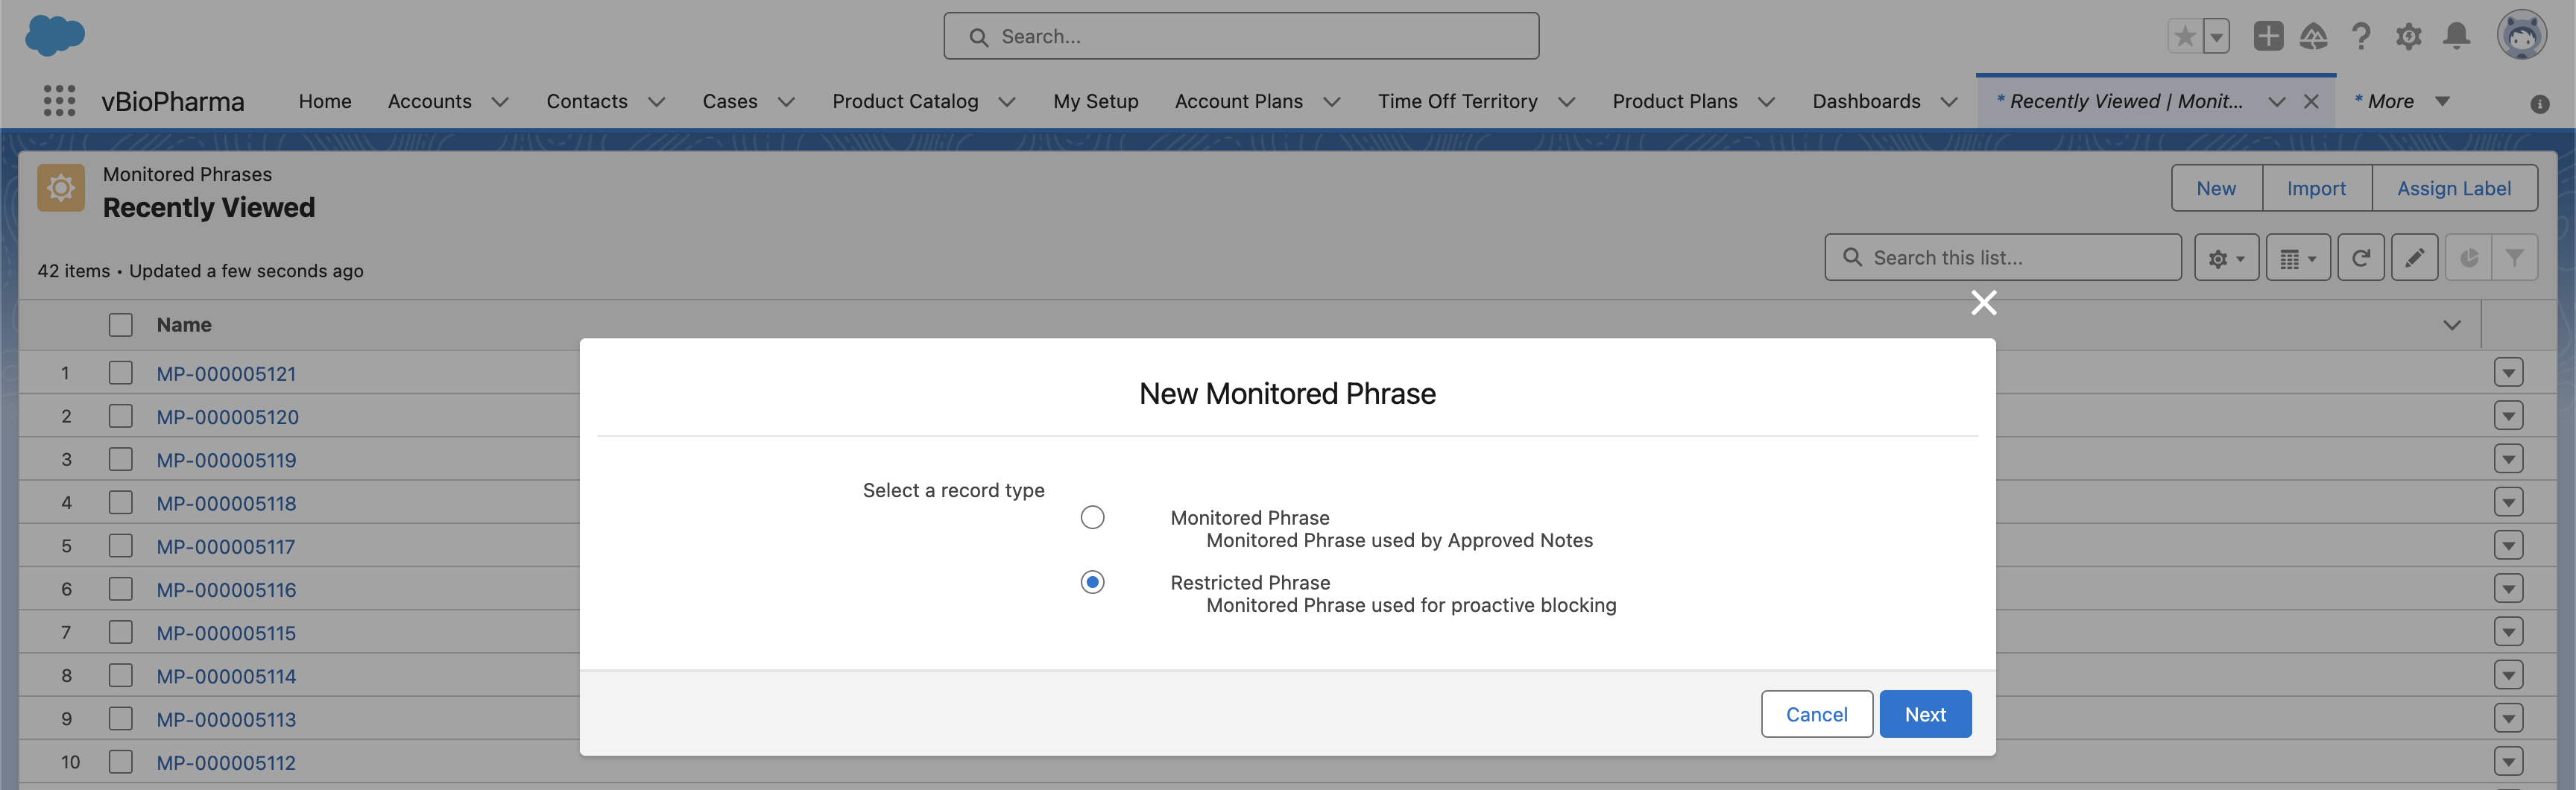
To define a restricted phrase and associate it with a rule for Engage chat:
- Navigate to the Monitored Phrases tab.
- Create a Monitoring_Phrase_vod record with the Restricted_Phrase_vod record type.
- Populate the Phrase_vod field with the text to be restricted.
Restricted phrases are not case sensitive. Additionally, emojis are not supported.
- Select one of the following values for the Match_Type_vod field:
- Contains – Matches if the entered text contains the phrase. For example, a Contains phrase where the phrase is "earn" matches both "learn" and "learned."
- Exact – Matches if the entered text is exactly the phrase. For example, an Exact phrase where the phrase is "earn" matches "earn" but does not match "learn" or "learned."
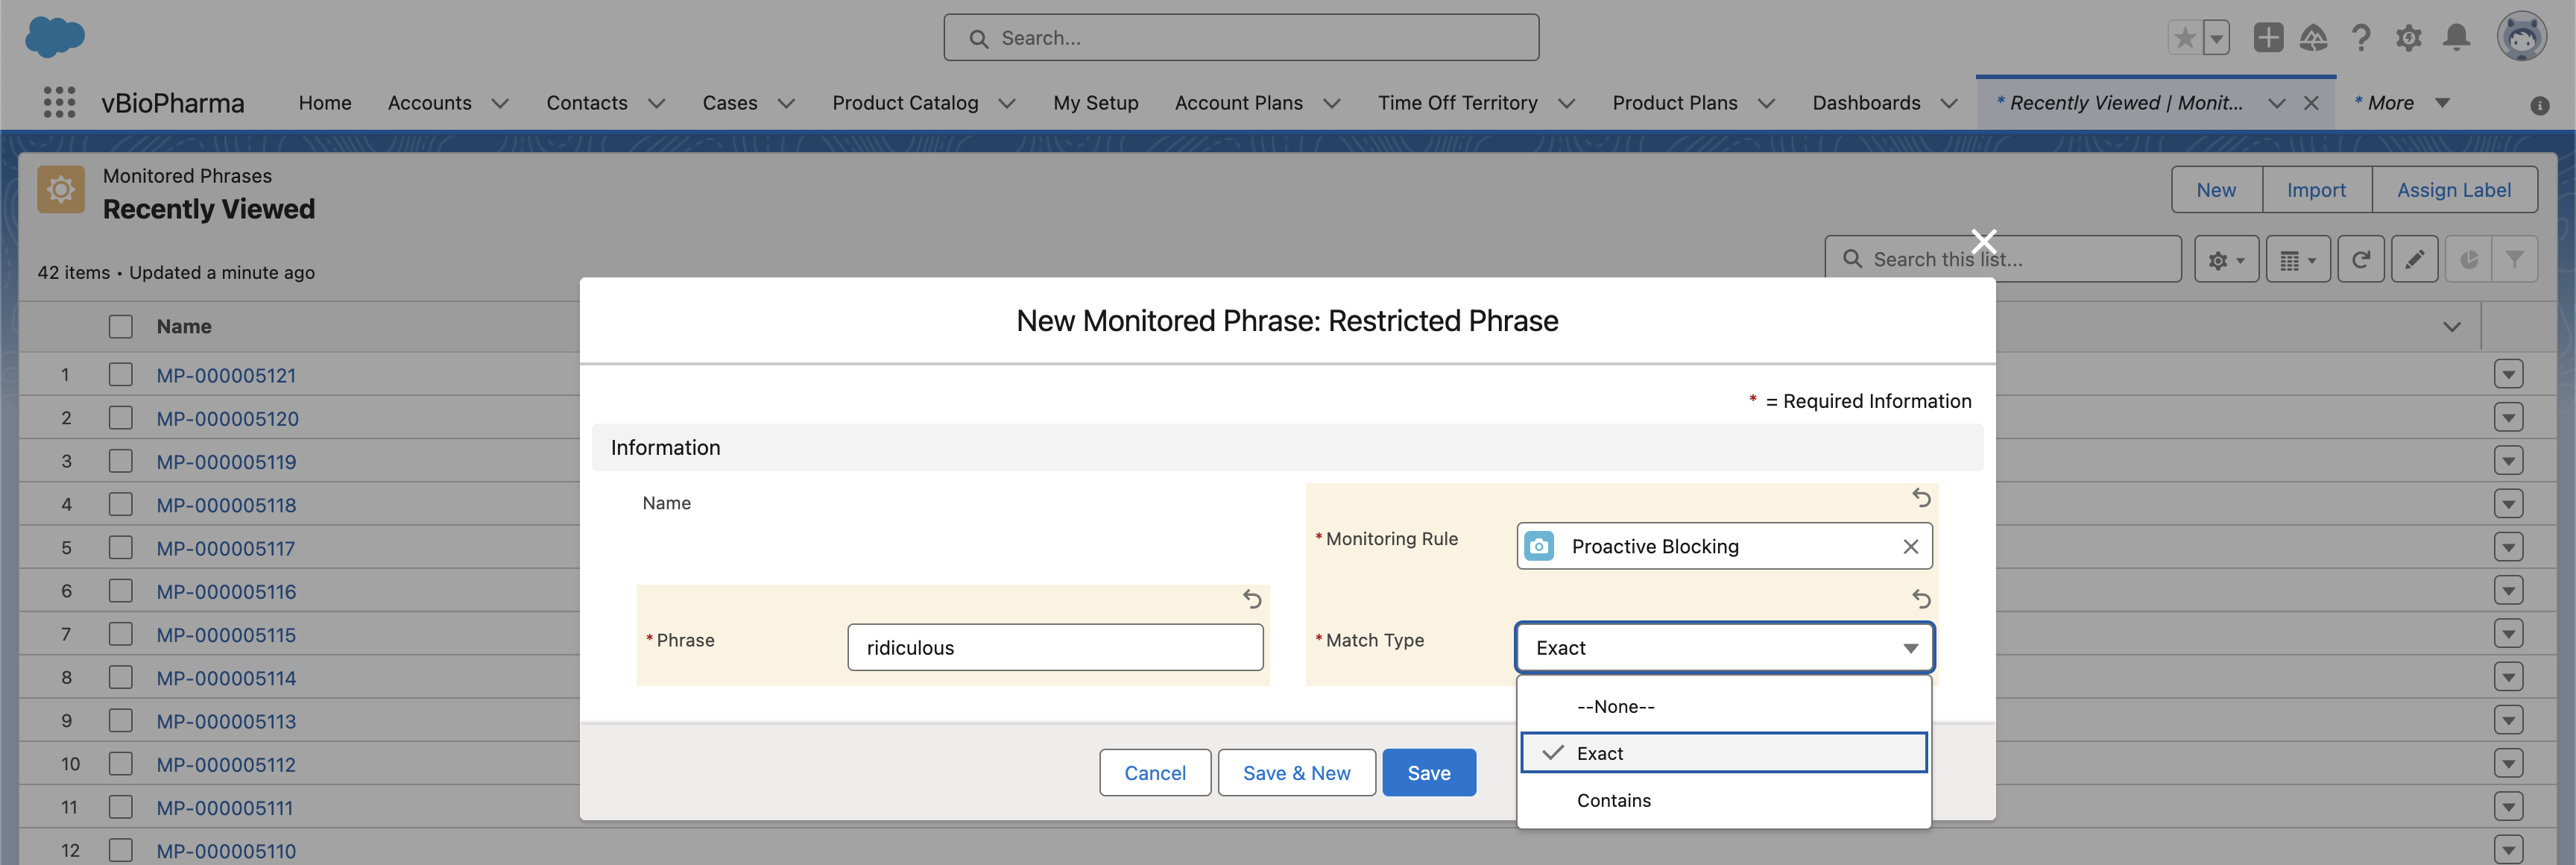
- Populate the Monitoring_Rule_vod field with the appropriate Monitoring_Rule_vod record.
Monitored_Phrase_vod records with the Restricted_Phrase_vod record type can only be associated with Monitoring_Rule_vod records with the Restricted_Phrase_Rule_vod record type.
- Select Save.
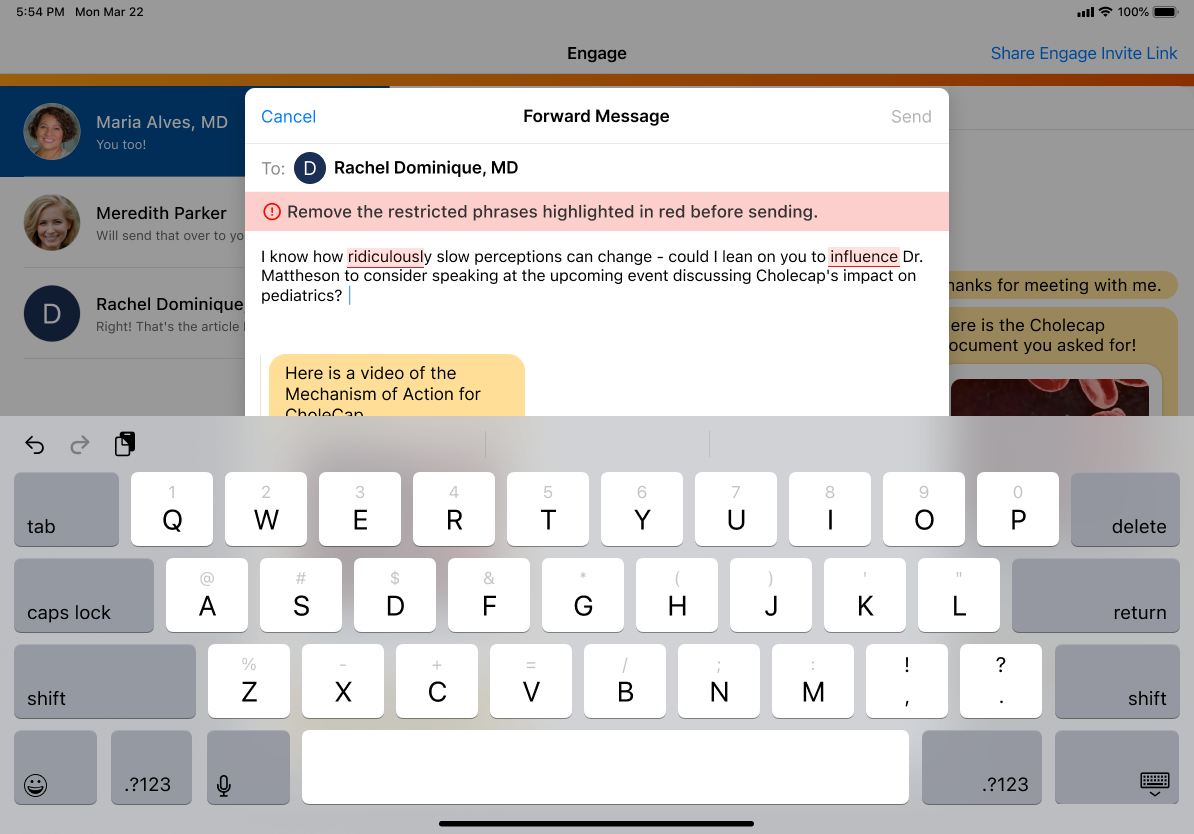
Restricting Phrases in Engage Chat
When users enter chat messages in the input field, text matching restricted phrases are highlighted in red, an error message displays above the input field, and the Send button is grayed out. Users must fix all the highlighted phrases before they can send the message.
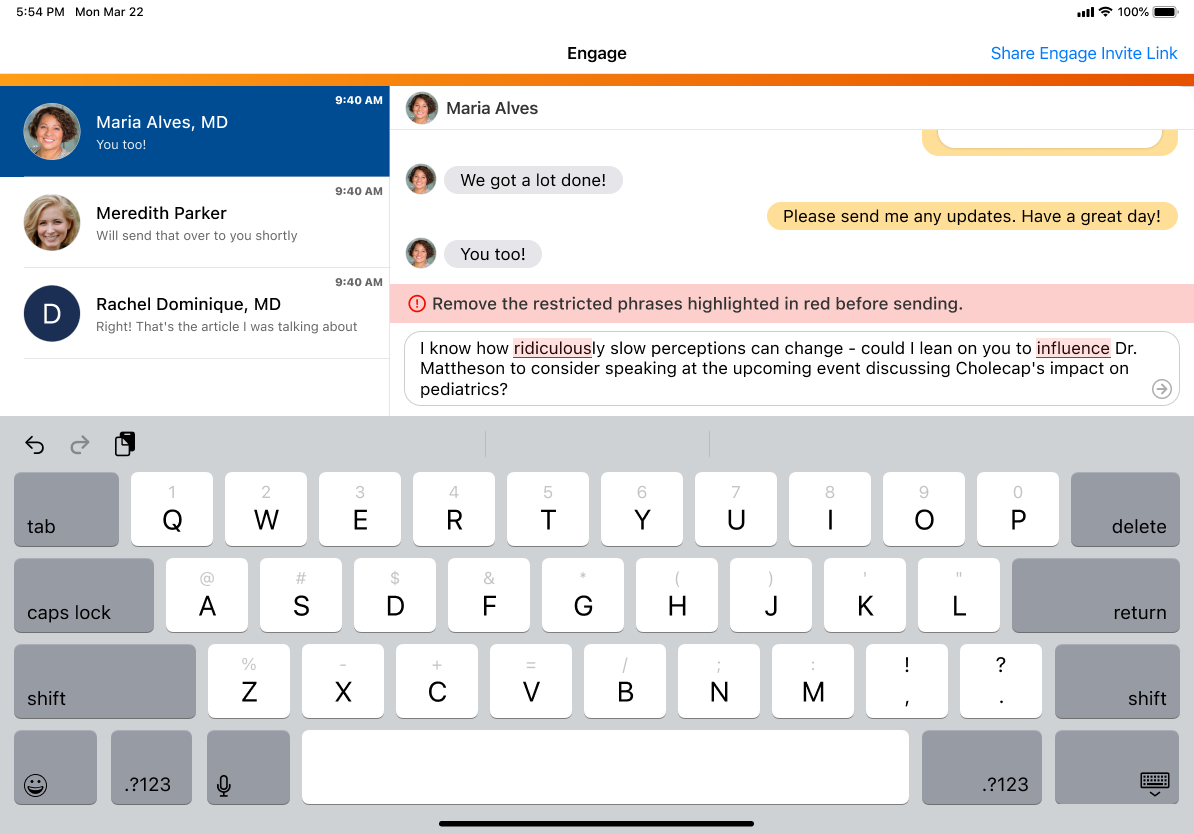
Additionally, when users forward a message with optional text, restricted phrases in the optional text are highlighted and the Forward button is grayed out. See Forwarding Chat Messages for more information.
Events Management
Filtering Event Budgets
Admins can configure the list of budgets that display as available for an event to only display budgets with a product, program type, event format, or location type that match the event or the event’s topic.
By reducing the number of budgets that display to end users, end users can quickly select the appropriate budget to add to their event, which in turn reduces any potential errors that need to be corrected during event approval.
Defining Budgets
Populate the following fields on the appropriate EM_Budget_vod records based on the fields configured for filtering:
- Product_vod
- Program_Type_vod
- Event_Format_vod
- Location_Type_vod
Viewing the Filtered List of Available Budgets
When adding a budget to an event, the list of EM_Budget_vod records automatically filters based on the following:
- Status_vod = Available_for_Use_vod
- EM_Budget_vod records that match configured filtering fields on the EM_Event_vod record or EM_Catalog_vod record representing the event’s topic
Budgets are considered a match if the configured filtering fields are blank on the budget, event, or catalog record.
Medical
Capturing Medical Standing Requests Using Documented Interest
Documented interest agreements help grow relationships between MSLs and KOLs and ensure MSLs have preapproval to proactively approach an HCP on what normally would have been a reactive discussion. MSLs can use Documented Interest to create medical standing requests – agreements for an agreed-upon, renewable period of time with HCPs, allowing MSLs to proactively contact HCPs and provide information for a specific product topic, represented in CRM by a Scientific Interest record.
Medical Affairs users can use Documented Interest to collect scientific interest data to categorize key areas of interest by HCPs. The Scientific Interest record ties together a product and a documented interest. Medical Affairs users create Scientific Interest records in CRM. MSLs are then required to select a scientific interest when capturing a documented interest agreement (also known as a standing request).
For example, during a scheduled visit with an HCP for educational outreach on Rovustatin, an MSL determines that the HCP is interested in an ongoing clinical trial of Rovustatin for children. They ask if the HCP is interested in receiving updates related to the clinical trial. The HCP agrees and the MSL creates a Documented Interest, selecting the scientific interest related to Rovustatin for a clinical trial. When new information about the topic becomes available, the MSL can share it and document that they shared it. For the next 12 months the MSL can select the Documented Interest within the call report.
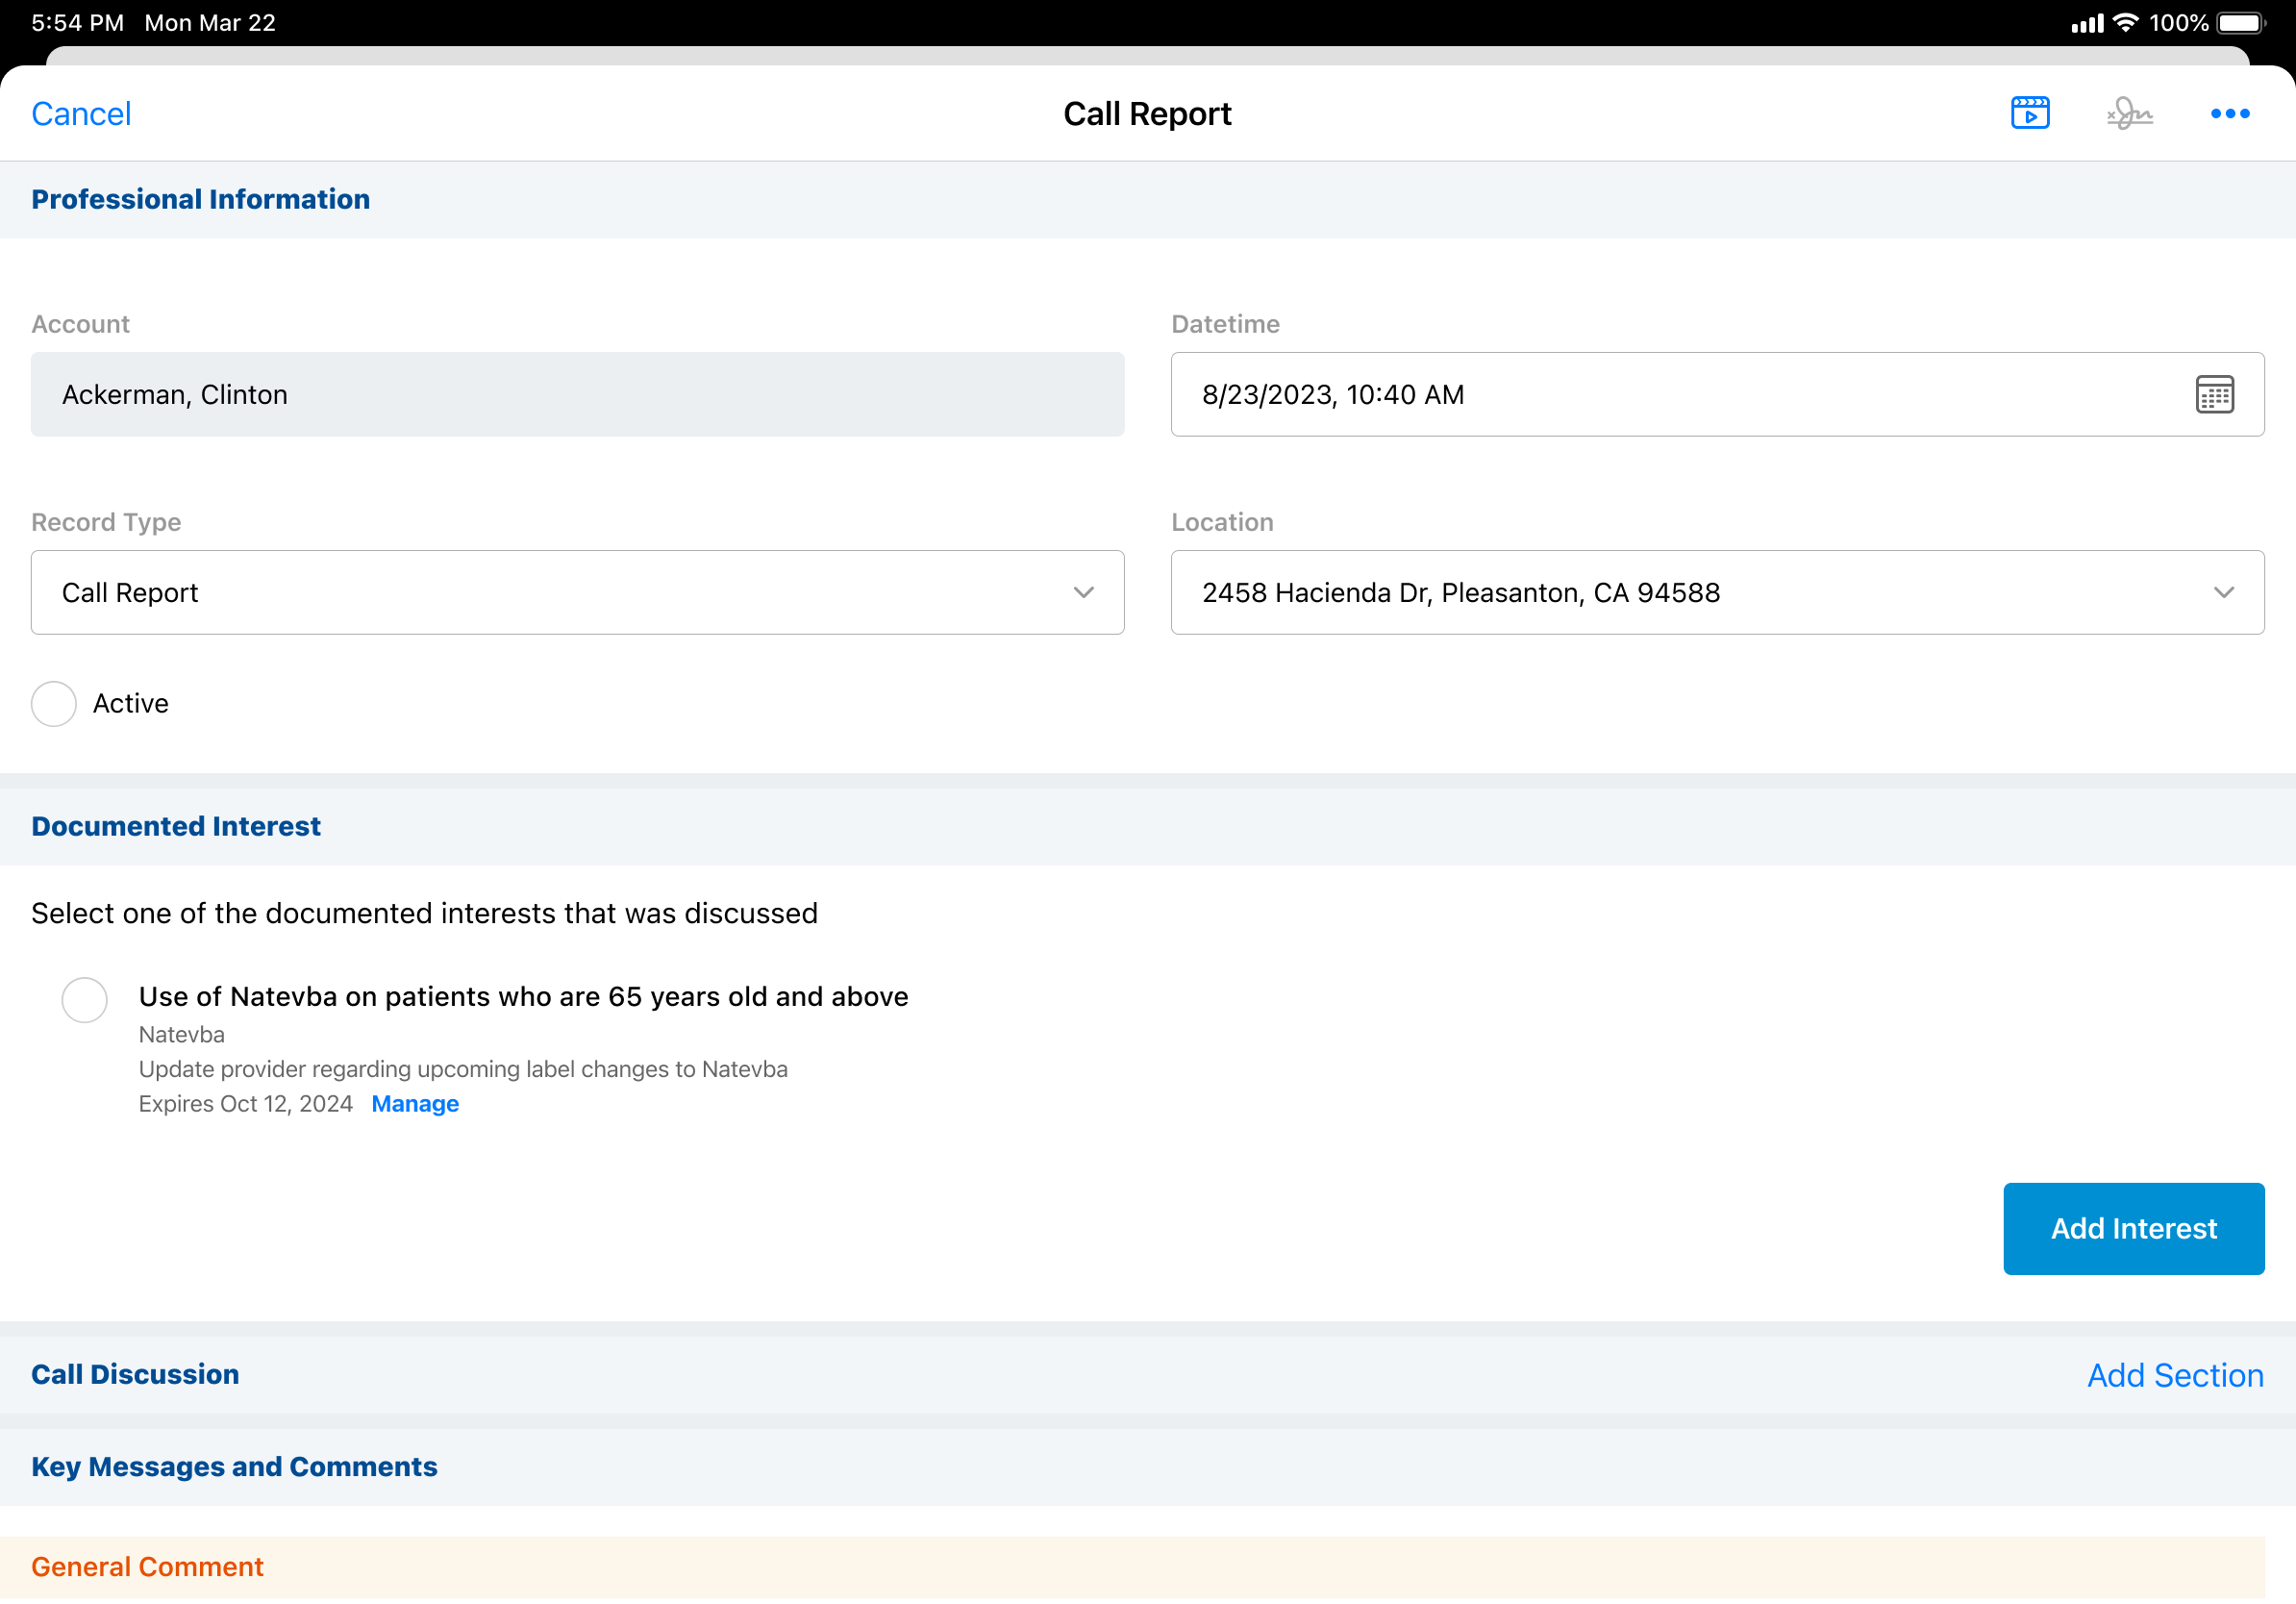
Using Documented Interest
MSLs can record an interaction with an HCP related to a previously captured, and unexpired, documented interest on the call report or account summary by selecting the appropriate Documented Interest.
To create a Documented Interest:
-
Open a Call Report for the appropriate account.
-
Select Add Interest.
-
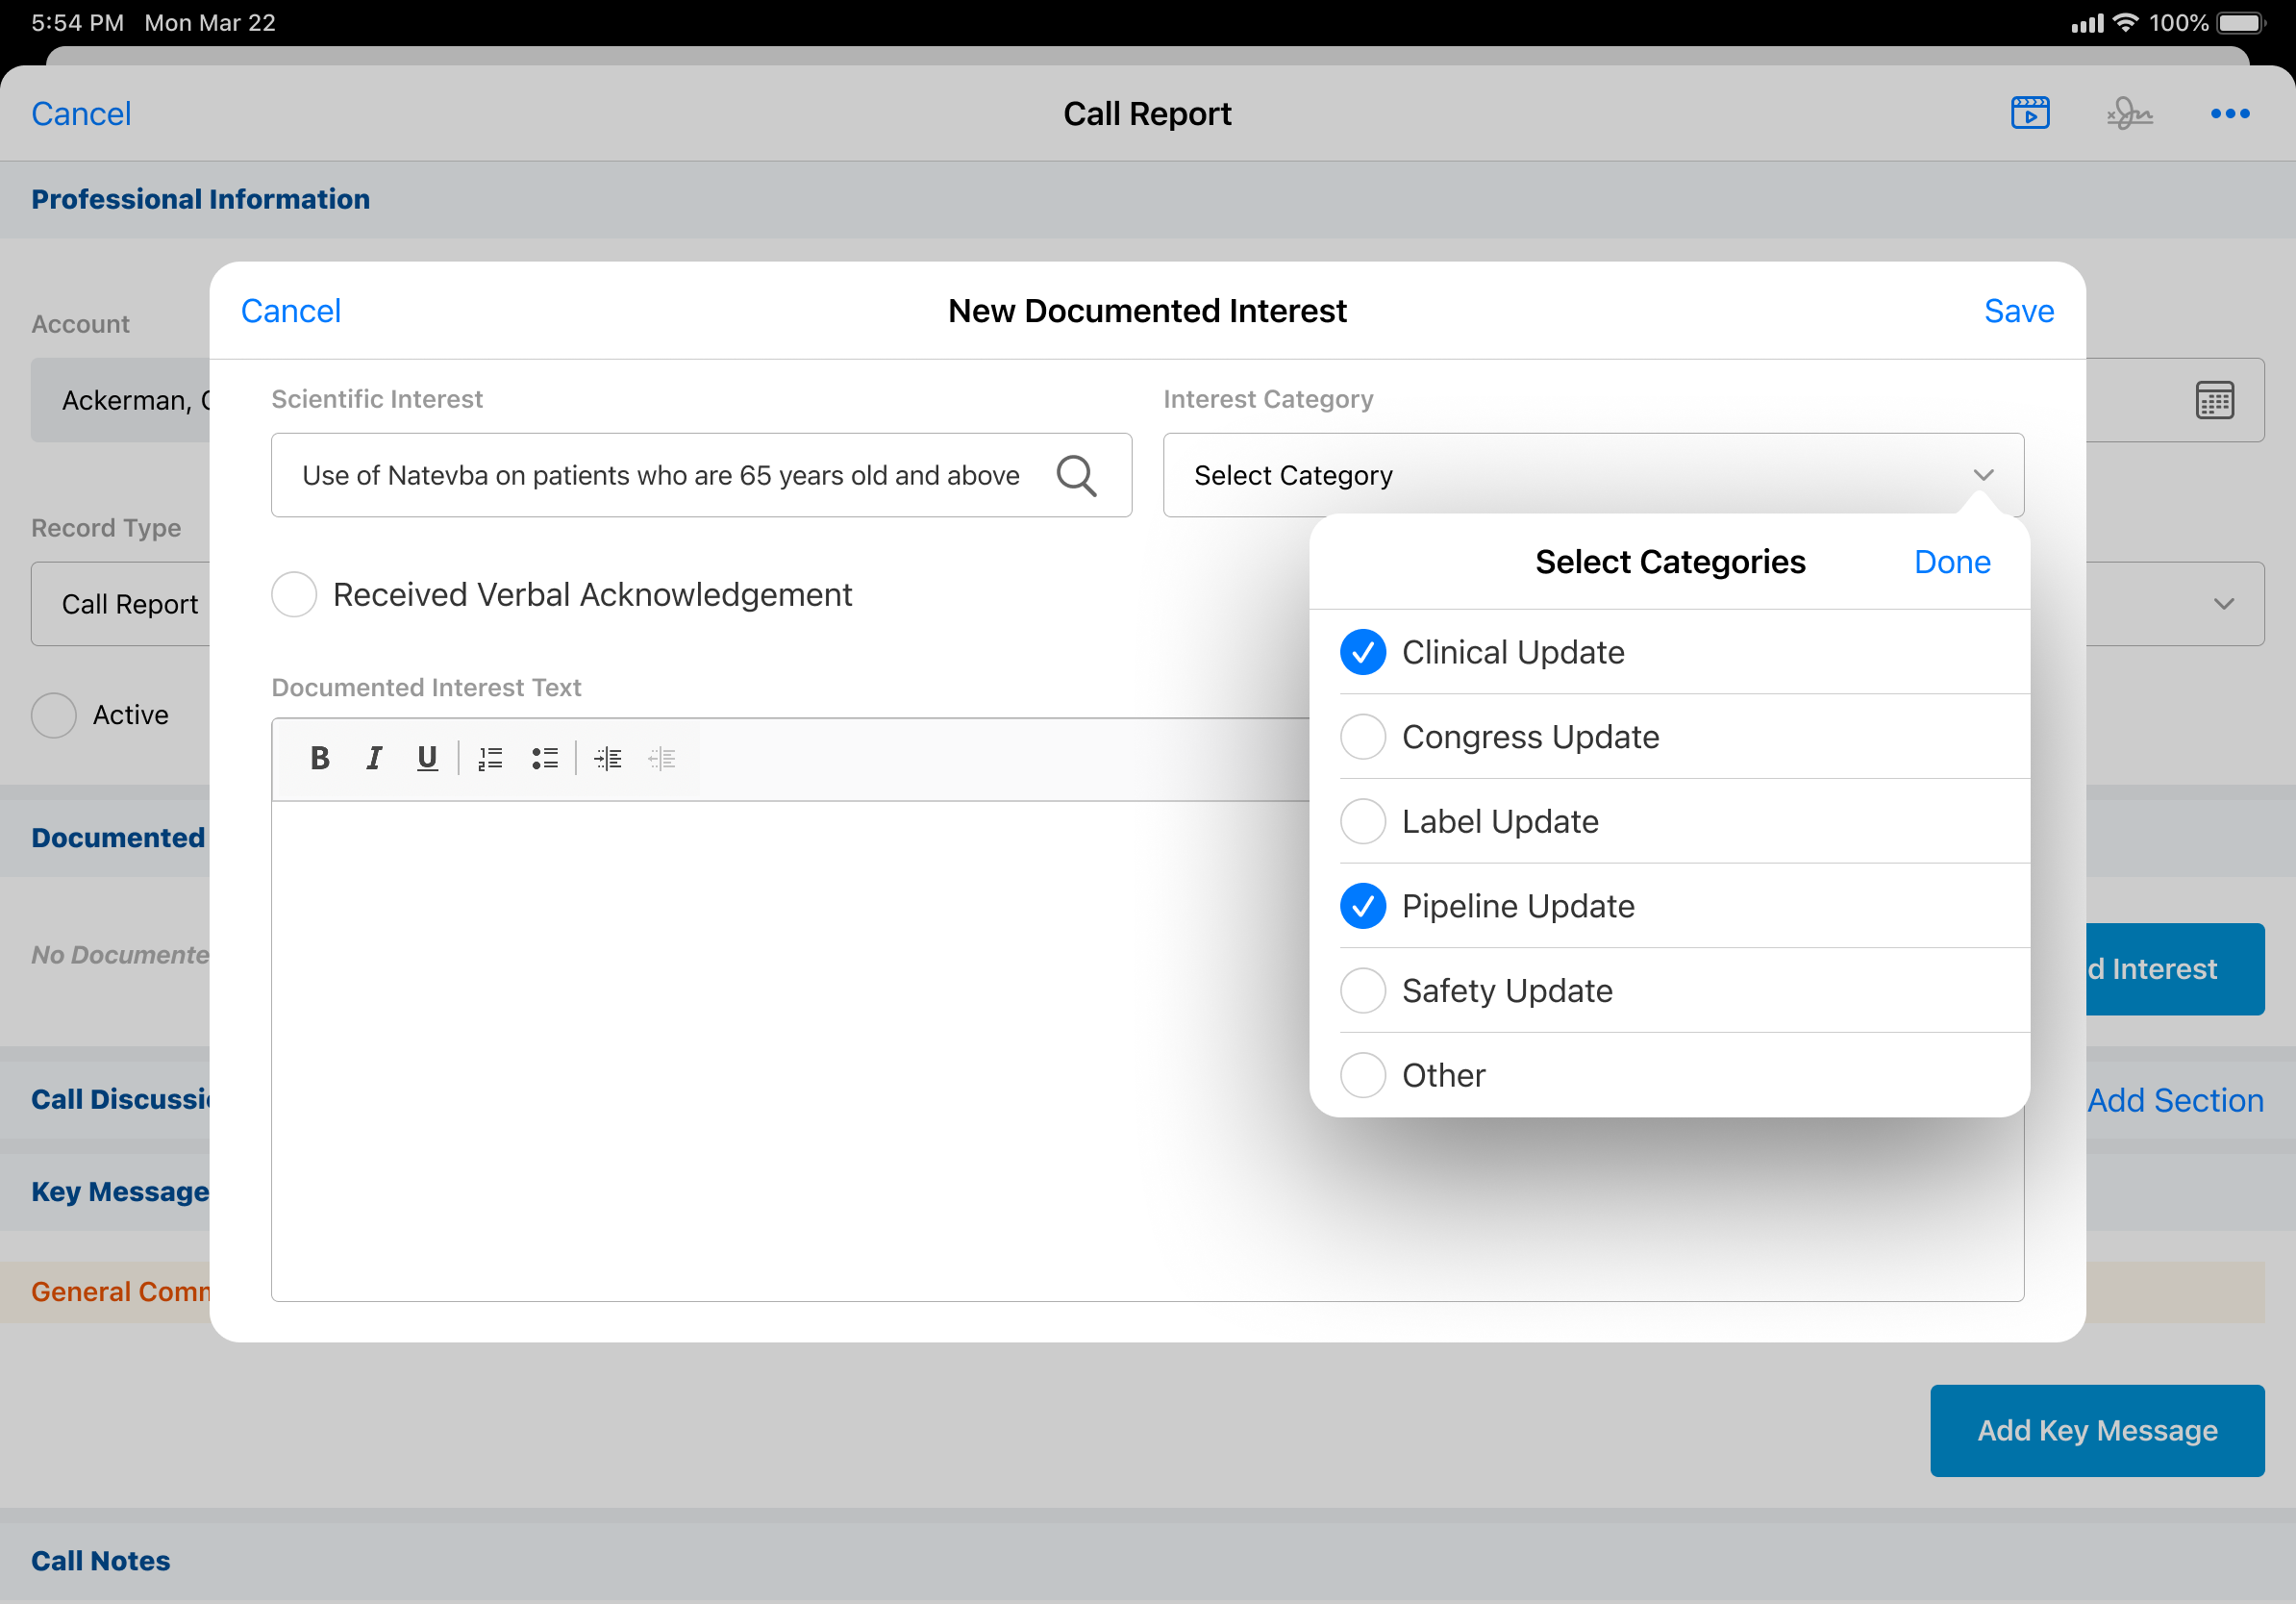
Select the appropriate record type. If only one record type is available, the system automatically uses that record type.
- Select a Scientific Interest. If only one Scientific Interest is available, it is pre-populated.
- Select at least one Interest Category. Users can select more than one Interest Category if more than one is available.
-
Select the Received Verbal Agreement check box if available. This step is optional.
-
Enter informational details regarding the Documented Interest.
-
Select Save. The record is automatically submitted and locked.
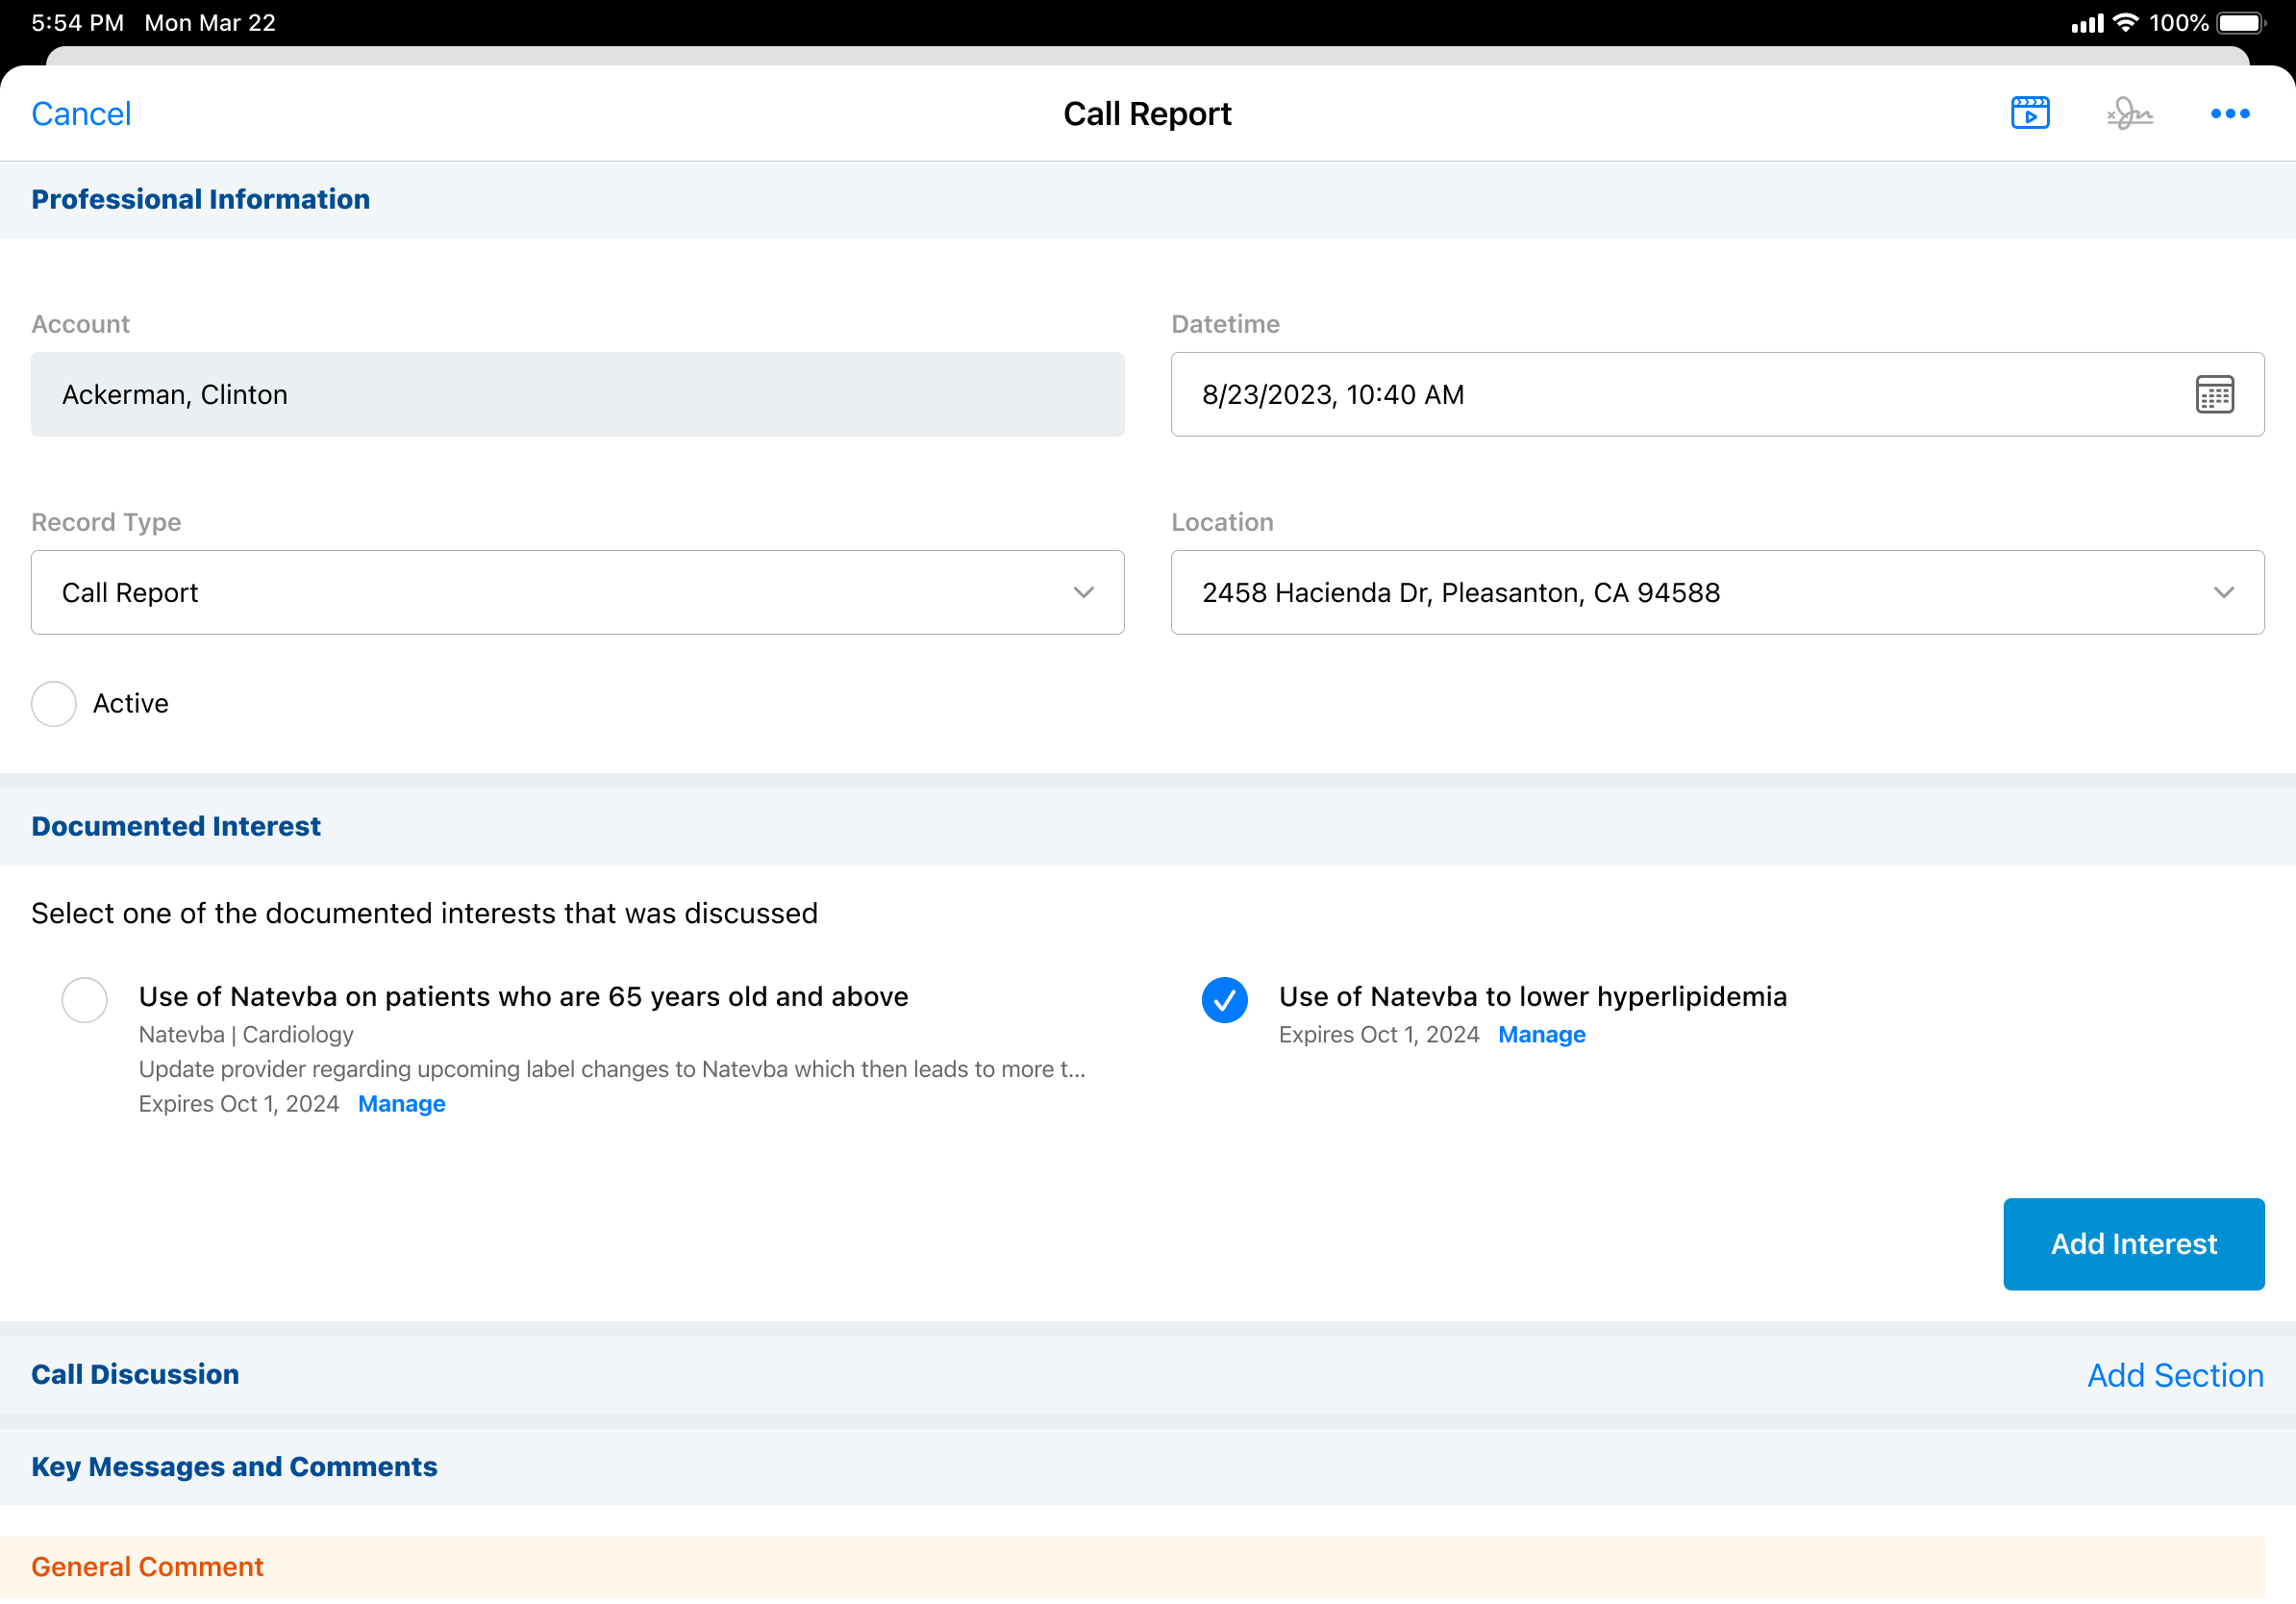
Recording a Documented Interest
MSLs can indicate they discussed a previously captured, unexpired documented interest when recording a call with an HCP.
To record a Documented Interest:
-
Open a Call Report.
-
Select a documented interest from the Documented Interest section. Users can select only one documented interest.
-
Select Save.
Renewing a Documented Interest
Documented interest agreements can be renewed, if requested by an HCP, for an additional period, or terminated when an HCP no longer wants to be proactively informed on a specific subject. Users with FLS Read permission to the Expiration_Date _vod field on the Documented_Interest_vod object can view the expiration details of a documented interest. Users with FLS Edit permission to this field can manage the expiration details.
If a documented interest is expired, an Expired message displays. Expired documented interest agreements cannot be renewed.
You can renew an unexpired documented interest agreement without unlocking it.
To manage the expiration of a Documented Interest:
-
Open a Call Report for the appropriate account.
- Select Manage under the Documented Interest you want to update.
- Select the down arrow next to the expiration date.

-
Select Renew to... or Expire today. Renewing a Documented Interest creates a new record with a new expiration date.
-
Select Save.
Unlocking a Previously Submitted Documented Interest
MSLs can edit a previously submitted Documented Interest on any supported platform if the admin unlocks the record using the Browser.
You can renew an unexpired documented interest agreement without unlocking it.
Admins
To unlock a previously submitted (and locked) Documented Interest (Browser only):
-
Open an Account Details.
-
Select the Documented Interest you want to unlock.
-
Select the Unlock button. The record is updated to Saved status. Documented Interests in saved status do not display on the call report.
MSLs
To edit an unlocked Documented Interest (any supported platform):
-
Open Account Details for the appropriate account.
-
Select the Documented Interest you want to edit.
-
Select the Edit button.
-
Edit the Documented Interest accordingly.
-
Select Save. The record is updated to Submitted status (locked).
To delete an unlocked Documented Interest (Browser only):
-
Open a Call Report or Account Details.
-
Select the Documented Interest you want to delete.
-
Select the Delete button. A confirmation message displays
-
Select Delete.
Updating Documented Interests Using an External System
Admins can create an Integration user for an external system with the appropriate permissions to unlock, edit or delete a locked Documented Interest, and relock the record in the same transaction.
To edit a Documented Interest using an external system, integration users need FLS edit permission to the Override_Lock__vod field on the Documented_Interest_vod object. The Override_Lock_vod field must be set to TRUE in the transaction.
