

Enabling My Schedule Map View
- iPad
To help users efficiently plan call routes and navigate to scheduled activities, calls, events, and medical events are plotted along a daily route in Map View. Users can also view nearby accounts and schedule calls from Map View.
Configuring the Map View for My Schedule
Ensure initial configuration is complete before enabling this functionality.
To enable this feature, grant users FLS Read permission to the Latitude_vod and Longitude_vod fields on the Address_vod object.
Ensure account latitude and longitude data are loaded to Address_vod records. If Geocoding Missing Address Coordinates is enabled, missing address coordinates may be geocoded. Geocoding is only intended to supplement existing Latitude_vod and Longitude_vod field data when coordinate information is not available.
Using the Map View
The Maps tab contains three main components: a calendar panel, an accounts panel, and a map panel.
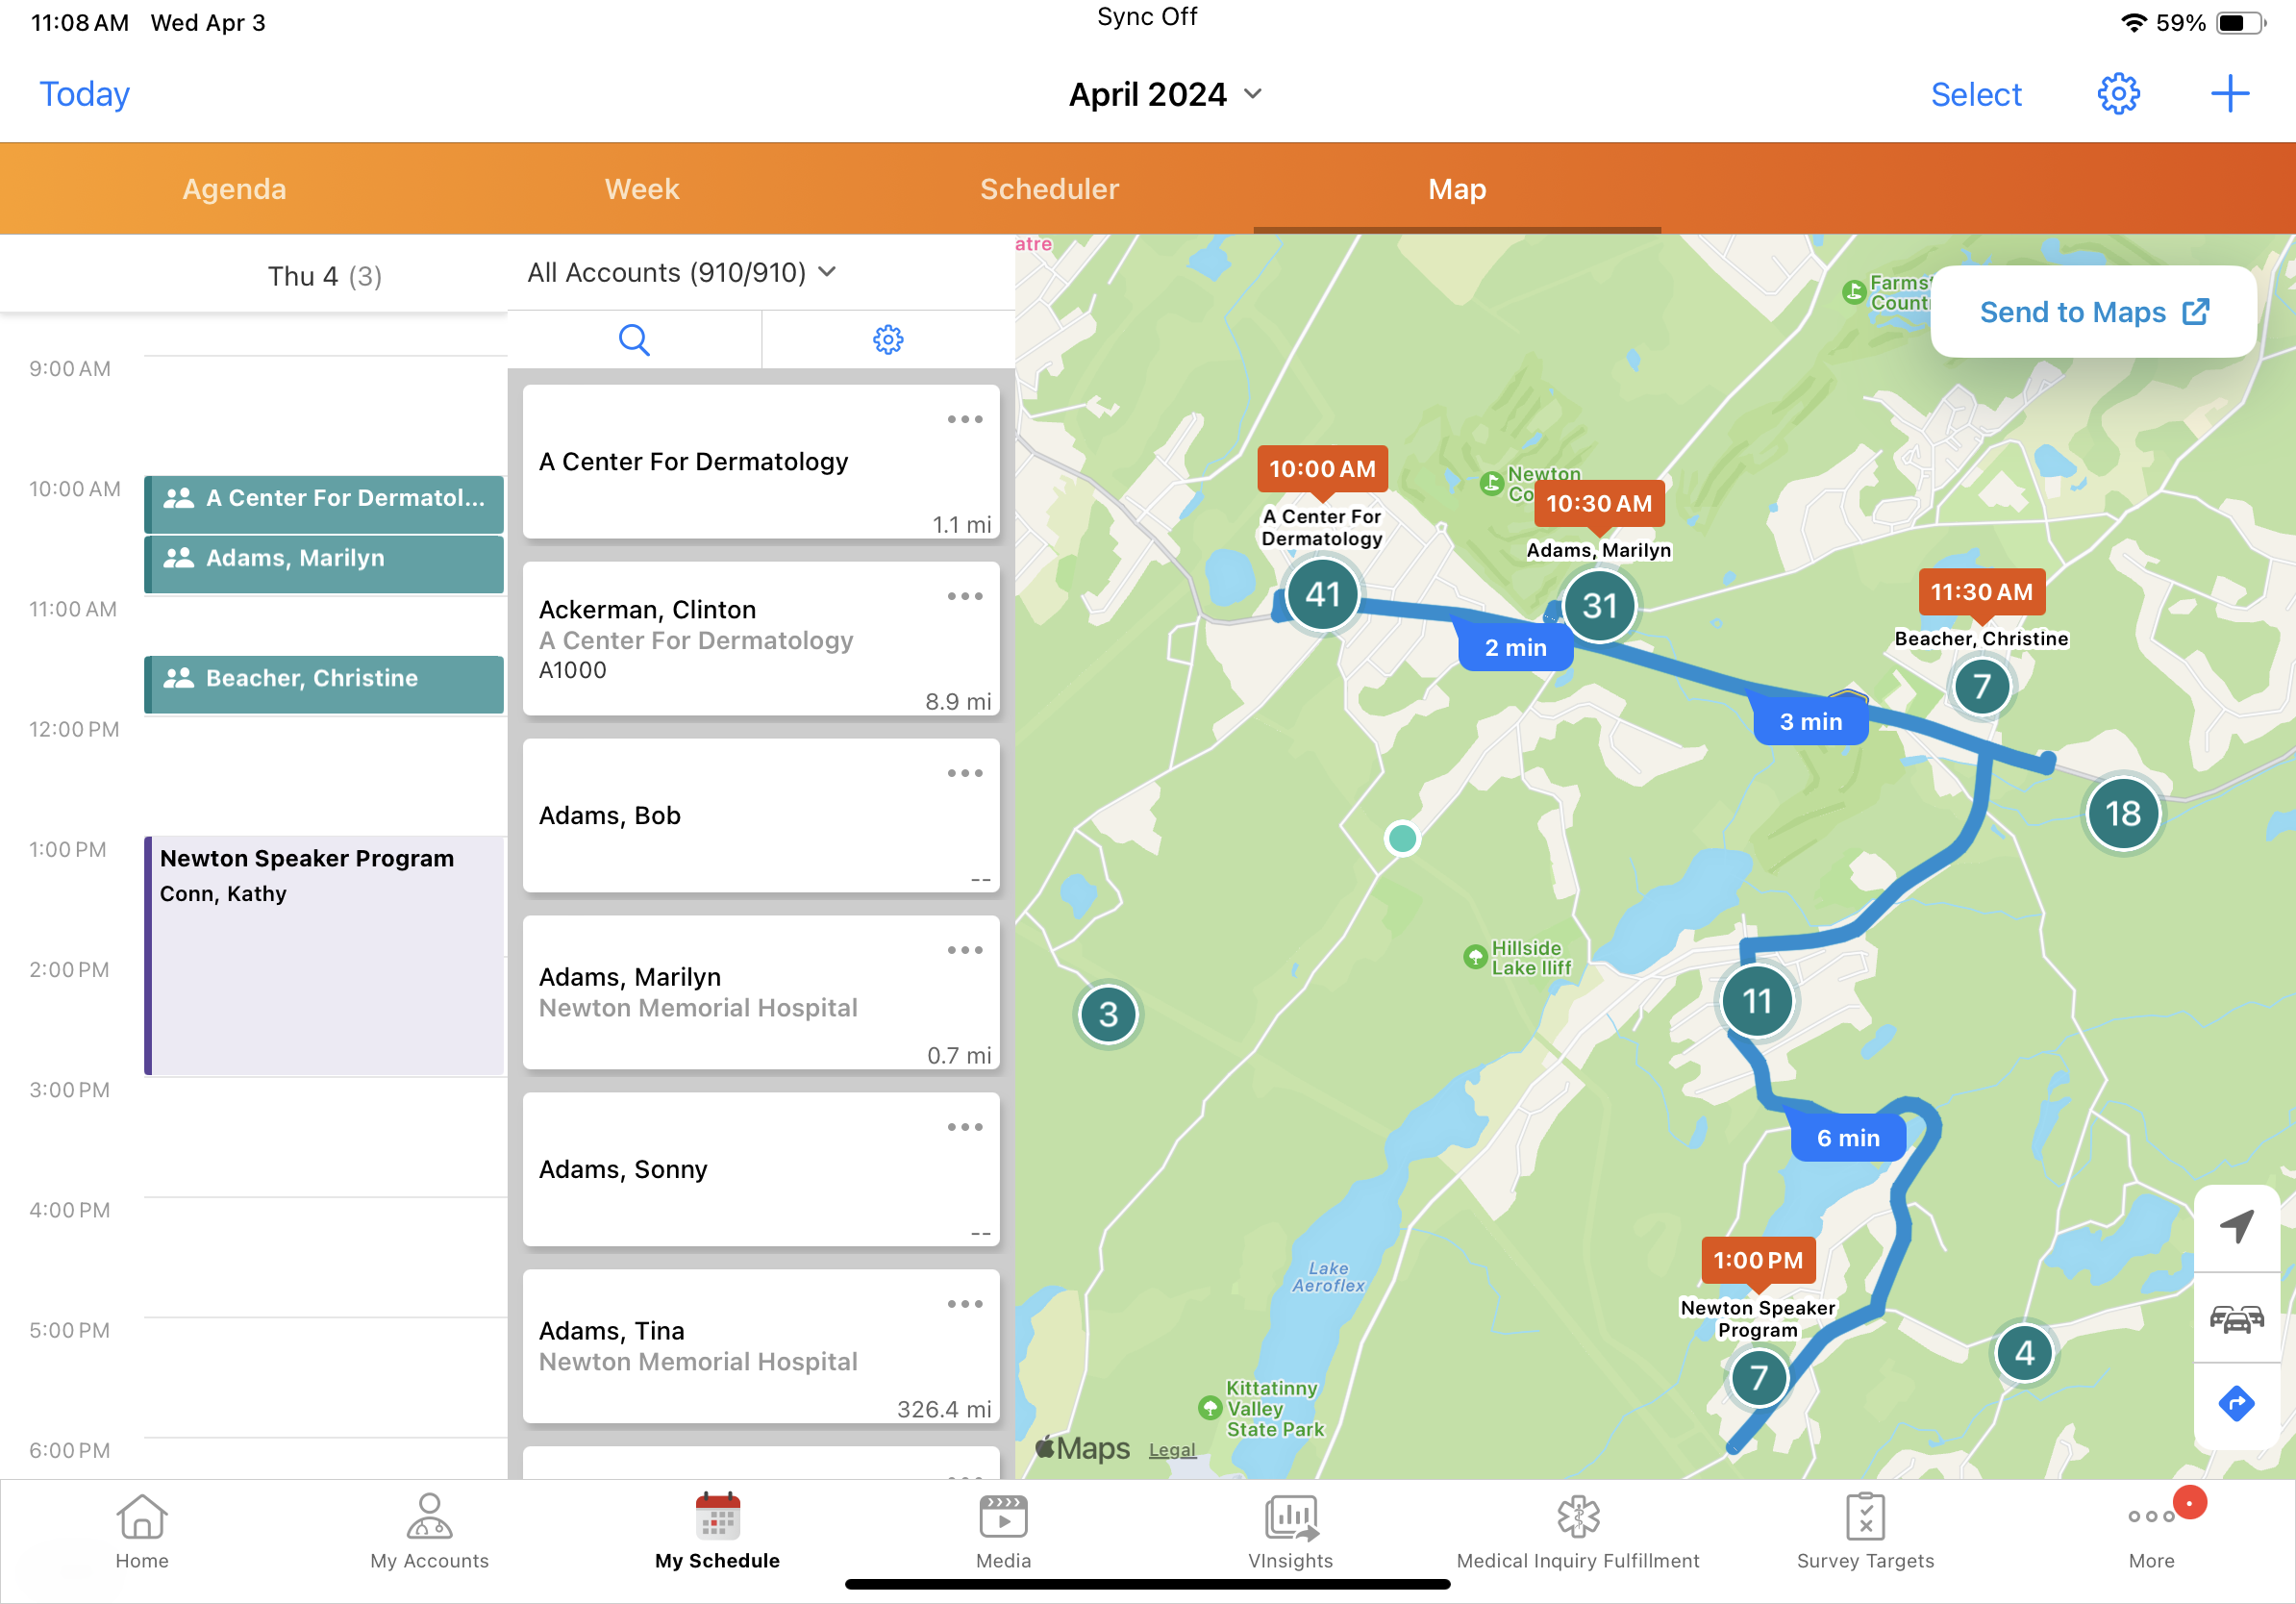
Using the Accounts Panel in Map View
The accounts panel displays all accounts available for the user and the account distance, which is based on the center point of the user’s scheduled calls for the day or, if calls are not scheduled for the day, distance from the user’s current location. Depending on the user’s locale, distance displays in miles or kilometers.
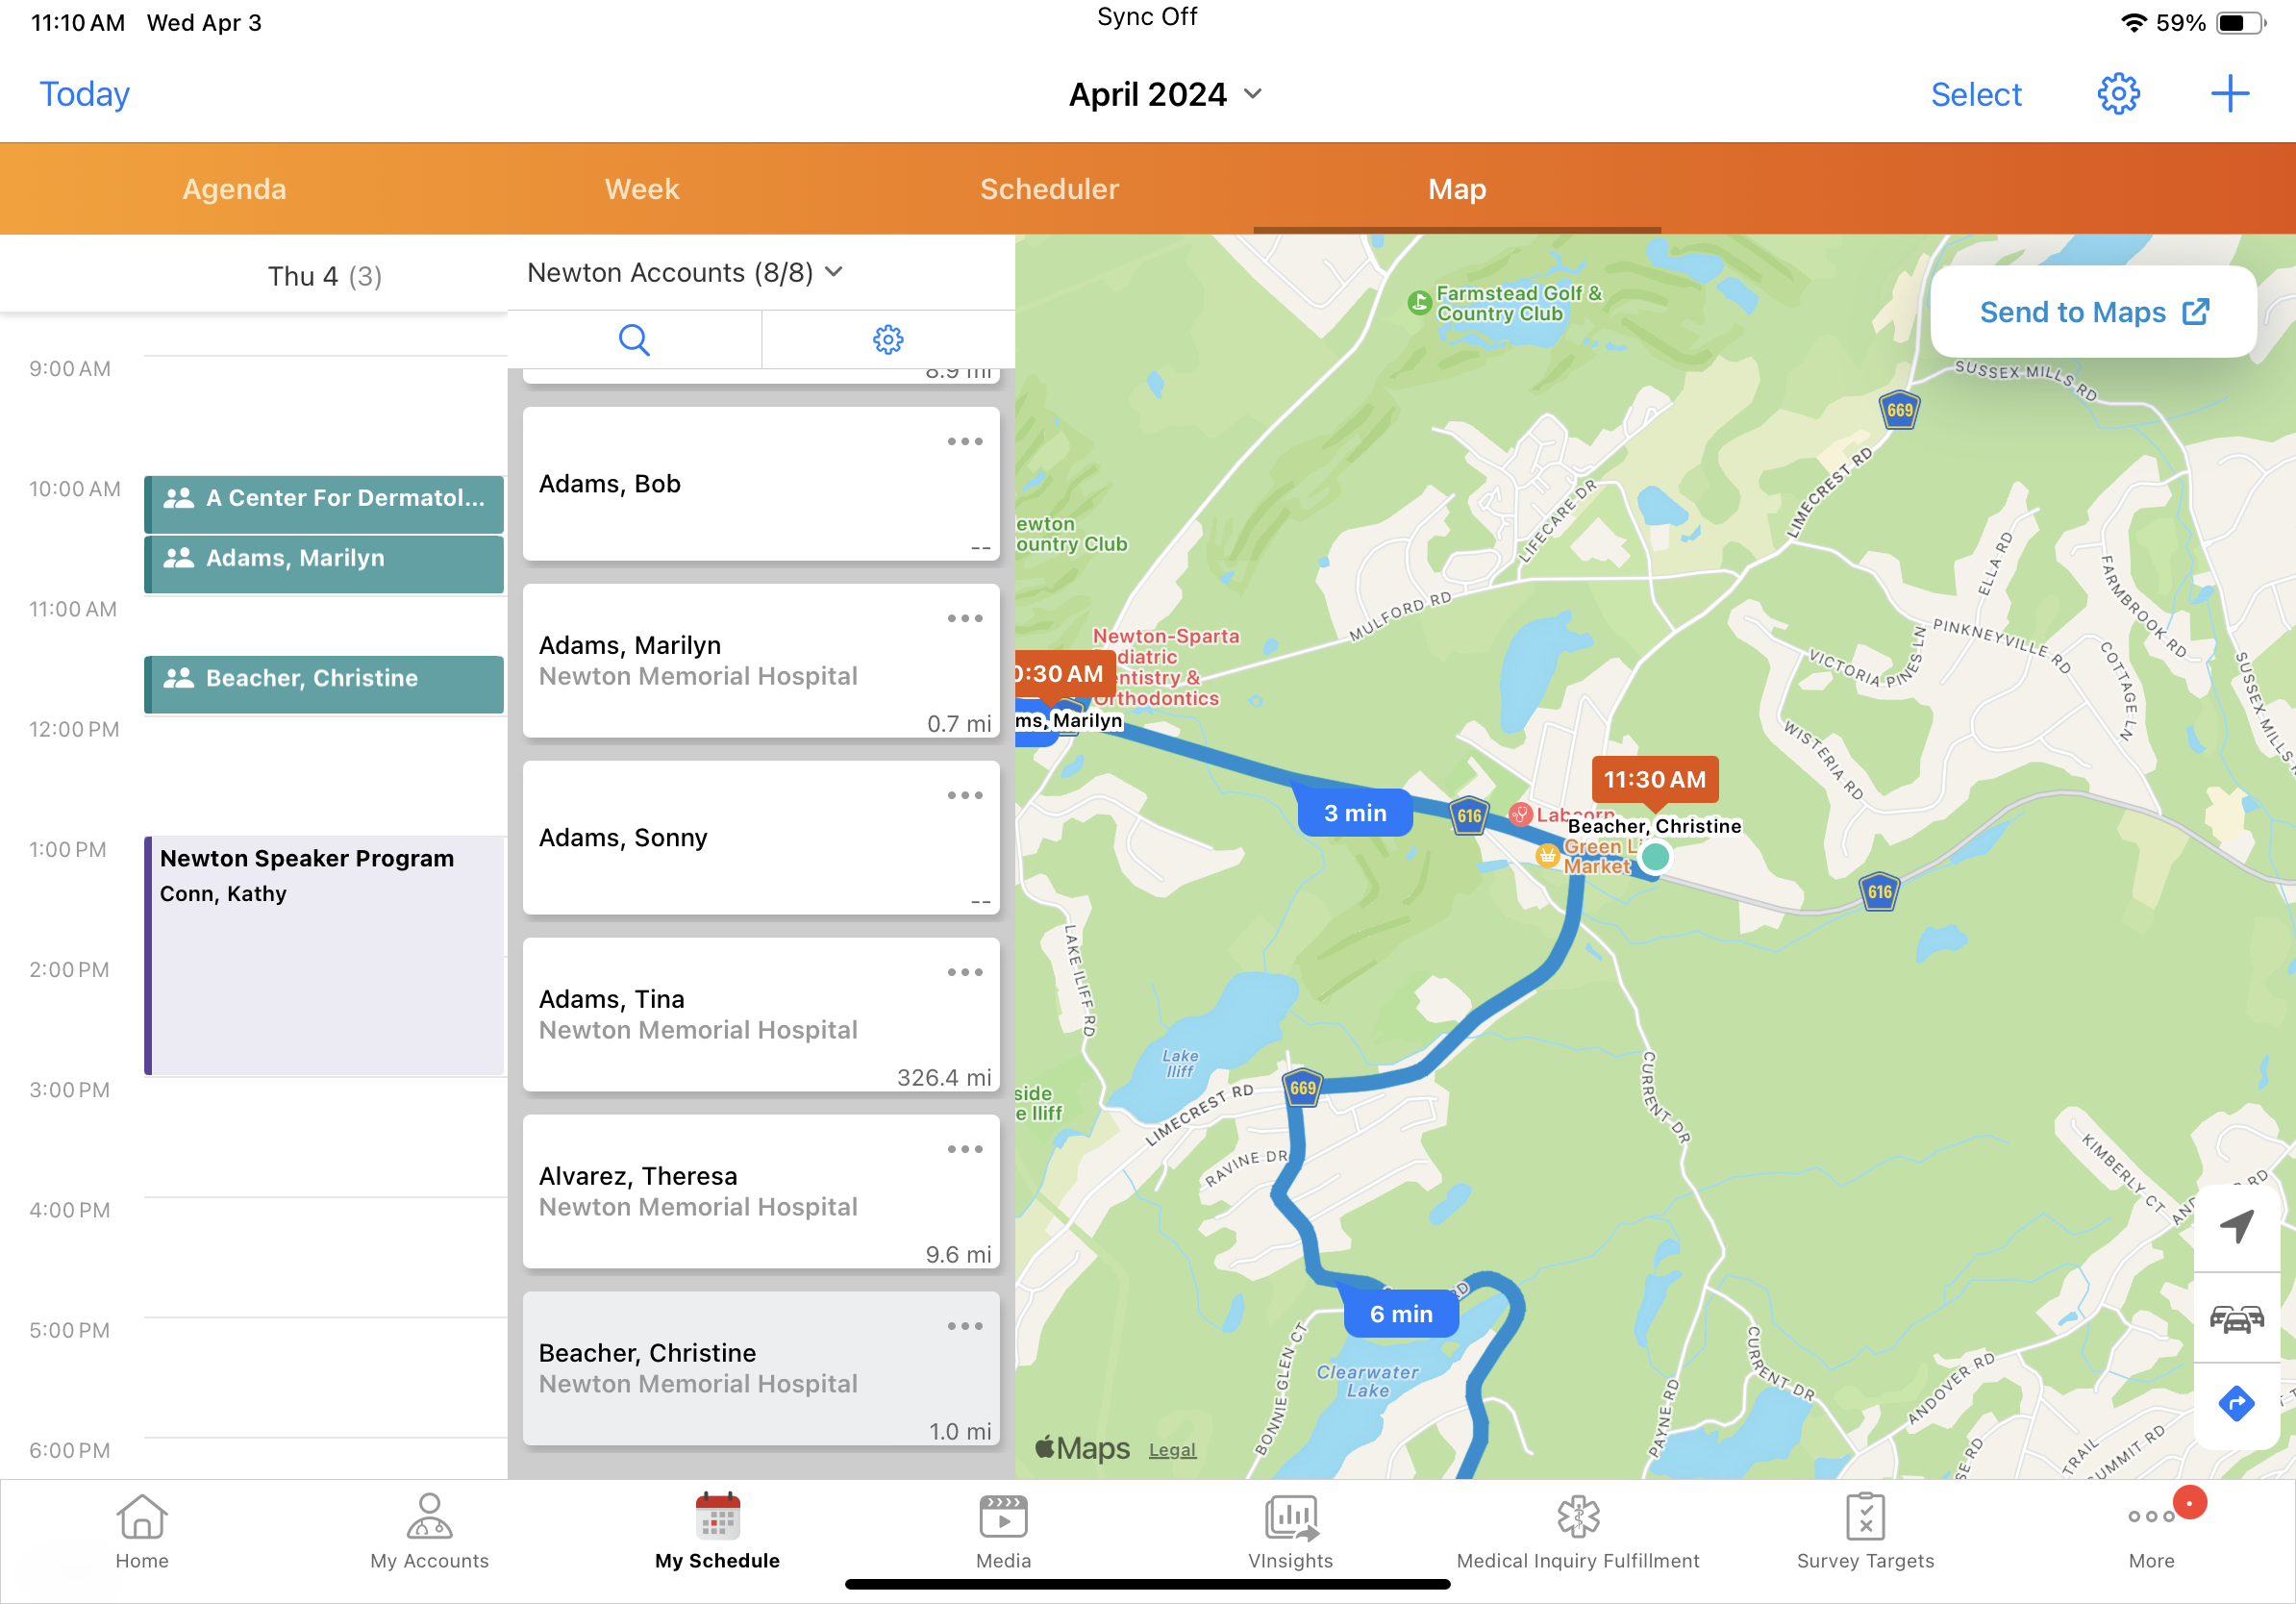
To find a specific account, users can filter accounts using the drop-down list at the top of the accounts panel or search for accounts from the search bar. Users can also view display-by information in the accounts panel, including custom display-by information. For more, see Viewing Custom Information with Display-By.
To schedule a call, drag an item from the accounts panel to the calendar panel. Selecting an account card changes the card to dark gray and enlarges the account’s teal dot on the map.
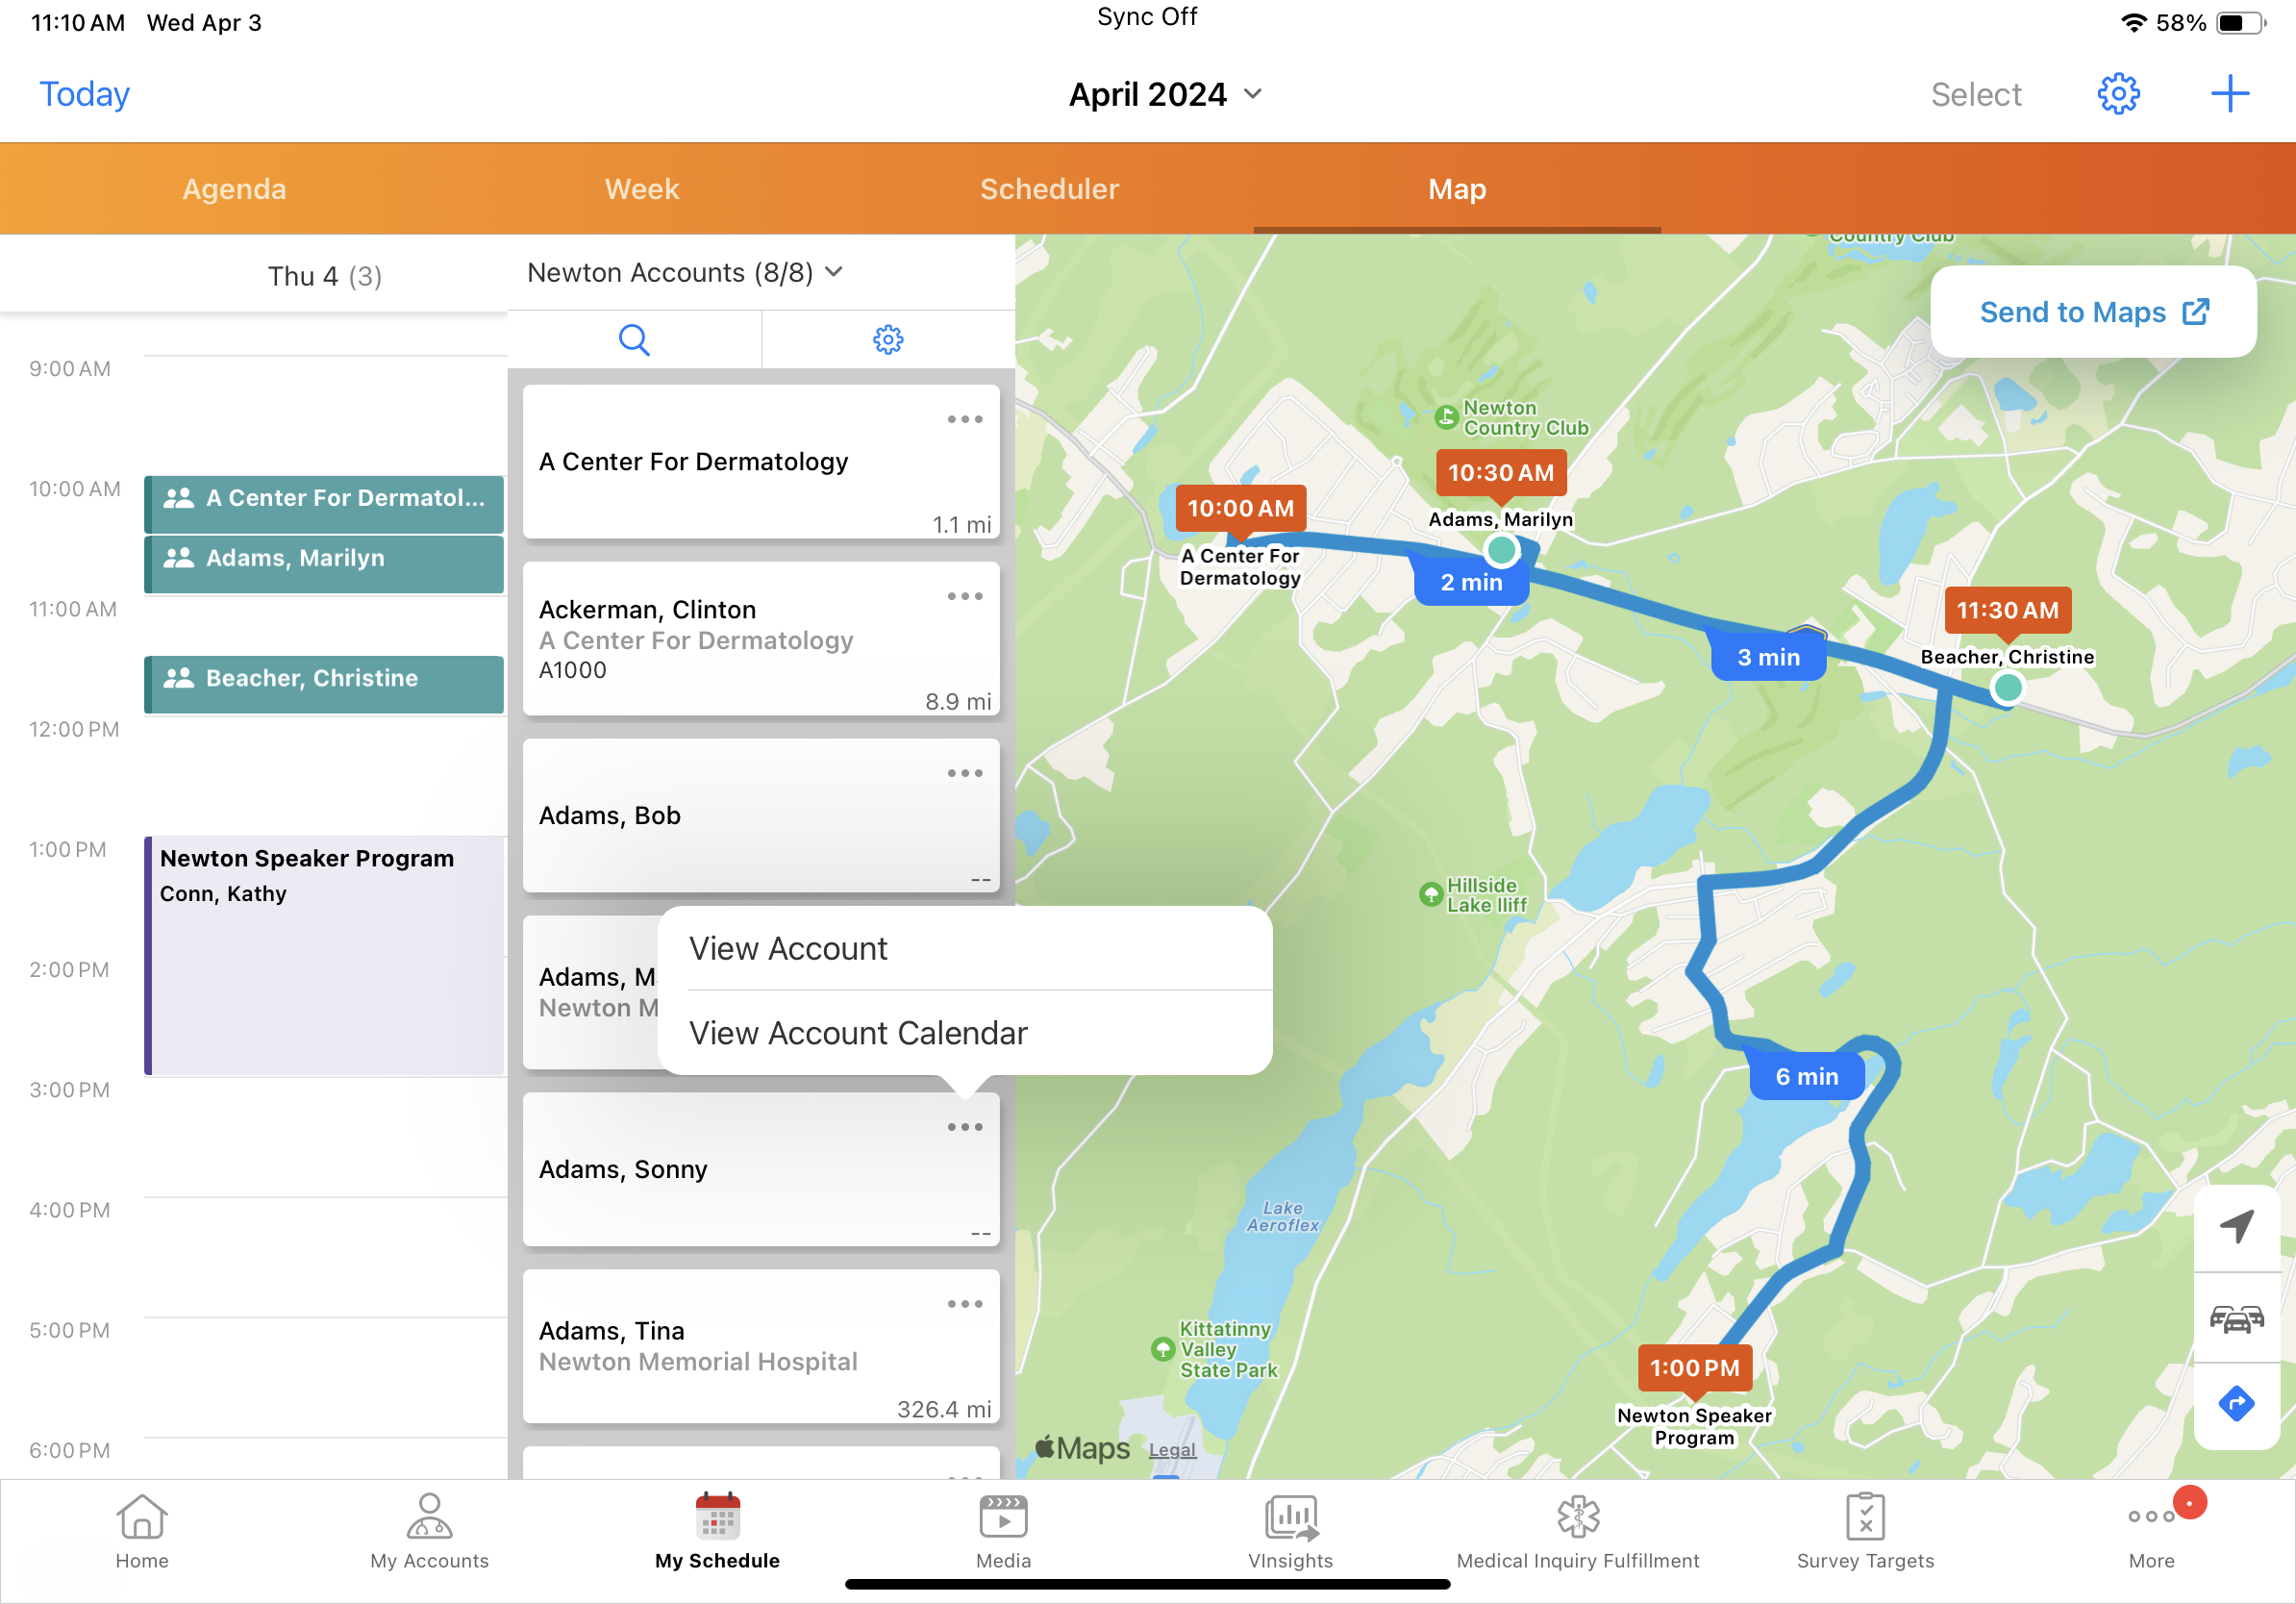
To view Account Details or the Account Calendar for a particular account, select the appropriate option from the More Actions menu on the account card.
Users can easily schedule or reschedule calls across days by dragging calls to the edge of the calendar panel for at least one second:
- To move a call to a past day, drag the call to the left edge of the schedule and drop the call on the appropriate date and time
- To move call to a future day, drag the call to the right edge of the schedule and drop the call on the appropriate date and time
Once users drop a call, the call is rescheduled to the selected date and time. The call status remains the same. For example, when a user reschedules a planned call, the call remains in planned status.
Using the Map Panel in Map View
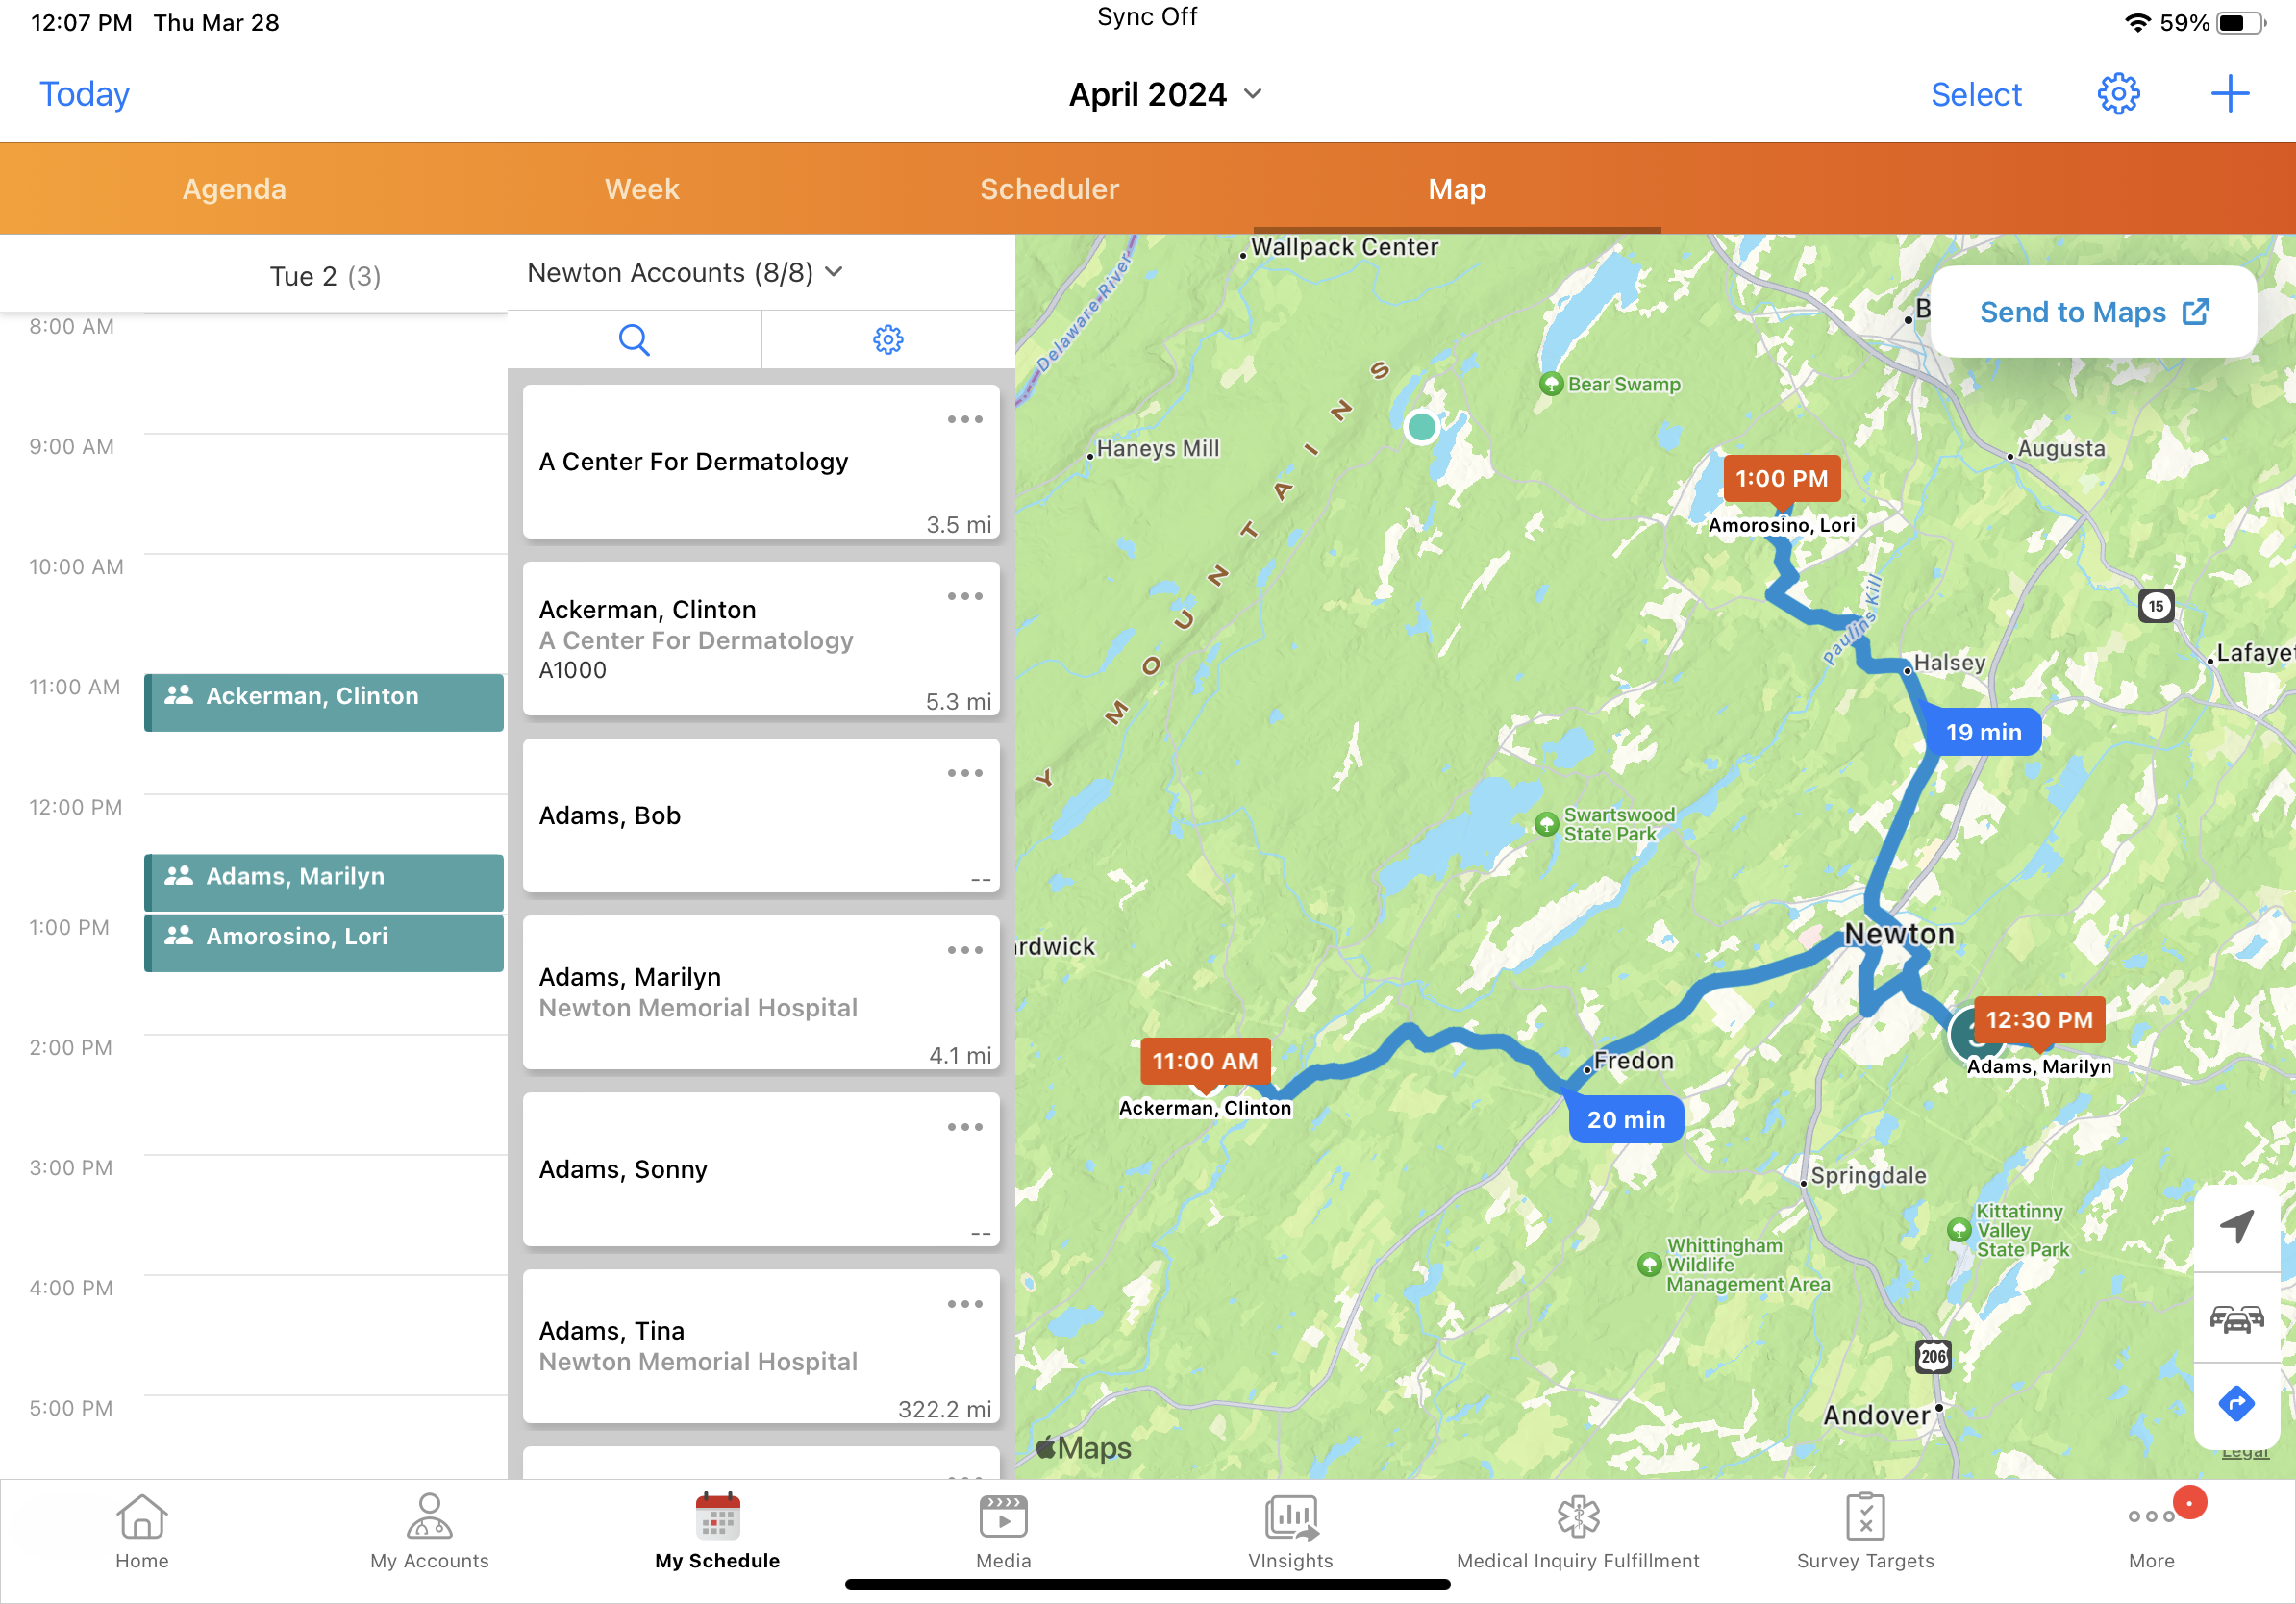
The map panel displays scheduled calls, events, and medical events, indicators for accounts nearby, and cluster indicators for groups of accounts near each other. The map automatically zooms to display any scheduled activities with an orange timestamp. If location services are enabled on the user's device, the map is sized to include the user's current location, along with their scheduled activities for the day. Selecting a nearby account indicator displays the associated card in the account panel.
When there are multiple calls or events at the same address, the number of entries displays along with the timestamp. Clusters of several accounts are represented with a green dot displaying the number of accounts.
|
Marker Type |
Image |
Usage |
|---|---|---|
|
Green dot with number |
|
Indicates a cluster of accounts close to one another. The number represents the number of accounts in the cluster. |
|
Orange timestamp |
|
Indicates a call or event at a specific address. If there are multiple calls or events at the same address, the number of entries displays next to the event time pin. The time displays up to a zoom radius of 100 kilometers. |
|
Teal dot |
|
Indicates an account without a scheduled call. The teal dot represents the preferred address for the account, if there is a Preferred_Address_vod value on the TSF_vod record for the account and territory combination. If a preferred address is not available, the account's primary address is used. |


Only account-based events with addresses associated are plotted in Map View. Plotting for venue and location based events is not supported. If only the Venue_vod or Location_vod fields are populated, the event or medical event is not plotted on the map. For more on events and medical events in My Schedule, see Displaying Events in My Schedule.
Viewing Clusters
Selecting a cluster indicator zooms the map in, breaks the cluster into smaller clusters, and displays the associated accounts on the account panel.
Using Routing in Map View
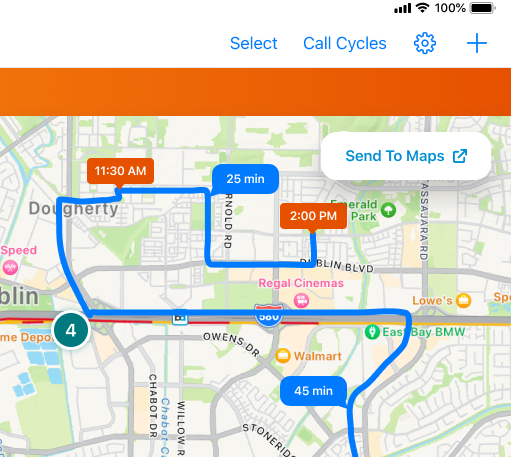
Users' scheduled activities for the day are connected by a blue line representing the route. Expected travel times display on each segment of the route. Travel times are based on driving between the addresses for each call or event, and include traffic estimates according to the travel conditions at the time the route was created. When users create, edit, or delete activities meeting the routing criteria, the route is automatically recalculated to reflect the changes.
To toggle routing, select the route icon in Map View. The route icon is blue when routing is on, and gray when routing is off.

Routing requires at least a start point and end point. If Location Services is enabled on the user's device, there must be one eligible call or event in the day to create a route between the device location and the eligible activity. If Location Services is not enabled, there must be two eligible calls or events in the day to create a route.
To be included in the route, calls must meet the following criteria:
- Call datetime must be in the future
- Call channel must be In_Person_vod or blank
- Call is associated to an account with an address
If the user is added as a user attendee on a call meeting these routing criteria, the call is included in the route.
If Capturing the Call Date Only is enabled, calls are not included in the route. Routing requires a call datetime.
Medical events and Events Management events must meet the following criteria:
- Start and end datetimes are populated (Event Start and End Times in Events Management and Medical Events must be enabled)
- Start datetime is in the future
- Event format is In_Person_vod or Hybrid_vod, for Events Management events
- Medical events must be associated to an account with an address
If Displaying Events in My Schedule for Event Team Members is enabled, events where the user is a team member are included in the route.
When users create calls from medical events, only one of the activities is included in the route. If the call and associated medical event are scheduled for the same datetime, the medical event is included in the route. If the call datetime is later than the associated medical event datetime, the call is included in the route instead. When several calls are created from a single medical event, only the calls are routed, regardless of the starting datetime. Events with the same start time are routed in the order they display on the calendar grid in My Schedule.
All-day calls or events are not included in the route, and multi-day events are only included in the route for their start date. If an event spans or ends on the selected day, it is not included in the route.
Sending a Route to Maps
To send an entire route to Apple Maps from My Schedule Map View, select the Send to Maps button. The number of entries users can send to maps depends on the number of stops supported in their selected mapping application.
Users can also send routes to maps from Agenda View on the iPhone platform. For more information, see Sending an Address or Route to Maps.
Disabling Map View in My Schedule
To disable only the My Schedule map entry point, populate the Disable_Map_Entrypoints_vod Veeva Setting with MySchedule_vod. To disable all maps entry points, see Configuring Accounts.
