

Sending an Address or Route to Maps
- iPhone
To easily navigate to calls using their preferred navigation app, users can push an individual address from the Veeva CRM app to Google Maps, Apple Maps, or Waze by selecting Navigate from the All Actions menu. The call address is automatically populated in the user’s navigation app.
Alternatively, users can send a route with several scheduled activities to Apple Maps or Google Maps from My Schedule. Eligible activity addresses are automatically populated in the mapping application.
Ensure initial configuration is complete to use this functionality.
Sending an Address to Maps
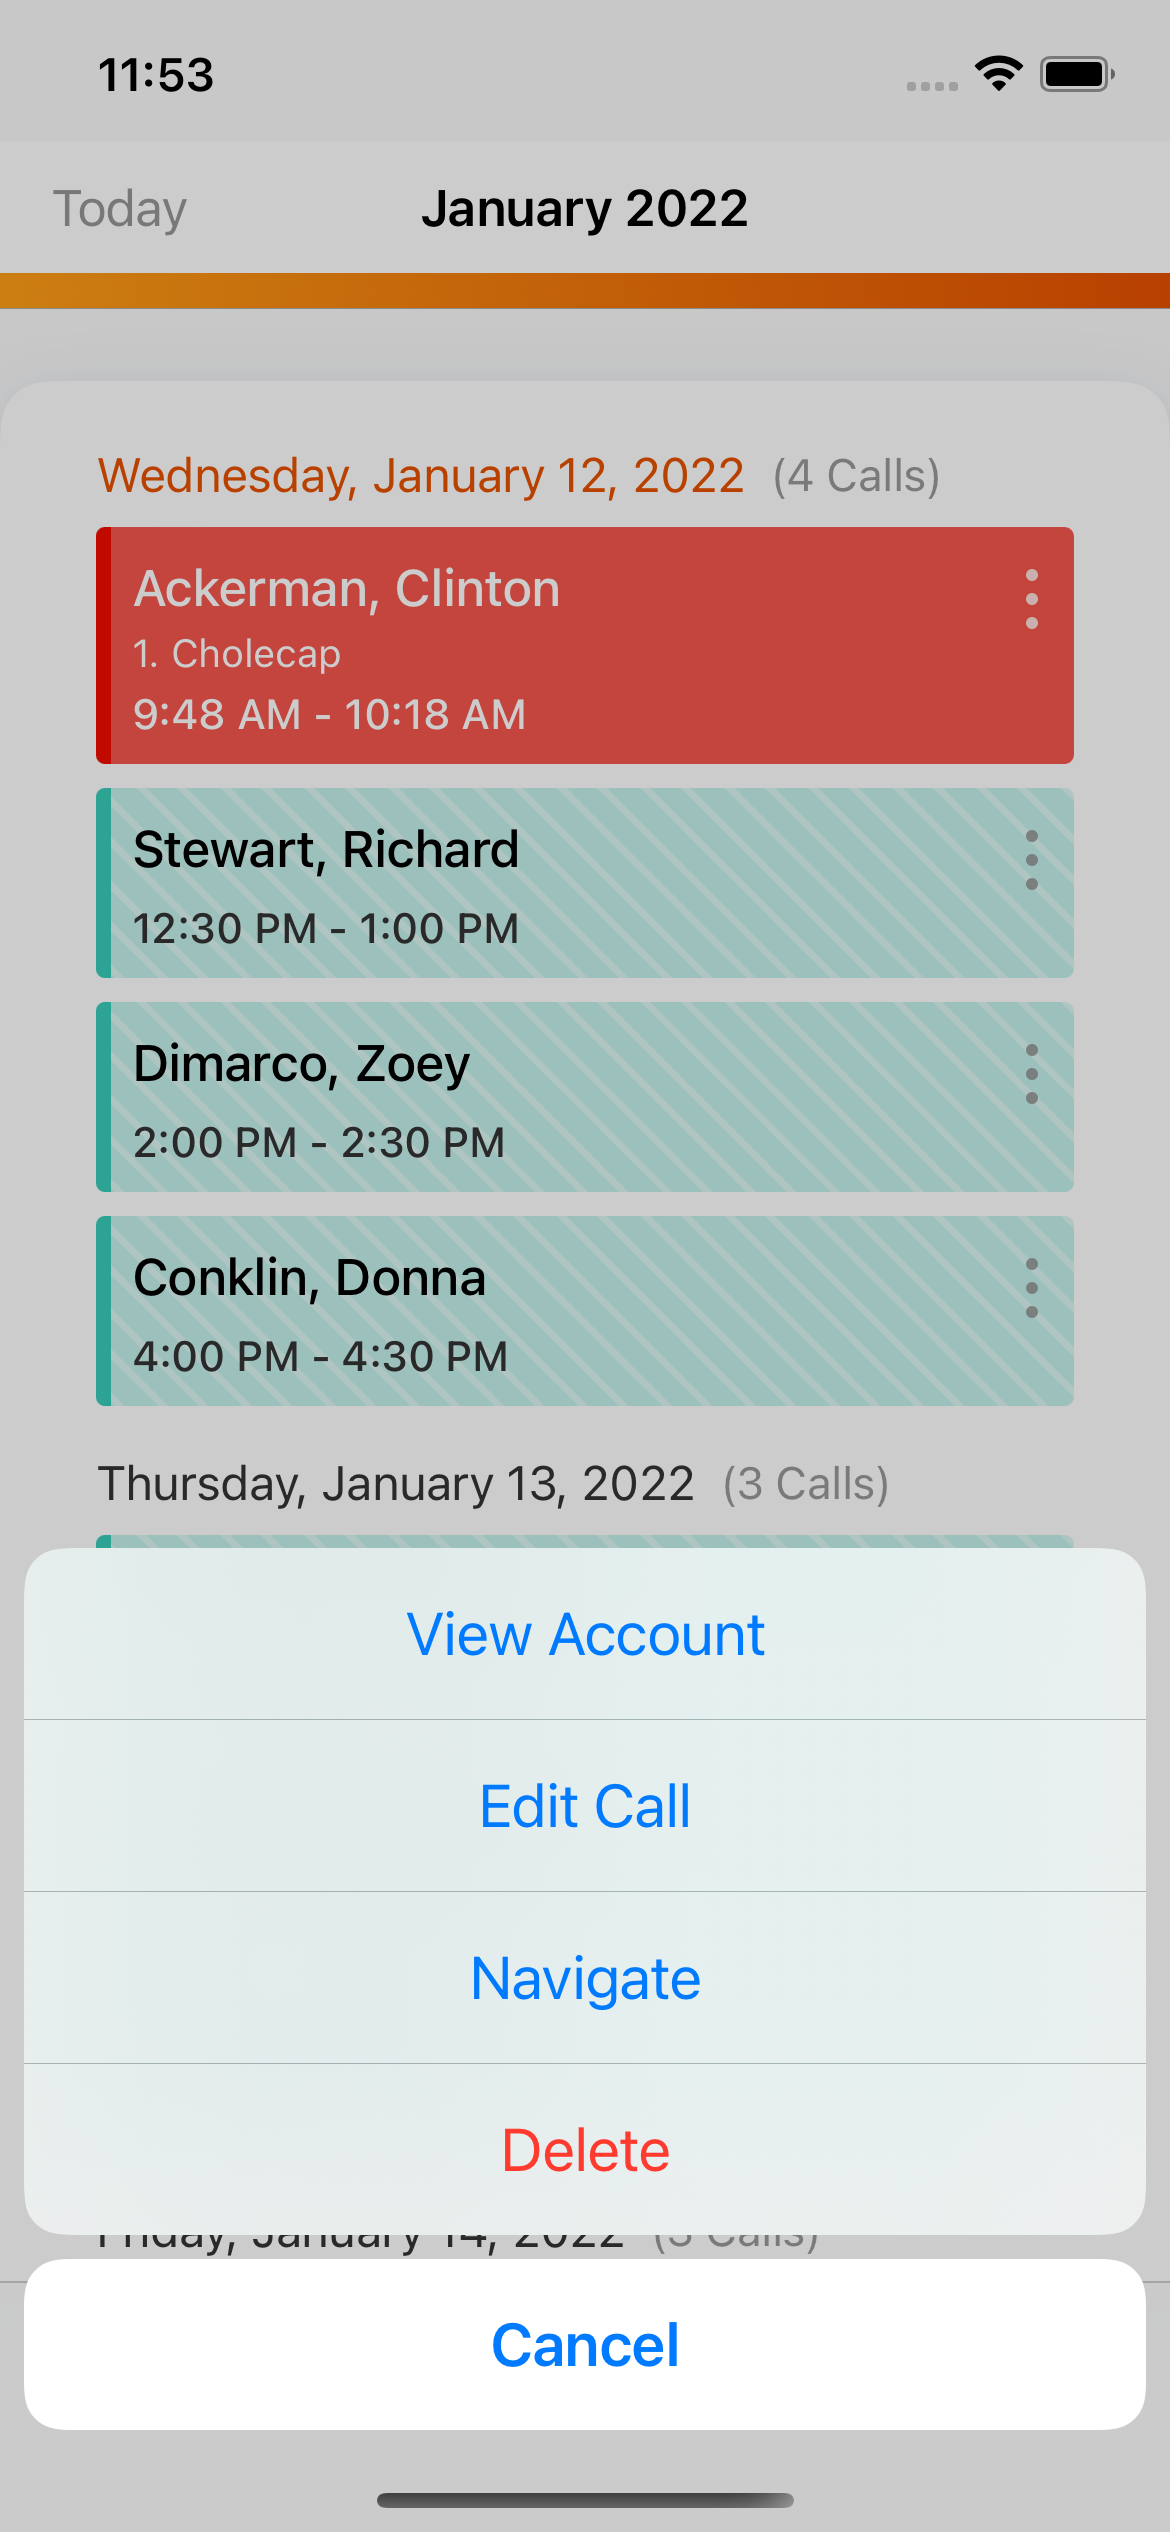
Select Navigate from the More Actions menu to send a single address from the Veeva CRM app to Google Maps, Apple Maps, or Waze. Users need to select a default mapping app if one is not selected. When users select Navigate after selecting a default mapping app, the default app is automatically used for sending addresses to maps.
Sending a Route to Maps
An all-day Send to Maps button displays for each day in Agenda View with eligible calls or events.
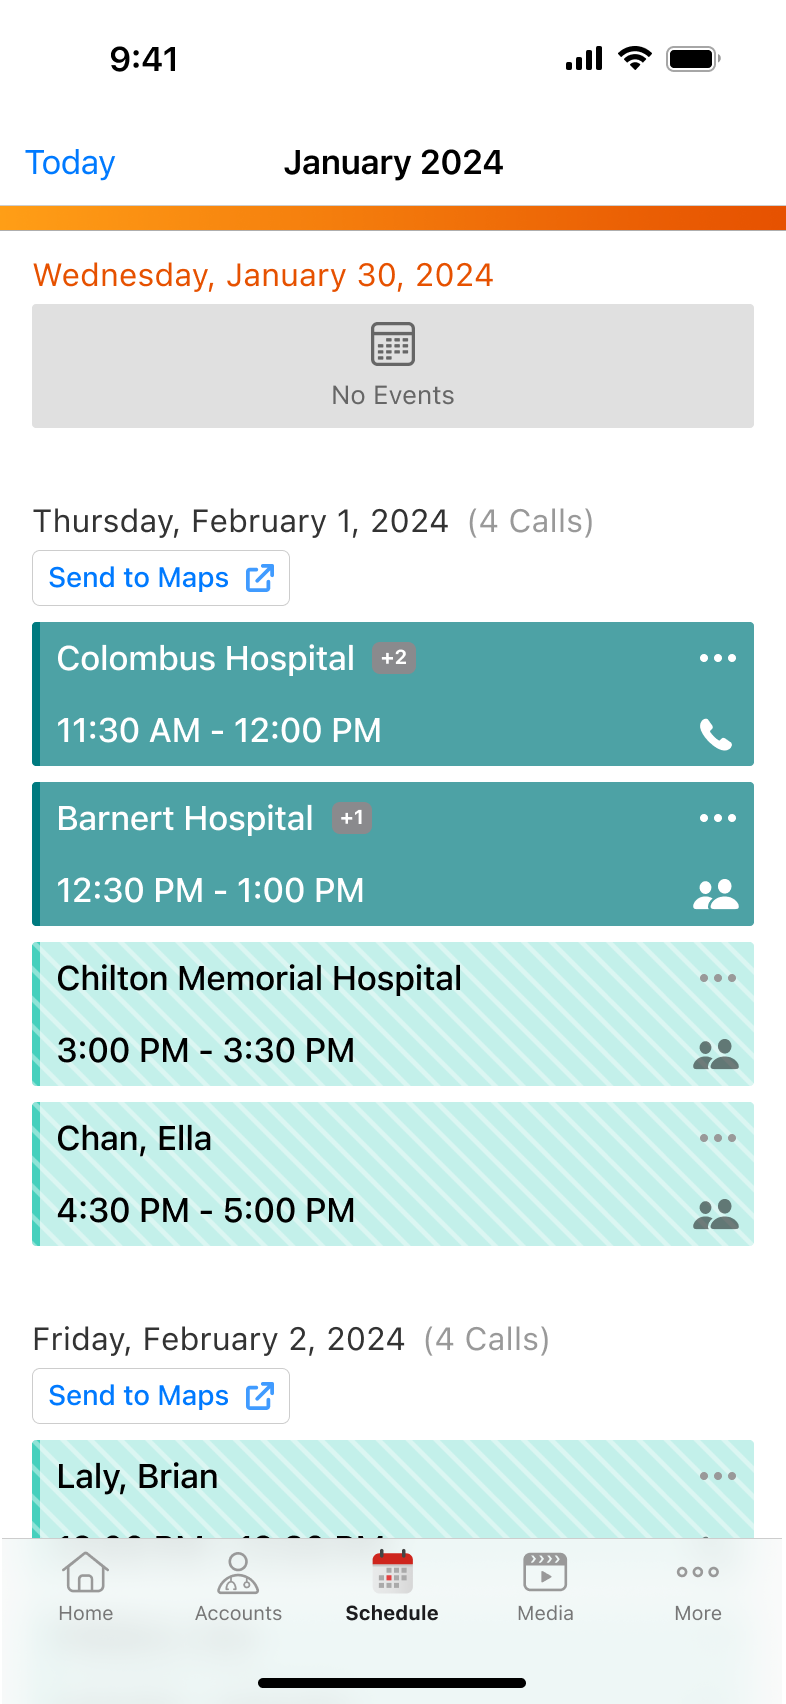
Select the Send to Maps button to send all eligible calls and events scheduled for that day to Google Maps or Apple Maps as a route. Users need to select a default mapping app if one is not selected. When users send routes or addresses to maps after selecting a default mapping app, the default app is automatically used for sending routes to maps. The number of entries users can send to maps depends on the number of stops supported in their selected mapping application.
The same routing criteria apply in Agenda View as Map View. For more on routing criteria, see Routing in Map View.
Waze is not supported for sending all-day routes to maps.
