

22R1.2 Functionality Guide
The Functionality Guide is intended for Sales Operations, Business Administrators, System Integrators, and others responsible for making decisions about what features are needed for end users to be successful and deciding which features work together with existing customer configurations.
Account Management
Decoupled Unverified Records
Users can create and immediately use decoupled unverified accounts, addresses, and child account records to log a call, or use decoupled unverified new records for an existing account.
For example, Sarah Jones wants to submit a call for Dr. Ackerman, but one of the attendees, Dr. Bob Adams, is not an existing account at Verteo Biopharma. After searching for Bob Adams, she selects the New Account button and enters all the required data for the New Account wizard, which immediately adds the decoupled unverified account and allows Sarah to add Dr. Adams as an attendee on the call.
Considerations
- When CRM Managed Acct Types is configured, Veeva CRM does not create a DCR for the Account record type specified in the CRM Managed Acct Types setting, but the account is still created and available for immediate use.
- Third Party Account record types are not supported.
- A Veeva Network license is not required.
Using Decoupled Unverified Records
When users in offline mode search for an account and do not find the account in the results, they can select the New Account button and use the New Account wizard to enter account details. Users can also enter a new address from the Addresses section of the Account Detail screen. Veeva CRM creates a Data Change Request. The new decoupled unverified account or address record is immediately available for use in calls.
Internet access is required on the iPad platform to create the unverified records and make them available to the user.
This feature is available from the following entry points:
- New Account wizard
- New Account from Global Account Search
- New Child or New Parent button from the Members list on the Account Detail page
- New Address from the Account detail page
Decoupled DCR Support for the GAS New Account Button
CRM customers can use Decoupled Data Change Request functionality when creating a new account from the Global Account Search results. If the user’s organization is configured for Decoupled DCRs, the New Account Button displays even if the user does not have OLS on the Account object, and launches a version of the New Account Wizard that creates a DCR for the account.
For example, Sarah Jones searches for Dr. Clinton Ackerman and finds he is not an existing account at Verteo BioPharma. She wants to create an account and a DCR for Dr. Ackerman. She selects the New Account button on the GAS results screen and enters all the required data for the New Account wizard, which creates a DCR for the new account.
GAS Customized Columns and Preview Pane (Available June 2, 2022)
To make it easier to find accounts, Admins can customize what information displays in the Global Account Search results screen. For Browser (Lightning), admins can specify which columns display. For the iPad, admins can specify which fields display in the preview window for a selected account.
For example, Alice Adams wants to add the Do Not Call field to the Preview pane in GAS for iPad users. She adds the API name of the Do Not Call field to the list of fields in the GAS_PREVIEW_FIELDS Veeva Message. When Sarah Jones views accounts in GAS on her iPad, she can quickly see which accounts are not available for calls.
Engage Connect
Updates to the Engage Scheduling Site (Available June 2, 2022)
When a recipient opens an Approved Email containing the {{schedulerLink}} token, the token renders as a link to the Engage Scheduling Site via Engage, enabling recipients using Engage to see and avoid potential scheduling conflicts when requesting a new meeting.
For example, Dr. Clinton Ackerman requests a meeting with Sarah Jones via the Engage Scheduling Site. Later that day, he receives another link to request a meeting with Ian Kehl. When Dr. Ackerman sees the available times to request a meeting, he sees the time he previously requested to meet with Sarah Jones. This helps Dr. Ackerman avoid accidentally creating a scheduling conflict when requesting a time with Ian Kehl.
To use the Engage Scheduling Site to schedule a meeting as a recipient:
-
Select the link rendered by the {{schedulerLink}} token. The browser site renders in the viewer’s browser language and is available in all Veeva supported languages. If the view is using a language that is not supported by Veeva, the browser language defaults to English.
If recipients select the link on a device with the iOS or Android Engage app installed, the app opens and the recipient creates the meeting request from within the application. Recipients without the app installed can continue via the browser to create the meeting request there.
-
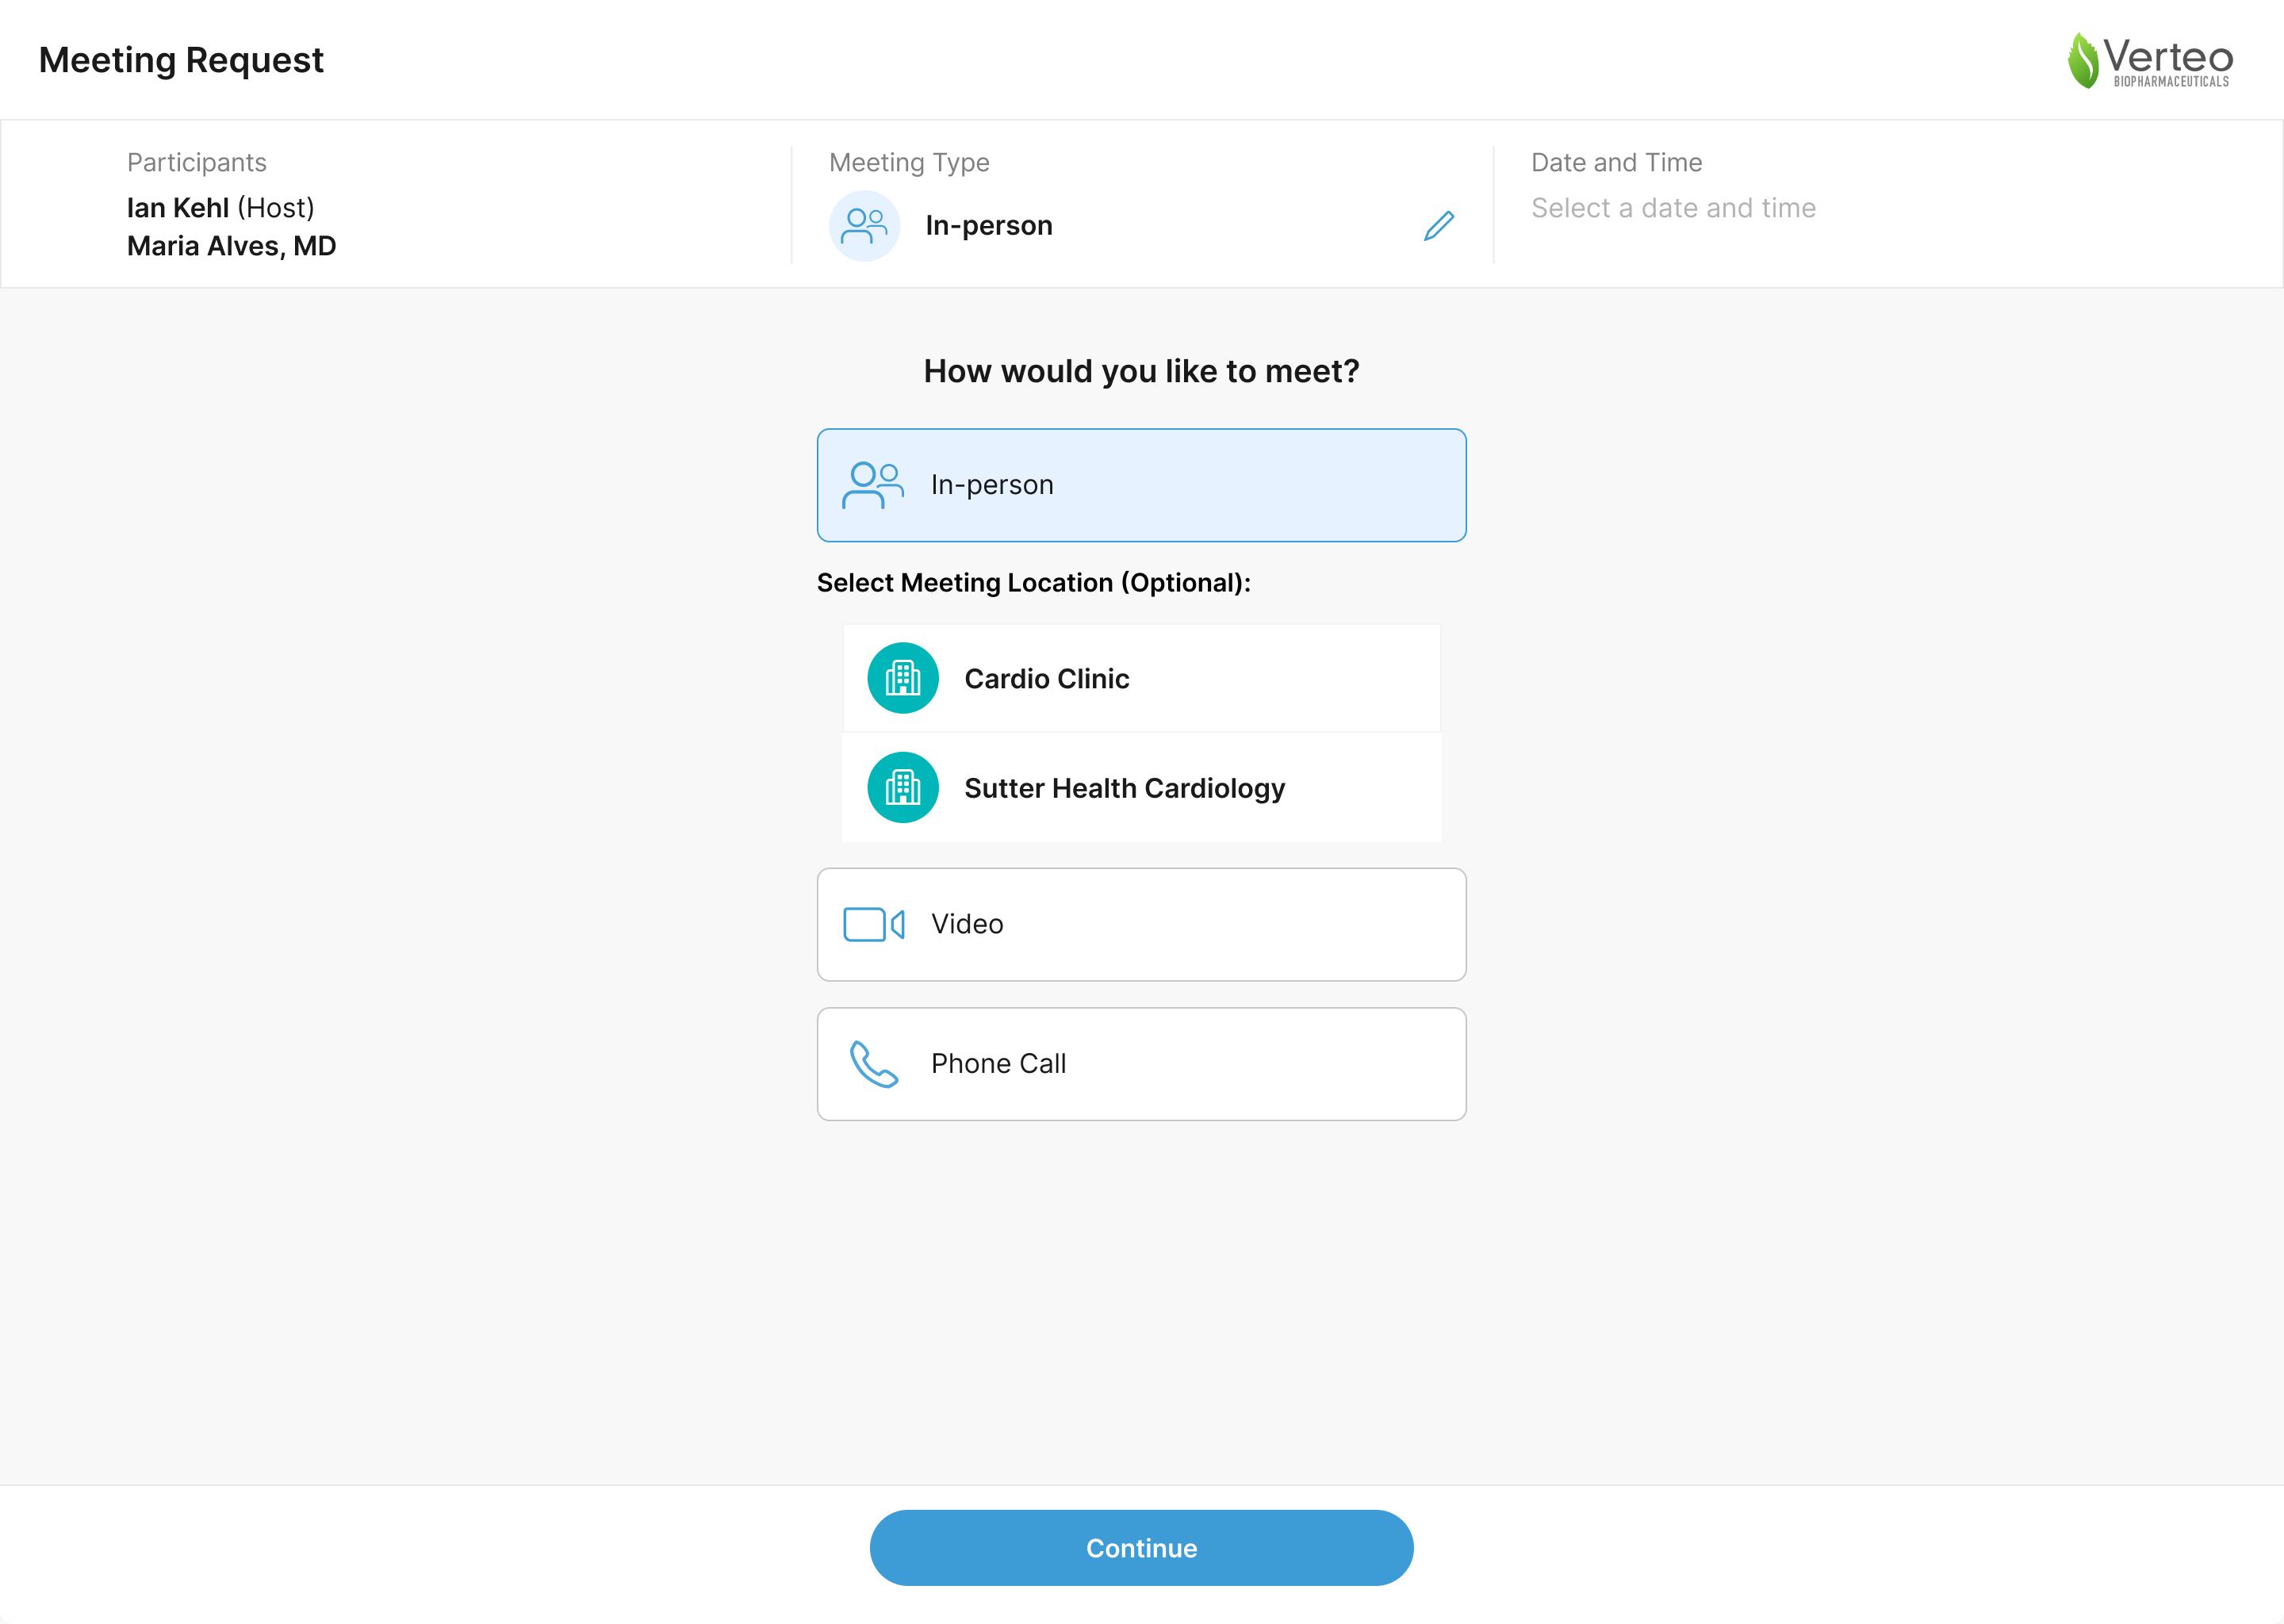
Select one of the meeting types:
- In-person
- Video
- Phone
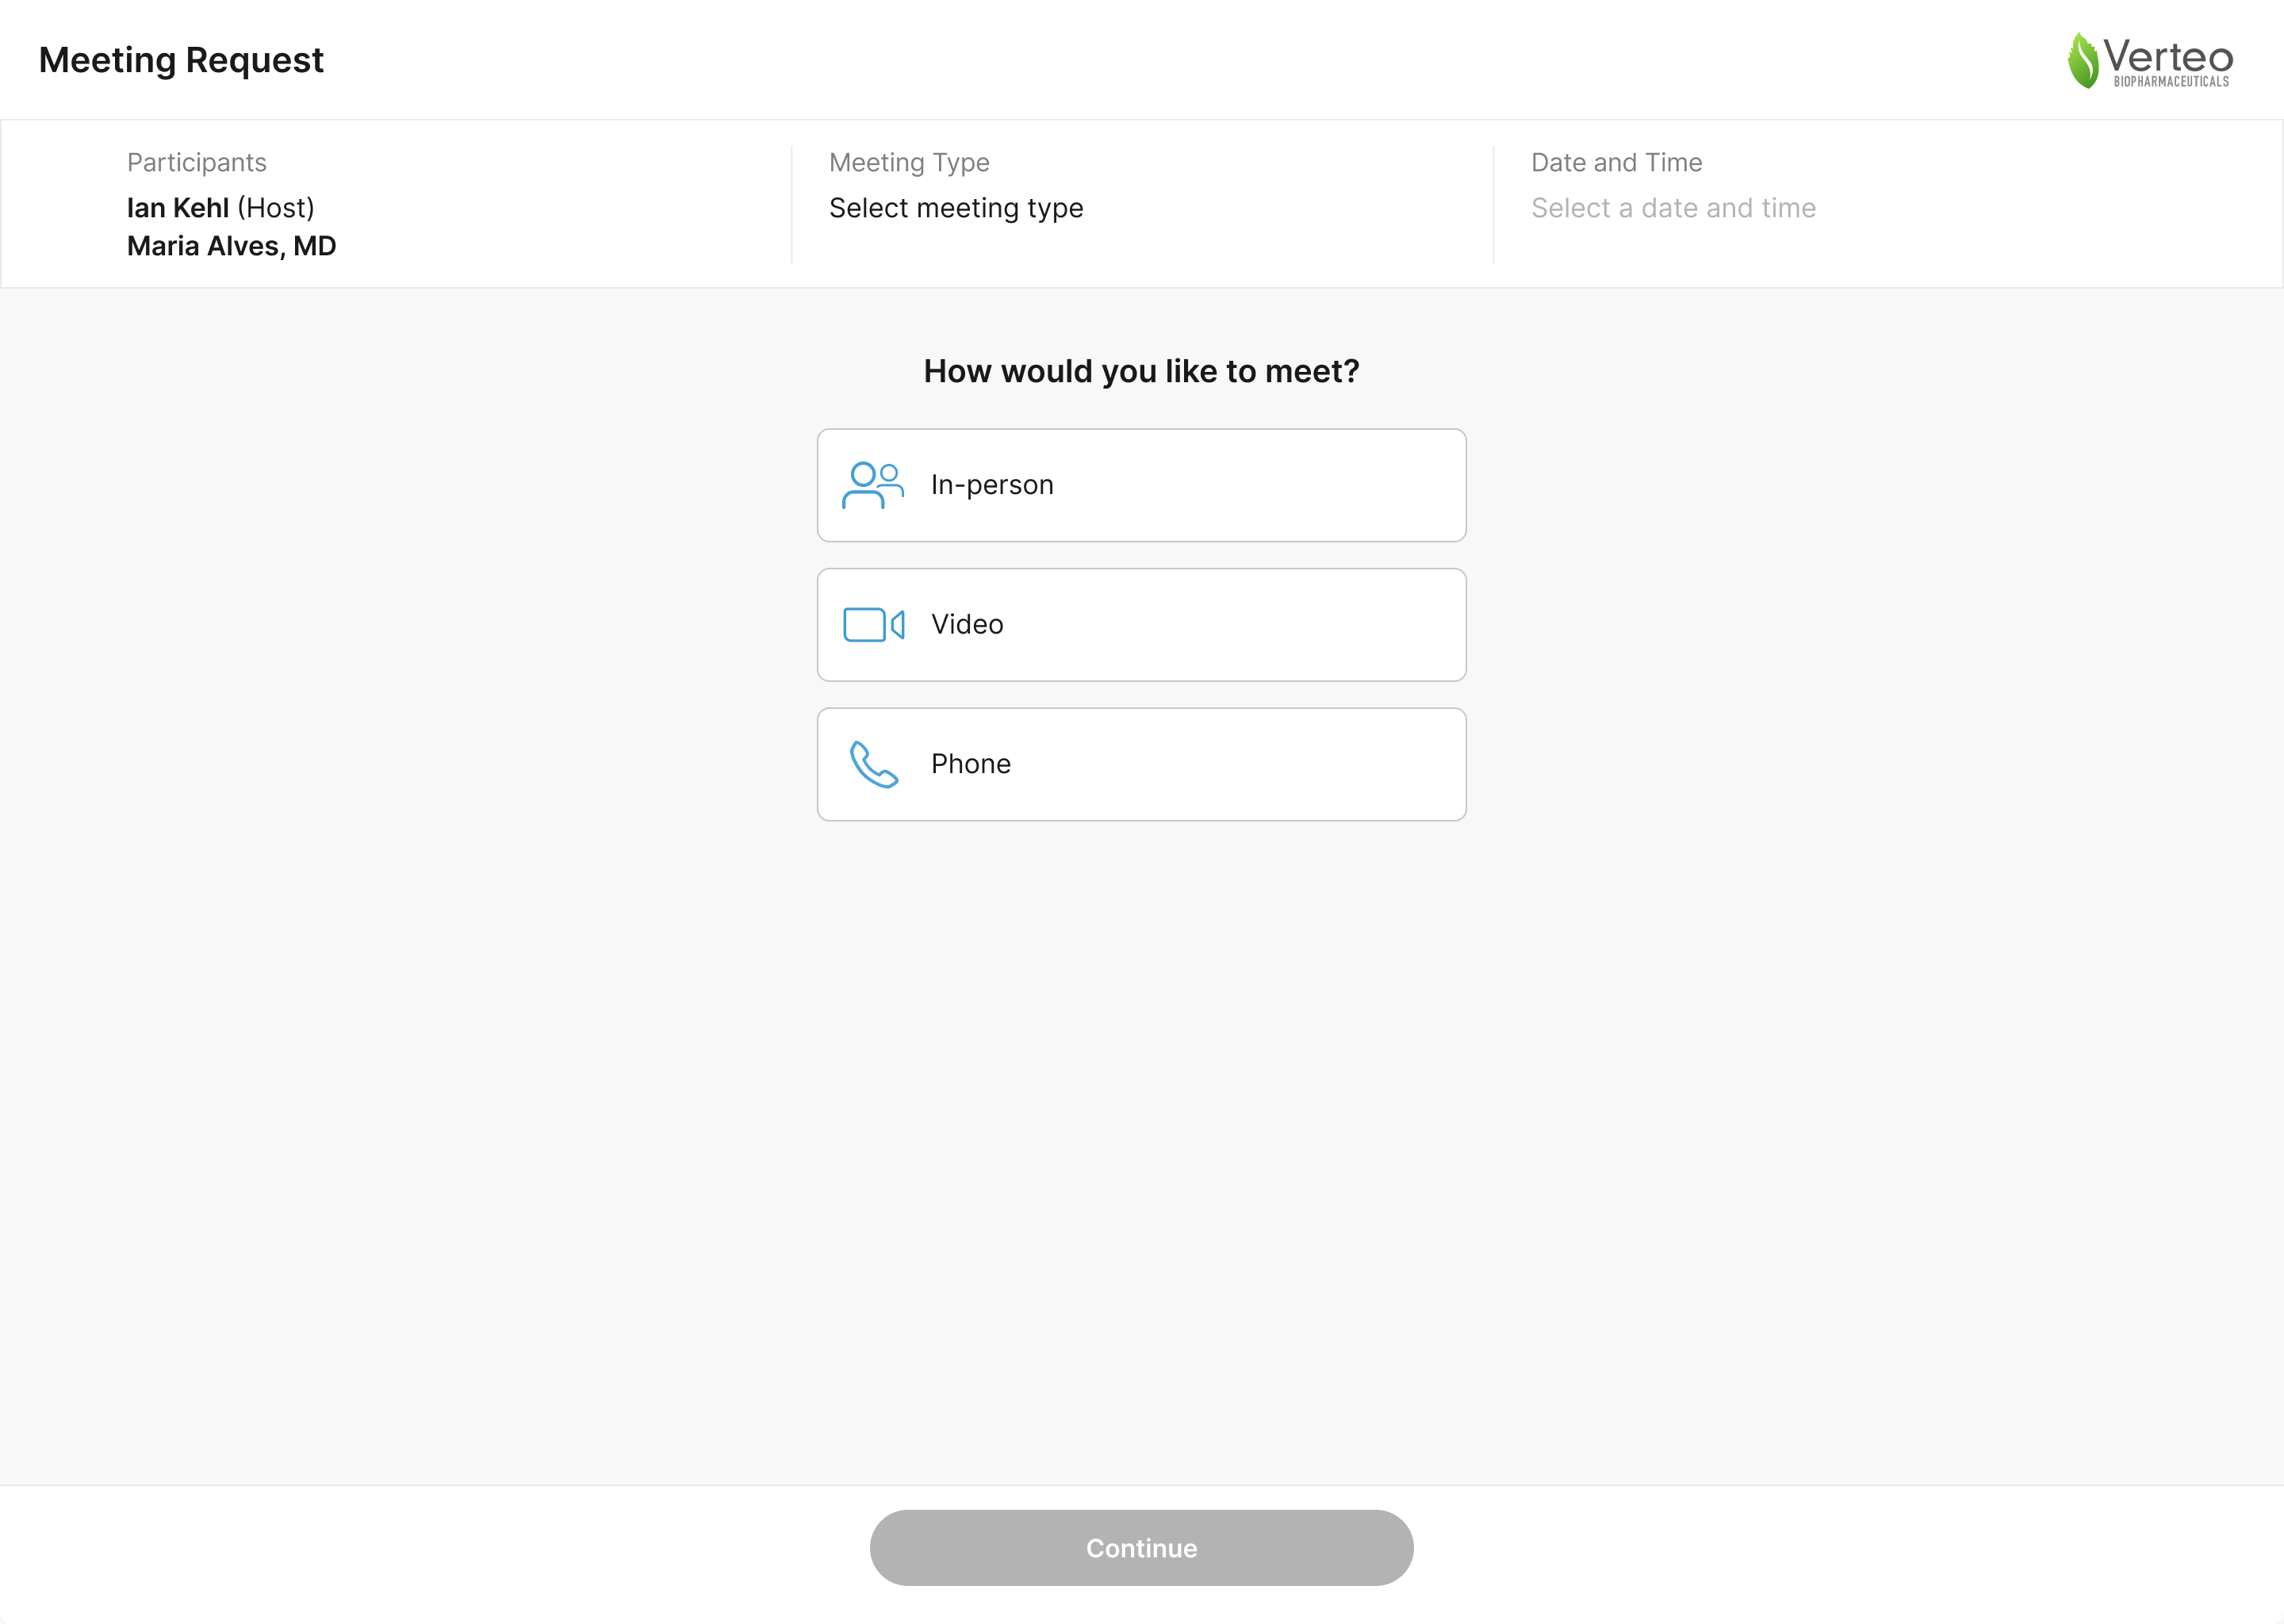
When users accept meeting requests, the Call_Channel_vod field is automatically populated based on the meeting type the HCP selects on the Engage Scheduling Site. The meeting type options are not configurable.
If the recipient selects In-person for the meeting type and has associated offices in Engage, they can optionally select an office to associate with the request.
-
Select the desired time and date for the meeting. Recipients can request meetings up to 90 days in advance.
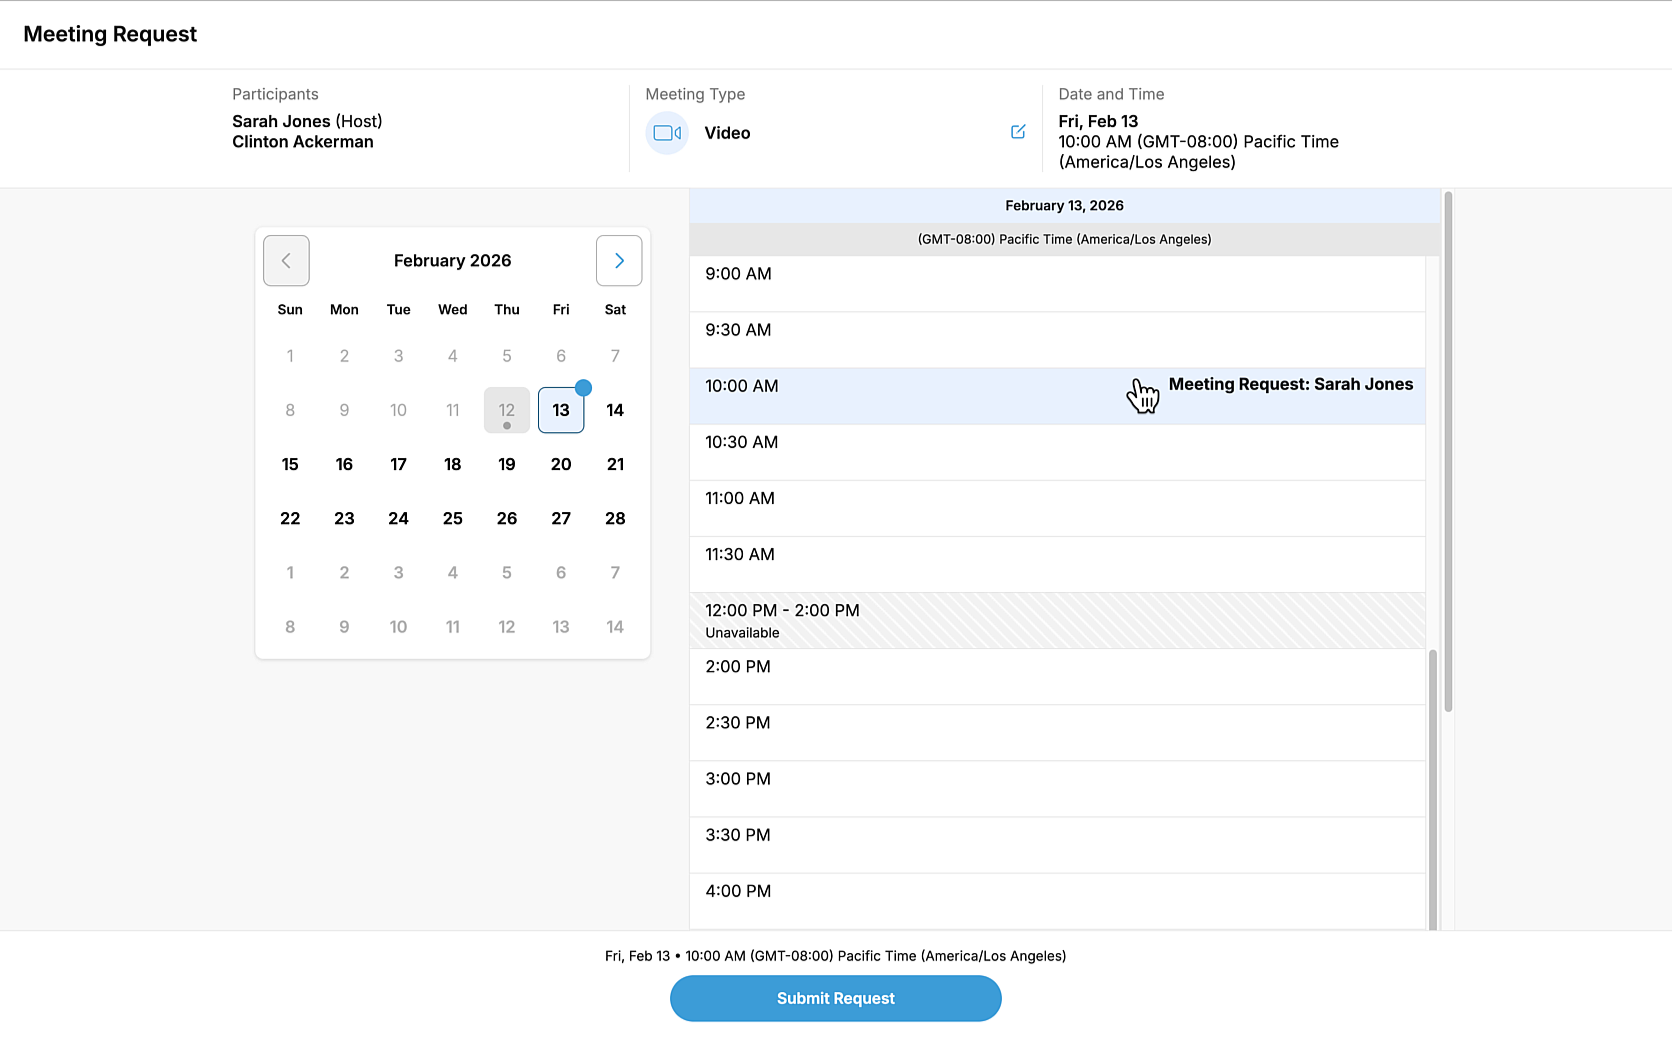
Recipients can change the requested meeting type at any point in the scheduling process. On mobile devices, select the back arrow in the header. On browser, select the pencil button next to the Meeting Type in the header.
-
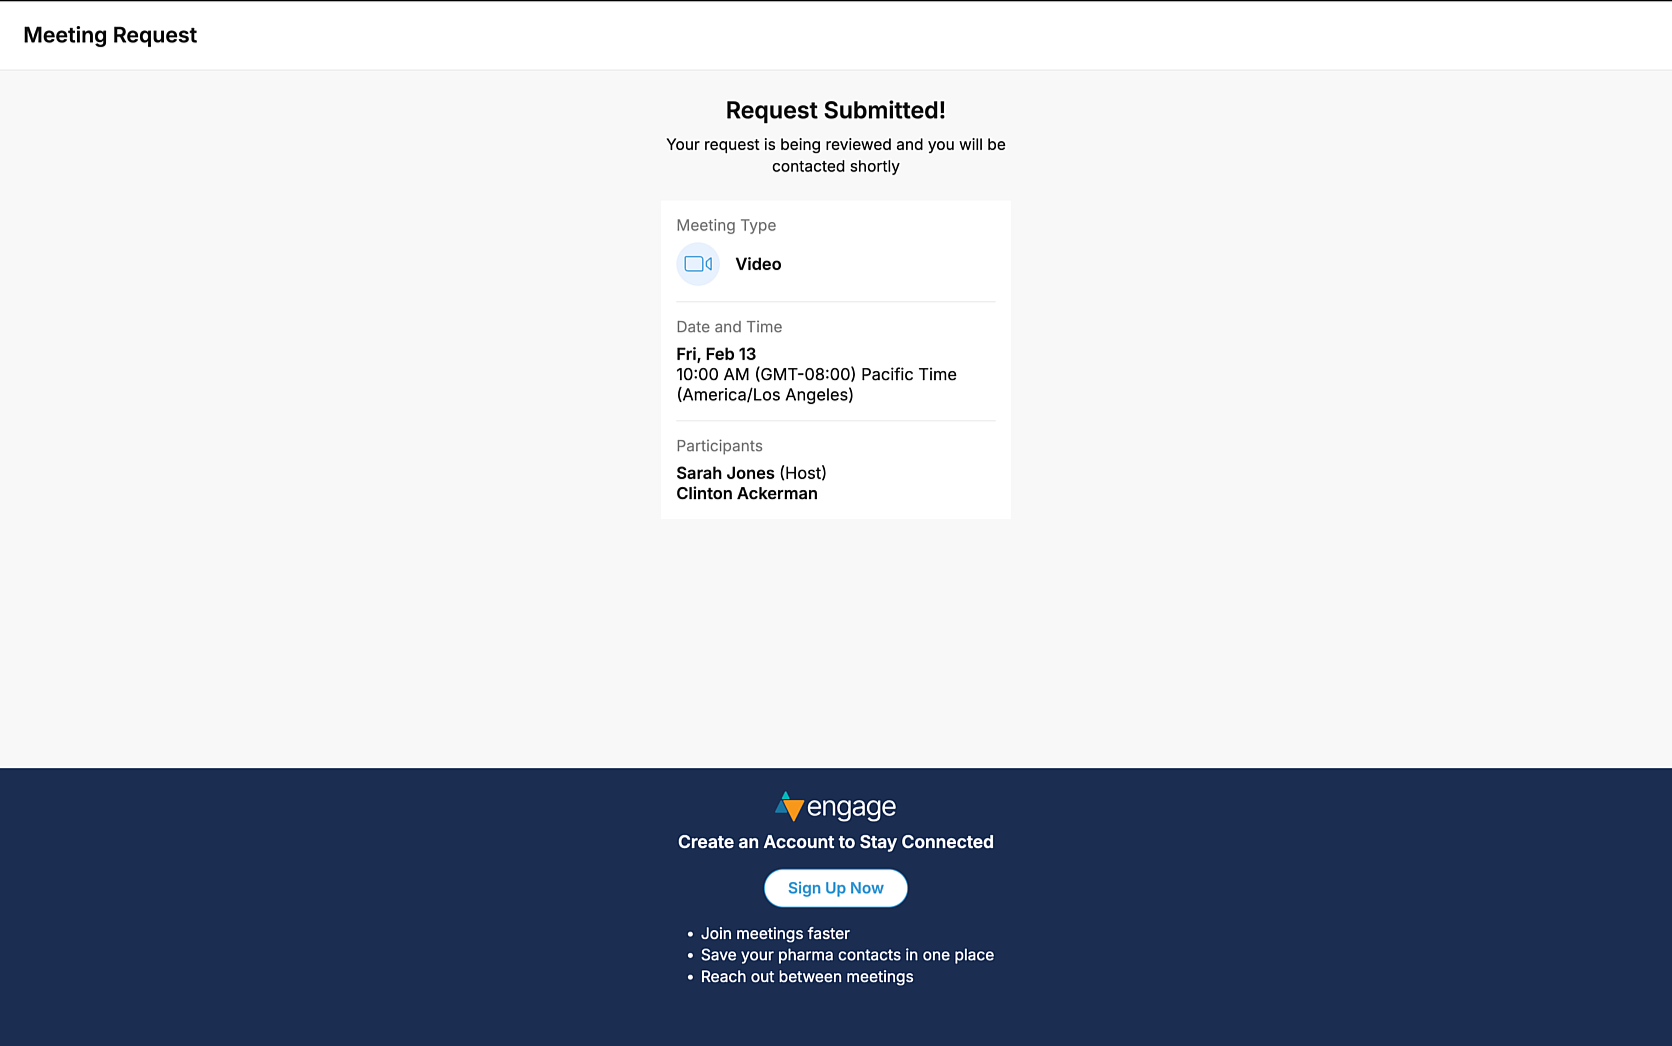
Select Confirm. A confirmation message displays containing the meeting request information.
Engage
Tracking Website Links
Users can view the sent message details, including the actions taken on the sent message, for an account on the account timeline. This allows users to assess the recent message activity for accounts when planning calls. Users can drill into Sent_Message_vod records from the timeline for more information.
Once a website link is sent, a Sent_Message_vod record is automatically created with the following fields populated:
If the full URL for a website is sent instead of the shortened URL, the reason is stamped in the Details_vod field on the Sent_Message_vod record.
|
Field |
Value |
|---|---|
|
Record Type |
Content_vod |
|
Account |
Lookup to the account, if selected |
|
User |
Lookup to the user who sent the website |
|
CLM Presentation |
Lookup to the CLM_Presentation_vod record |
|
Key Message |
Lookup to the Key_Message_vod record (associated with CLM_Presentation_Slide_vod record for the website) |
|
Engage Link |
The URL after all the tokens are resolved |
|
Shortened Engage Link |
The shortened URL |
|
Capture Datetime |
The datetime at which the sharing option was selected |
|
To |
The phone number or ID of the app to which the website was sent (populated only if a number or ID was available when the Send Website button was selected) |
|
Sent from Platform |
The platform from which the website was sent |
|
Sent Via |
The sharing option used to send the website |
|
Transaction Type |
Website Content |
|
Message Values |
JSON object containing the value stored in the URL_vod field of the Key_Message_vod record before any of the tokens are resolved and a list of the tokens with their real values. Includes values for the {{linkTracker}} token, if available in the URL. |
|
Call |
Lookup to the appropriate Call2_vod record, if the website was launched from a call and an attendee account was selected |
|
Product |
The product on the Key_Message_vod record |
|
Detail Group |
The detail group on the Key_Message_vod record |
|
Mobile Id |
System-generated Id |
|
VExternal Id |
The unique identifier of the shortened URL |
Events Management
Nominating Speakers
In order for an account, an HCP, MSL, etc. to speak at an event, the account must be designated as being qualified to speak about the event’s topic. To streamline this process, users can nominate accounts to become new speakers, or can renominate existing speakers to be qualified to speak on additional topics.
For example, Sarah Jones believes Dr. Ackerman would be a good speaker candidate for events about Cholecap. To start the process of getting Dr. Ackerman reviewed and trained for Cholecap, Sarah submits a speaker nomination for Dr. Ackerman’s account in CRM for the topic Cholecap. The nomination is reviewed by the necessary approvers, who begin the process of marking Dr. Ackerman as being qualified to speak about Cholecap. Sarah is then able to use Dr. Ackerman as a speaker at future Cholecap events.
Prerequisites
- The Speaker Tab must be enabled in order to use this feature on the iPad platform
Nominating New Speakers
To nominate new speakers:
- Navigate to the Speaker Nominations tab from the Browser platforms or the Speakers tab on the iPad.
- Select New.
- Select New Speaker for the record type.
- Select Next.
-
Populate the following fields:
- Account_vod – Selecting the appropriate account causes the following fields to automatically populate based on the fields of the account:
- First_Name_vod
- Last_Name_vod
- Credentials_vod
- Title_vod
- Any custom mapped fields on the Account object
- Product_vod
- Comments_vod
- Justification_vod
- Select Save.
-
Upload the appropriate attachments needed for review.
iPad users can attach files while editing the nomination before saving.
- Select Submit.
Submitting the nomination creates a new EM_Speaker_vod record with a status of Nominated_vod. The fields of this record are populated based on the field values of the created EM_Speaker_Nomination_vod record.
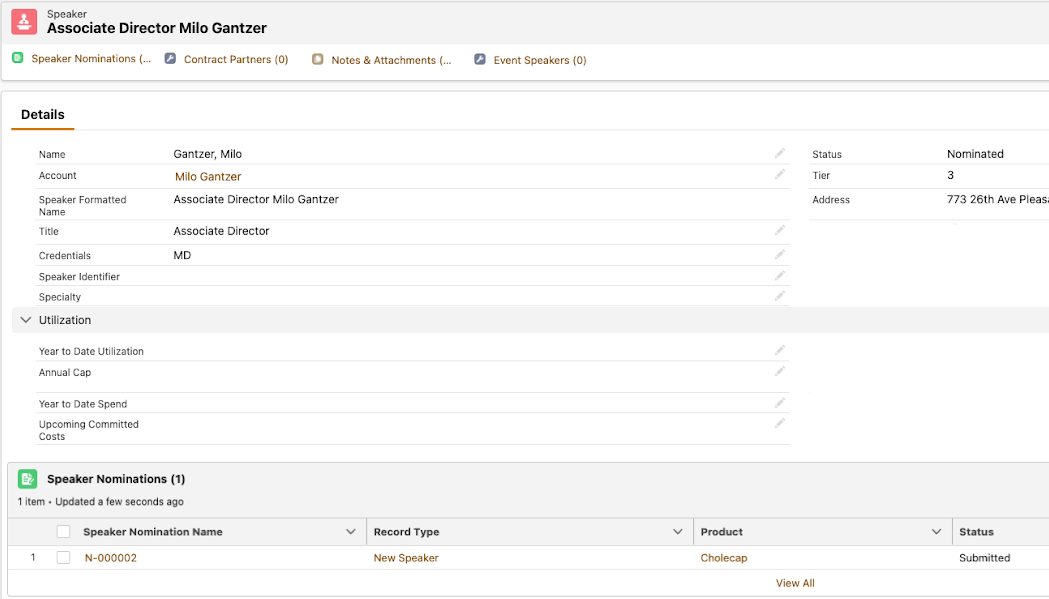
Newly nominated speakers also display in the list of speakers in the Speaker Tab.
Renominating Existing Speakers
Users can also renominate existing speakers to be considered qualified for additional topics:
- Navigate to the Speaker Nominations related list of the appropriate EM_Speaker_vod record.
- Select Create.
-
Populate the following fields:
- Product_vod
- Comments_vod
- Justification_vod
- Select Save.
- Upload the appropriate attachments needed for review.
- Select Submit.
