Managing Attendees in the Refreshed Events Management UI
- iPad
Event organizers using the refreshed Events Management UI can add attendees to their event and view key metrics about those attendees directly from an event. Additionally, event organizers can use the Manage Sheet to quickly create, edit, and view further details about the attendees associated with their events.
Who Can Use This Feature?
- Platform – iPad
- Licensing – Available to users with Events Management
- Users – End users
Configuring Event Attendees
To configure this feature for end users, ensure Using the Refreshed Events Management UI is enabled.
The following Attendee features are supported when using this feature:
- Adding Attendees to an Event
- Outside Territory Attendee Search
- Child Accounts in Events Management
- Search by Furigana in Event Attendees and Speakers
- Selecting Attendees in Hierarchies
- Walk-in Attendees
- Displaying Walk-in Fields by Attendee Type
- Setting Walk-in Attendee Status
- Reconciling Walk-in Attendees
- Creating New Accounts from Walk-in Attendees
Adding Attendees to an Event
To add attendees to an event:
- Navigate to the Attendees related list of the appropriate event.
-
Select the + button. The Attendee Selector modal displays all available accounts, users, or contacts to add as attendees based on the selected view. Attendee fields in the Attendee Selector modal display based on the configured event rule.
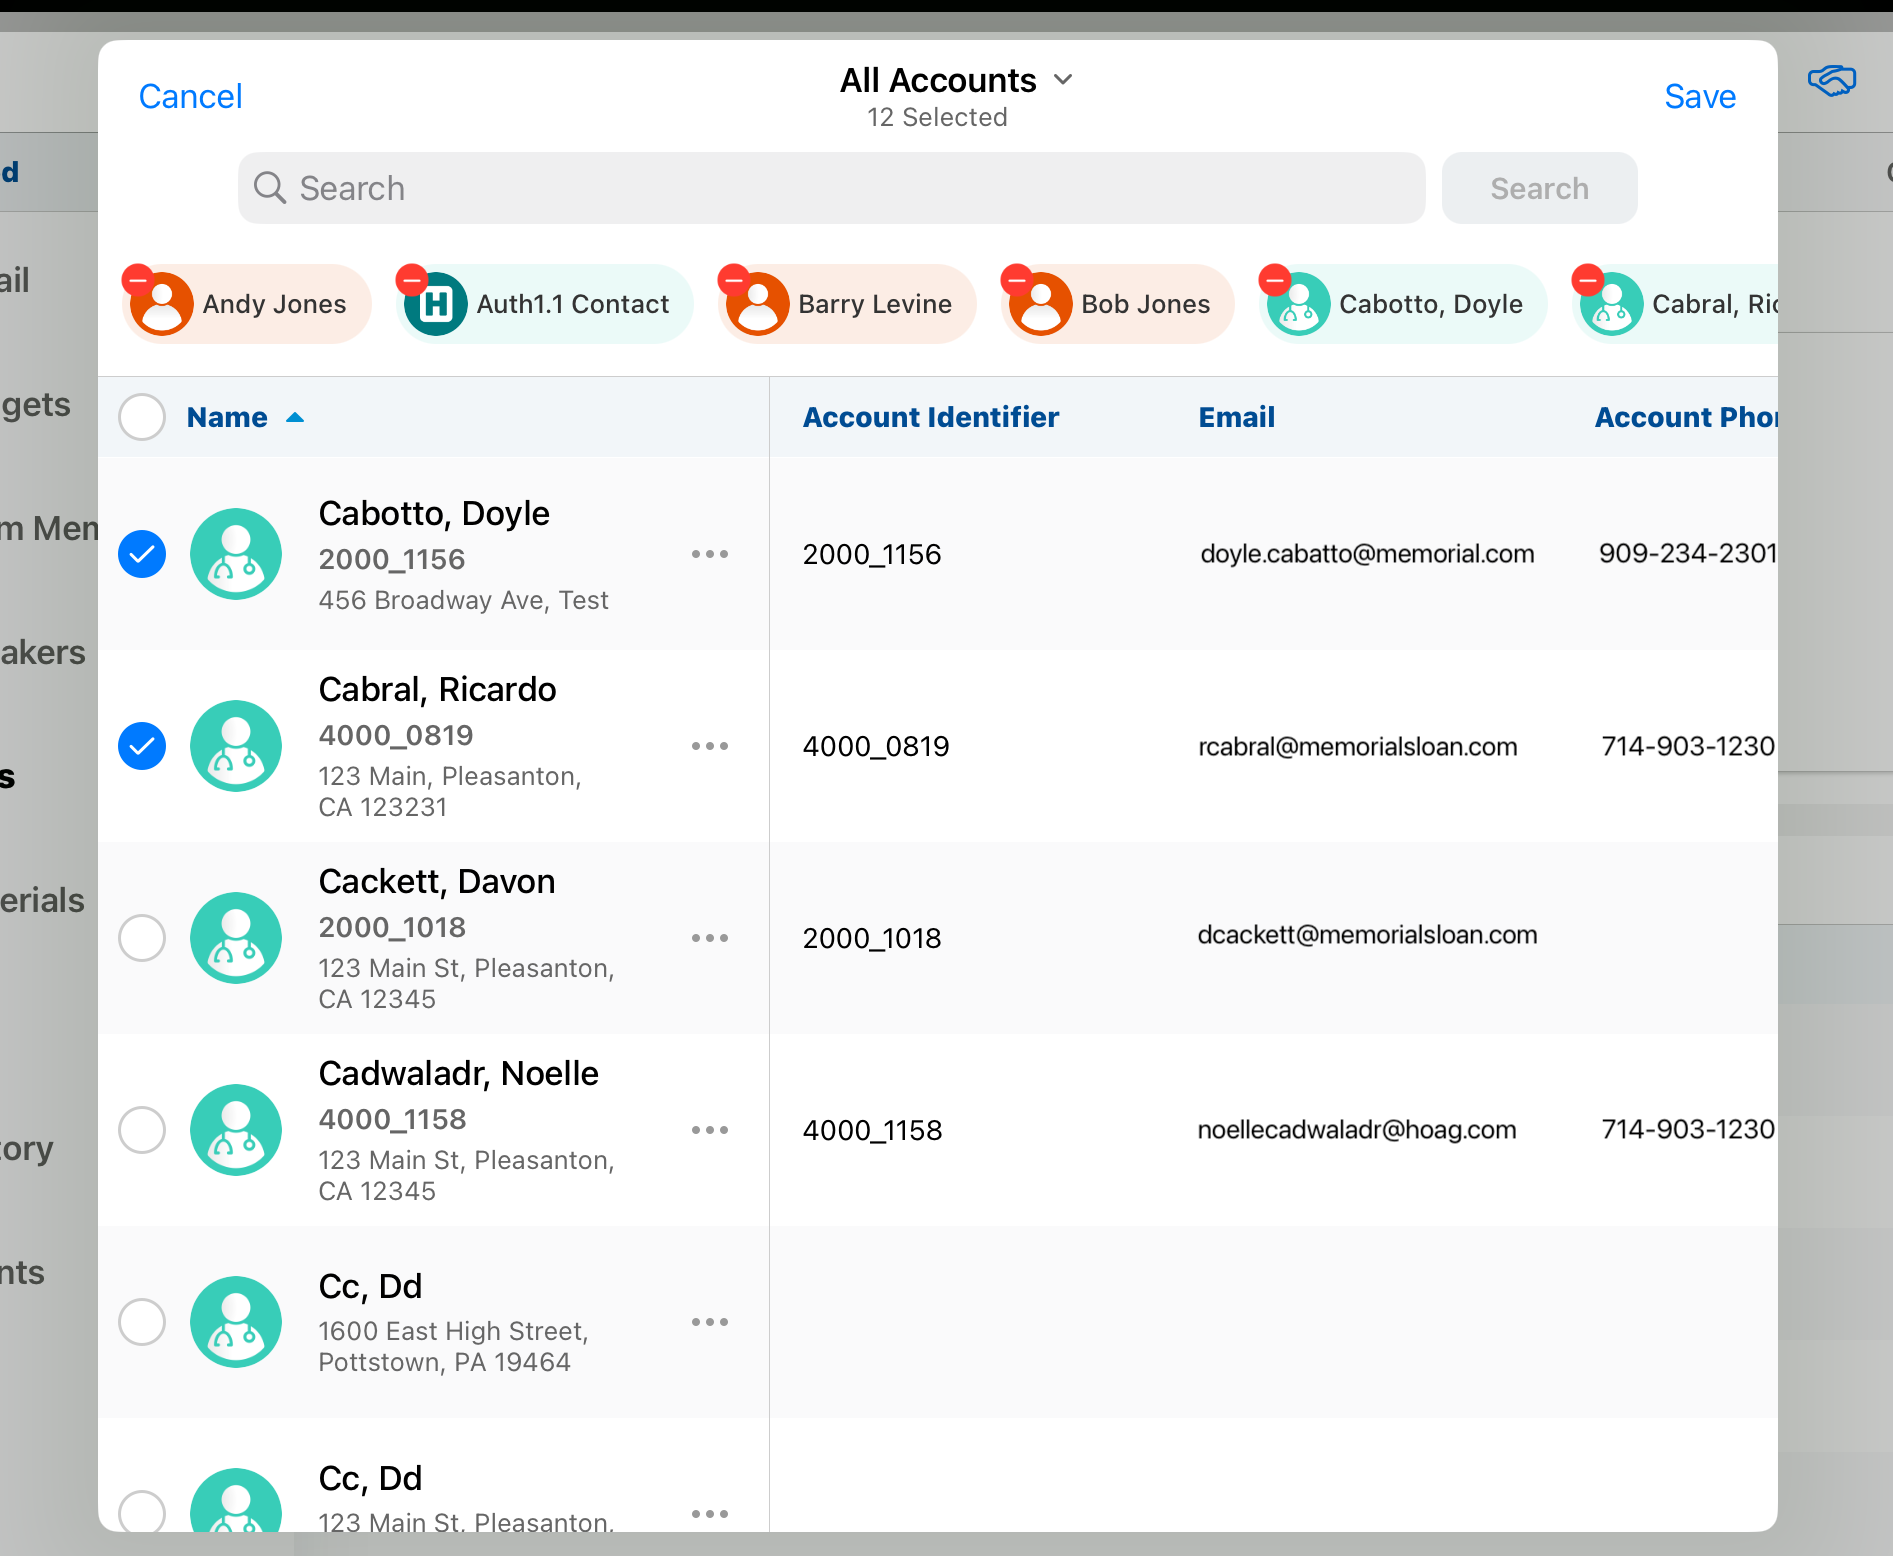
- Enter the appropriate search criteria to search across all displayed fields.
- Select the check box next to the appropriate attendee or attendees to add to the event.
- Select Save to add the selected attendees to the event.
Viewing Attendee Details
Event organizers can view details about an attendee before selecting them to add to the event:
- Navigate to the appropriate attendee in the Attendee Selector modal.
-
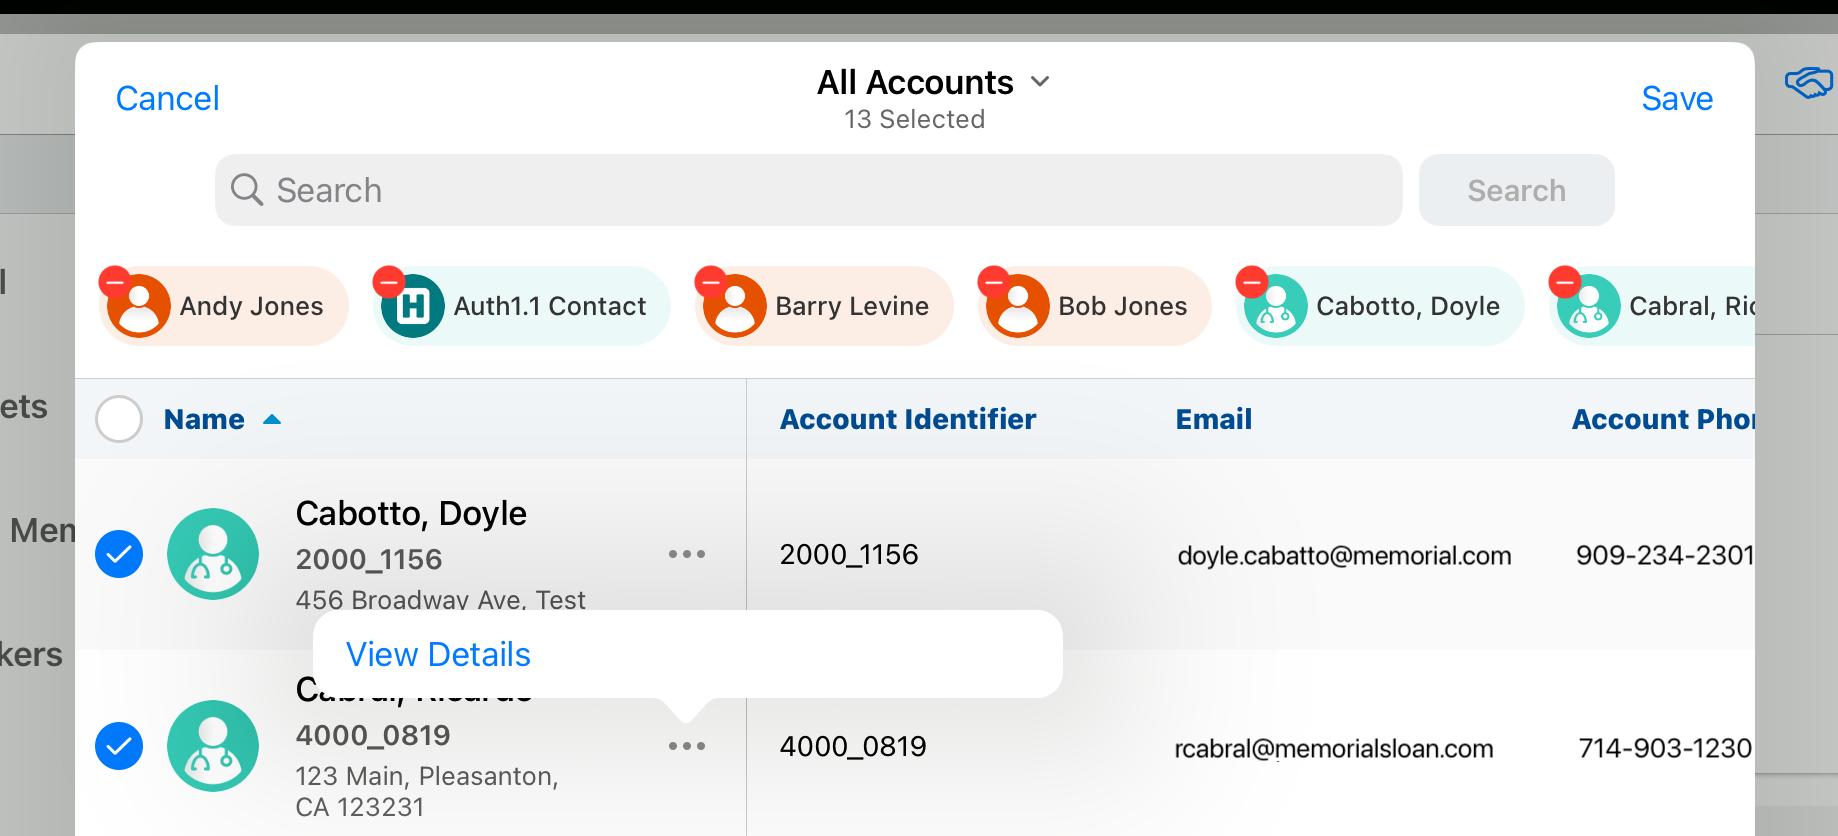
Select the More Actions menu.
-
Select View Details to view more details about an attendee before adding it to the event.
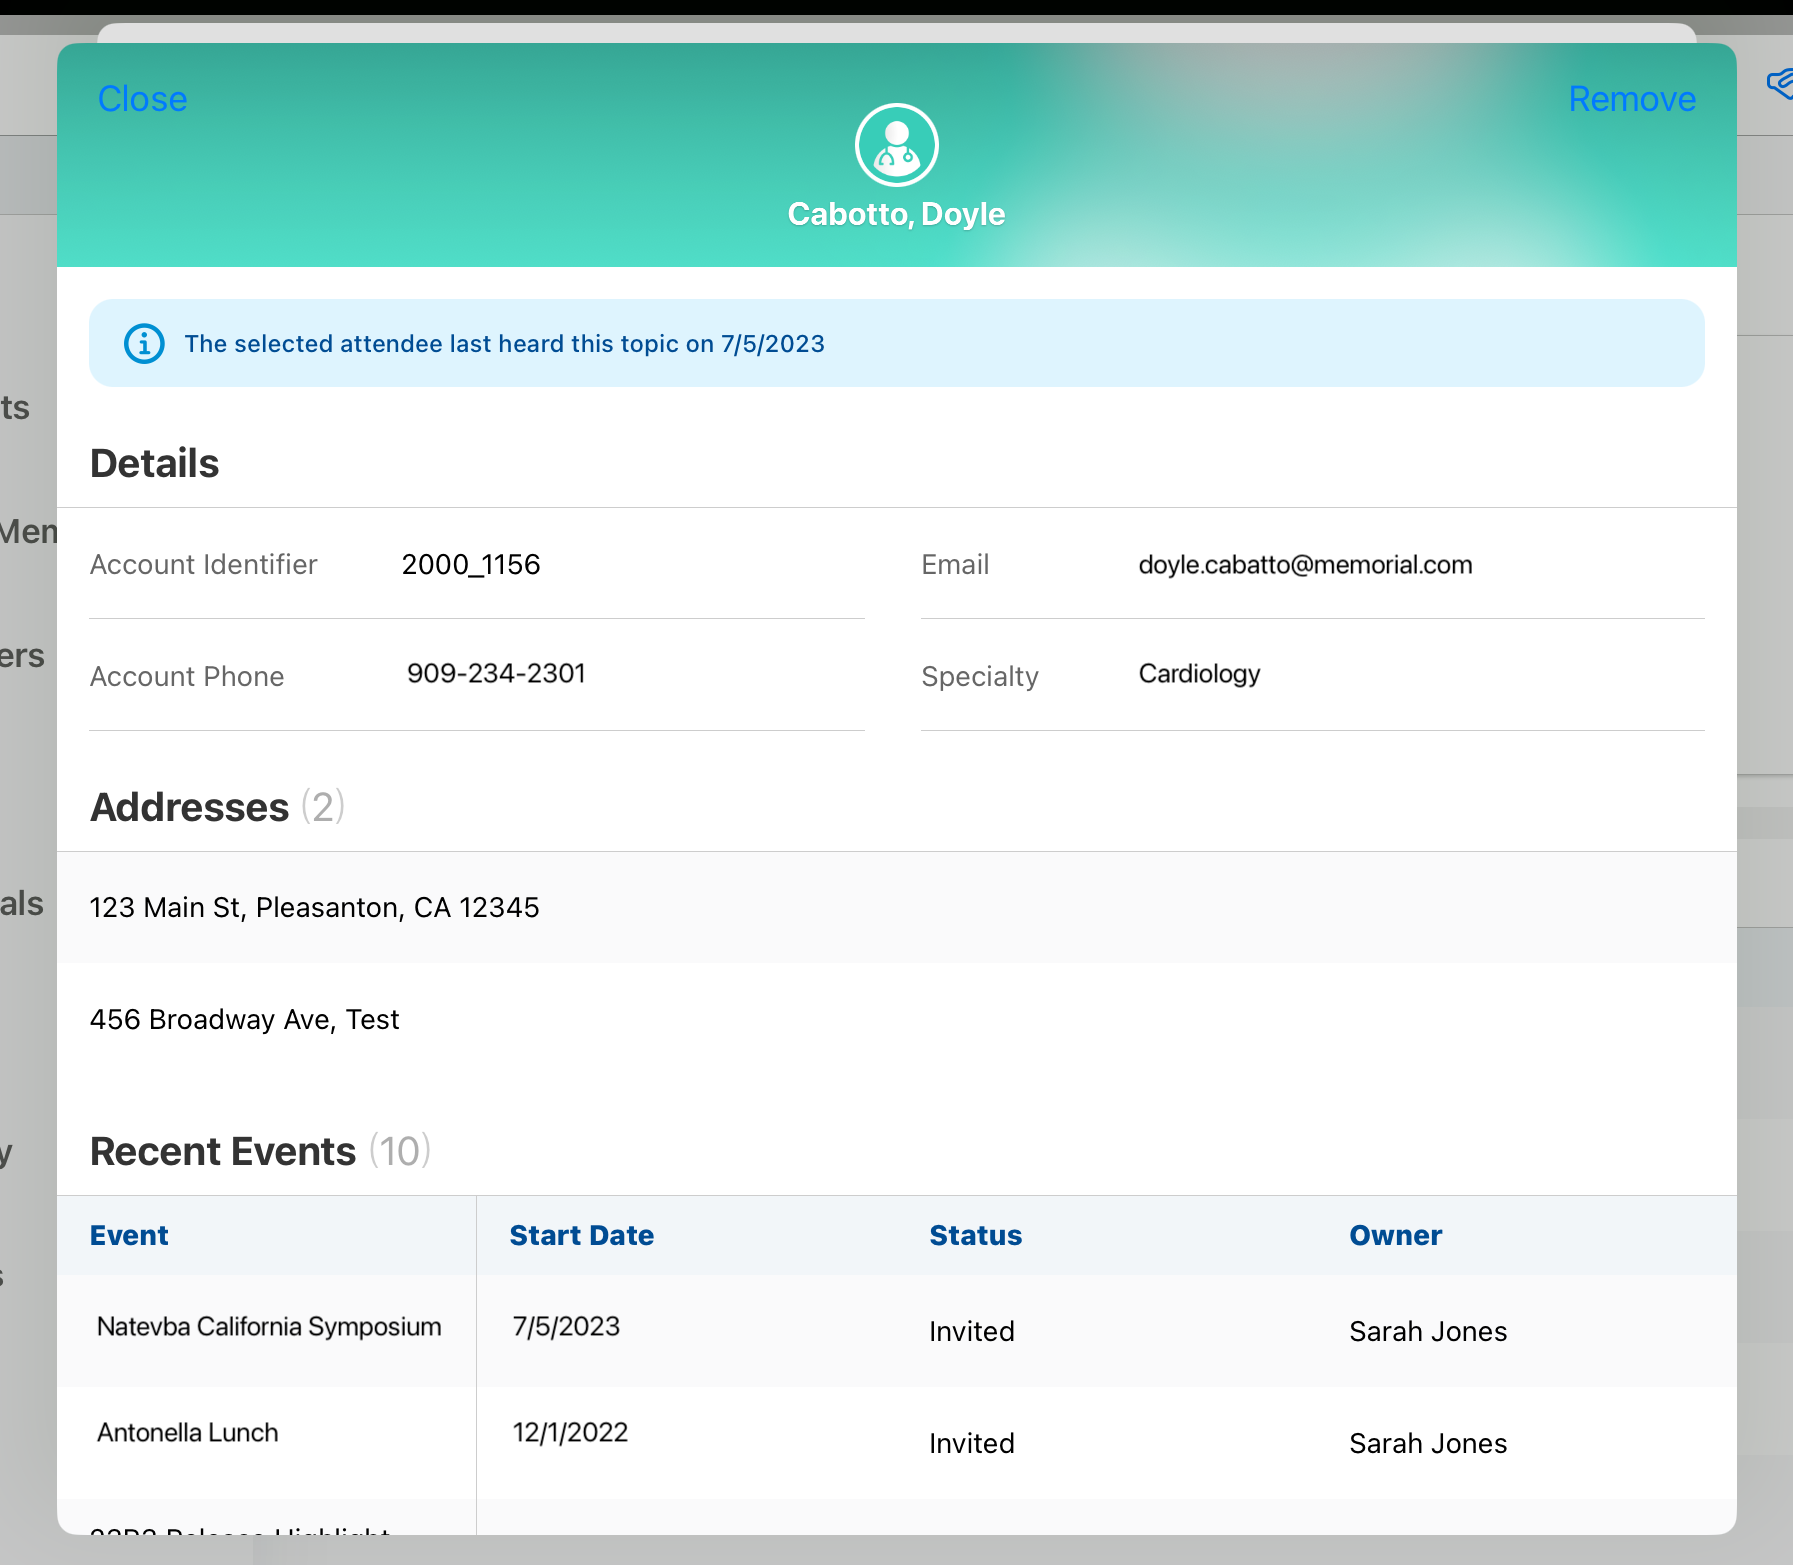
If Selecting Attendees in Hierarchies is enabled, organizers can drill down into a business account to view related accounts in the hierarchy.
Using Outside Territory Search
To search for an attendee outside of the user's territory:
- Open the Attendee Selector modal for the appropriate event.
-
Select the Filter button.

- Enable the Include Outside Territory toggle.
- Search for and select the appropriate attendee.
Users cannot view the account hierarchy or view related accounts for accounts outside of their territory.
Selected attendees outside of the user's territory display as gray icons. These icons display to all event team members viewing the Attendee Selector modal, even if the Include Outside Territory option is not currently enabled.
Viewing Event Attendees
To help organizers visualize the current status of their event attendance, a summary widget displays in the Attendees related list. This widget groups the event's attendees by status, as well as a metric for the total number of attendees.

Select the metric for a specific status to display a filtered view of attendees in the Manage modal. Statuses are displayed in alphabetical order.
Managing Attendees Using the Manage Sheet
Event organizers can further search, filter, or modify attendees for their event by selecting Manage from the Attendee related list. Select the More Actions menu next to the appropriate attendee to display the following additional actions:
- Edit – Displays based on user permissions and layout configuration
- Delete – Displays based on user permissions and layout configuration
- Sign – Displays the attendee signature modal when Signature_Datetime_vod is configured as a related list column
- Reconcile – Displays the Attendee Reconciliation modal for the attendee. This action is only available for unreconciled walk-in attendees. See Reconciling Walk-in Attendees for more information.
Reconciling Walk-in Attendees
Before an event can be closed, any walk-in attendees of the event must be reconciled to accounts in Veeva CRM. To reconcile walk-in attendees:
-
Select the Attendee Reconciliation button from the event. The Attendee Reconciliation page displays a table containing all of the event’s walk-in attendees. This table includes the following columns:
- Attendee_Name_vod
- Walk_In_Status_vod
- Walk_In_Type_vod – Only displays if Displaying Walk-in Fields by Attendee Type is enabled
- Any additional fields configured for the walk-in type
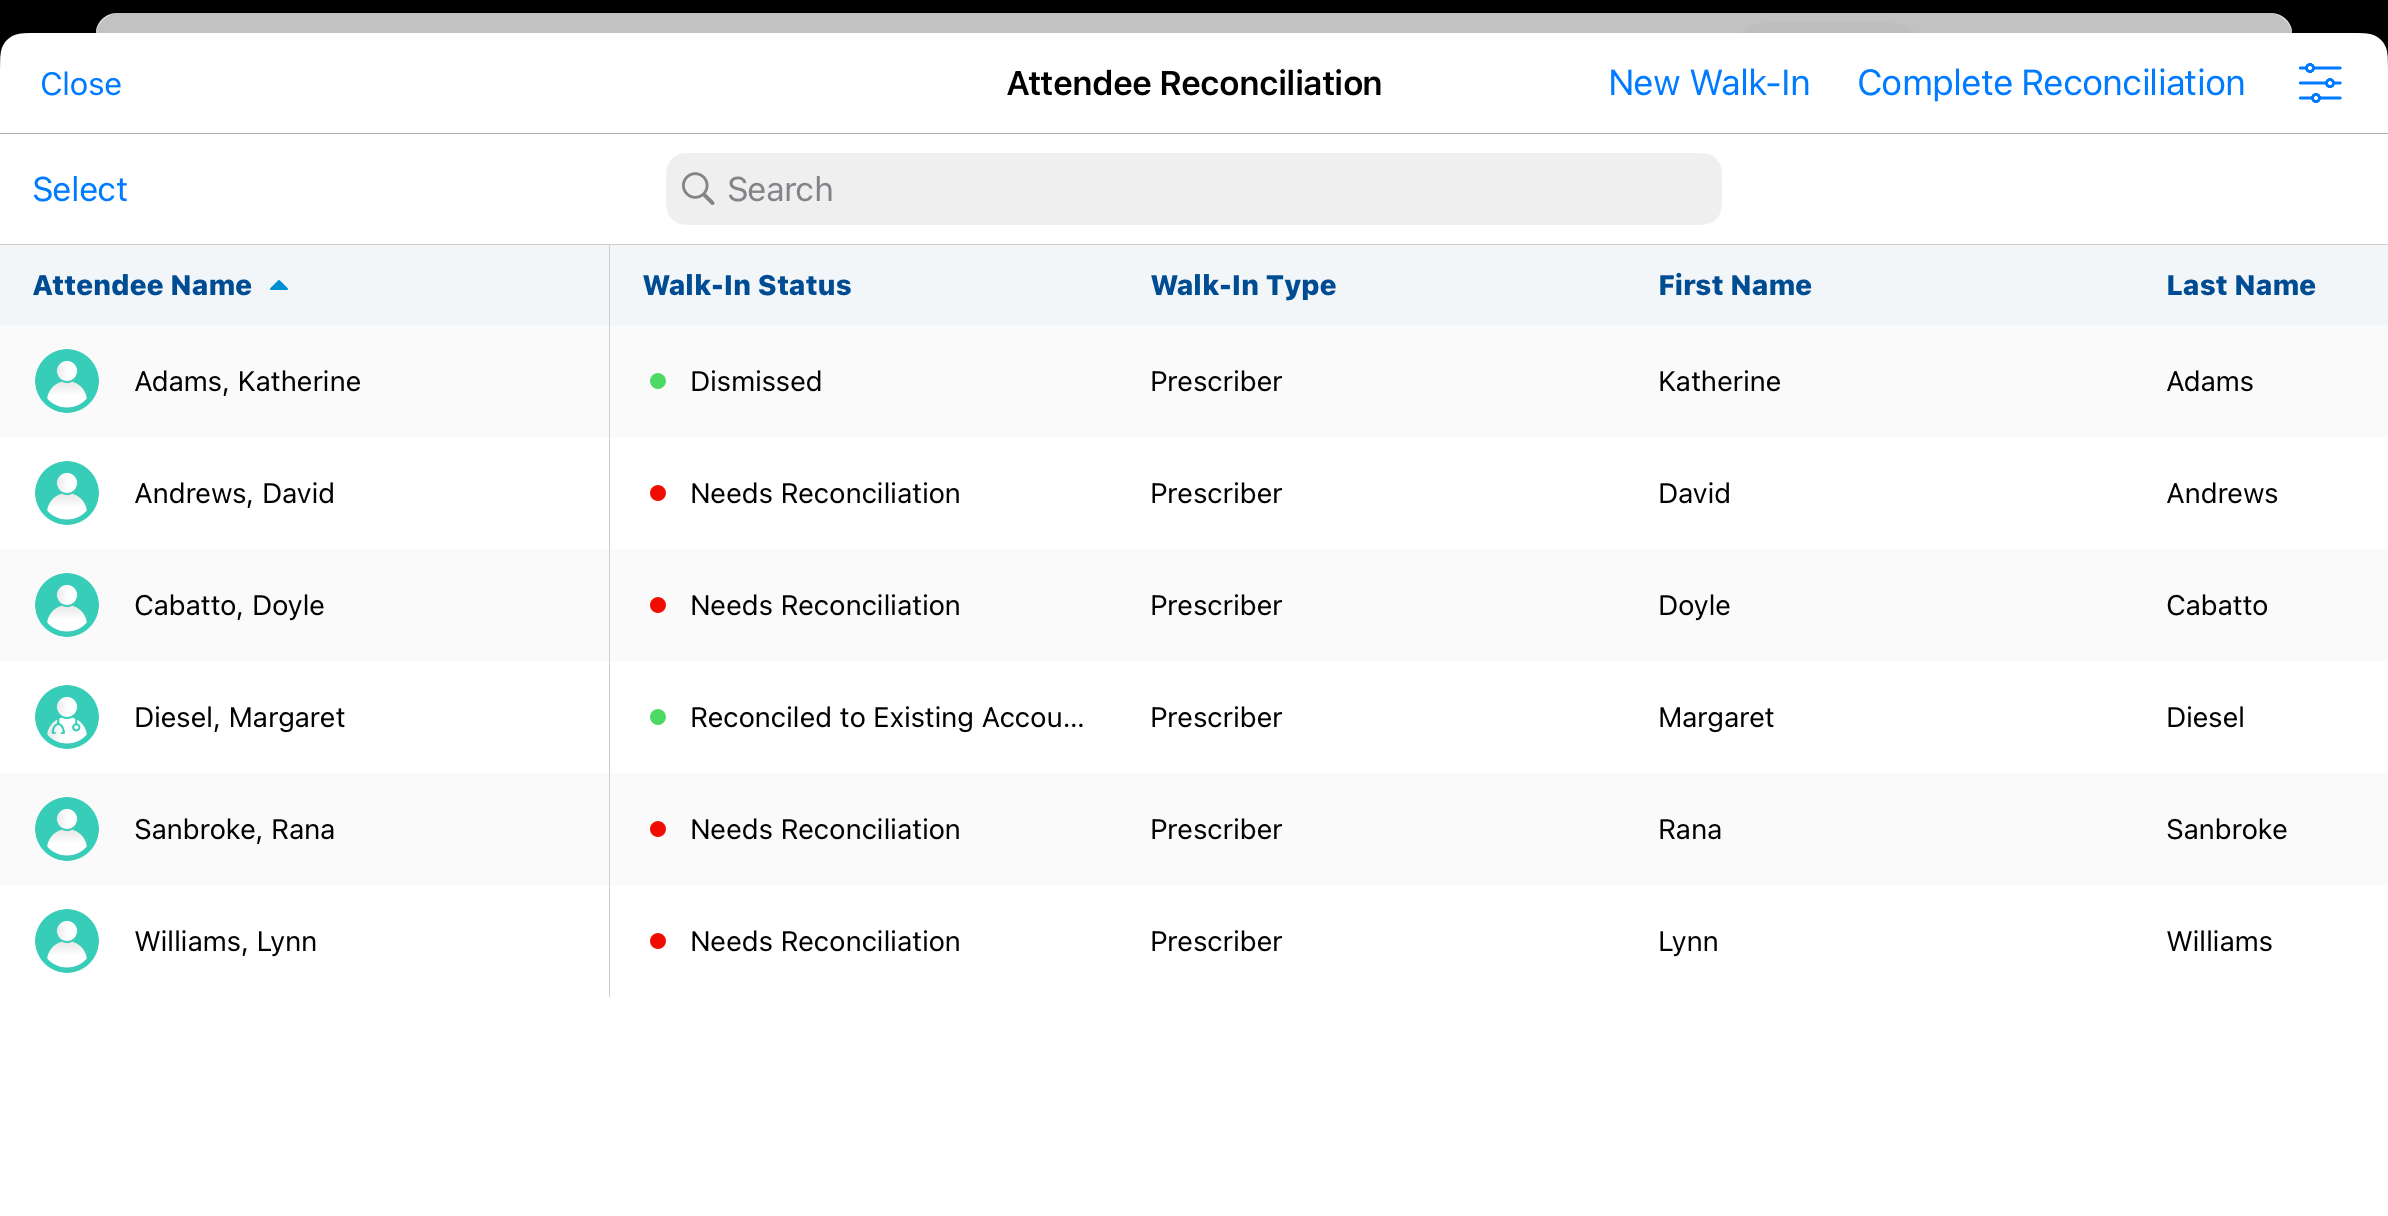
- Search and filter across the list of walk-ins to locate the appropriate attendee. Organizers can filter attendees by walk-in status or walk-in type.
-
Select the walk-in attendee to reconcile. Search results for potential matches automatically display. Within the search results, configured walk-in fields display as columns if the fields match against an Account or Address_vod field.
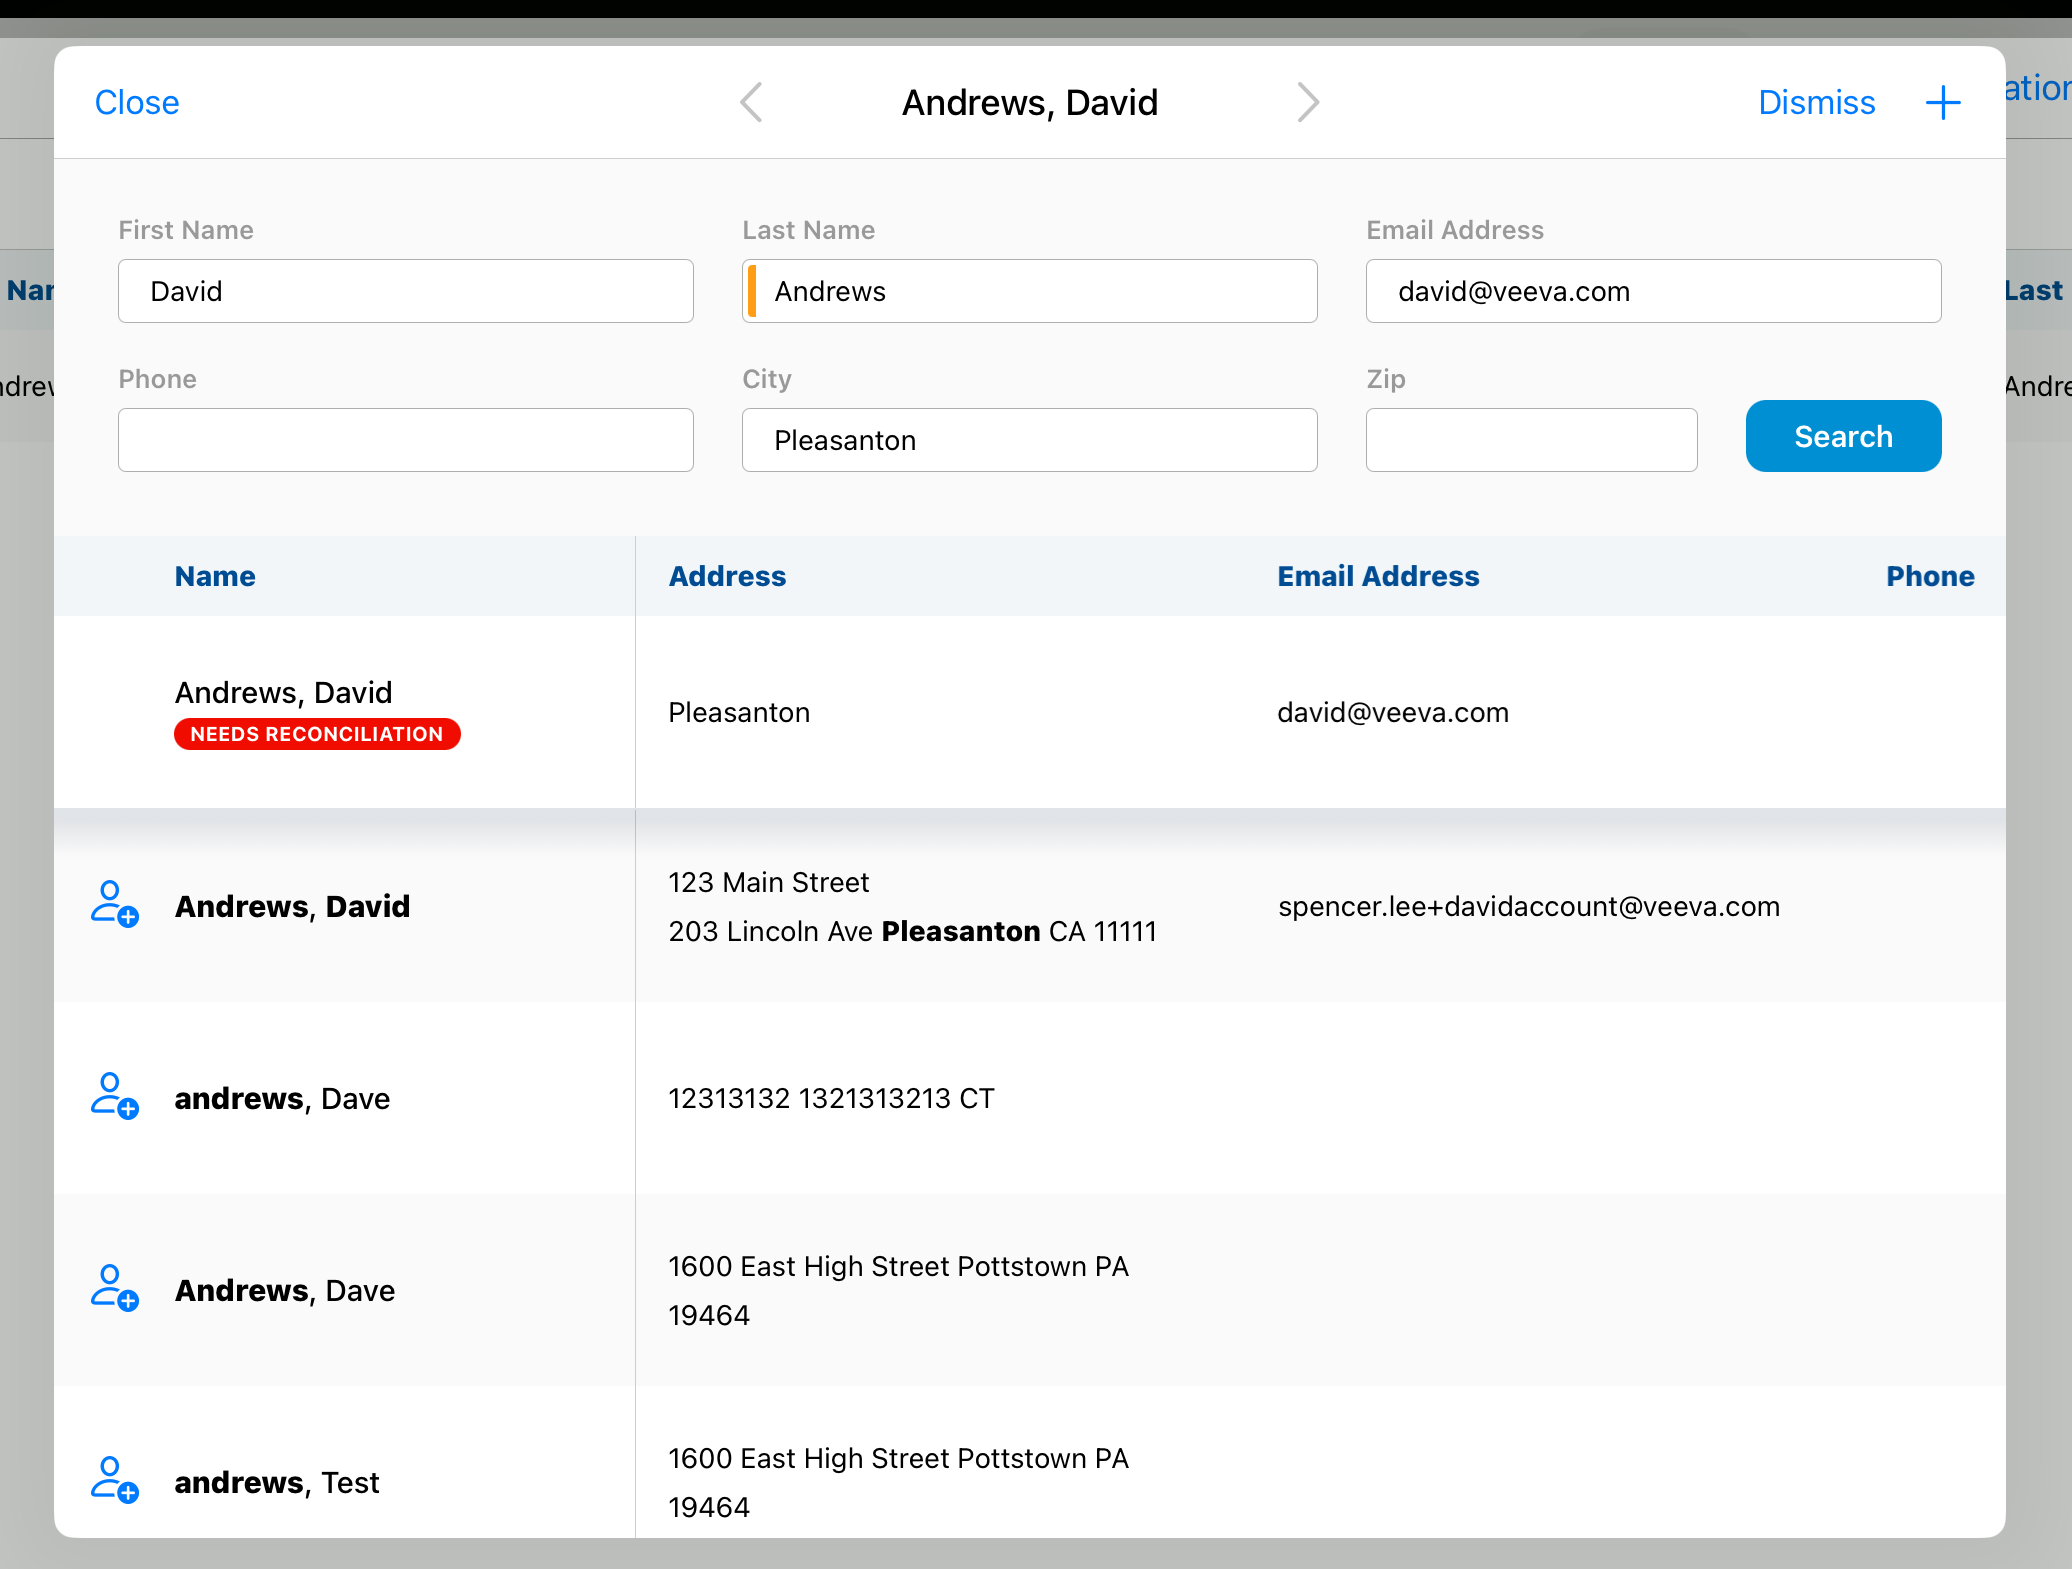
-
Select the appropriate account to reconcile the walk-in attendee to.
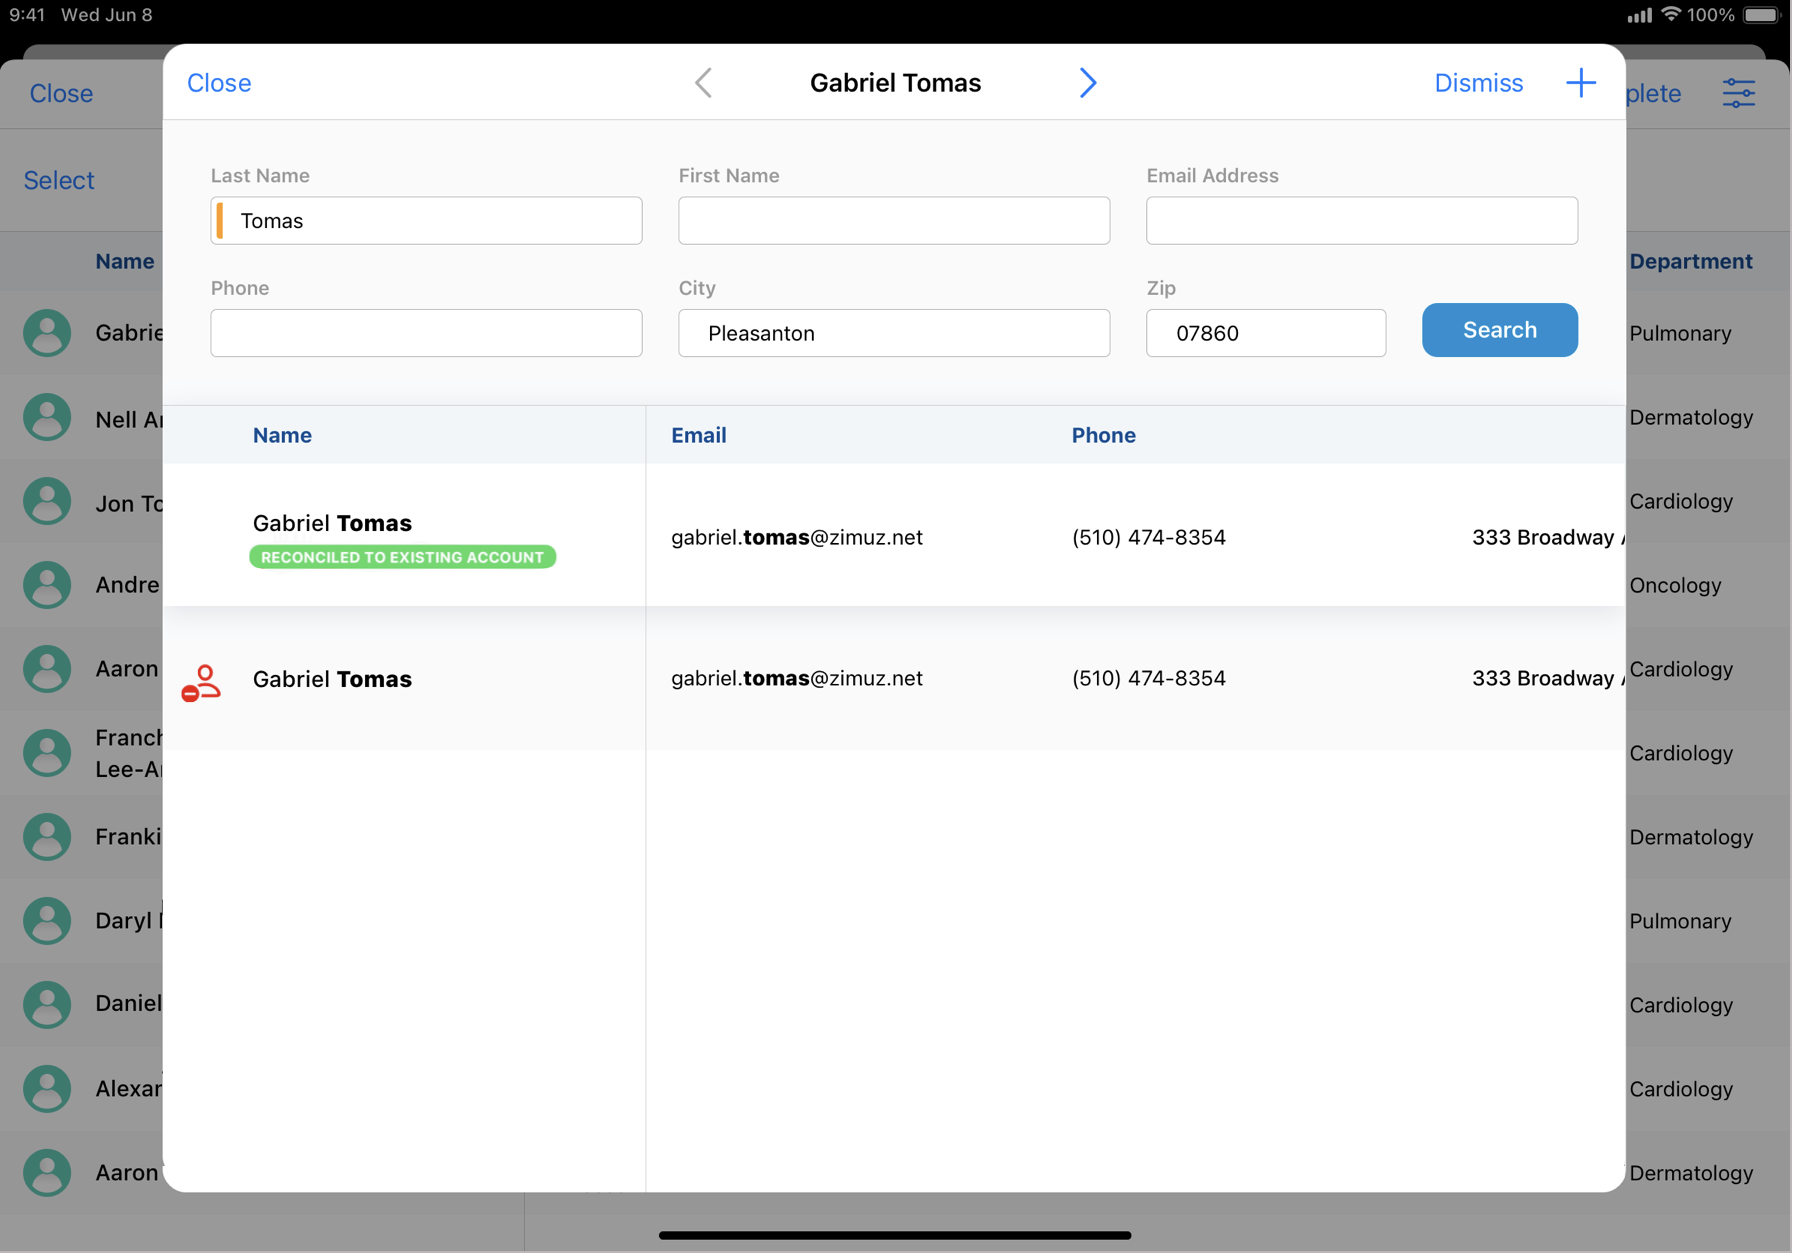
If Creating New Accounts from Walk-in Attendees is enabled, event organizers can also create a new account based on walk-in attendee information.
Selecting Multiple Attendees to Reconcile
Organizers can reconcile walk-ins individually, or in bulk:
-
Navigate to the Attendee Reconciliation modal.
-
Select the Select button.
-
Select each attendee using the check box in the left column, or select the Select All button.
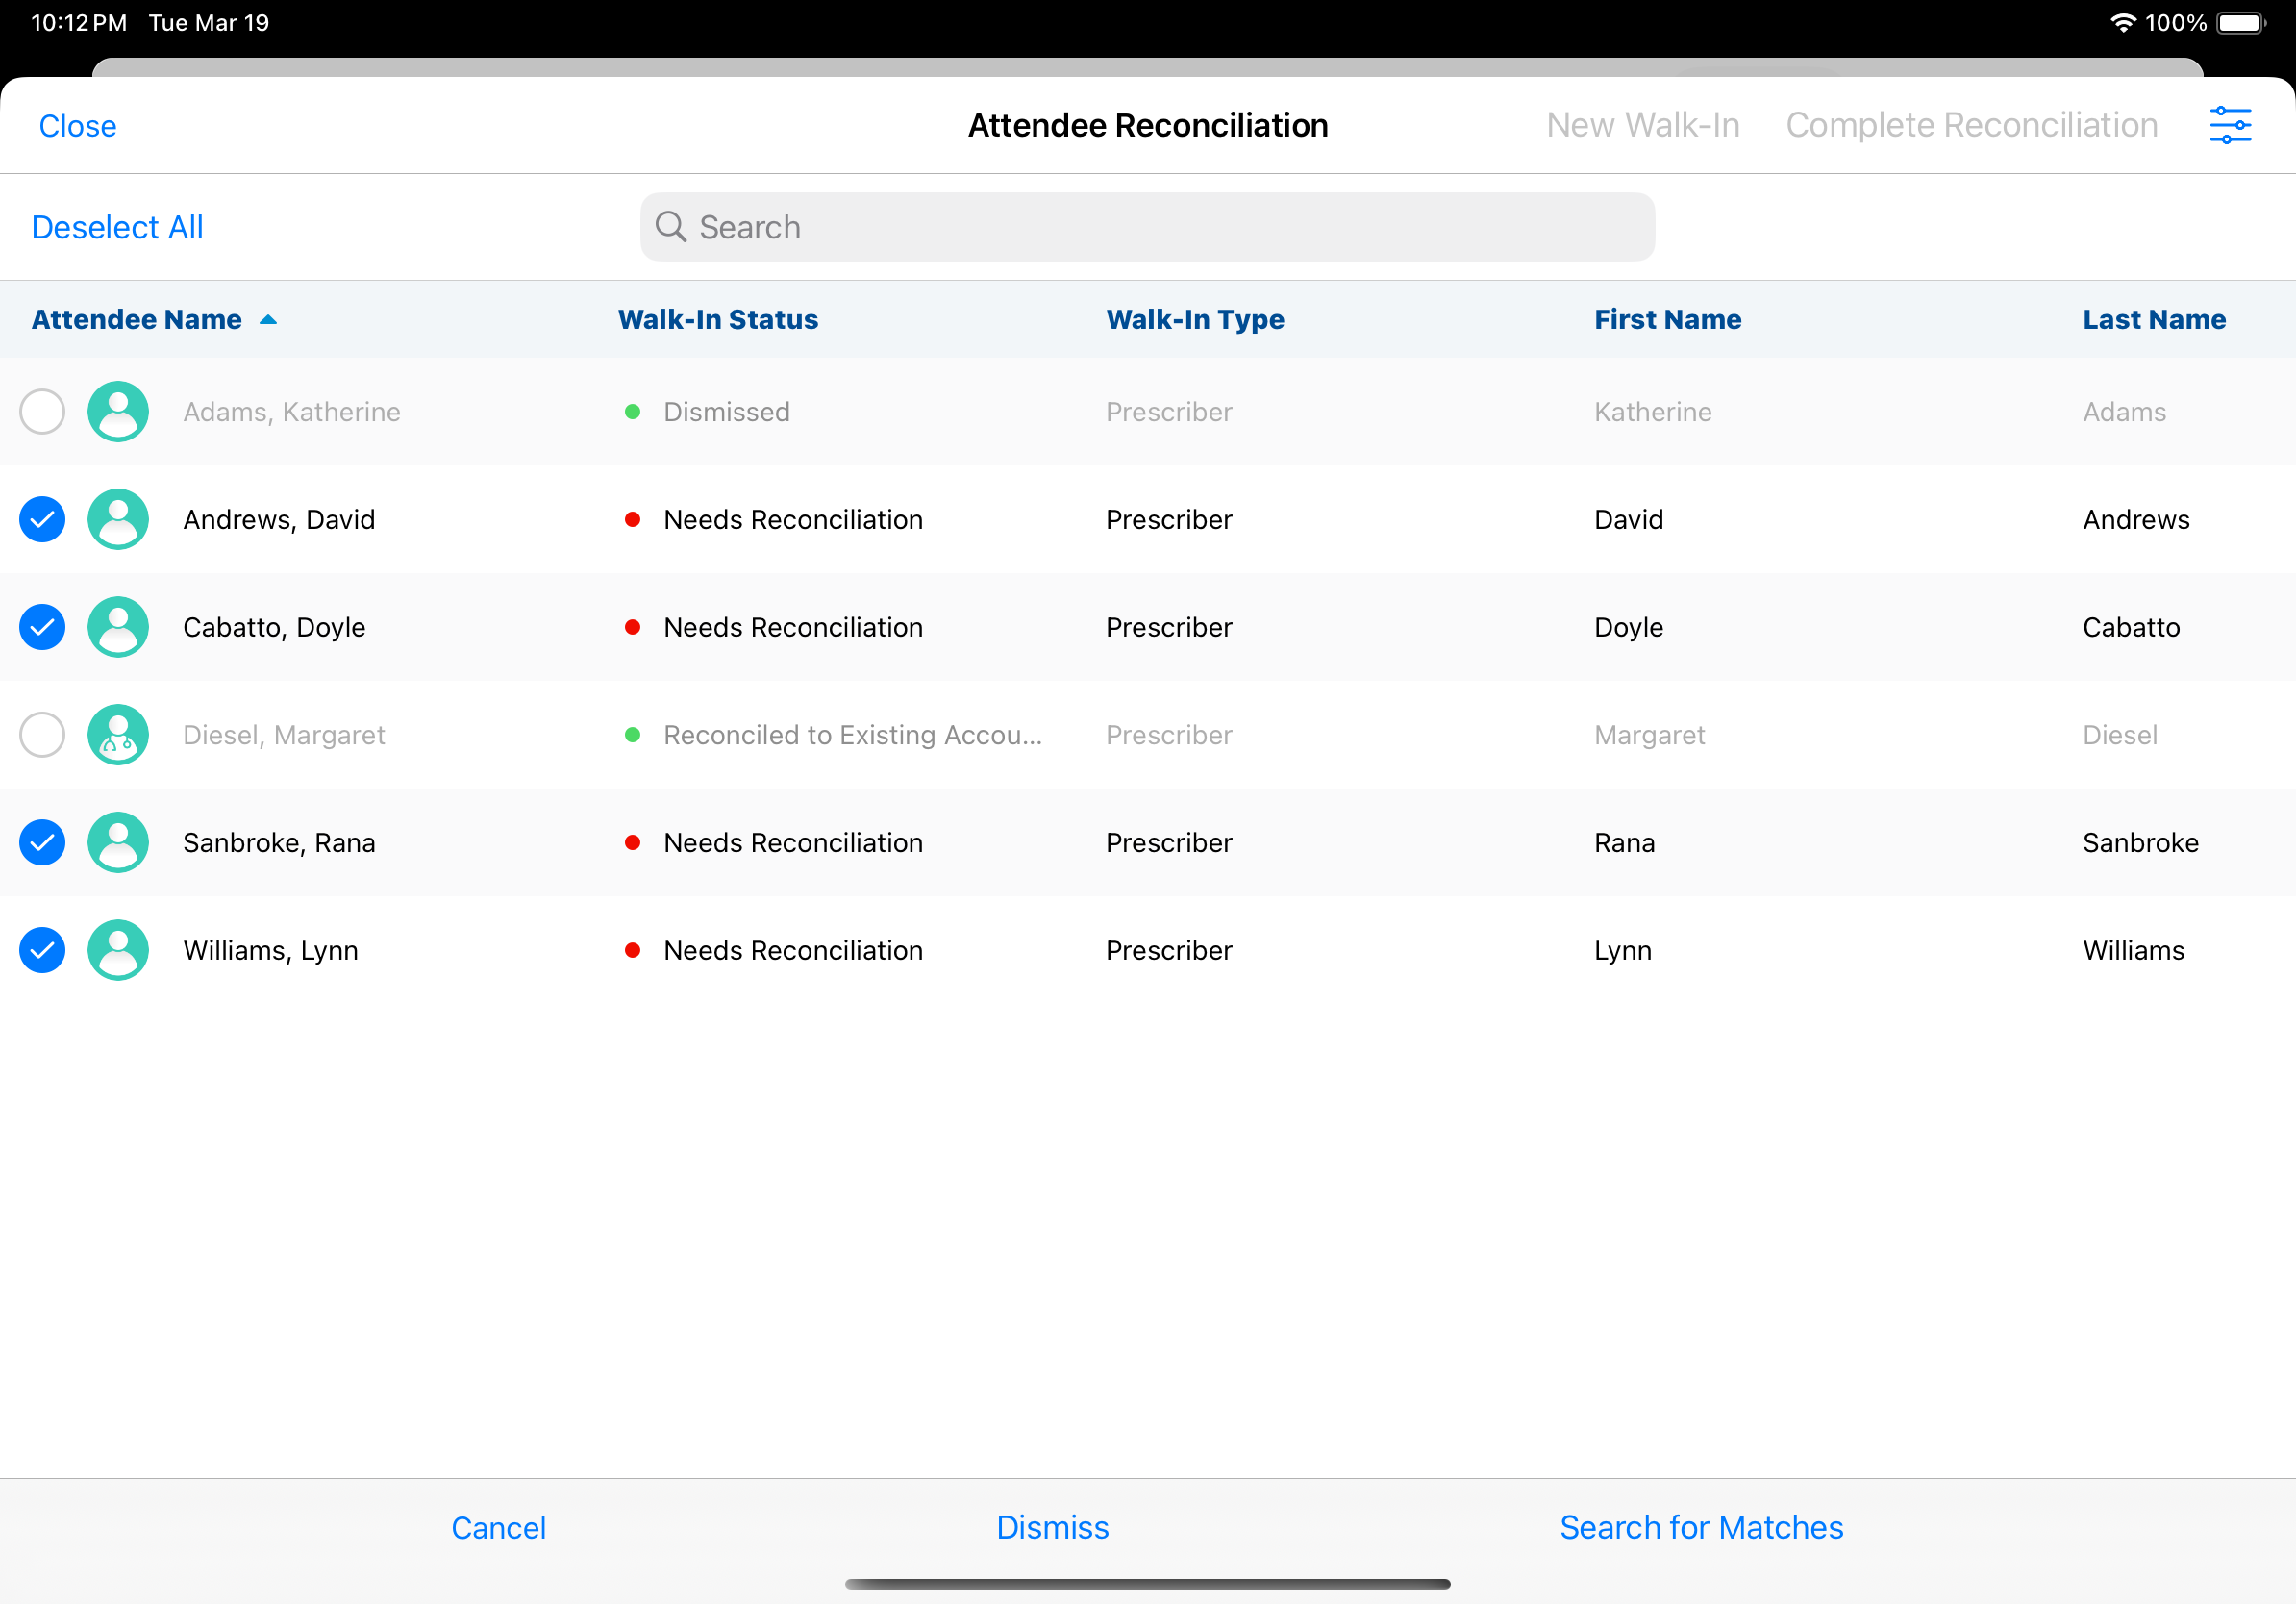
Attendees who have already been reconciled or dismissed cannot be selected.
- Select either Search for Matches , or Dismiss to dismiss the attendees.
When searching for matches, organizers can navigate to the next or previous walk-in through the selected attendees to streamline the reconciliation process.
Adding Walk-in Attendees
Event organizers can add additional walk-in attendees to their event:
-
Navigate to the Attendee Reconciliation page.

-
Select New Walk-In.
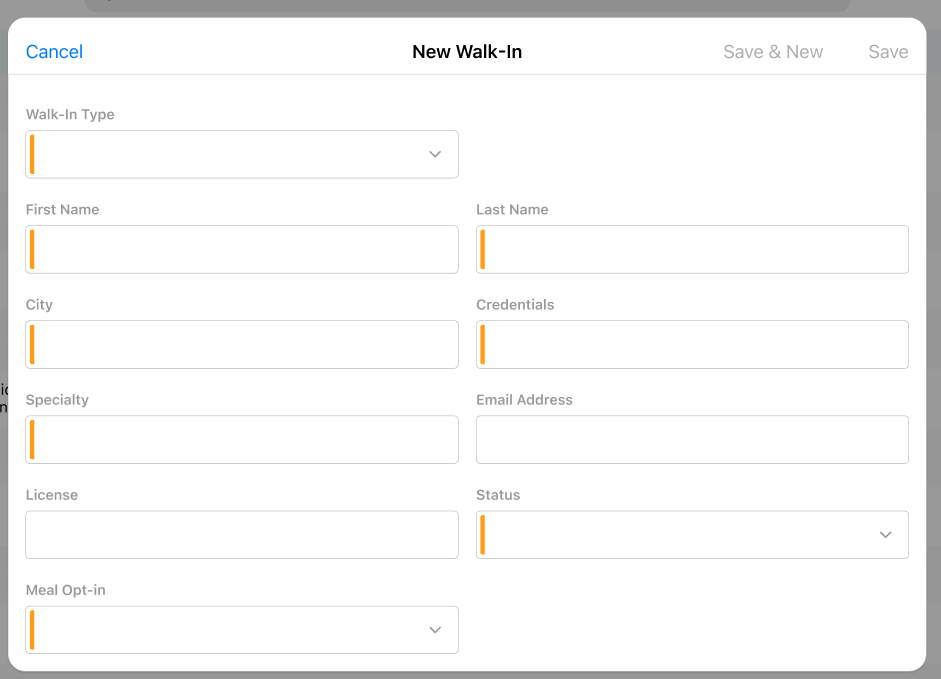
- Enter the appropriate information, including any required fields.
- Select either Save or Save & New.


