

Capturing Inventories
- Browser
- iPad
To keep track of physical inventory stock and ensure compliance with sample regulations, users capture inventories of their on-hand sample inventory. Sample Inventories enable users to capture inventories for themselves and for any reporting users.
Ensure initial configuration is complete to use this functionality.
Creating Inventories
To create a new sample inventory record, select New Inventory from the Sample Inventories section of the My Samples tab and complete the appropriate fields.
The Previous Sample Inventory Date Time field is prepopulated based on the datetime of the most recently submitted inventory, enabling third-party sample reconciliation systems to aggregate sample transactions.
Selecting an Inventory Type
By default, users select from the following inventory types:
- Monthly
- Quarterly
- Year-end
- Closeout
- Annual
Changing the inventory type does not affect the layout displayed to the user; data on the inventory type is for recordkeeping purposes. For information on defining inventory types, see Managing Picklist and Field Values for Sampling.
Entering Inventory Counts
For all products, users can manually enter the inventory count. To manually enter inventory counts, type the quantity directly into the Count field.
Inventory counts do not affect users’ calculated quantity of sample lots or which products are available for sampling. Sample availability is driven only by the sample lots assigned to the user and which sample lots the user marks as active. For example, if Sarah Jones enters zero in the Count field, the sample lot is still available for selection, unless she marks it as inactive by deselecting the Active check box for the sample lot.
Entering Inventory Counts by Case
For sample products with a defined quantity per case, users can instead select the Case Calculator icon to update the quantity based on the number of cases and units. Using the Case Calculator enables users to enter their inventory efficiently, by counting cases instead of individual boxes when possible. To enter quantity by case and unit, select the Case Calculator icon to the right of the Count field.

In the Case Calculator pop-up window, enter the number of cases and the number of units and then select Save. The Count field is then updated based on the cases and units entered in the Case Calculator pop-up.
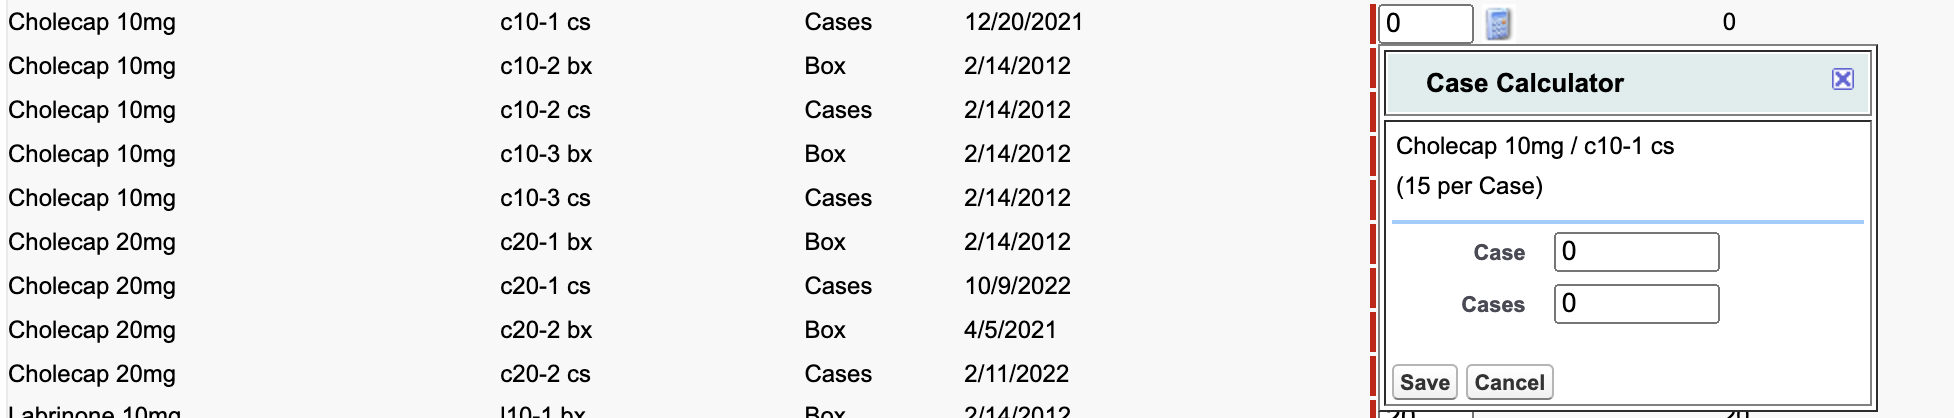
If a user enters a number of boxes or any individual units, the number of individual units is added to the calculated case quantity—for example, entering one case with 15 boxes of Cholecap, plus two individual boxes of Cholecap, equals a count of 17 units.
Saving and Submitting Inventories
After entering the inventory, select Save if the inventory is not complete. When the inventory is complete, select Submit to finish the inventory and lock the record. Only admins can unlock and remove submitted inventory records for archival purposes (see Unlocking Submitted Sample Transaction and Inventory Records for more information).
For data integrity, users cannot edit inventories once they are submitted. Submitted inventories are a historical snapshot of the inventory at a particular point in time.
Calculating Expected Quantity and Difference
On the Sample Inventory page, admins view expected quantity and difference for each inventory line item. These fields are also used in sample reconciliation.
- Expected_Quantity_vod - The Expected Quantity is calculated based on all sample transactions performed against the sample lot—receipts, disbursements, adjustments, transfers, and returns. It is only saved on the inventory when the user submits the Sample Inventory record.
- Difference_vod - The Difference is calculated as users enter inventory counts, based on the difference between the Expected Quantity and the Count
Viewing Past Sample Inventories
To double check their inventory accuracy or answer questions regarding discrepancies or inventory issues, users can view past inventories in the Sample Inventories section of the My Samples tab. Viewing past inventories also enables users to see trends in their disbursement activity over time.

To view a past inventory, select the appropriate link from the Inventory column. A read-only version of the Sample Inventory record displays.
Submitting Inventories Without Sample Lots
If users are required to submit an inventory but do not have any active sample lots, they can still submit inventories by selecting the No Sample Lots check box, then Submit.
If there are any active sample lots for the user, the No Sample Lots check box is deselected and read-only.
