

21R3.2 Functionality Guide
The Functionality Guide is intended for Sales Operations, Business Administrators, System Integrators, and others responsible for making decisions about what features are needed for end users to be successful and deciding which features work together with existing customer configurations.
Events Management
Events Timeline Homepage
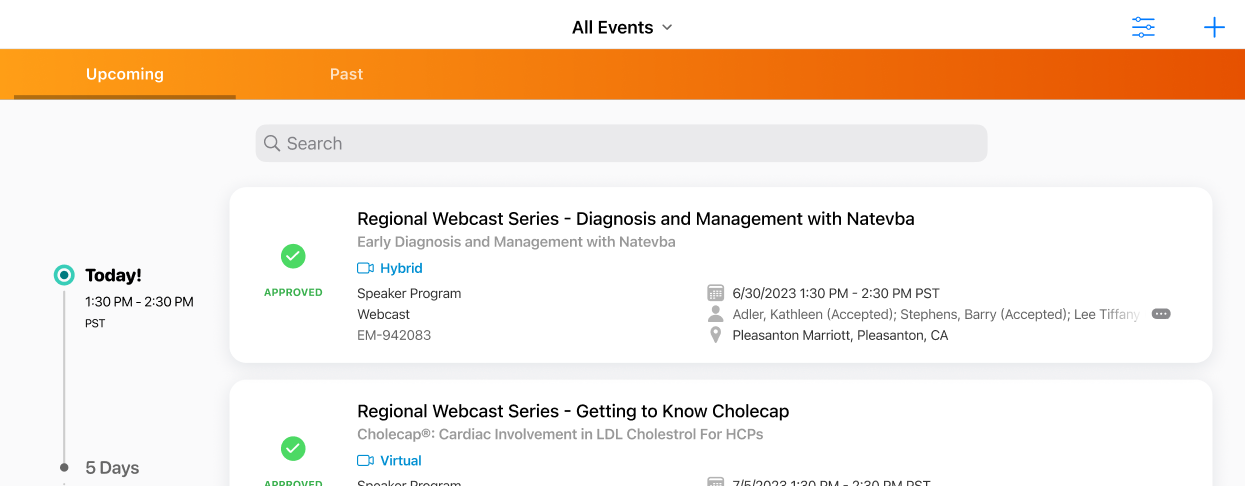
Events Management has a timeline-based homepage that enables users to quickly locate appropriate events in the past, currently open events, or events planned in the future. Additionally, users can extensively filter and search for event information, for example, accounts, speakers, or topics available to the user. The events homepage also uses a series of icons to represent various event statuses, enabling users to visually identify an event’s lifecycle state.
For example, Sarah Jones wants to continue working on an approved, upcoming speaker event later this month. She navigates to the Events Management tab in CRM and filters the list of events to only display upcoming events owned by her. She searches for the event’s speaker, quickly locates her event, and resumes preparing for the event.
Considerations
- This feature is only available to Events Management users, not Medical Events users. However, if users are configured to use both Events Management and Medical Events, available Medical Events also display in this tab alongside Events Management events.
Prerequisites
- Ensure Events Management is configured for all appropriate users
Using the Events Timeline Homepage
To display the events homepage, navigate to the Events Management tab in CRM.
When the tab loads, any updates to event data are downloaded to the device if users have an active internet connection. Users can refresh retrieved data by pulling to refresh on the homepage.
A timestamp of the most recent update displays below the view name.

Events display as cards in a timeline, enabling organizers to quickly view information about an event’s details, as well as when it is scheduled in relation to other events. Organizers can view an event’s detail record page by selecting the appropriate card.
If the Local Time and Timezone feature is enabled alongside this feature, all displayed dates and times on the homepage also display the local event time.
Filtering and Searching the List of Events
A variety of filtering methods are available to organizers enabling them to quickly filter the greater list of events to only display the ones relevant to them.
-
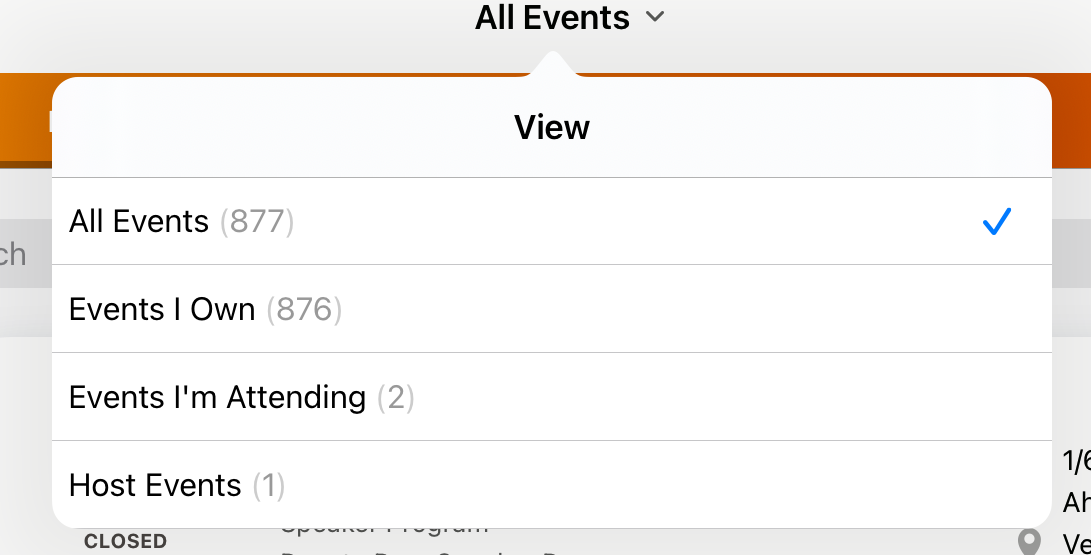
List Views – The Events Management tab contains the following available list views:
- All Events
- Events I Own – Displays all events owned by the user
- Events I’m Attending – Displays all events where the user is a listed attendee or an Event Team Member. If Displaying Events in My Schedule for Event Team Members is enabled, events where the user is part of a group listed as an Event Team Member also display.
- Host Events – Displays all parent events not owned by the current user
Switching views clears any defined search terms and applied filters.
- Tabs – The following tabs are available grouping events based on their Start Date and End Date:
- Upcoming
- Past
-
Filters – The Filter button enables organizers to filter the list of events based on any of the following criteria. Users must have FLS read permission to the relevant fields for certain options to display:
- Date – Always available
- Status – Always available
- Account – Filters based on the Account_vod field on the EM_Event_vod and Medical_Event_vod objects
- Product – Filters based on the Product_vod field on the EM_Event_vod and Medical_Event_vod objects
-
Speaker – Filters based on the EM_Speaker_vod and EM_Event_Speaker_vod fields on the Event_Attendee_vod object
EM_Event_Speaker_vod records with a Status_vod of Rejected_vod do not display as available for selection.

All filters display as multi-select picklists, except for the Date filter, which displays as a calendar organizers can use to select a range for an event’s start date.
Additionally, the Account, Product, and Speaker multi-select picklists dynamically display values based on the current list of events. For example, Sarah Jones covers Cholecap and Restolar. There are no current events scheduled discussing Restolar, so when she filters by Product, only Cholecap displays as an available option.
-
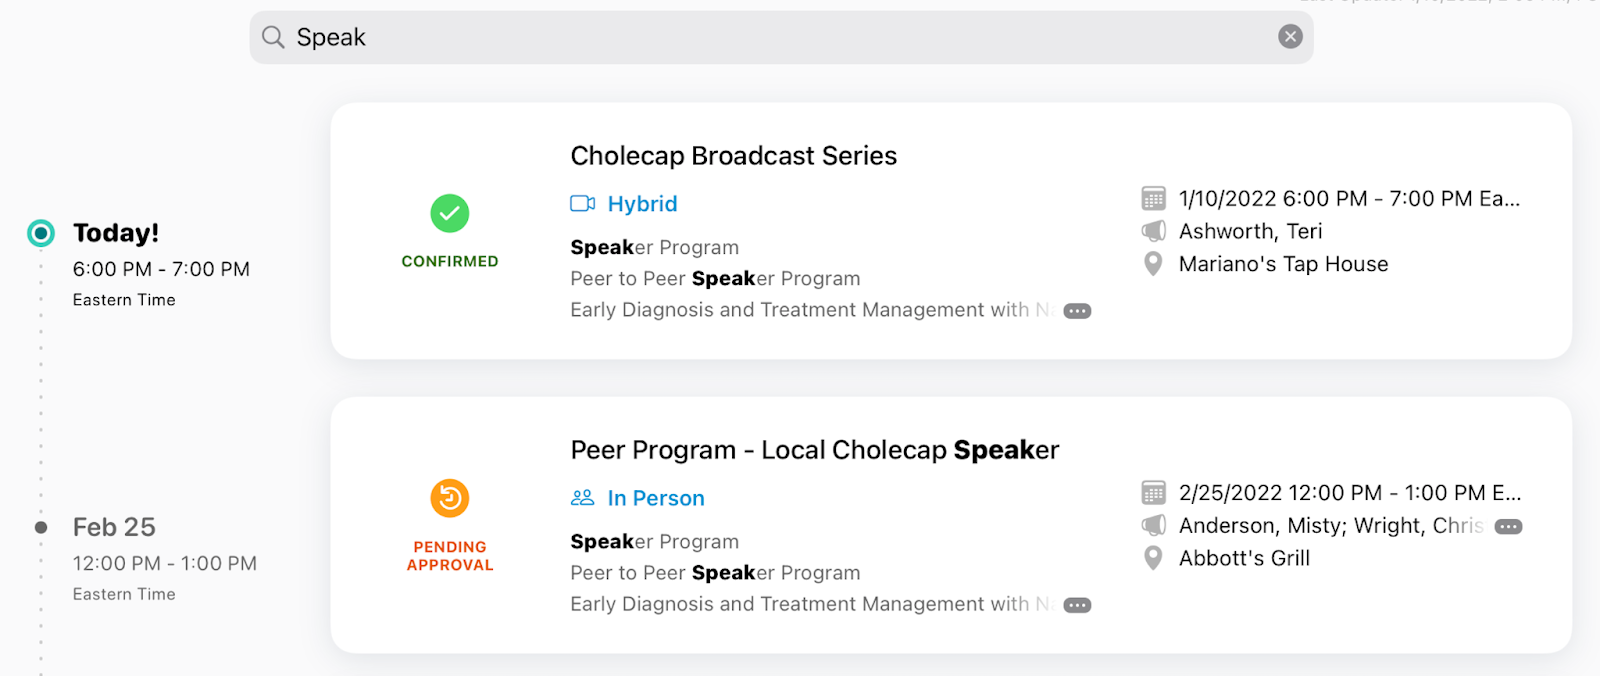
Search Bar – Searching allows organizers to search for any information on an event’s card on the timeline. Matches to search terms highlight in the resulting event cards.
MyInsights Studio
Using the Sales Data Query Data Element (Available February 3, 2022)
Users can query sales data from the org using the Sales Data Query data element to display and analyze the data in custom MyInsights pages. The sales data must already be loaded into the org. See Loading Sales Data into Veeva CRM for more information.
Users must populate the following information when creating a query:
- Scale – Dropdown menu with options to define the queried sales data as weekly or monthly
- Data Type – Type of sales data queried (e.g. TRx, NRx)
- Account IDs – Account(s) for which to query the sales data
- Start Date (optional) – Earliest date of sales data to query
- End Date (optional) – Latest date of sales data to query
- Sort – An ordered list of sort keys, where each sort key is composed of a sales data field (see table) and a direction (Ascending or Descending). Can be empty.
Sales Data Field
Data Type
Account_Id_vod__c
String
ID_vod__c
String
Market_vod__c
String
Market_Id_vod__c
String
Product_Group_vod__c
String
Product_Group_Id_vod__c
String
Sales_Date_vod__c
Date
Sales_Data_vod__c
Number
- Limit – Empty by default. Defines the number of records to display.
The Preview fetches and displays a maximum of 200 records regardless of the limit.
A sales data query can return a single record or a list of records as output, depending on the limit defined by the user. Each record can contain all of the sales data fields (see table).
Using Icons in Display Elements (Available February 3, 2022)
Users can select icons to display for the section, field list, and metric highlight display elements to indicate the purpose of each element.
Sample Management
Capturing Remote Signatures for Sample Opt-In
For convenience during remote meetings, and to accommodate any restrictions on in-person meetings, users can capture signatures for sample opt-in using Links or QR Code®s. Capturing sample opt-in signatures enables users to remotely continue sample disbursements, even when they do not have face-to-face interactions with HCPs.
For example, Sarah Jones captures a sample opt-in signature for Dr. Ackerman once a year to allow him to continue receiving samples. To capture his signature from their remote meeting, Sarah sends him a request for sample opt-in using EWS Links. Dr. Ackerman provides his signature remotely, and Sarah continues to disburse samples to him without interruption.
Prerequisites
Capturing Remote Signatures for Sample Opt-In
To capture a remote signature for sample opt-in:
- Select the More Actions button on the Account Detail page.
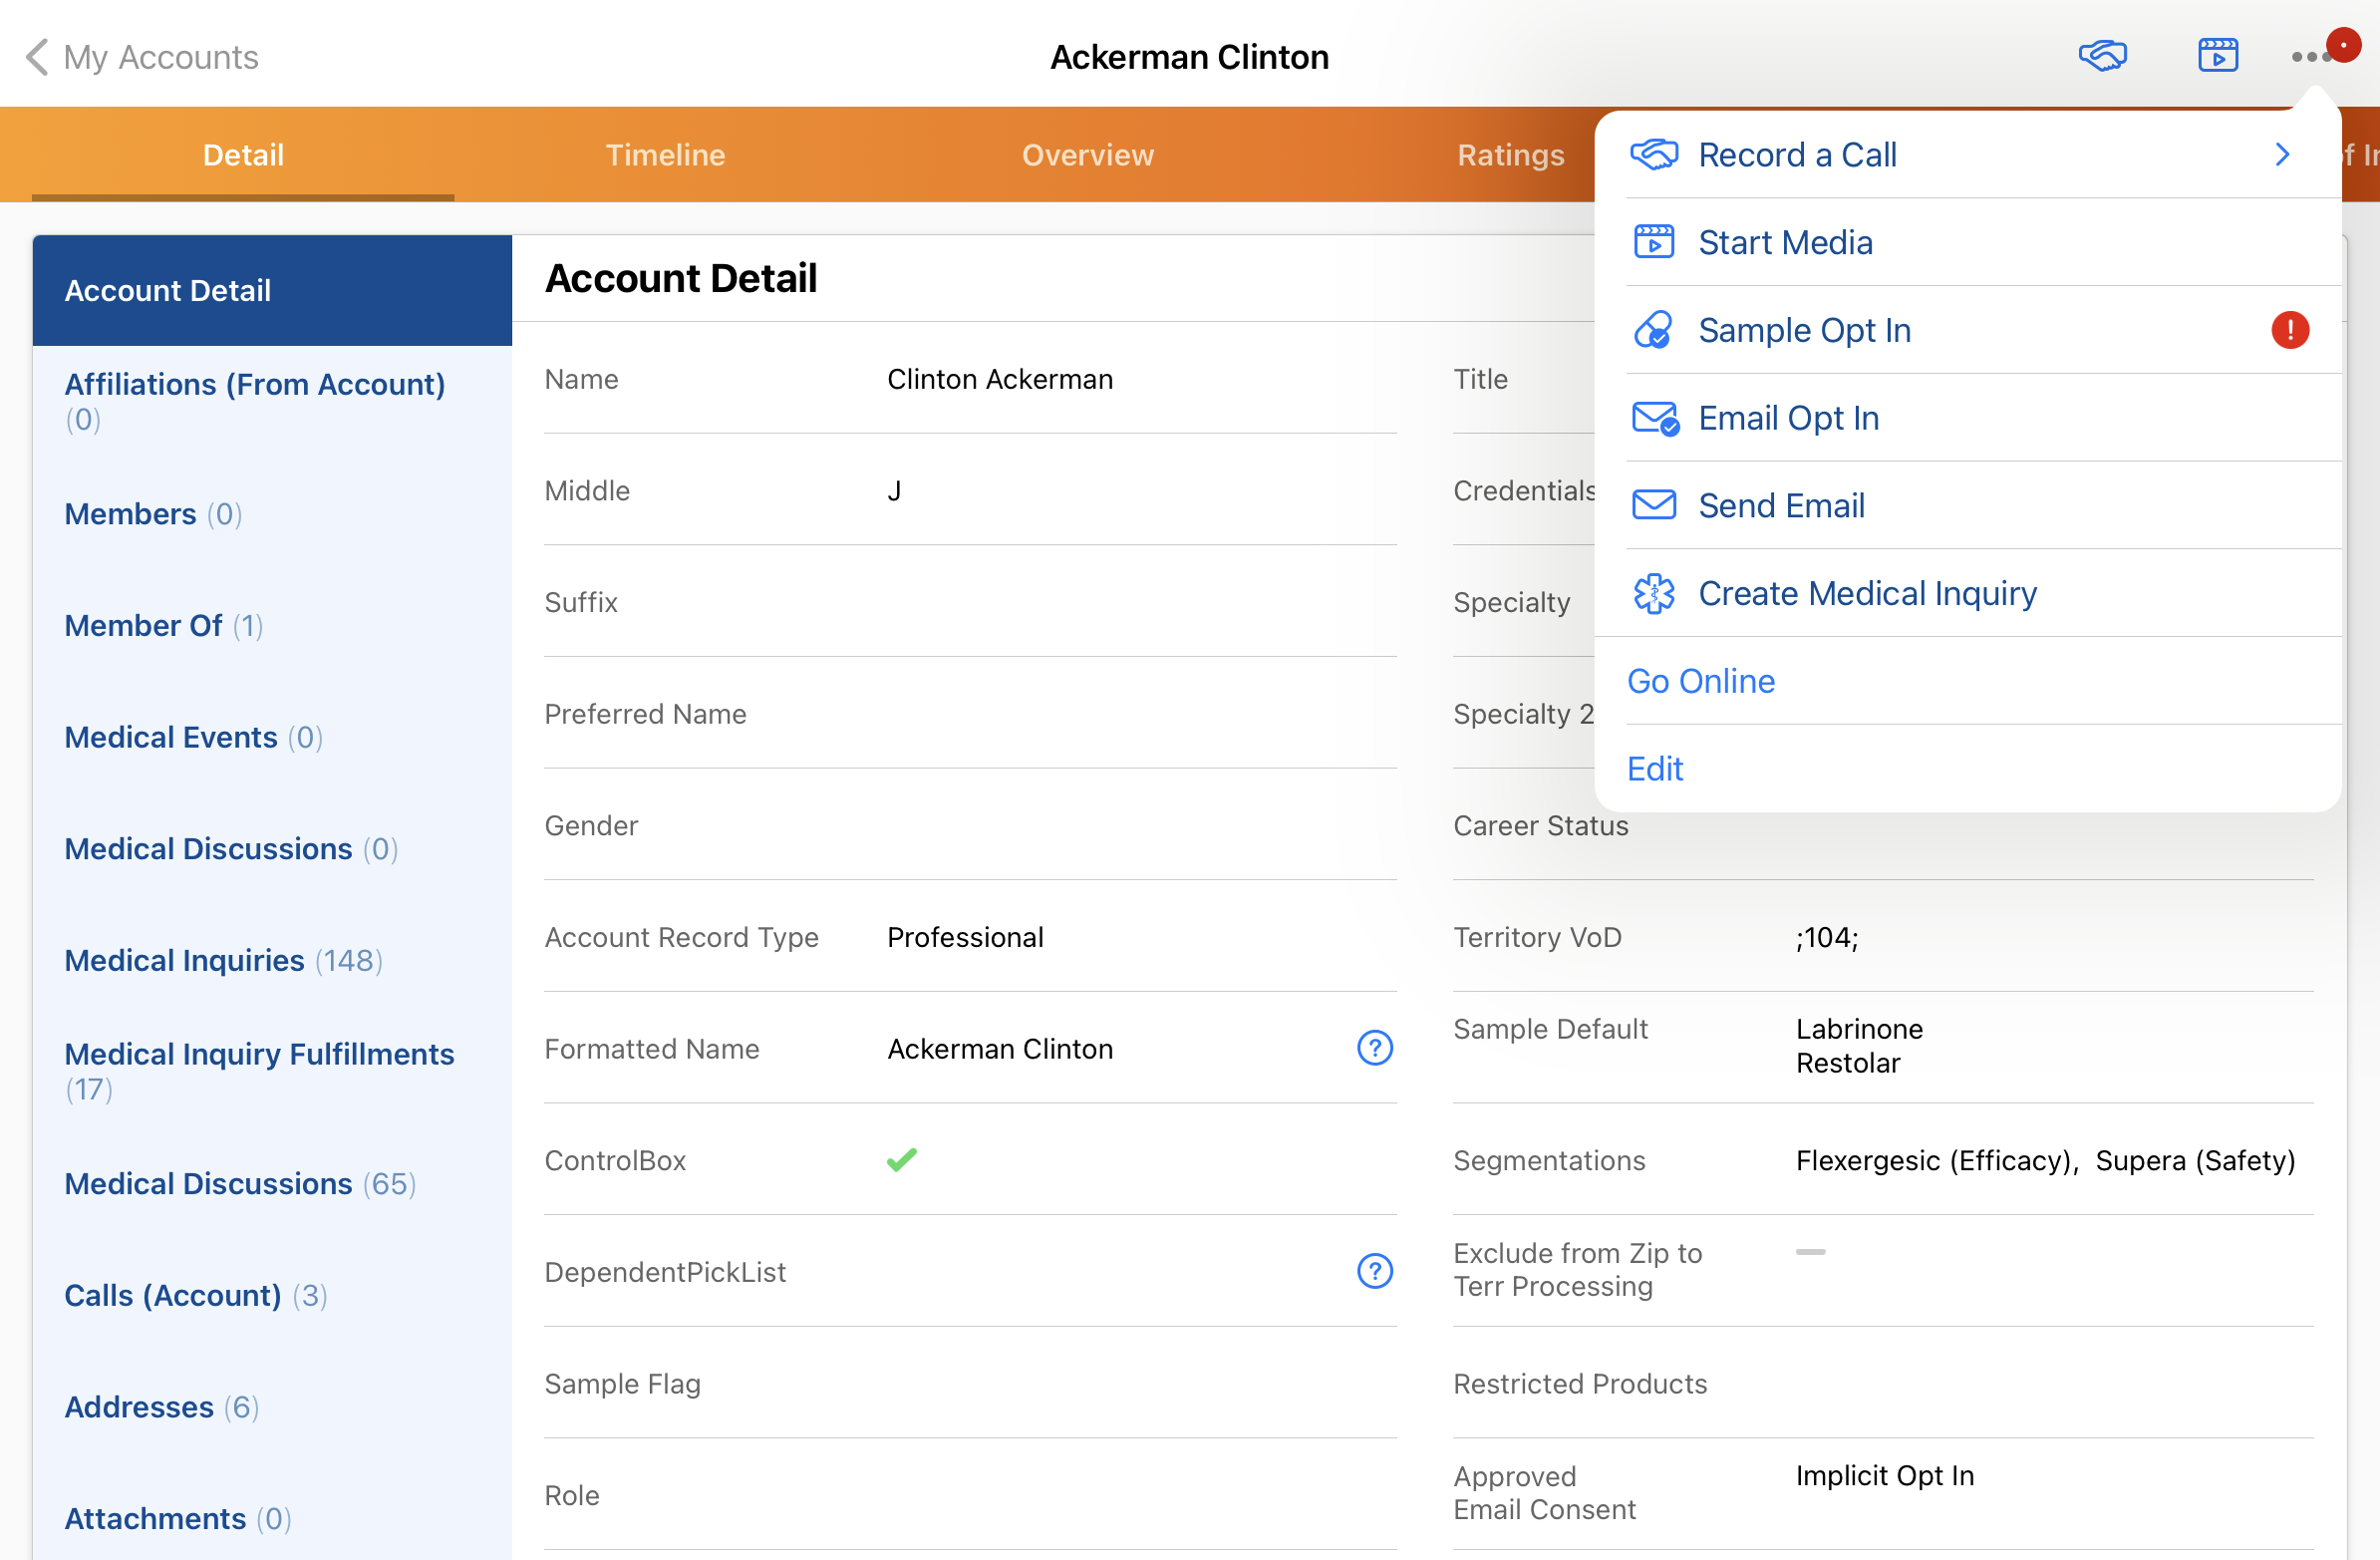
- Select Sample Opt In.
- Alternatively, select the Sample Opt-In warning displayed on the call report
-
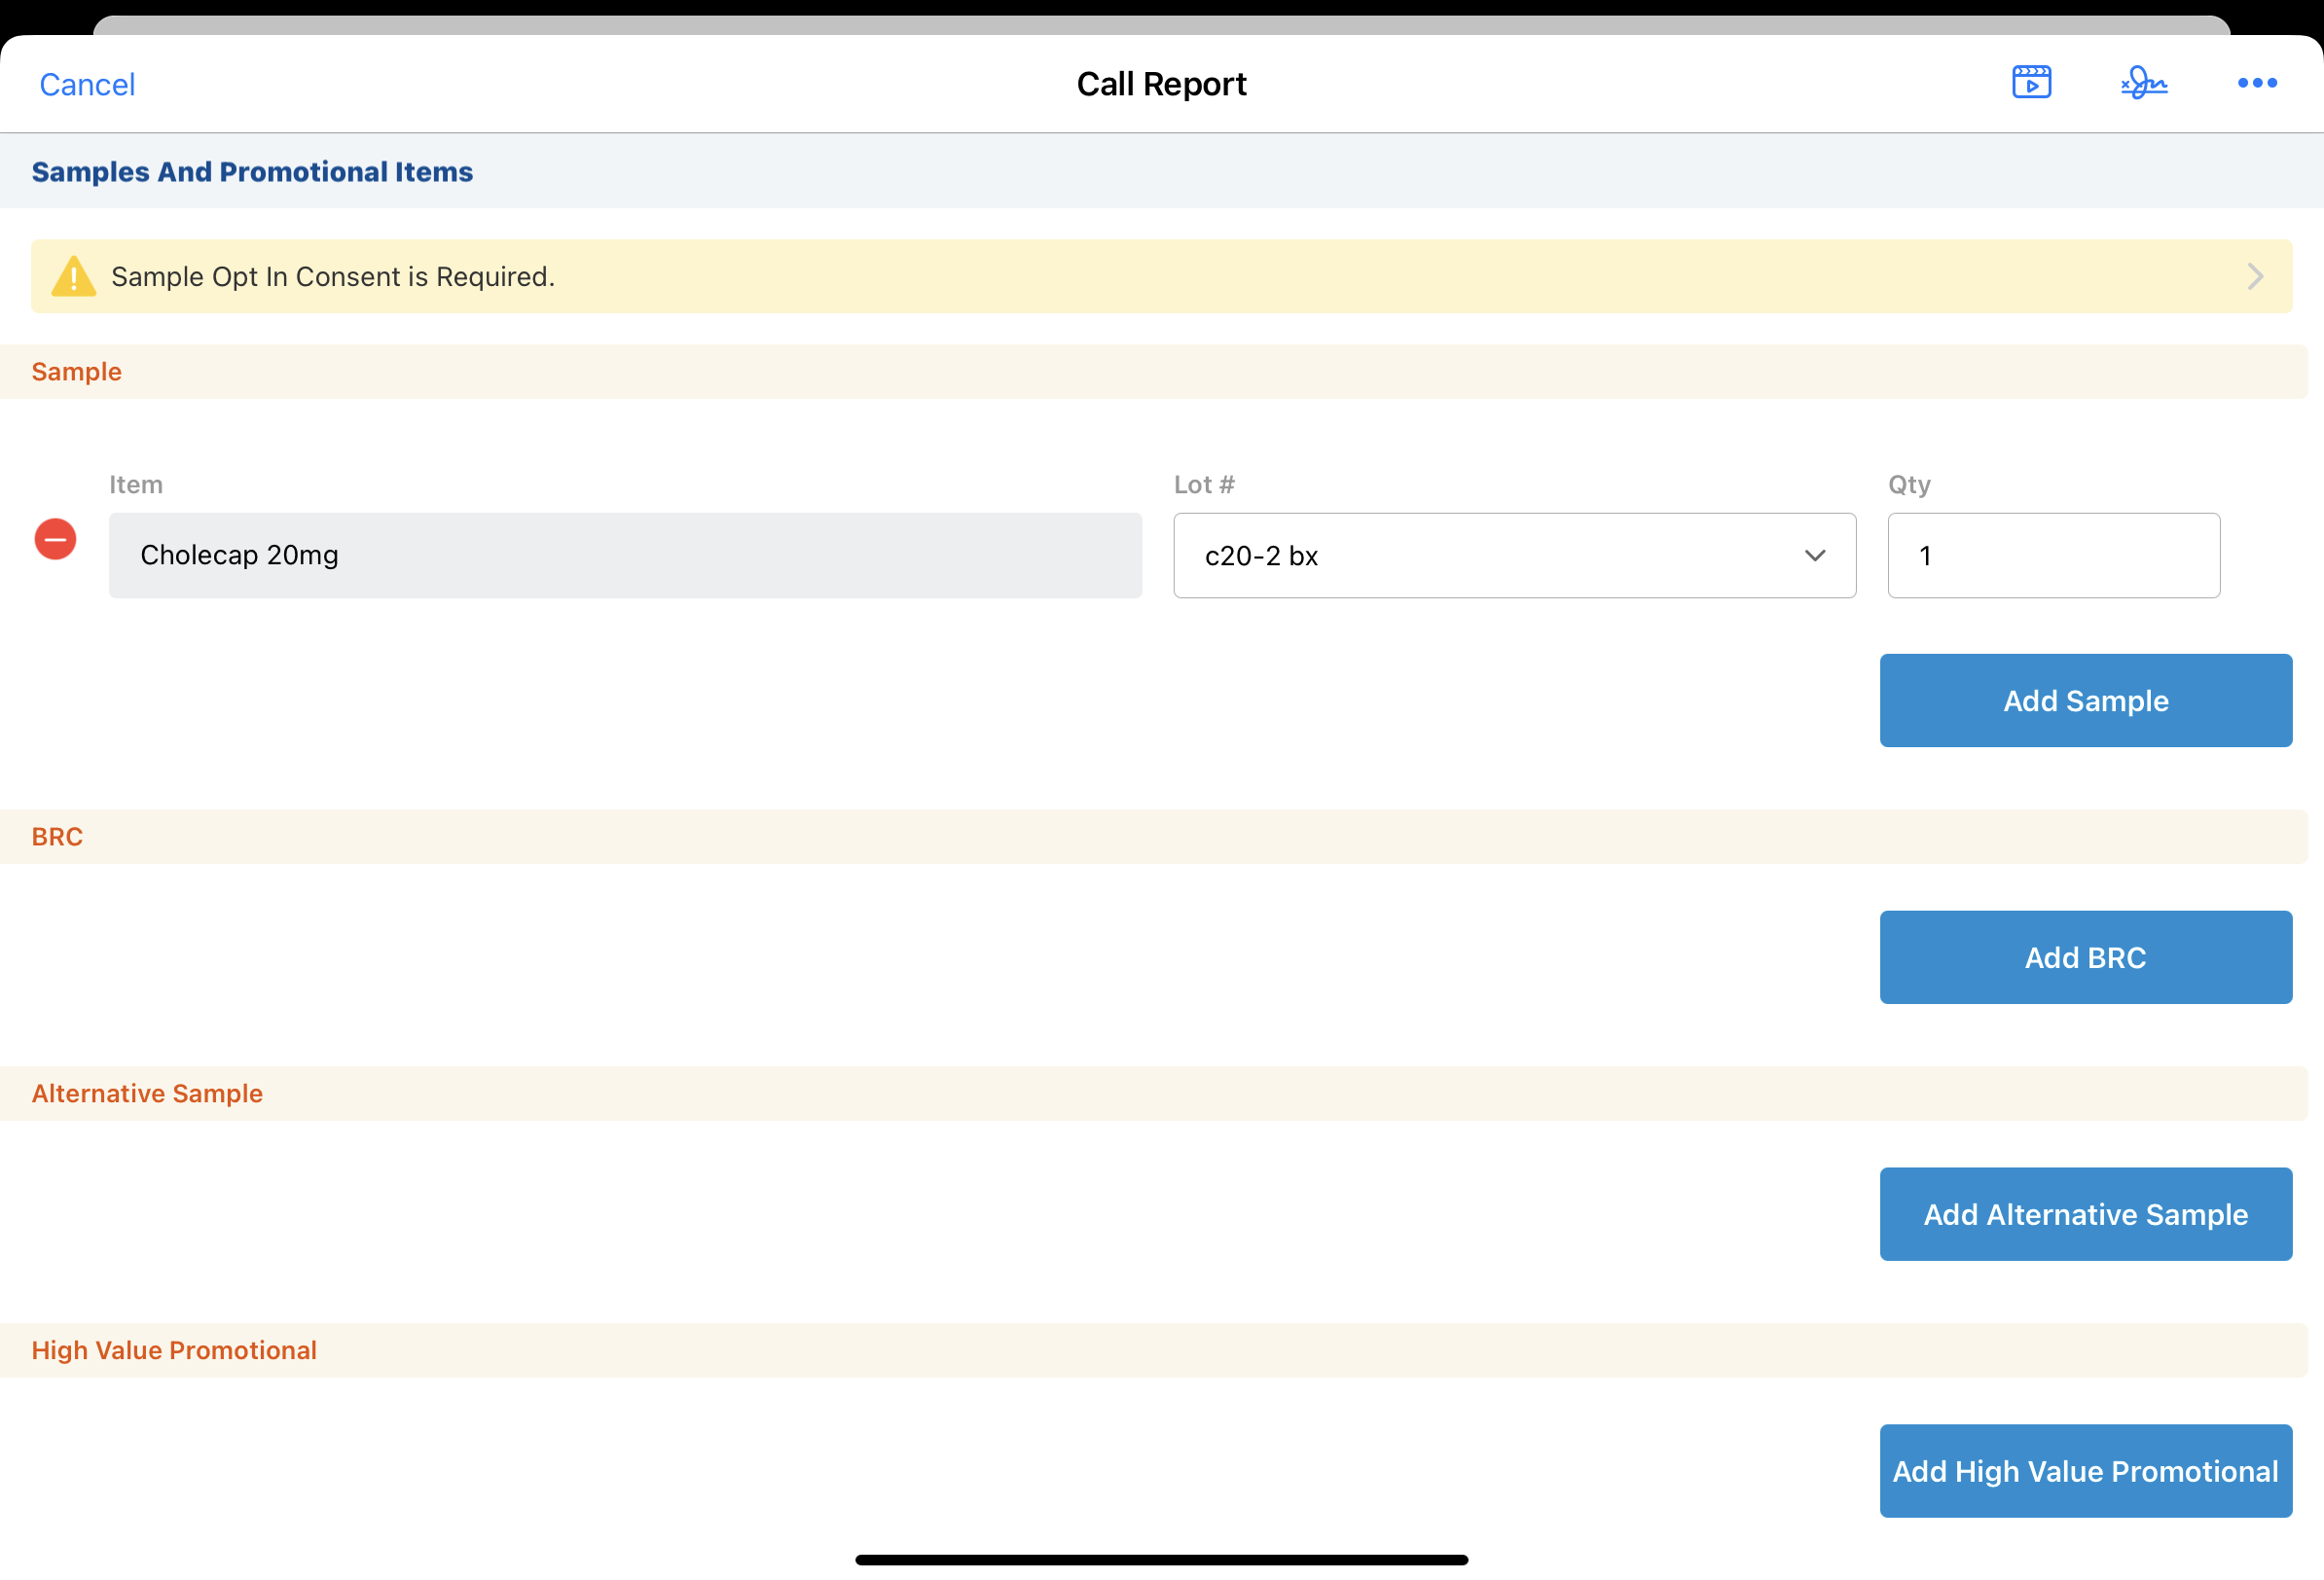
- Select the appropriate signature method from the Signature Set Up screen.
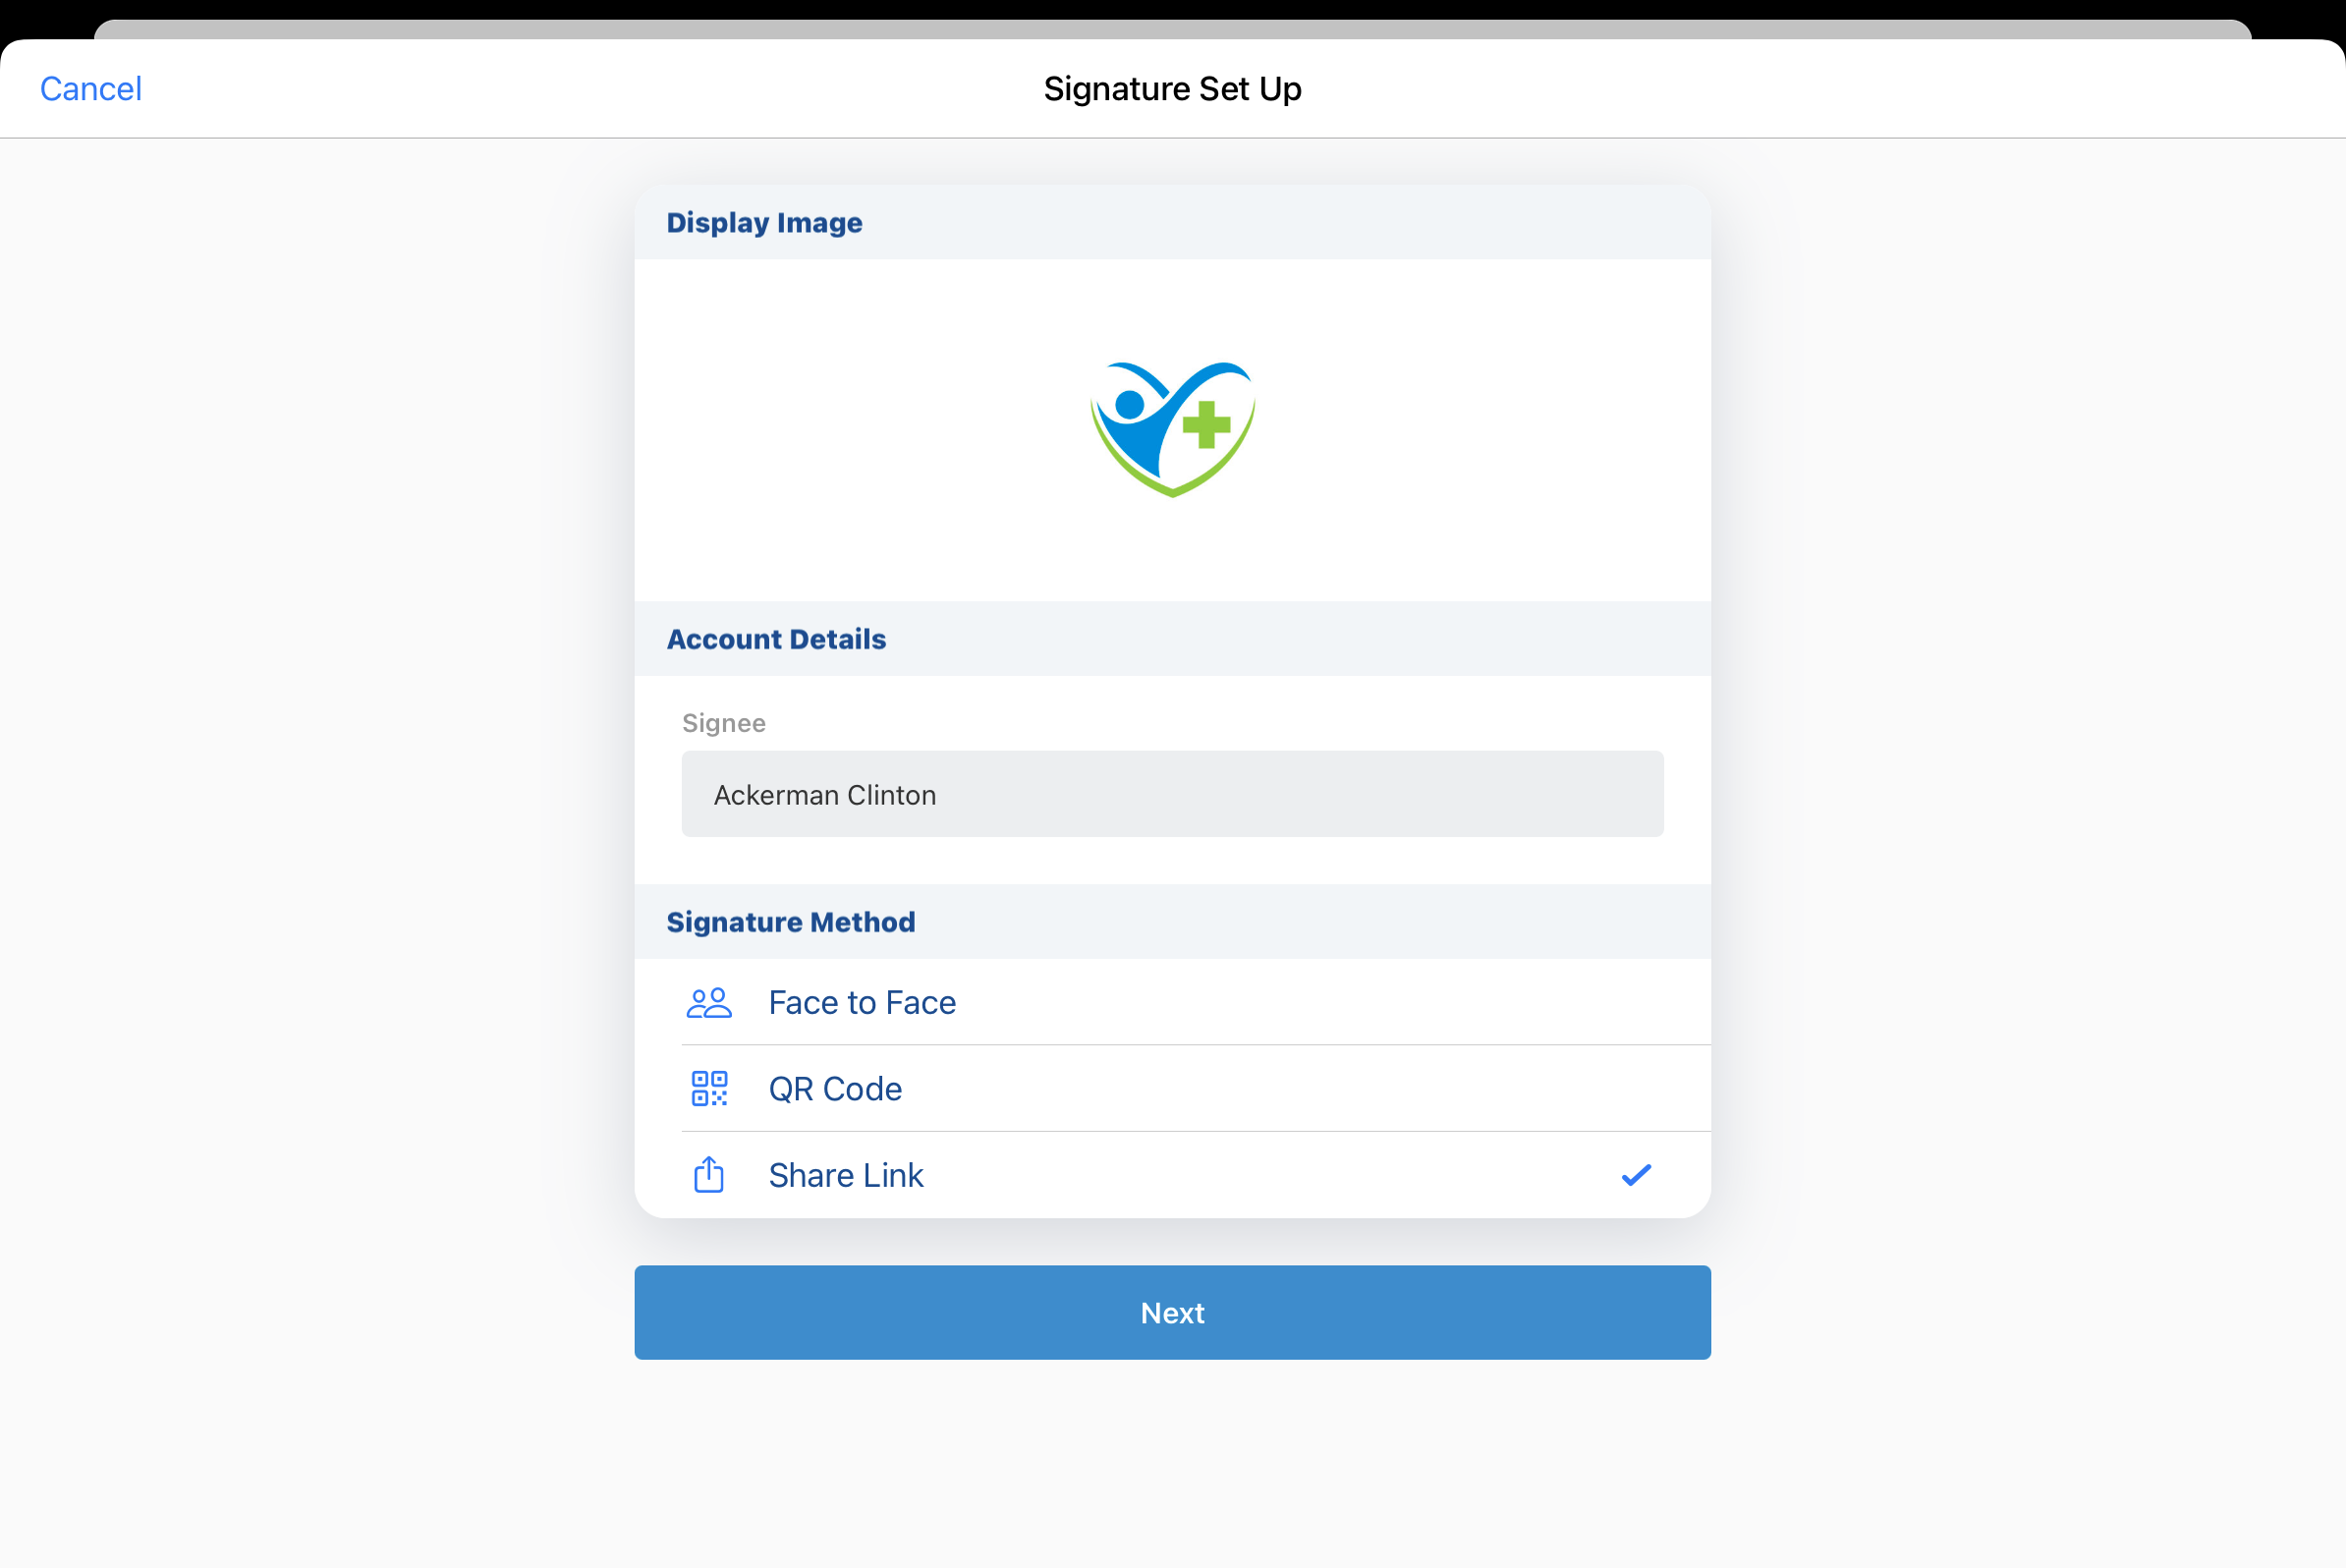
- Select Next.
- Follow the prompts to complete Signature Set Up and share the link or QR Code® with the HCP.
After selecting the appropriate option, end users must remain signed into Veeva CRM until HCPs provide their signature.
Providing Remote Signatures for Sample Opt-In
HCPs receive the link from the application chosen by the sender, or by scanning the QR Code® with their device. To provide a signature, HCPs:
- Select the link or scan the QR Code® to display the signature capture screen in an internet browser. (For more information on using QR Code® signature capture, seeCapturing Remote Signatures for Sampling with QR Codes®.)
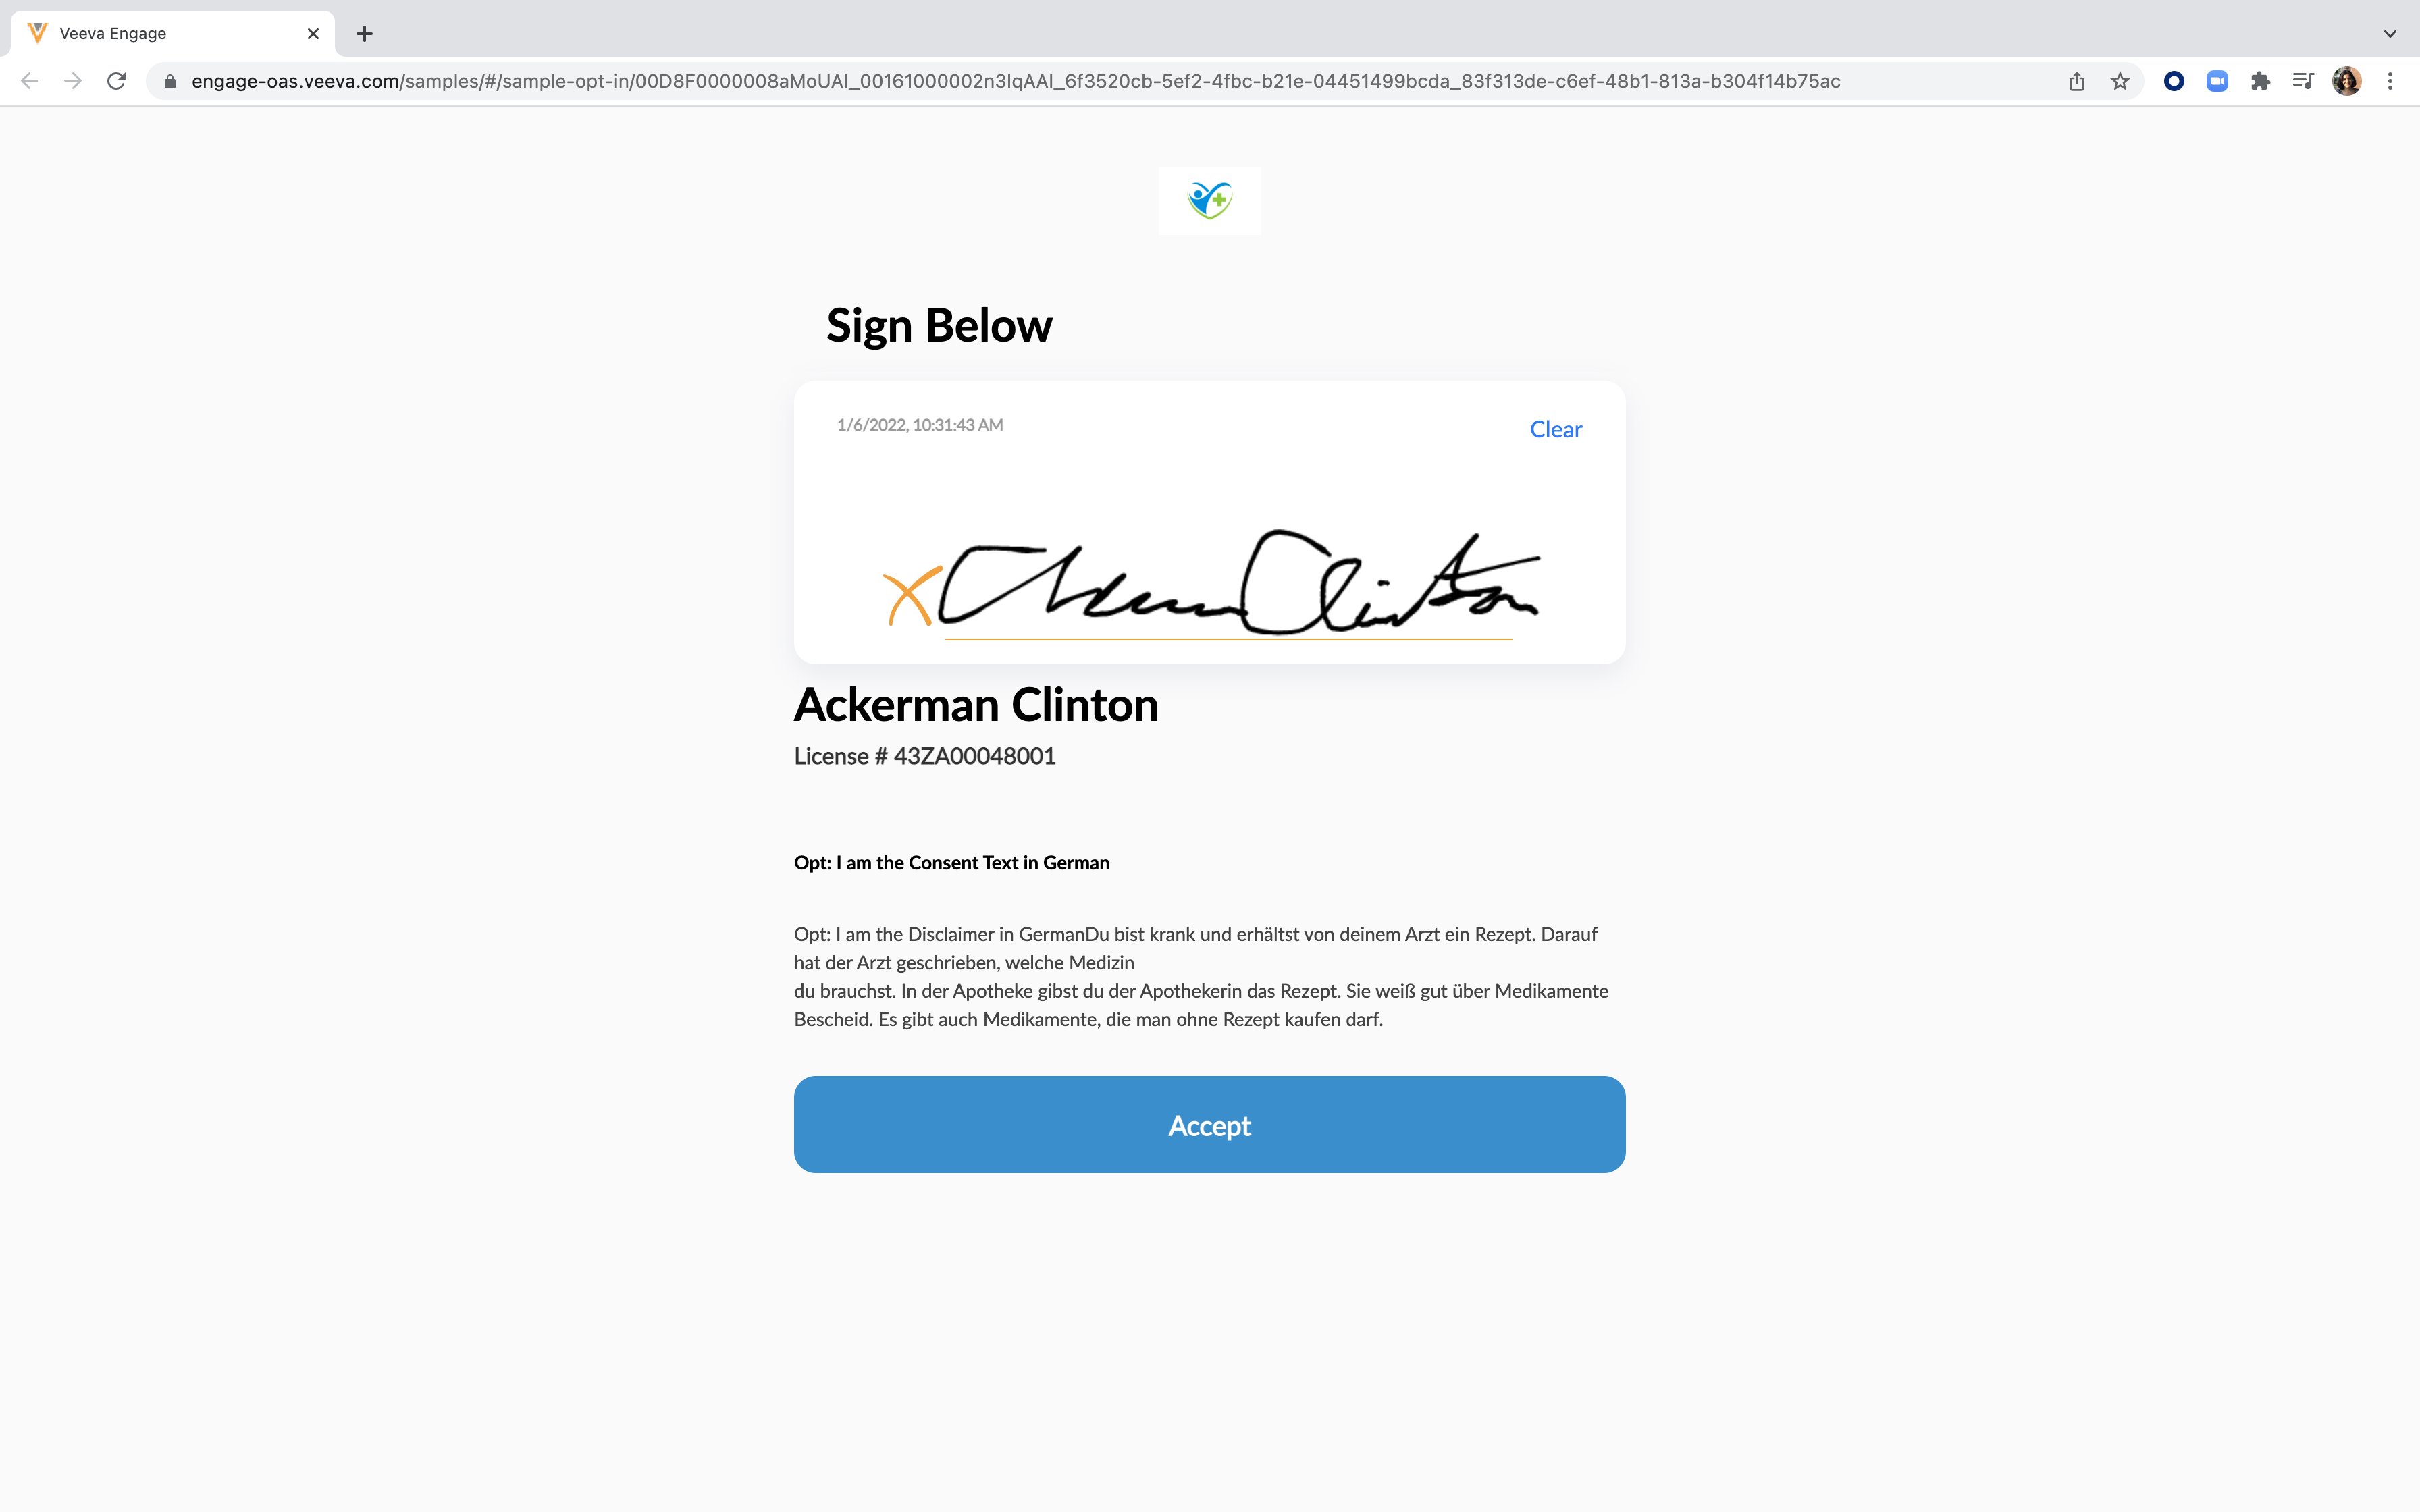
- Review the opt-in details, consent message, and disclaimer.
- Sign in the Signature box.
- Select Accept. The signature page is locked, all fields are stamped in the audit trail, and the signature is sent to the end user for review. A confirmation message displays to the end user:

Reviewing Remote Signatures for Sample Opt-In
After HCPs submit their signatures, end users review the signature and either accept the signature or request the HCP sign again. To accept the signature, select the Accept button.
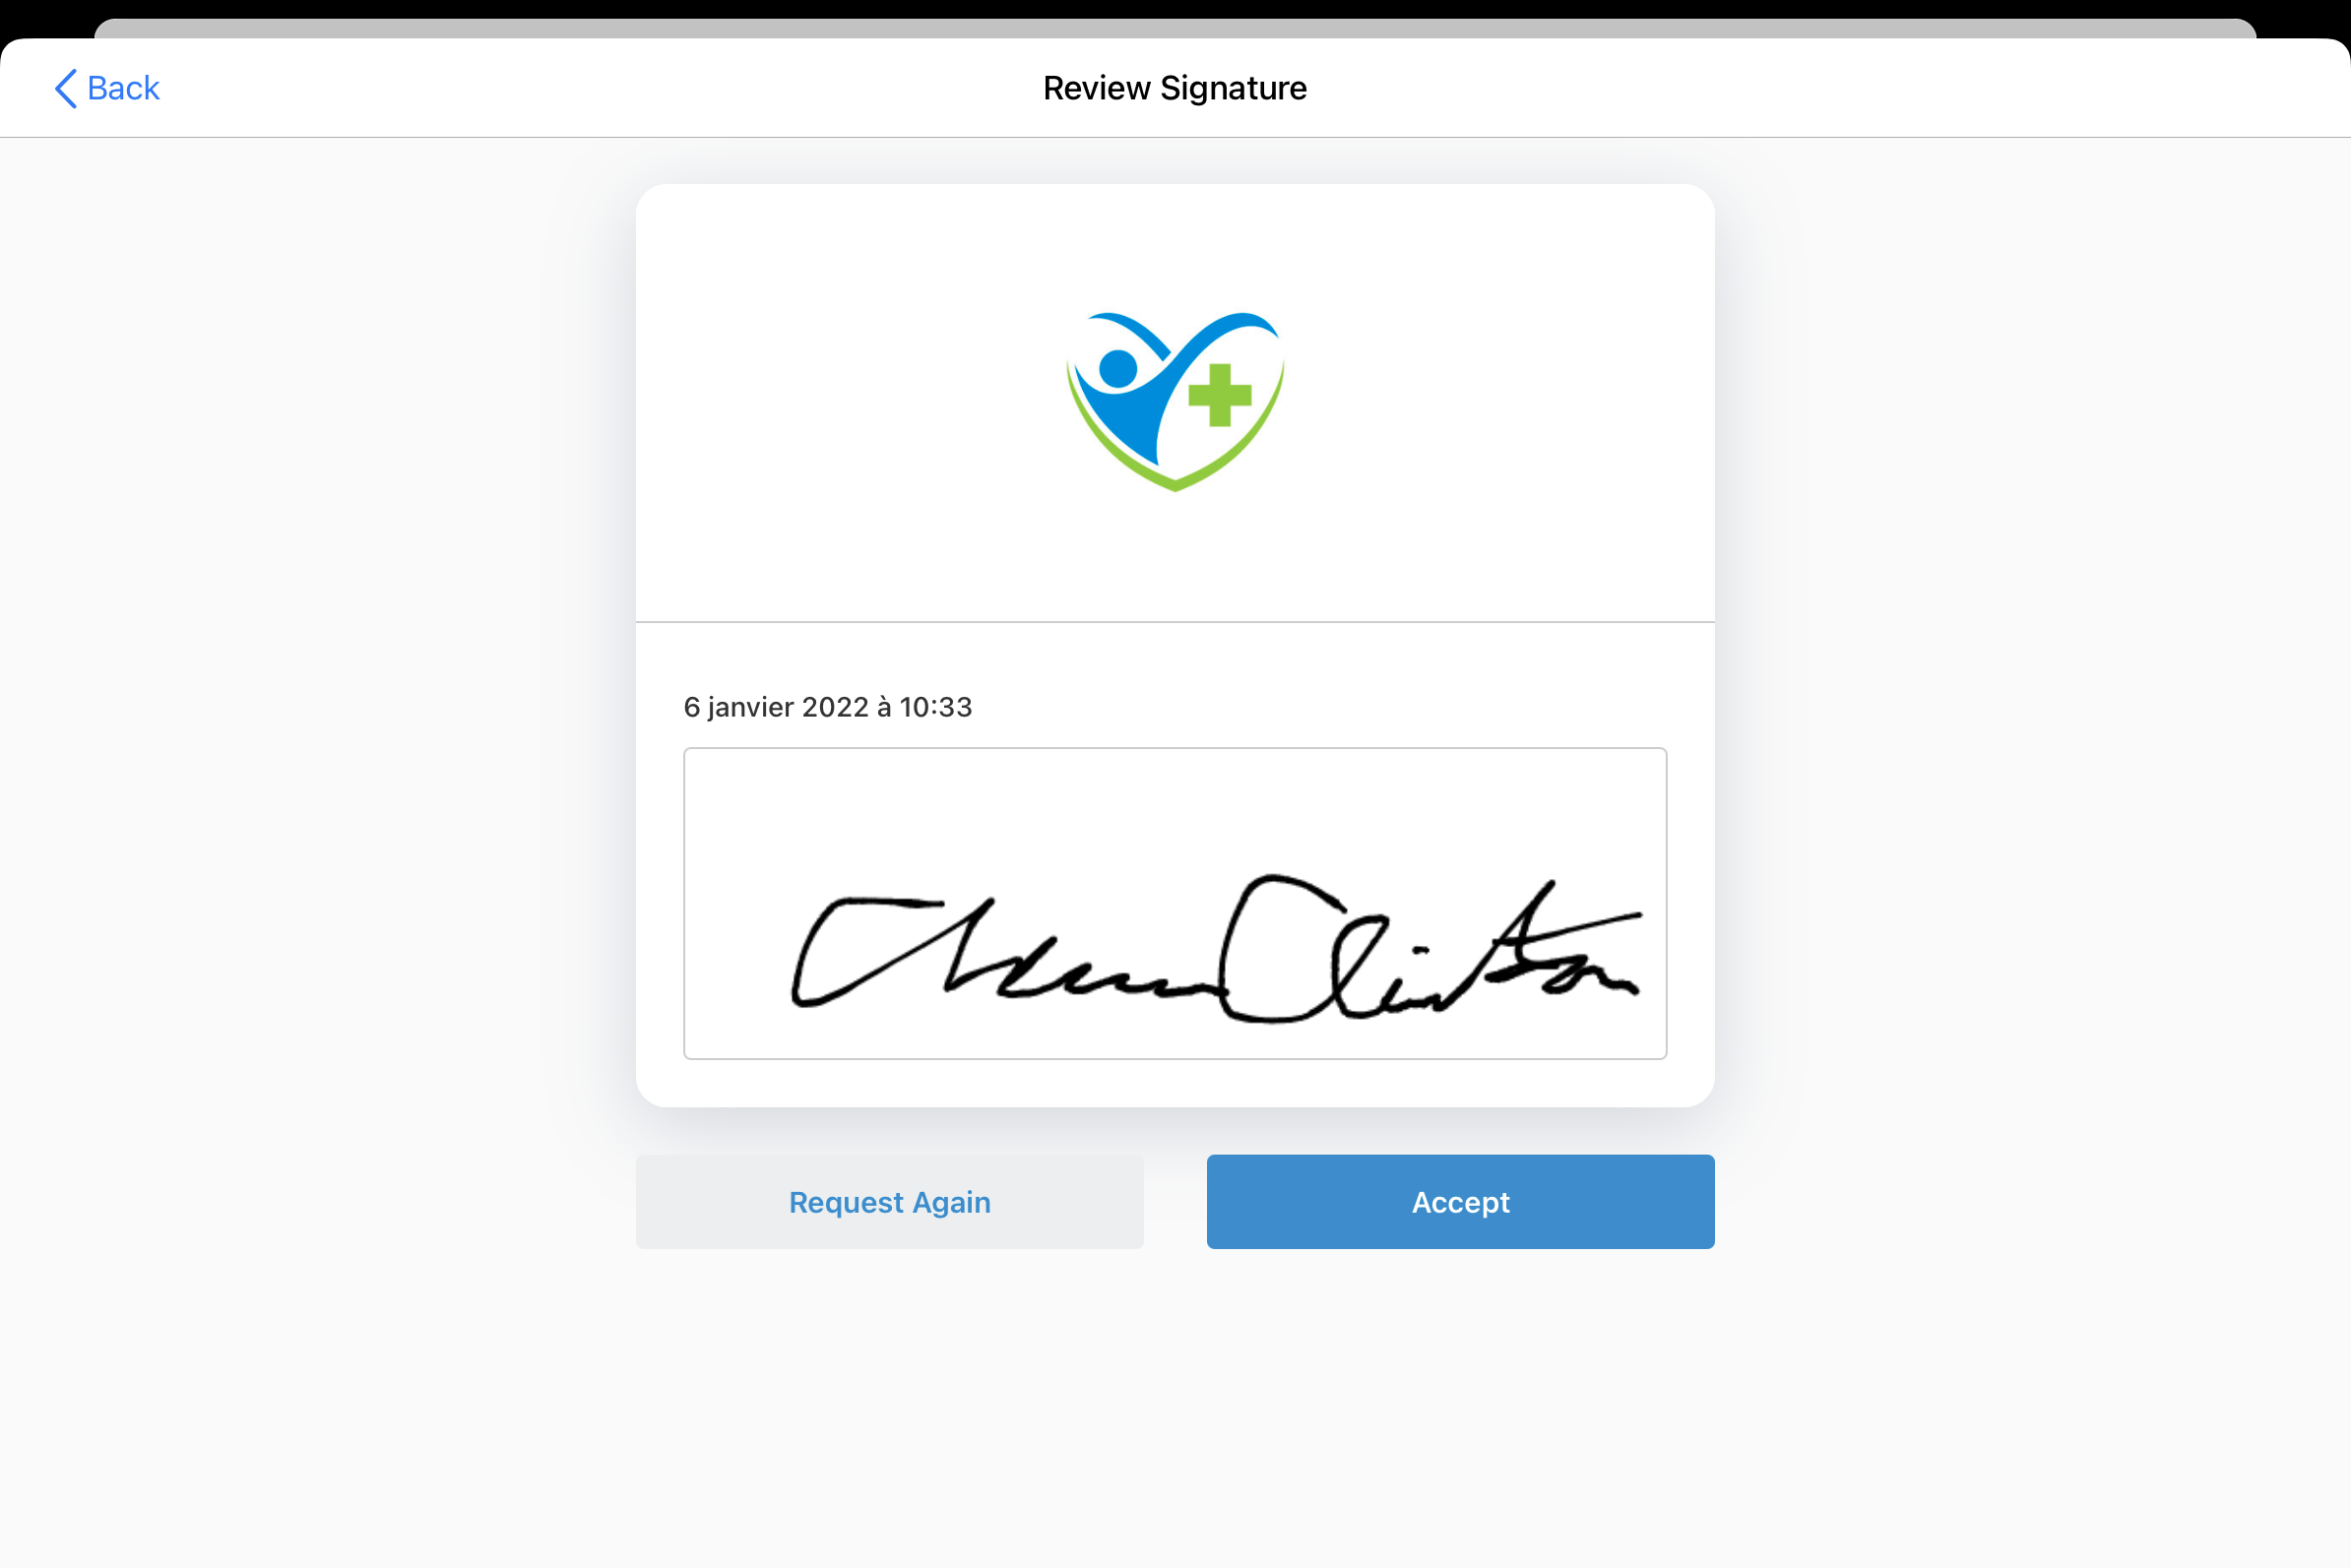
Accepting the signature generates a new Multichannel_Consent_vod record with the appropriate values. Depending on the signature capture method, the Signature_Captured_Share_Link_vod or Signature_Captured_QR_Code_vod check box is automatically selected on the Multichannel_Consent_vod record.
