

Hosting a Virtual Event using Engage
- Browser
- CRM Desktop (Windows)
- iPad
Event organizers can host virtual events using Engage. This enables event organizers to plan and schedule virtual events just as they would in-person events, enabling attendees to join the meeting using HCP Attendee apps.
Considerations
- Virtual event users are added as Engage user groups
- Attendees can join using any of the supported HCP apps, as well as the web client
- This feature is supported in Lightning for Events Management
- Virtual events are not supported on CRM Desktop (Mac)
Prerequisites
- Events Management
- Engage – Configure event organizers as meeting hosts
- Sending Engage Invitations via Approved Email
- Engage Attendance Tracking
Configuring Virtual Events
To configure virtual events:
-
Grant admins the following permissions:
Object
OLS
Record Type
Fields
FLS
EM_Event_vod
CRUD
n/a
- Assigned_Host_vod
- Engage_Webinar_vod
- Status_vod
- Webinar_Status_vod
- Webinar_Error_Message_vod
- Webinar_Error_DateTime_vod
Edit
EM_Event_Speaker_vod
CRUD
n/a
- Webinar_Panelist_URL_vod
- Webinar_Panelist_ID_vod
- First_Name_vod
- Last_Name_vod
- Speaker_Name_vod
- Engage_Provisioning_Status_vod
Edit
- Speaker_Formatted_Name_vod
Read EM_Speaker_vod
CRUD
n/a
- First_Name_vod
- Last_Name_vod
- Name
Edit
- Speaker_Formatted_Name_vod
Read EM_Attendee_vod
CRUD
n/a
- Webinar_Participant_URL_vod
- Webinar_Participant_ID_vod
- Engage_Provisioning_Status_vod
Edit
Remote_Meeting_vod
CRUD
Event_vod
- Assigned_Host_vod
- Description_vod
- Latest_Meeting_Start_Datetime_vod
- Meeting_Id_vod
- Meeting_Name_vod
- Meeting_Outcome_Status_vod
- Meeting_Password_vod
- Name
- Scheduled_DateTime_vod
- Scheduled_vod
- VExternal_Id_vod
Edit
Remote_Meeting_Attendee_vod
CRUD
Event_vod
- EM_Attendee_vod
- EM_Event_Speaker_vod
Edit
User
CRUD
n/a
- Remote_Meeting_Host_Id_vod
- Remote_Meeting_Host_Token_vod
Edit
-
Grant end users the following permissions:
Object
OLS
Record Type
Fields
FLS
EM_Event_vod
n/a n/a - Assigned_Host_vod
- Engage_Webinar_vod
- Status_vod
- Webinar_Status_vod
- Webinar_Error_Message_vod
- Webinar_Error_DateTime_vod
Edit
EM_Event_Speaker_vod
n/a n/a - Webinar_Panelist_URL_vod
- Webinar_Panelist_ID_vod
- First_Name_vod
- Last_Name_vod
- Speaker_Name_vod
Edit
- Speaker_Formatted_Name_vod
Read EM_Speaker_vod
n/a n/a - First_Name_vod
- Last_Name_vod
- Name
Edit
- Speaker_Formatted_Name_vod
Read EM_Attendee_vod
n/a n/a - Webinar_Participant_URL_vod
- Webinar_Participant_ID_vod
Edit
Remote_Meeting_vod
n/a Event_vod - Assigned_Host_vod
- Description_vod
- Latest_Meeting_Start_Datetime_vod
- Meeting_Id_vod
- Meeting_Name_vod
- Meeting_Outcome_Status_vod
- Meeting_Password_vod
- Name
- Scheduled_DateTime_vod
- Scheduled_vod
- VExternal_Id_vod
Edit
Remote_Meeting_Attendee_vod
n/a n/a - EM_Attendee_vod
- EM_Event_Speaker_vod
Edit
User
n/a n/a -
Remote_Meeting_Host_Id_vod
- Remote_Meeting_Host_Token_vod
Read
- Ensure all appropriate event organizers are licensed to use Engage and have all appropriate Group Meeting Permissions.
- Enable all values of the Webinar_Status_vod picklist on the EM_Event_vod object.
- Add the Webinar_Status_vod field to the appropriate EM_Event_vod object page layouts as read-only.
- Add the Schedule_Engage_vod button to the appropriate EM_Page_Layout_vod records.
- Add the Start_Webinar_vod button to the appropriate EM_Page_Layout_vod records.
Scheduling Virtual Events
To designate an event as a virtual meeting, navigate to the appropriate event and select the Schedule_Engage_vod button. This button displays for selection when the following requirements are met:
- The current user is a licensed Engage user
- The event’s Assigned_Host_vod field is blank
- The event’s Webinar_Status_vod field is Off_vod, Failed_vod or blank
After selecting Schedule Engage, participant URLs are generated for all existing Event Speakers and Event Attendees. Additionally, Webinar_Status_vod field updates to On_vod and creates a corresponding Remote_Meeting_vod record with a record type of Event_vod.
Inviting Attendees and Speakers to Virtual Events
Using the Engage Invitations via Approved Email feature, event organizers can select the Send button to send an Approved Email template to attendees and speakers.
To use an Approved Email Template:
- Ensure the Using Approved Email for Events Management feature is enabled.
-
Grant all users the following additional permissions:
Object
OLS
Record Types
Fields
FLS
Approved_Document_vod
RU
Remote_Meeting_vod
n/a
n/a
Sent_Email_vod
RU
Remote_Meeting_vod
Related_Transaction_ID_vod
Edit
Creating Speaker and Attendee Specific Templates
Approved Email templates sent as invitations to a virtual event can be made specific to either speakers or attendees, enabling greater flexibility when designing templates.
Email templates must have a type of Event Management Invite Template in Vault.
-
Set the Audience field to Speaker or Attendee. If this is left blank, the template is available for all audience types.
Templates sent to attendees should include the
{{EM_Attendee_vod__c.Webinar_Participant_URL_vod__c}}token. Templates sent to speakers should include the{{EM_Event_Speaker_vod__c.Webinar_Panelist_URL_vod__c}}token. Click tracking is not supported for Approved Emails containing URL tokens. - Align the Approved Email template to the desired Event Types and Event Topics using the Events Management Properties section.
Hosting a Virtual Event
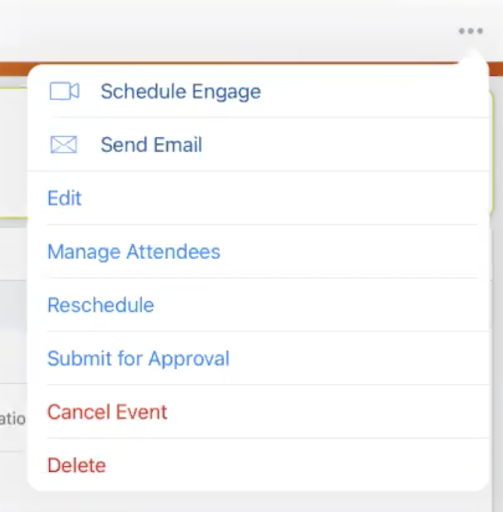
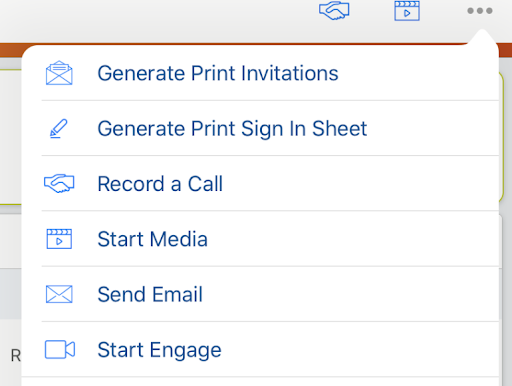
To start a virtual event via Engage, navigate to the event and select the Start_Webinar_vod button, Start Engage.
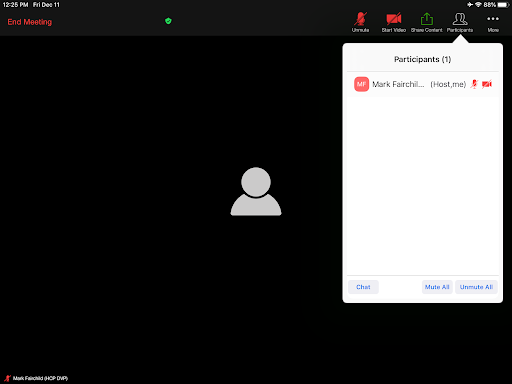
During the virtual event, hosts can perform the following actions:
- Mute/Unmute their own audio – If the host is not connected to the audio, the Join Audio button displays. Hosts can select this button to choose how to join the virtual event audio.
- Start/Stop their video
- Share Content – The types of content that can be shared varies based on the platform:
- iPad
- Screen
- Bookmark
- Photos
- Browser
- Desktop
-
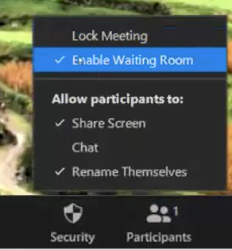
Security – This button only displays when the event is hosted on the Browser platform and enables the following actions:
The options are available on the iPad by selecting the More menu.
- Lock Meeting – Disables additional attendees from joining the event
- Enable Waiting Room – See the Waiting Room section for more information
- Allow attendees to share their screen
- Allow Chat
- Allow attendees to rename themselves.
- Participants – Displays the video and audio status of each attendee. Additionally, if the attendee selected the Raise Hand button, a raised hand icon displays next to their name. From this list, hosts can perform the following actions:
- Mute/Unmute an attendee
- Remove from event
- Ask to Start Video/Stop Video
- Chat – Does not display if chat is disabled
- Mute/Unmute all attendees
- End Meeting – Displays the message "Do you want to end the meeting for all participants?"
Joining a Virtual Event as an Attendee
Attendees of virtual events can join using any of the supported HCP apps.
Using the Waiting Room
The Waiting Room is a feature that enables the host to prevent attendees or speakers from entering a meeting before the organizer is ready.
When an attendee or speaker enters the event, a message displays to the host.
To let attendees into the meeting:
- Select the Participants button.
- Select the appropriate attendee.
- Select Admit.
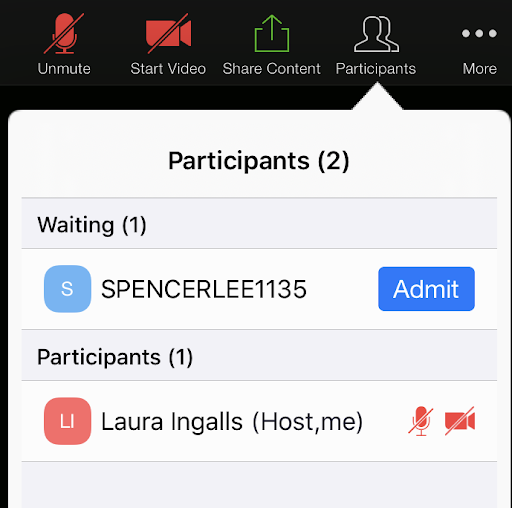
Optionally, the host can select Admit All to admit all waiting attendees.
The Waiting Room is automatically enabled for all meetings. Event organizers can disable the waiting room by selecting Security, then deselecting Enable Waiting Room.
On the iPad platform, Enable Waiting Room is in the More menu of the Meeting Controls Menu.
