

Using Custom Display Elements
Content creators in MyInsights Studio can create detailed and comprehensive MyInsights content with integrated data from CRM and external sources. Developers can create and import custom code into MyInsights Studio as custom display elements, including code created by third party developers.
Developers can manage custom display elements in a distribution channel associated with their Studio Domain. This Studio Domain becomes the source domain for the distribution channel, where developers can test unpublished versions of custom display elements. Developers must request a distribution channel by submitting a support ticket. A source domain can have multiple distribution channels, but each distribution channel can only be associated with one source domain. Users with access to the source domain can upload, test, and publish new custom display elements and new versions of existing elements to a distribution channel.
However, published custom display elements can be available to multiple customer domains associated with the distribution channel. Content creators with access to a customer domain can use any available custom display element in their MyInsights content pages.
Packaging Zip Files for Custom Display Elements
To create a custom display element, developers must upload a zip file, containing only the following, to the distribution channel:
- A src directory containing a JavaScript file defining a web component
- A custom element manifest named custom-elements.json defining the element properties. The manifest must include the file path to the JavaScript file and the HTML tag name defined in the JavaScript file. The tag name must be unique. The properties are the fields displayed in the edit modal when adding or editing the custom display element in a MyInsights page layout. The following field data types are available:
- boolean
- number
- string
- StudioDate – Defines a date field formatted for MyInsights Studio. Uses an ISO6801 formatted string.
- StudioDateTime – Defines a datetime field formatted for MyInsights Studio. Uses an ISO6801 formatted string in the UTC timezone.
- Array<{list of fields}> – Defines a list of fields and their types in the format field: type; field: type. The types must be one of the other five supported data types.
Developers can define the element properties in the comments of the JavaScript file and automatically generate the custom element manifest using the custom elements manifest analyzer tool.
- An optional _locales directory containing subdirectories for each appropriate locale. Each subdirectory contains only a messages.json file with the translations for the label for each property defined in the manifest.
The zip file must not exceed 50 MB. To view the packaging structure and sample content files, download the example zip file.
Managing Custom Display Elements
Developers can create and upload new versions of custom display elements for specific distribution channels associated with their source domain.
For example, the Veeva Link team adds publication details to their HCP profiles. Dani Johnson, a Veeva Link developer, creates a custom display element that takes a list of HCP accounts as input and outputs the most recent publication for each account. She also creates an updated version of an existing custom display element that summarizes an account’s clinical trial participation data to include publications related to each clinical trial. She tests the new elements in MyInsights pages created in the Veeva Link domain to ensure data displays as expected.
Creating Custom Display Elements
To create a custom display element:
- Select the Distribution Channels tab on the home page.
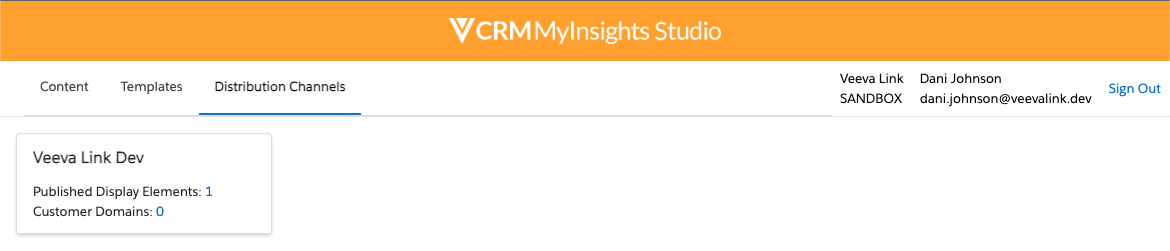
- Select the appropriate distribution channel to display the overview page.
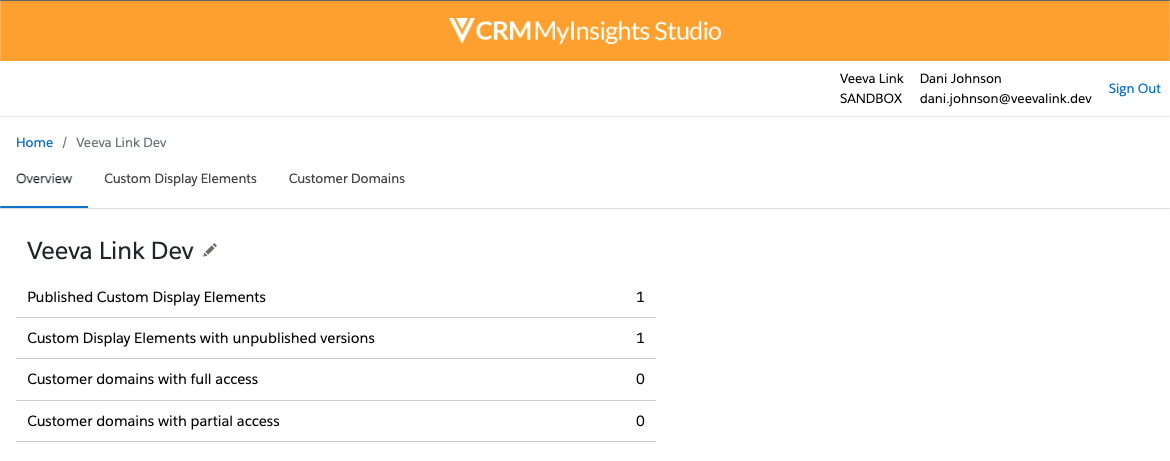
- Select the Custom Display Elements tab to display the list of all published and unpublished custom display elements.
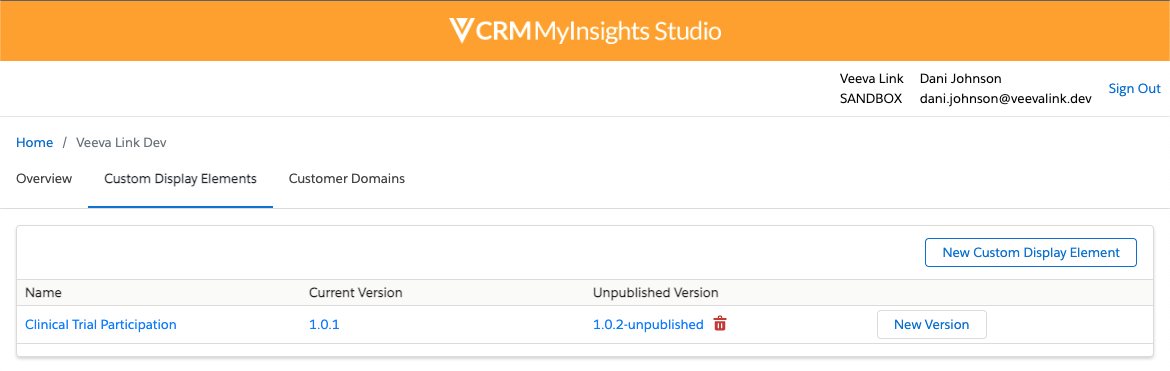
- Select New Custom Display Element.
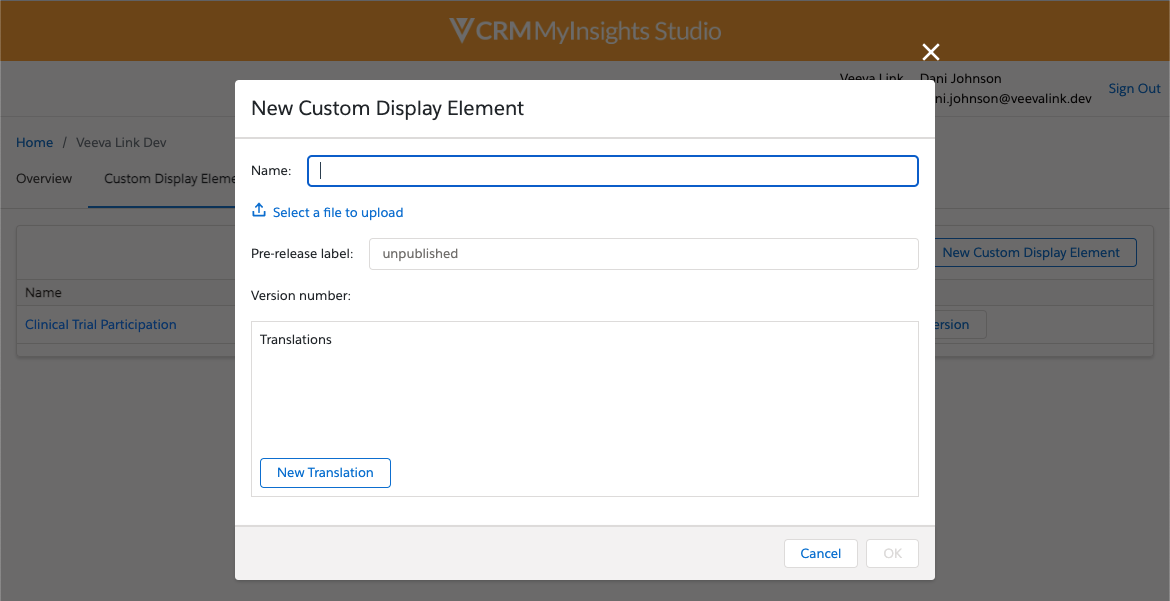
- Enter the Name of the new element.
- Enter a Pre-release Label for the unpublished element if desired. This label is appended to the version number. The default value is unpublished. See Semantic Versioning documentation for more information about versions numbers and pre-release labels.
- Select the Upload button to upload the zip file for the new element.
- Select New Translation to add a translation of the name of the custom display element, if applicable.
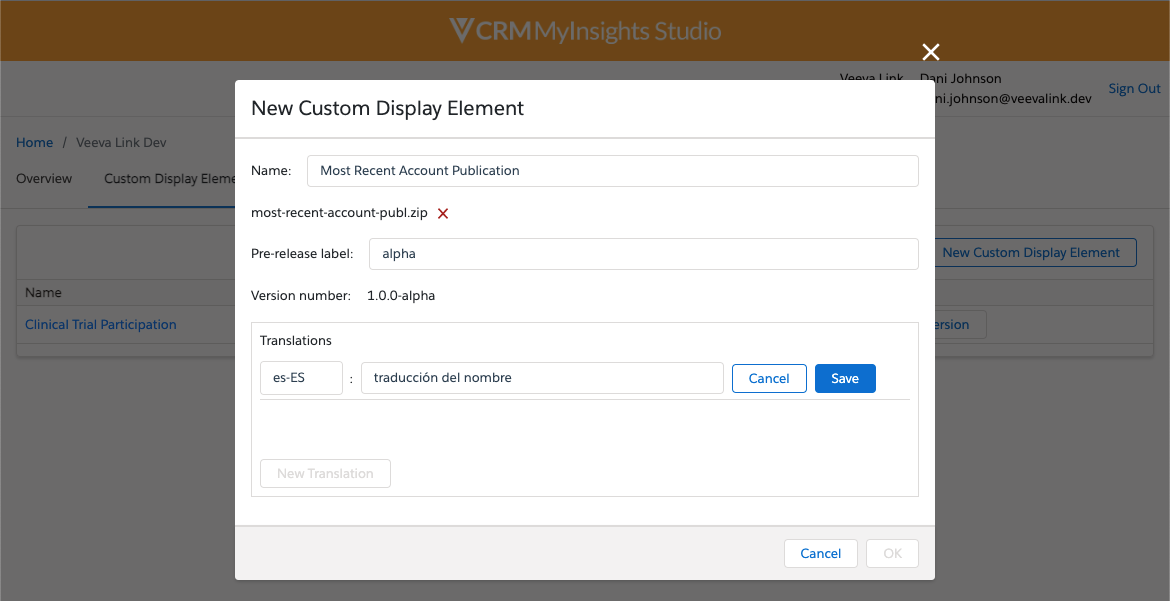
- Select OK.
Uploading New Versions of Custom Display Elements
To upload a new version of an existing custom display element:
- Select the Distribution Channels tab on the home page.
- Select the appropriate distribution channel to display the overview page.
- Select the Custom Display Elements tab to display the list of all published and unpublished custom display elements.
- Select New Version for the appropriate element. Alternatively, select the Name of the appropriate element, then select New Version.
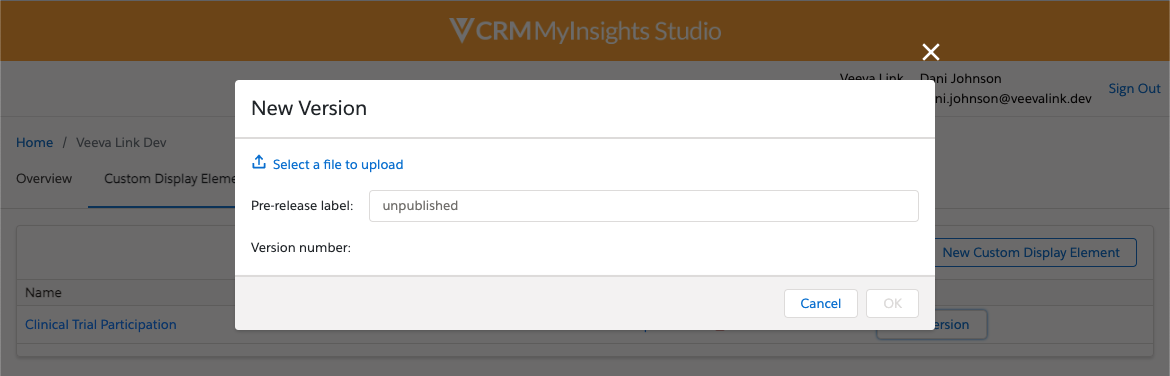
- Select the Upload button to upload the zip file for the new version. The zip file must not exceed 50 MB.
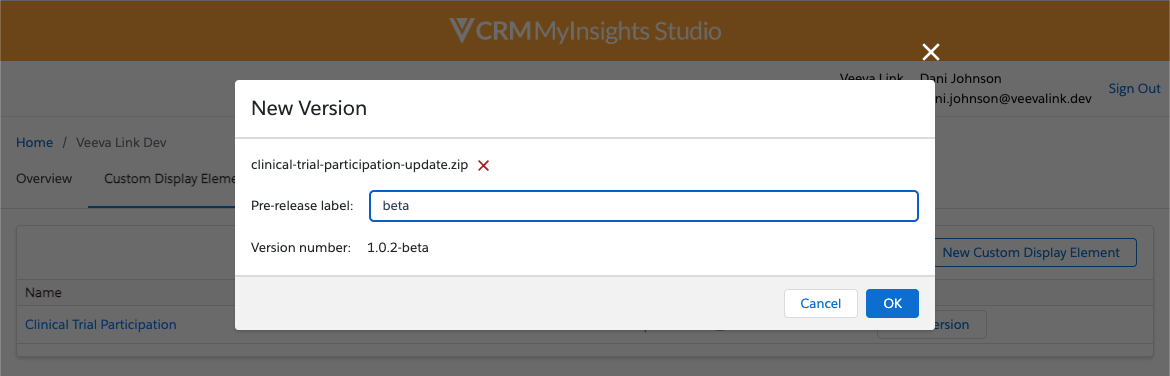
- Select Save.
The format of the version number for a custom display element is {major version}.{minor version}.{patch version}. When a new version of an element is uploaded, the version number is updated based on the backwards compatibility of any updates to the defined properties:
- If two versions only have different patch version numbers, then they have the same properties
- If two versions have different minor version numbers, then they have different properties and the newer version is backwards compatible with the properties of the older one
- If two versions have different major version numbers, then they have different properties and the newer version is not backwards compatible
Deleting Unpublished Versions of Custom Display Elements
To delete an unpublished version of a custom display element:
- Select the Distribution Channels tab on the home page.
- Select the appropriate distribution channel to display the overview page.
- Select the Custom Display Elements tab to display the list of all published and unpublished custom display elements.
- Select the trash can button beside the Unpublished Version of the appropriate element. Alternatively, select the Unpublished Version of the appropriate element, then select Delete.
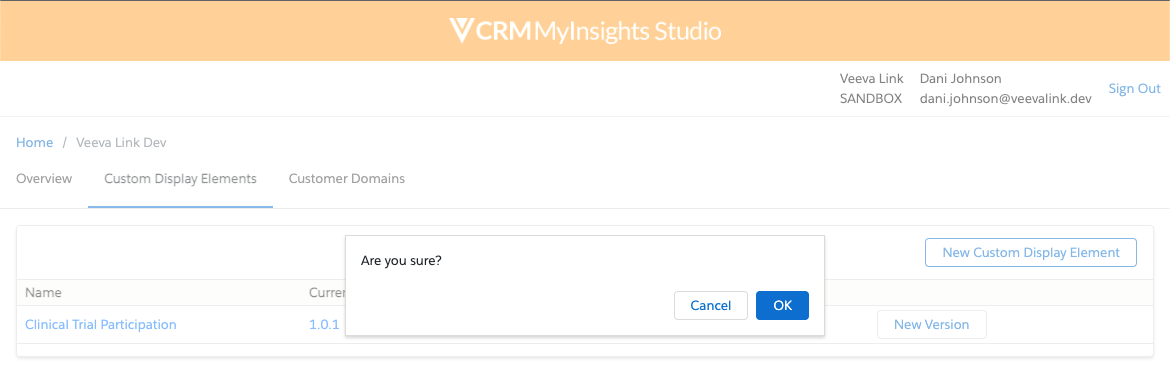
- Select OK to confirm.
If the custom display element does not have any published versions, the entire element is deleted.
Testing Custom Display Elements
Before publishing a custom display element, developers can test it in MyInsights pages created in the source domain to ensure it displays the data as expected.
To test a custom display element:
- Create or edit a MyInsights page from the home page. See Creating MyInsights Pages Using MyInsights Studio for more information.
- Select the Data Palette tab and add data elements. See Adding Data for MyInsights Pages for more information.
- Select the Pages tab to define the page layout.
- Drag and drop the appropriate custom display element to the page layout. See Adding and Previewing Display Elements for more information.
- Deploy the page to CRM to ensure the element displays correctly. See Deploying MyInsights Pages to Veeva CRM for more information.
Publishing Custom Display Elements
Developers can publish versions of a custom display element to associated customer domains to allow content creators in MyInsights Studio to use the element in deployable content.
For example, Dani Johnson finishes testing the new custom display element for most recent account publications and the new version of the element summarizing clinical trial participation data. She publishes both elements for use in customer domains.
To publish a custom display element:
- Select the Distribution Channels tab on the home page.
- Select the appropriate distribution channel to display the overview page.
- Select the Custom Display Elements tab to display the list of all published and unpublished custom display elements.
- Select the Unpublished Version of the appropriate element.
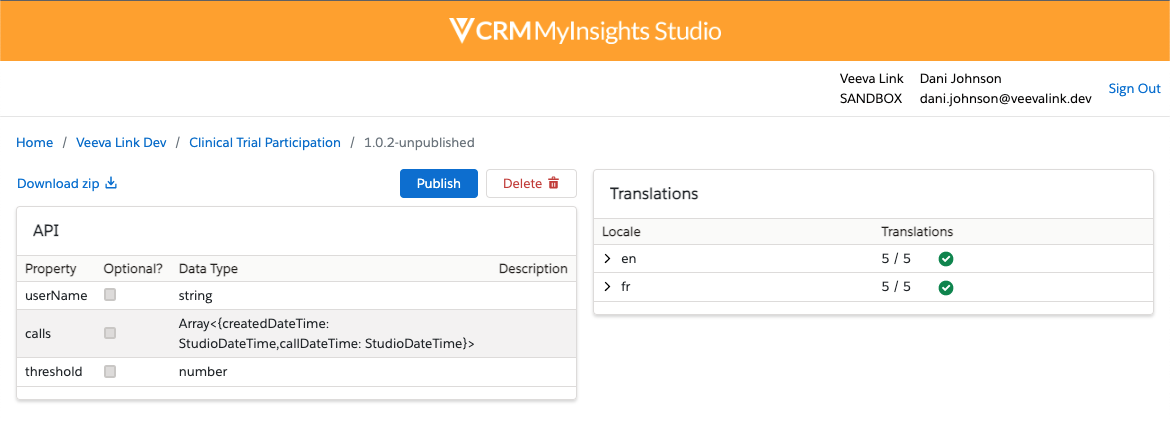
- Select Publish.
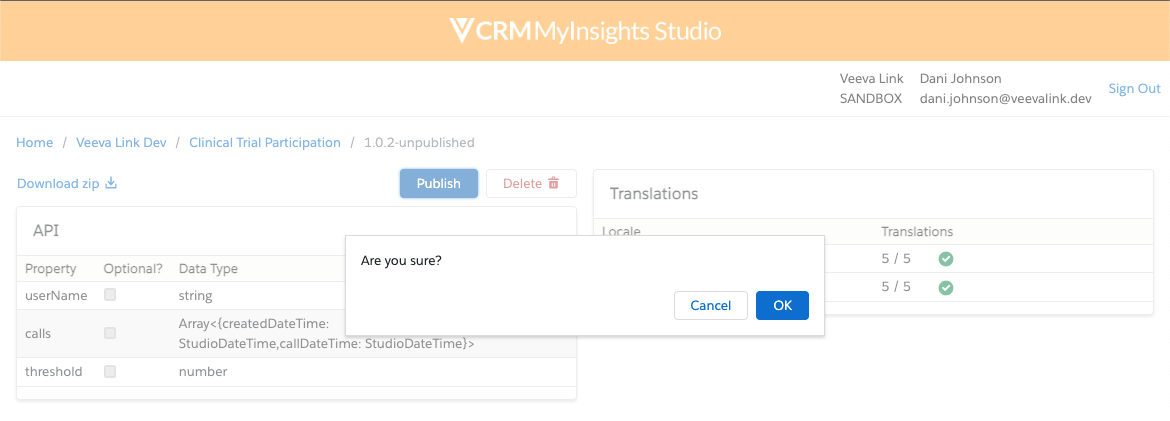
- Select OK.
Once a version of a custom display element is published, that version cannot be deleted. Developers must upload a new version of the element to update it.
Managing Customer Domains
A customer domain can be associated with multiple distribution channels, allowing content creators to use any custom display elements available from any of those channels. Developers can manage the list of customer domains with access to their distribution channel.
Adding Customer Domains
To allow content creators for a customer to use published custom display elements in MyInsights page layouts, developers can add their Studio Domain as a customer domain to the distribution channel and control the domain’s access to the available custom display elements.
For example, Verteo BioPharma subscribes to Veeva Link for HCP profiles and their Studio Domain, verteo, is a customer domain in the Veeva Link distribution channel with full access. Chris Carter, a content creator for Verteo BioPharma, has a MyInsights page using the older version of the custom display element summarizing clinical trial participation data. He updates the element to the new version, which is backwards compatible with the existing data, and adds the new element to display a list of each account’s most recent publication. He saves and deploys the updated page to Verteo BioPharma’s field users.
To add a customer domain to a distribution channel:
- Select the Distribution Channels tab on the home page.
- Select the appropriate distribution channel to display the overview page.
- Select the Customer Domains tab to display the list of all associated domains.
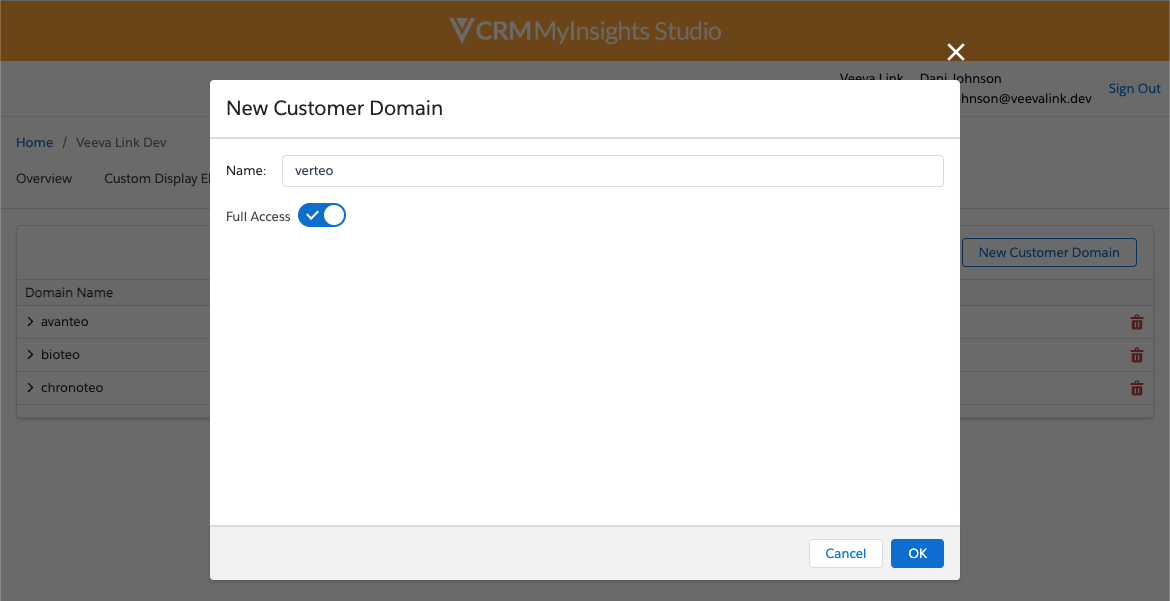
- Select New Customer Domain.
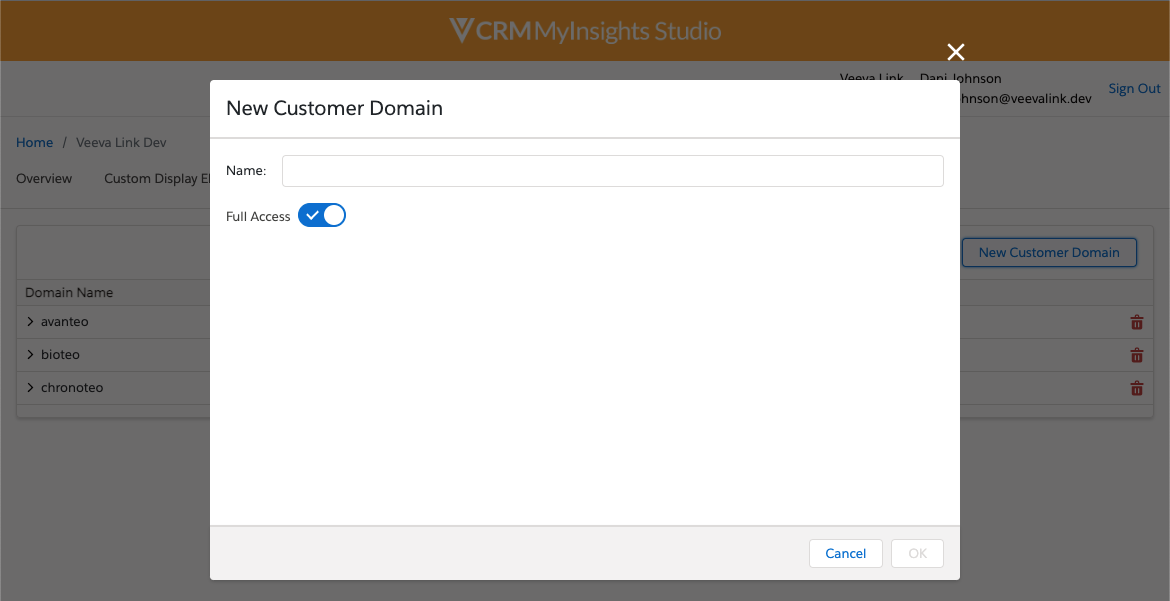
- Enter the Name of the domain. This must be the exact domain name of the customer domain.
- Select the Full Access toggle to define the access level for the domain. Full Access is enabled by default. The access levels are defined as follows:
- Full Access – All published versions of existing and future custom display elements are available
- Allow Access – Defines the partial access level for a specific custom display element. The following options are available for the Up to Version field:
- All – All published versions of this custom display element are available
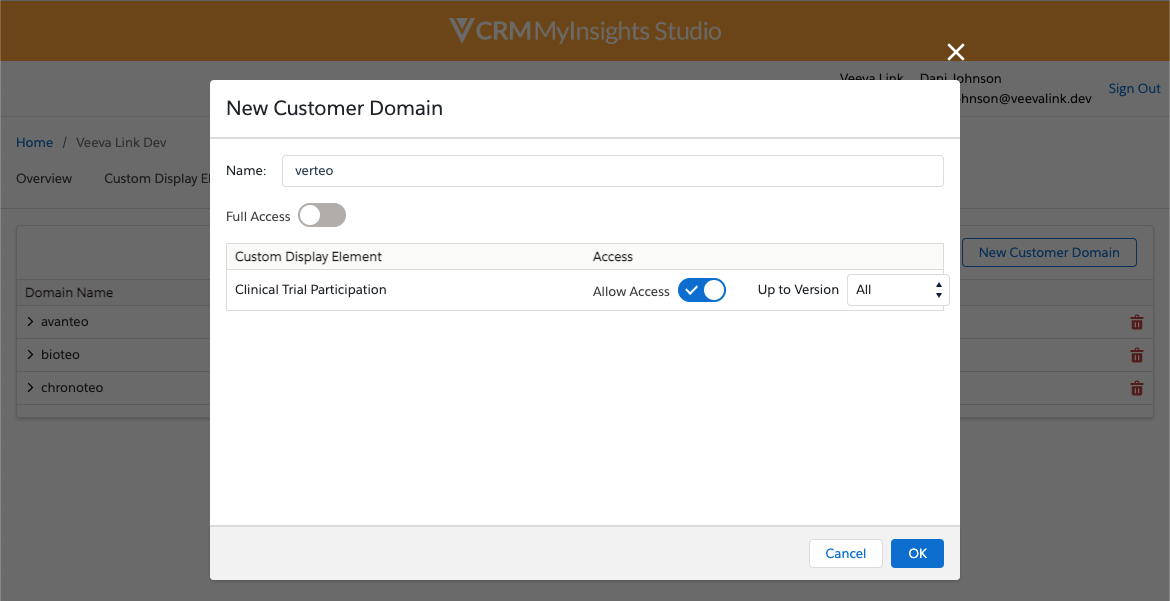
- {version number} – Published versions earlier than and including the selected version of this custom display element are available

- Full Access – All published versions of existing and future custom display elements are available
- Select OK.
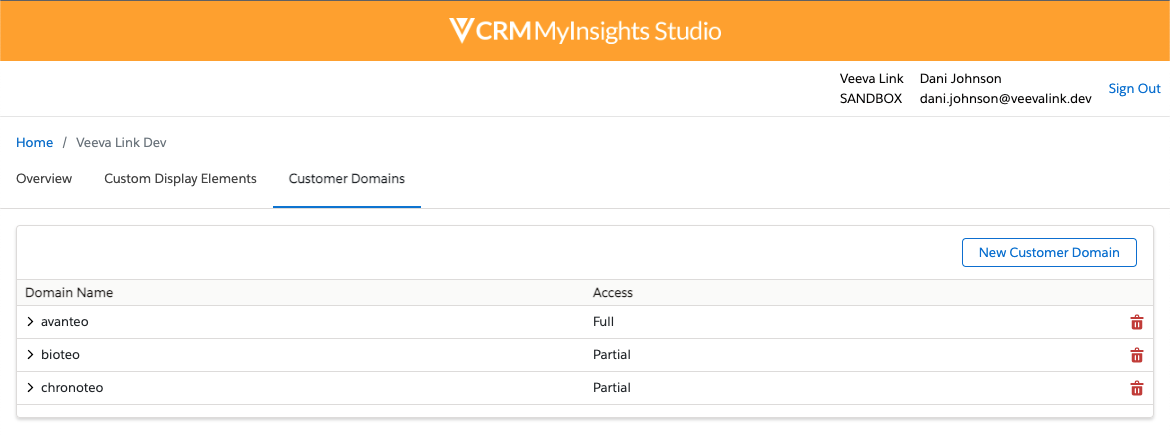
For example, Veeva Link’s distribution channel has a custom display element named Summarize Clinical Trials with published versions 1.0.0 and 2.0.0. The channel has three customer domains: Avanteo, Bioteo, and Chronoteo.
- Avanteo has Full Access
- Bioteo has Allow Access up to version All because they only subscribe to the existing elements used in their MyInsights content
- Chronoteo has Allow Access up to the latest version of Summarize Clinical Trials (2.0.0) because they have not renewed their subscription
Dani Johnson uploads a new version of Summarize Clinical Trials (version 2.0.1) and publishes it. Avanteo and Bioteo have access to the new version, but Chronoteo does not. Dani then creates and publishes a custom display element named Highlight Publications (version 1.0.0). Avanteo has access to this new element, but Bioteo and Chronoteo do not.

Developers can manage the access level for each customer domain from the Customer Domains tab.
Removing Customer Domains
When a customer domain no longer needs access to a distribution channel, developers can remove the domain.
For example, Verteo BioPharma ends their subscription to Veeva Link and should no longer have access to Veeva Link’s custom display elements. Dani Johnson removes verteo, Verteo BioPharma’s Studio Domain, from the Veeva Link distribution channel. When Chris Carter edits the page layout for a MyInsights Studio page, he views the list of distribution channels available and Veeva Link’s distribution channel no longer displays.
To remove a customer domain from a distribution channel:
- Select the Distribution Channels tab on the home page.
- Select the appropriate distribution channel to display the overview page.
- Select the Customer Domains tab to display the list of all associated domains.
- Select the drop-down arrow beside the appropriate customer domain name.
- Select the trash can button.
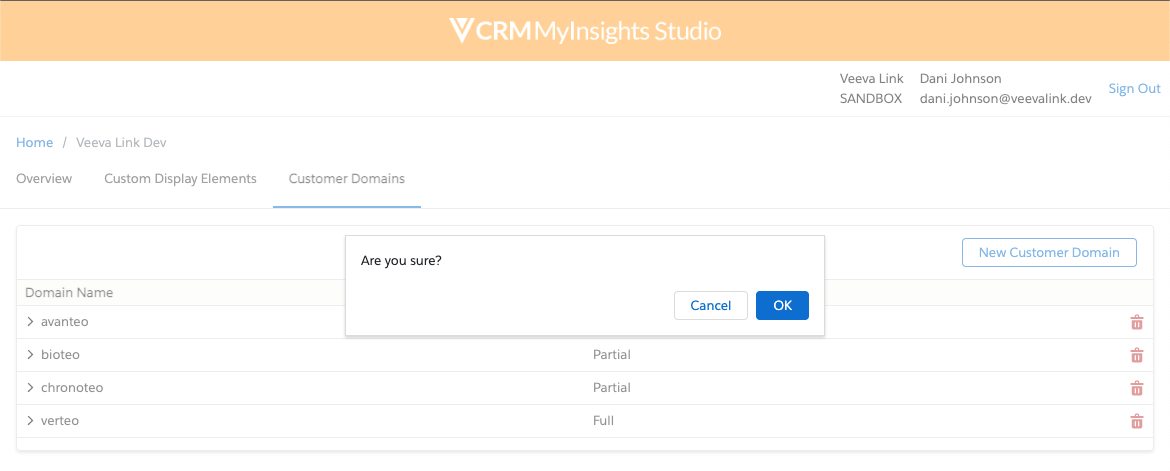
- Select OK to confirm.
Using Custom Display Elements in MyInsights Layouts
When defining the page layout for a MyInsights page, the list of available distribution channels and all their published custom display elements and versions displays. Content creators can select the appropriate published version of a custom display element before adding it to the page layout and can optionally include a description to help identify the element. See Adding and Previewing Display Elements for more information about using display elements in page layouts.
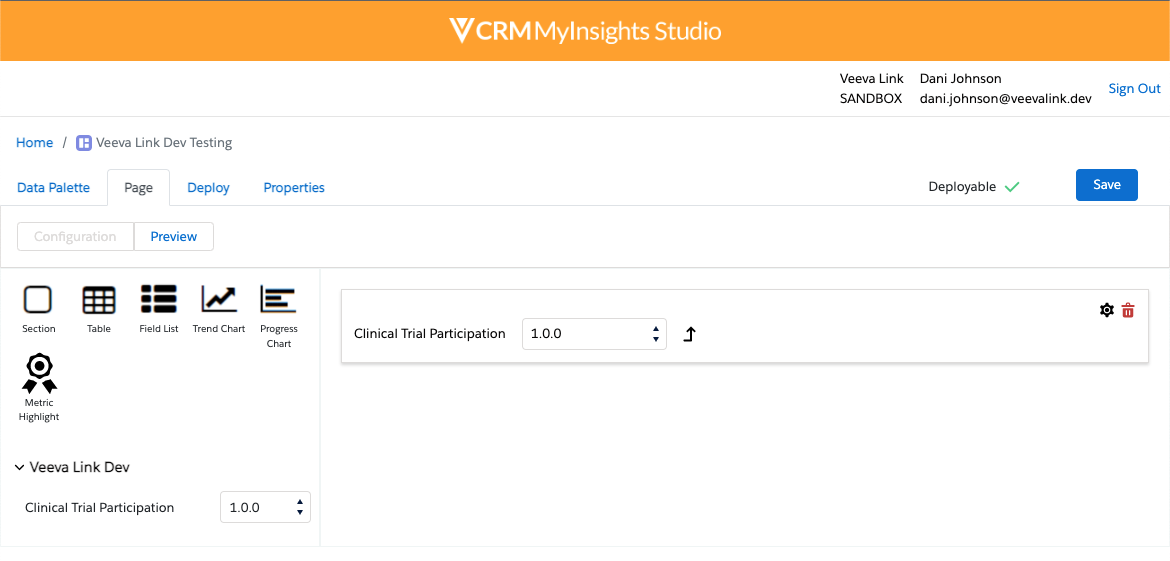
When a custom display element is placed on a page layout, the version number displays next to the name and an update icon displays next to the version number if there is a newer version of the element. Content creators can compare version numbers to understand if the newer version is backwards compatible with the existing data. See Uploading New Versions of Custom Display Elements for more information about versioning.
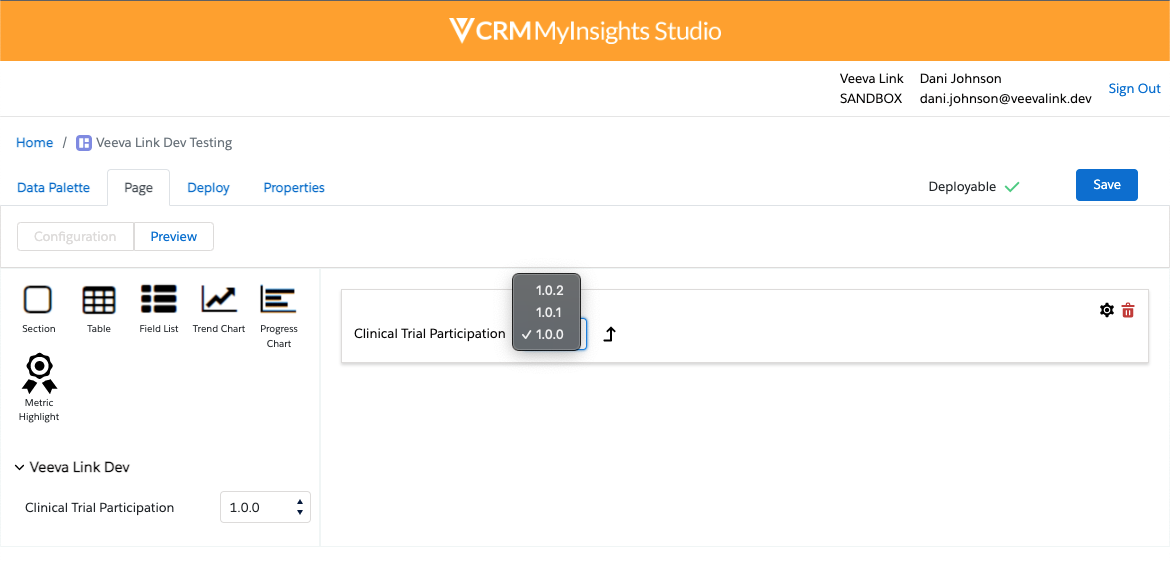
To update the element, select the new version from the version number drop-down menu.
