

Managing Push Notifications
- iPad
- iPhone
A push notification creates a popup, or toast, on mobile devices to notify the user of an activity. Users can receive push notifications from the Veeva CRM app for important, actionable, or time-sensitive alerts, for example, cycle plan reminders. This allows users to be informed when important information becomes available without needing to launch the Veeva CRM app to check for new updates manually. Users can select push notifications to automatically launch Veeva CRM and view their notifications in the Notification Center on the home screen.
Considerations
- Devices must have an internet connection in order to receive push notifications
- Customers using their own certificates to sign into Veeva CRM on iOS must have a valid certificate to use Push Notifications in Veeva CRM. See Generating Push Notification Certificates for more information.
Configuring Push Notifications
To configure push notifications:
- Ensure the My Alerts component is fully configured, including all VMOCs for each device receiving the push notifications.
- Enable a Full Sync VMOC for the Mobile_Device_vod object.
-
Grant admins the following permissions:
Object
OLS
Record Type
Field
FLS
Alert_vod
CRUD
n/a
-
Push_Notify_APNS_Status_vod
-
Last_Push_Notify_APNS_Datetime_vod
Edit
Alert_Profile_vod
CRUD
n/a
Last_Push_Notify_APNS_Datetime_vod
Edit
Alert_User_Action_vod
CRUD
n/a
Last_Push_Notify_APNS_Datetime_vod
Edit
Mobile_Device_vod
CRUD
iOS_vod
-
Active_vod
-
App_Deleted_Datetime_vod
-
AppID_vod
-
Device_vod
-
Last_App_Version_vod
-
Last_Connected_Datetime_vod
-
Last_Device_Model_vod
-
Last_OS_Version_vod
-
Log_Out_Datetime_vod
-
Mobile_ID_vod
-
Push_Company_Alerts_Disabled_vod
-
Push_Notifications_Enabled_vod
-
User_vod
Edit
User
CRUD
n/a
Mobile_CRM_App_Access_Disabled_vod
Edit
-
-
Grant end users the following permissions:
Object
OLS
Record Type
Field
FLS
Mobile_Device_vod
CRU
iOS_vod
-
Active_vod
-
App_Deleted_Datetime_vod
-
AppID_vod
-
Device_vod
-
Last_App_Version_vod
-
Last_Connected_Datetime_vod
-
Last_Device_Model_vod
-
Last_OS_Version_vod
-
Log_Out_Datetime_vod
-
Mobile_ID_vod
-
Push_Company_Alerts_Disabled_vod
-
Push_Notifications_Enabled_vod
-
User_vod
Edit
User
R
n/a
Mobile_CRM_App_Access_Disabled_vod
Read
-
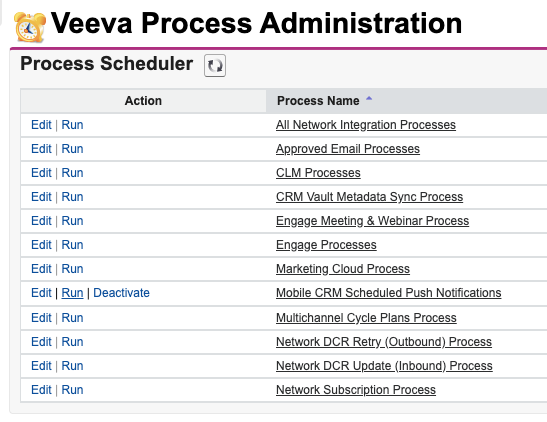
- Navigate to the Veeva Process Scheduler.
- Select the Mobile CRM Scheduled Push Notifications process to display the Mobile CRM App Administration page.
- Select Edit in the Veeva CRM Connection Management section.
- Add the appropriate multichannel integration user credentials.
- Select Validate Credentials to confirm credentials are accepted.
Testing Push Notifications
Admins can test push notifications in sandbox orgs to ensure notifications are correctly sent and received by end users.
To add a test user:
- Navigate to Custom Settings > Mobile CRM Settings > Manage.
- Select Edit to modify the test user in the Default Organization Level Value section.
-
Enter the Salesforce username of the test user in the Push_Notification_Test_User_vod field.
This field supports a maximum of 255 characters. To use a username exceeding 255 characters, populate a Veeva Message with the username and enter the Veeva Message in Push_Notification_Test_User_vod field. To set multiple users, use a double semicolon delimited list of usernames.
Setting Up Push Notifications
Admins can choose to send push notifications for specific alerts.
To set up push notifications for an alert:
-
Navigate to the appropriate Alert_vod record. Ensure the following fields are populated:
- Activation_Date_vod – Defines the date after which the process scheduler can send notifications for the alert
- Expiration_Date_vod – Defines the date after which the process scheduler cannot send notifications for the alert and the alert does not display in My Alerts
The year for the expiration date must be before 2038. - Alert_Profile_vod – Defines which user profiles receive notifications for the alert
- Set the Push_Notify_APNS_Status_vod field to Queued_vod.
After the scheduler successfully sends a push notification for an alert, the Push_Notify_APNS_Status_vod field on the Alert_vod record automatically updates to Processed_vod. The Last_Push_Notify_APNS_Datetime_vod updates to the time the scheduler ran.
Editing the Push_Notify_APNS_Status_vod field back to Queued_vod does not resend the push notification for an alert. To send another push notification for the same alert, admins must clone the Alert_vod record or create a new Alert_vod record with the same details.
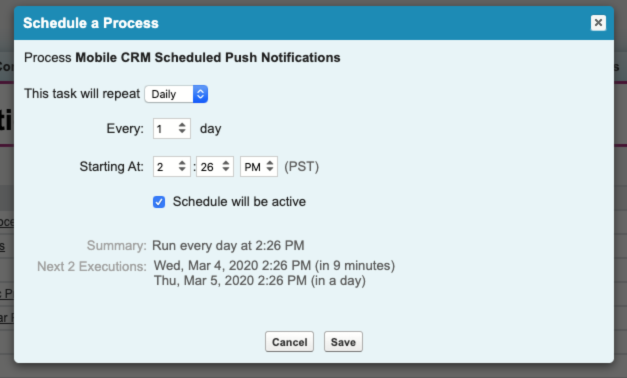
Scheduling Push Notifications
Admins can schedule push notifications via the Veeva Process Scheduler.
To schedule push notifications:
- Navigate to the Veeva Process Scheduler.
- Select Edit for the Mobile CRM Scheduled Push Notifications process.
- Enter the appropriate scheduling information. See Process Scheduler for more information.
- Select Save.
Immediately Sending Push Notifications
Admins can send push notifications immediately via the Veeva Process Scheduler.
To send push notifications immediately:
- Navigate to the Veeva Process Scheduler.
-
Select Run for the Mobile CRM Scheduled Push Notifications process.
- Select Run in the confirmation popup.
Sending Push Notifications to Individual Users
Admins can send specific push notifications to individual users.
To send a push notification to an individual user:
- Navigate to the appropriate Alert_vod record.
- Select New in the Alert User Actions related list to create an Alert_User_Action_vod record.
- Select the appropriate user to receive the push notification in the User_vod field.
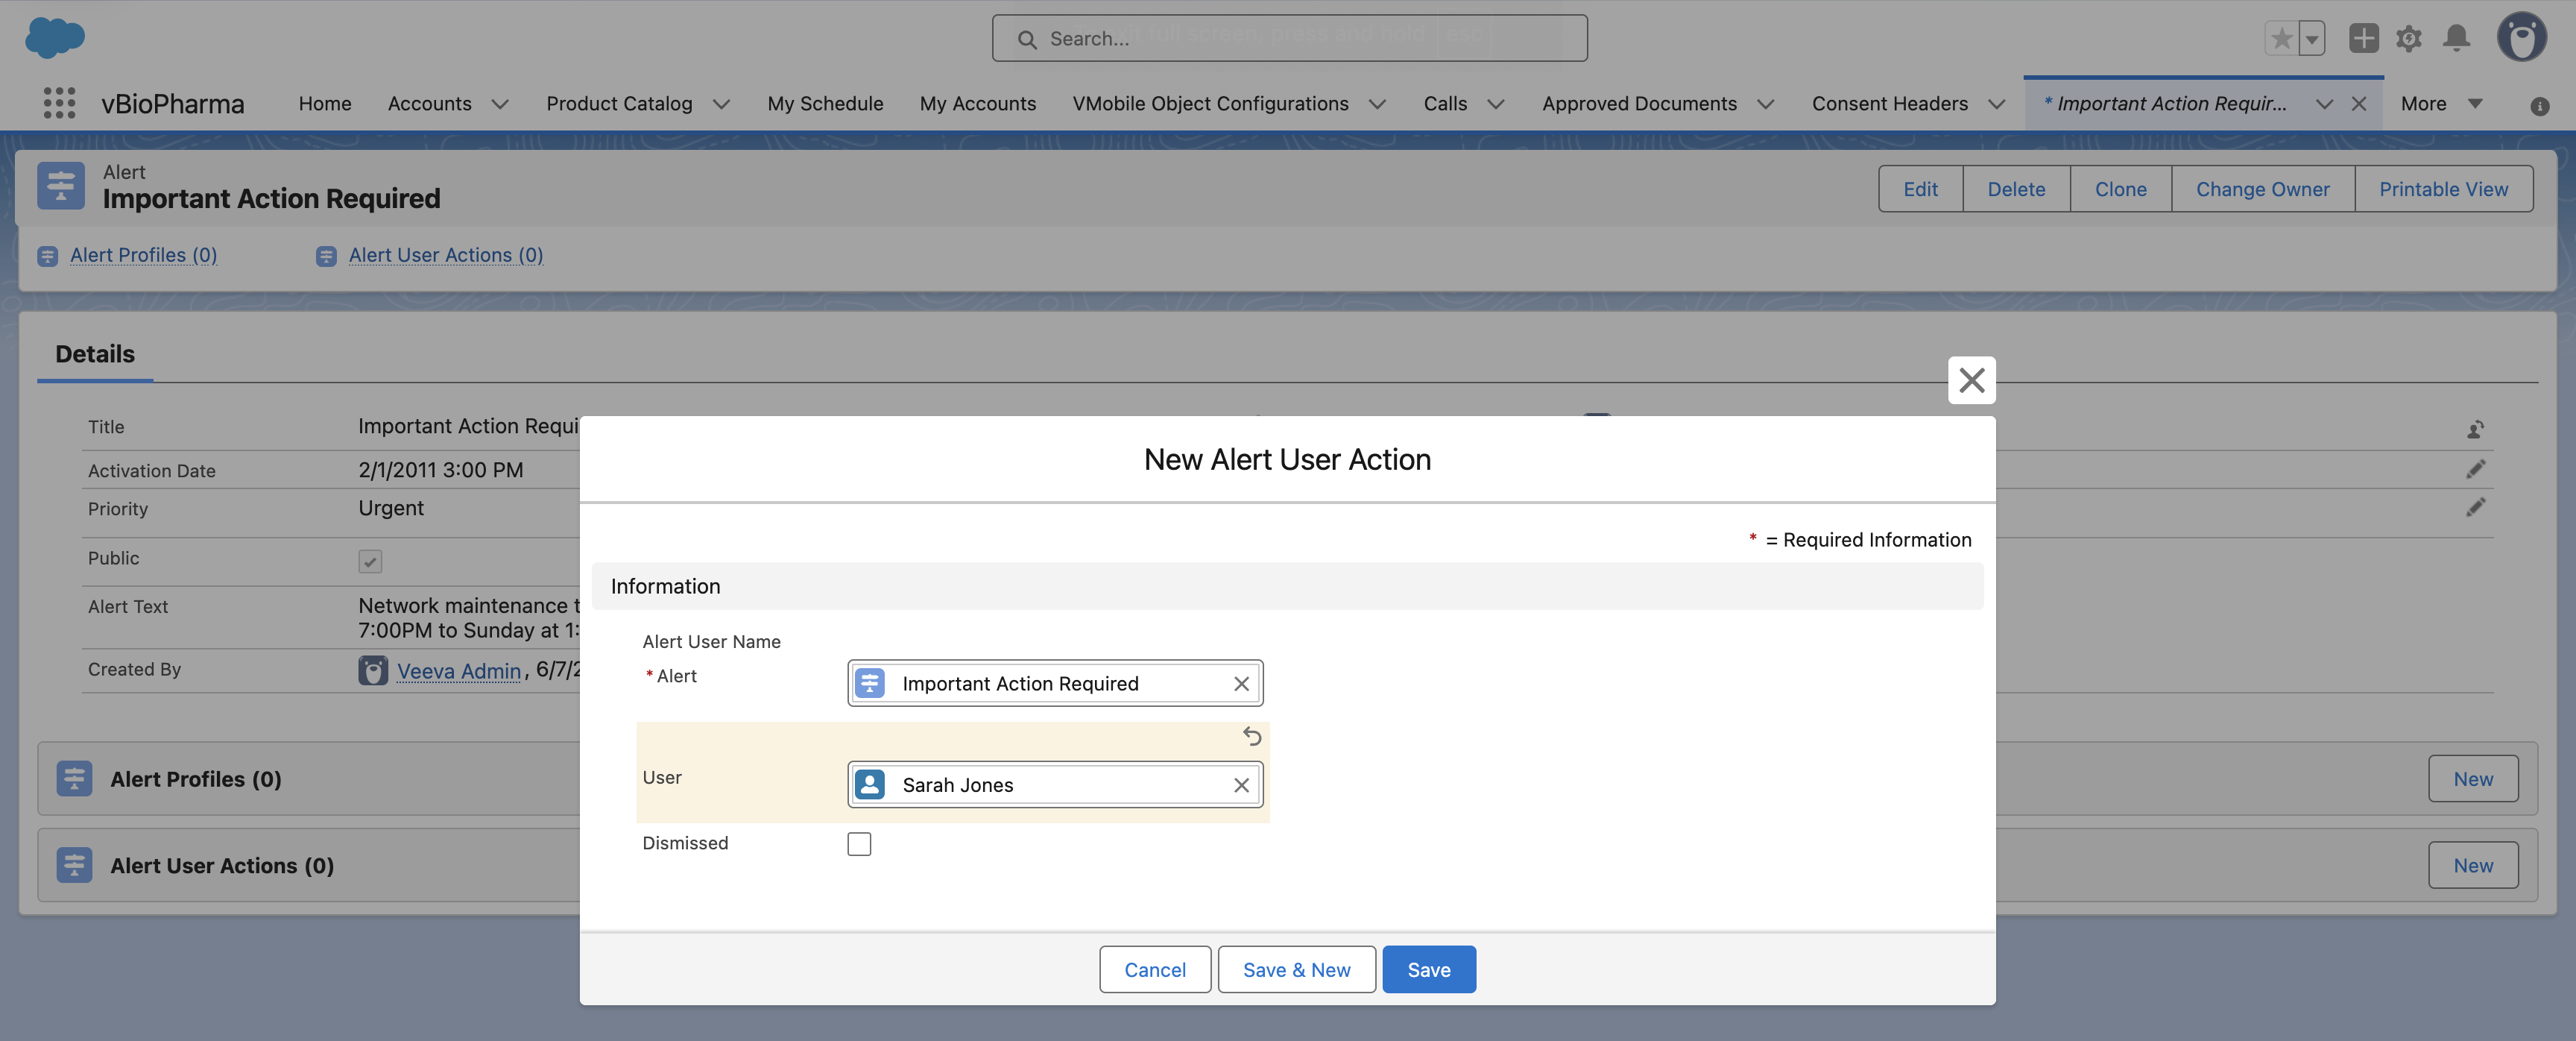
- Select Save. The Alert_vod record displays.
- Select Edit.
- Select Queued for the Push_Notify_APNS_Status_vod field.

- Select Save.
The next time the Mobile CRM Scheduled Push Notifications process runs, the selected user receives the push notification.
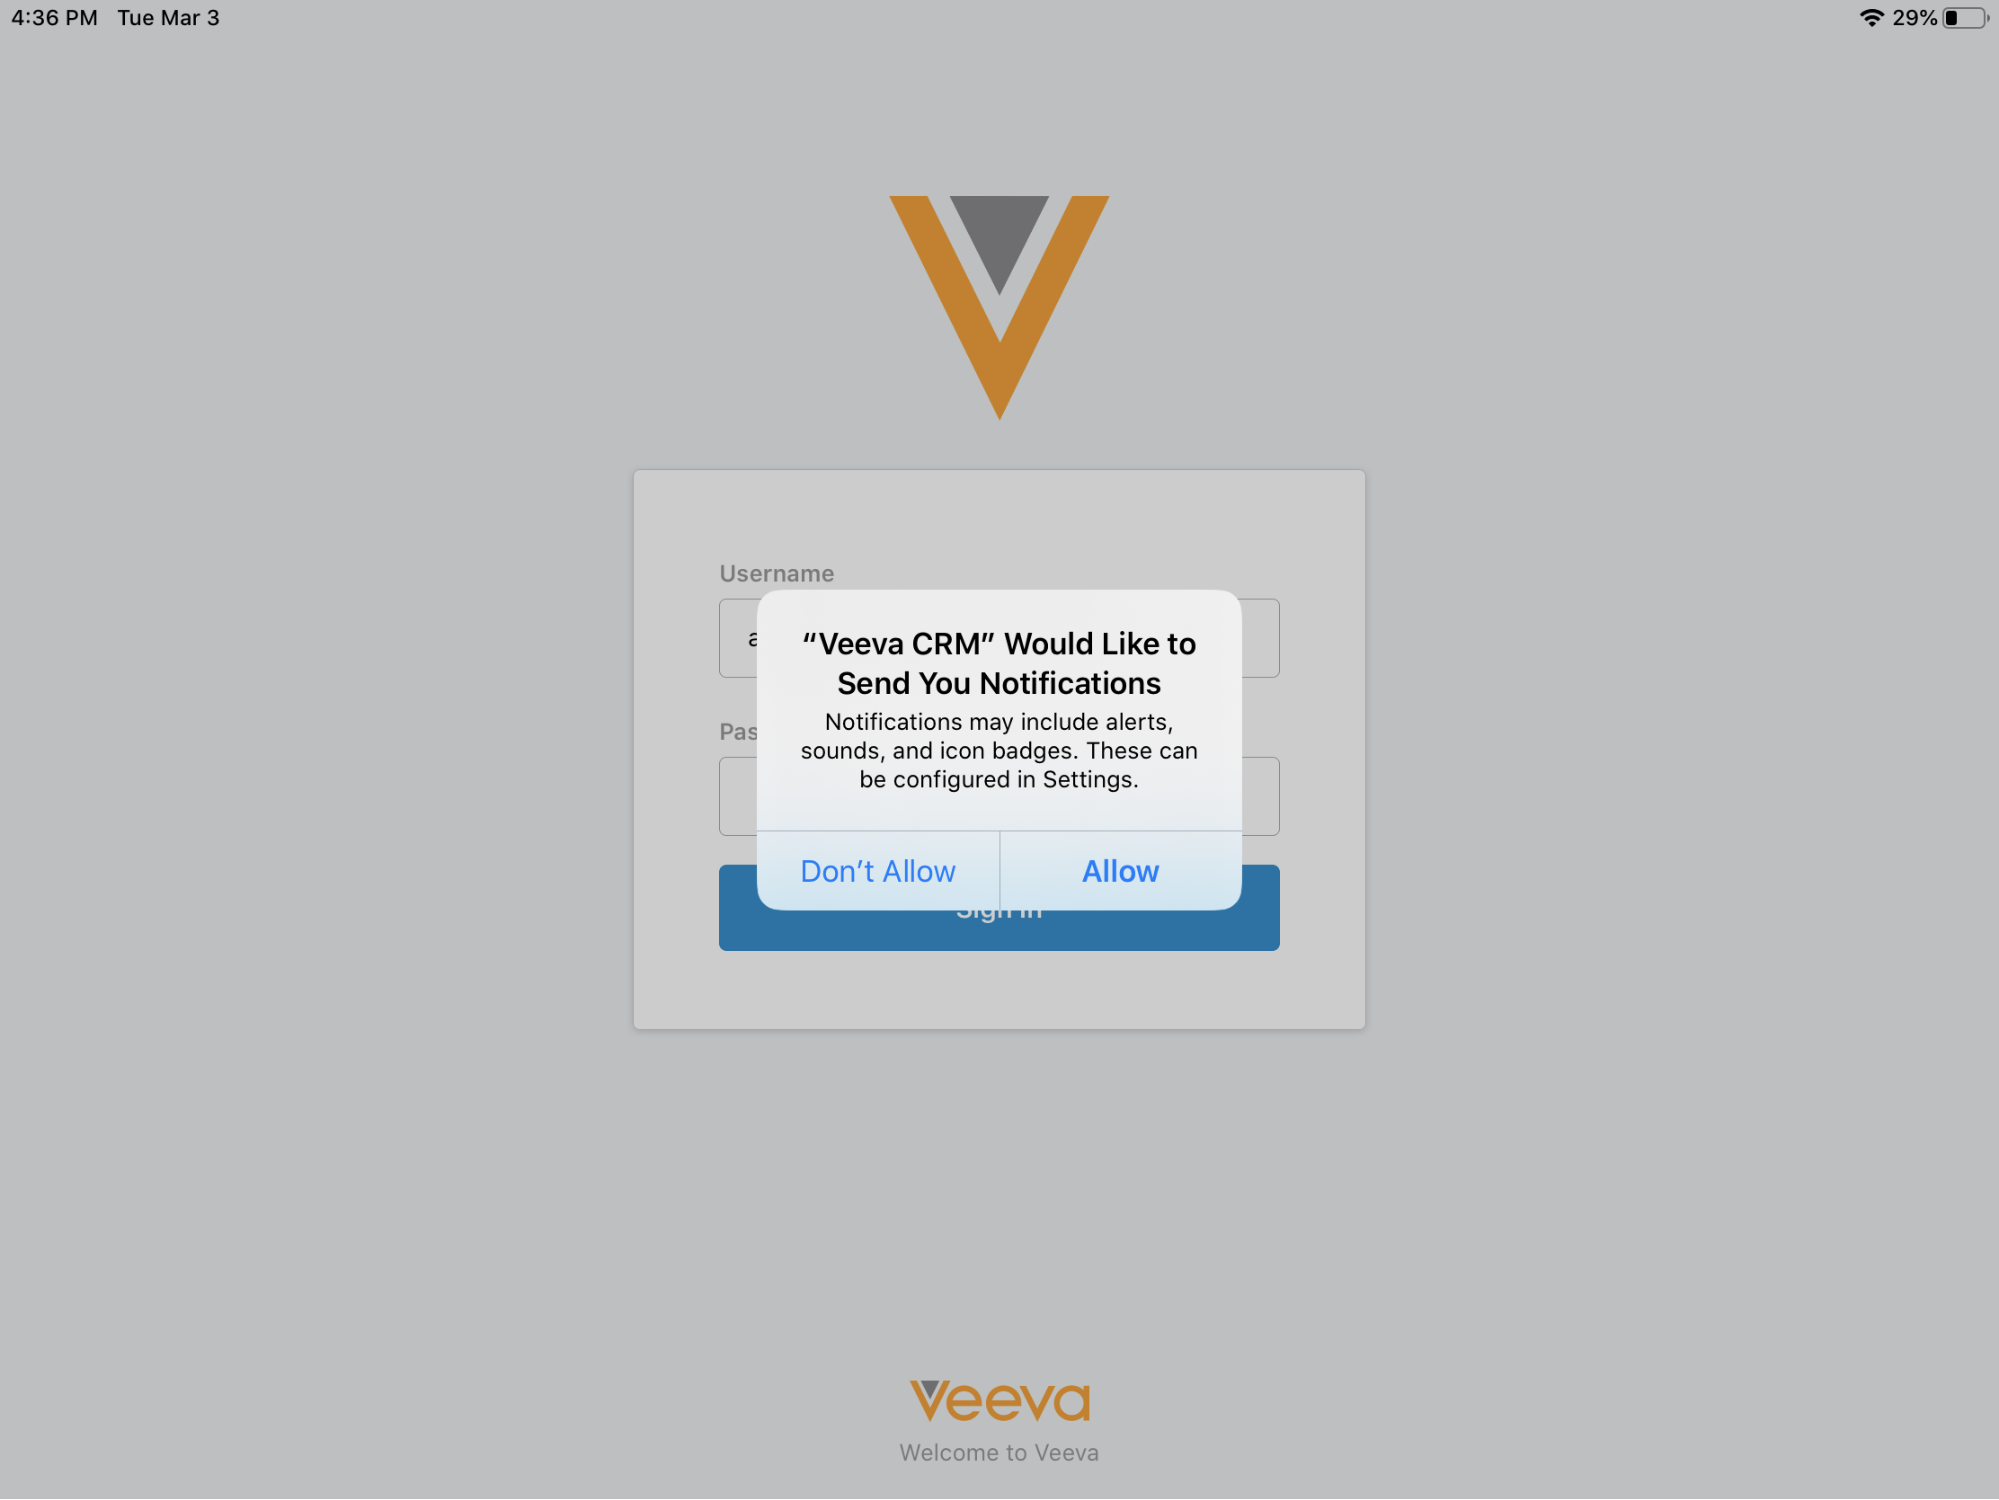
Viewing Push Notifications
After signing into the Veeva CRM app for the first time after configuring push notifications, a confirmation popup displays. End users can select Allow to allow the CRM app to receive and display push notifications.
If users select Don’t Allow, push notifications are disabled for the app. To enable via the iOS Settings app:
- Navigate to the Settings app.
- Select Notifications.
- Select the Veeva CRM app.
- Select the Allow Notifications toggle.
After changing the device's permissions to receive push notifications for Veeva CRM, users must exit the app and sign in again to apply the change.
Users receive push notifications on their devices at any time, whether or not they are actively using the Veeva CRM app, ensuring they stay up to date with content and time-sensitive tasks. Push notifications display at the top of the screen. Selecting a push notification automatically launches Veeva CRM.
Users can also view their notifications in Veeva CRM. A bell button displays on the home screen to represent the Notification Center, along with a badge count indicating how many new notifications have been received since the last time the user accessed the Notification Center.
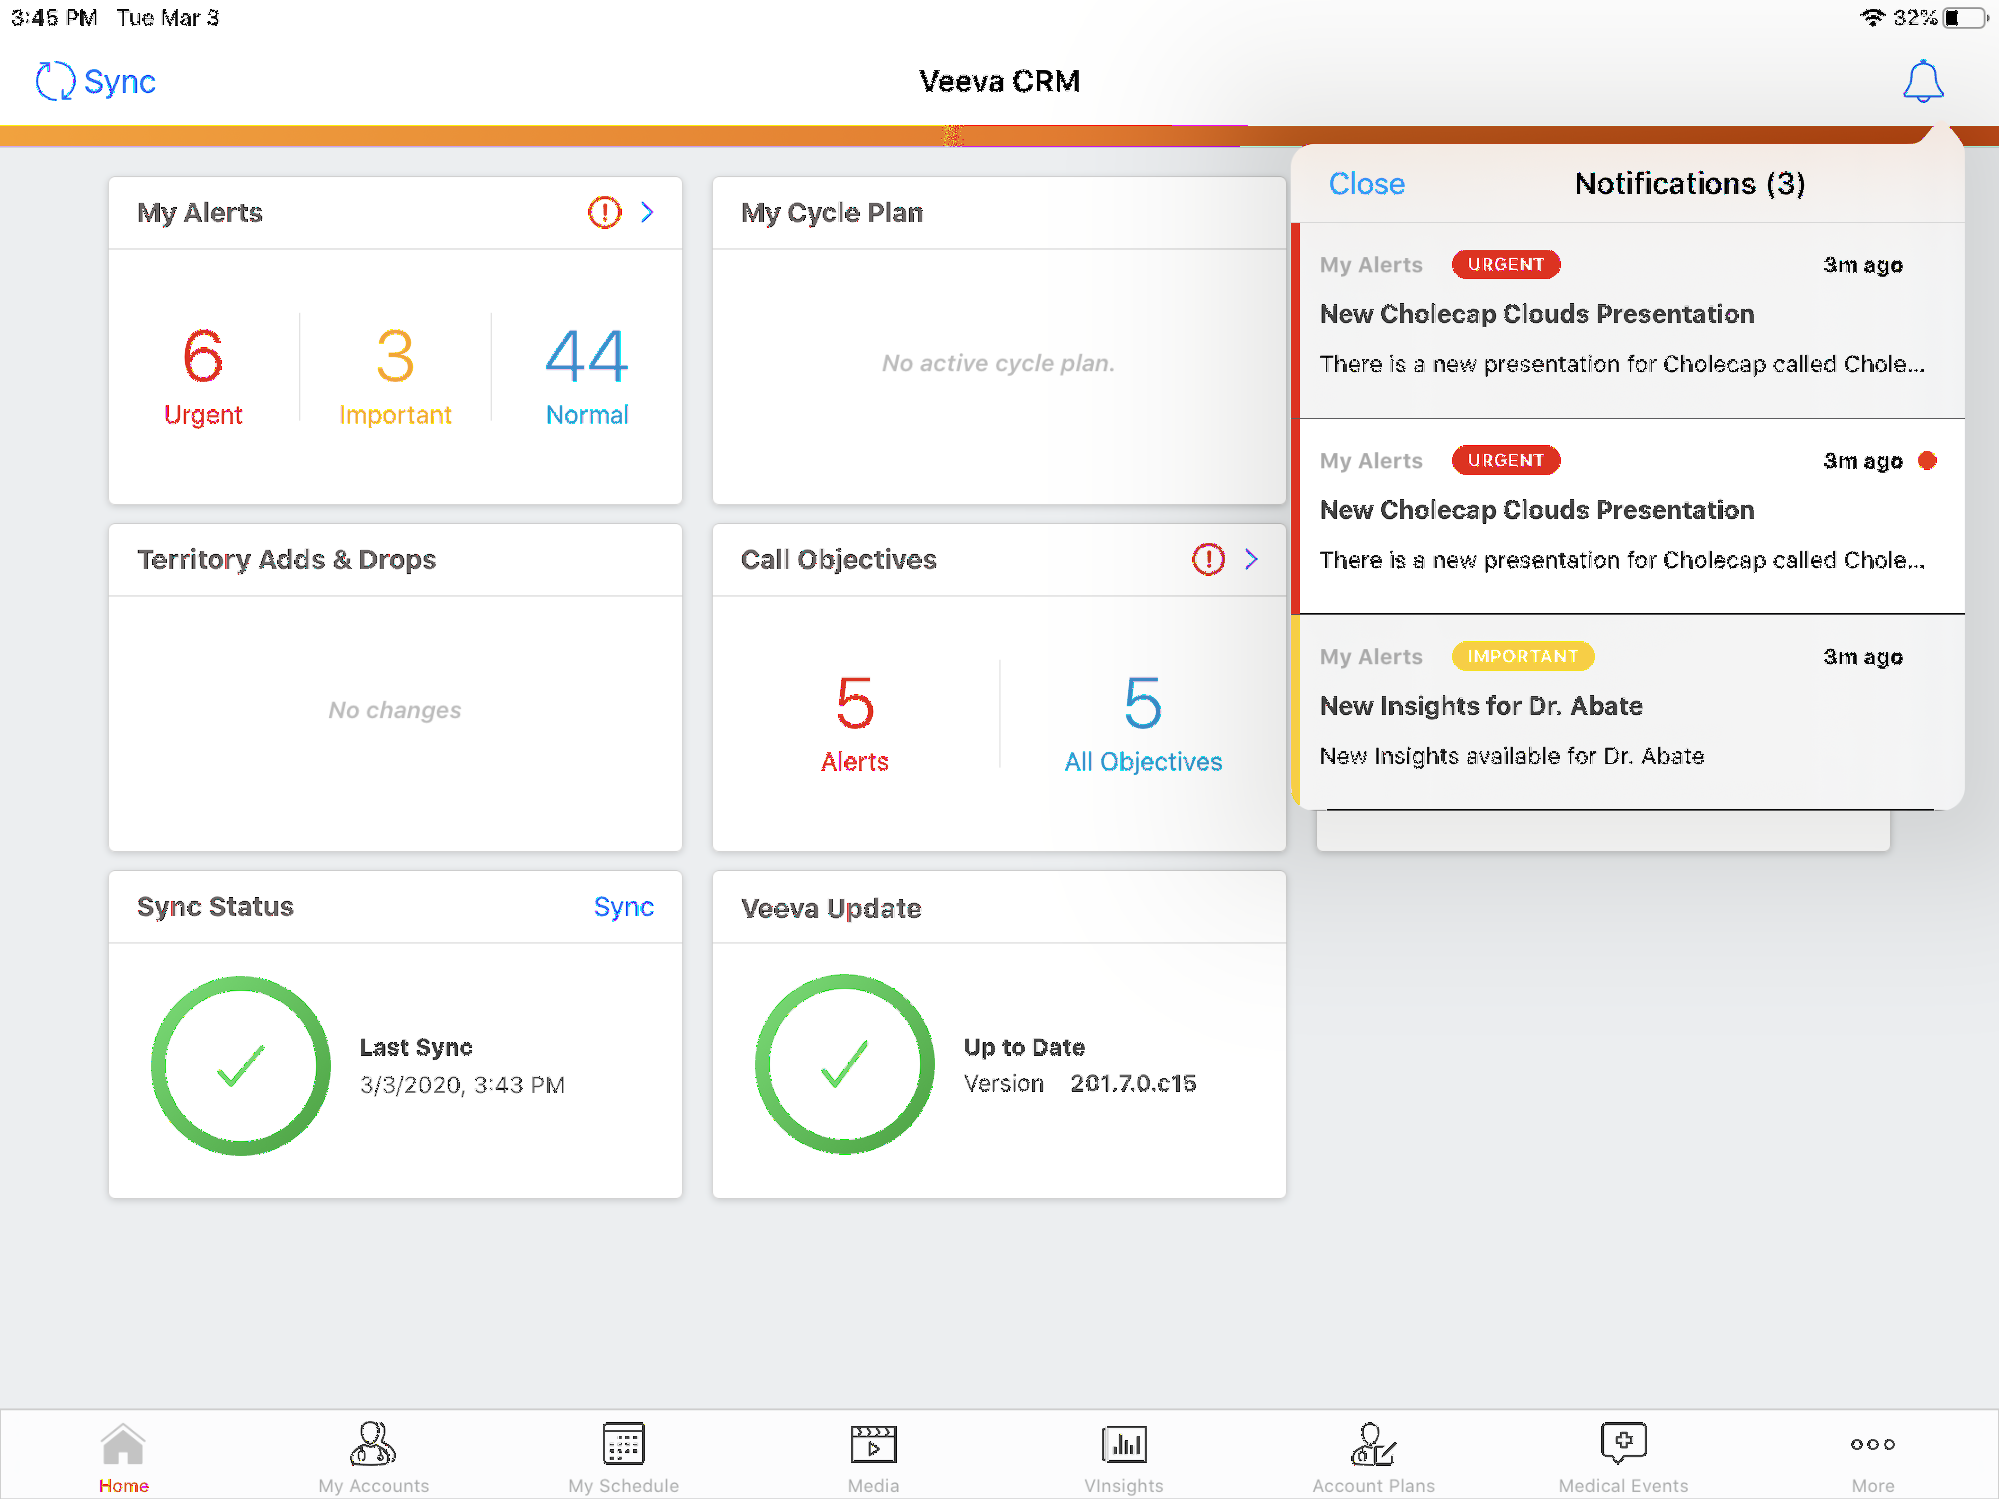
Users can select the bell button to view a list of all notifications received in the last six months. Select the bell button again to close the Notification Center and clear the badge count.
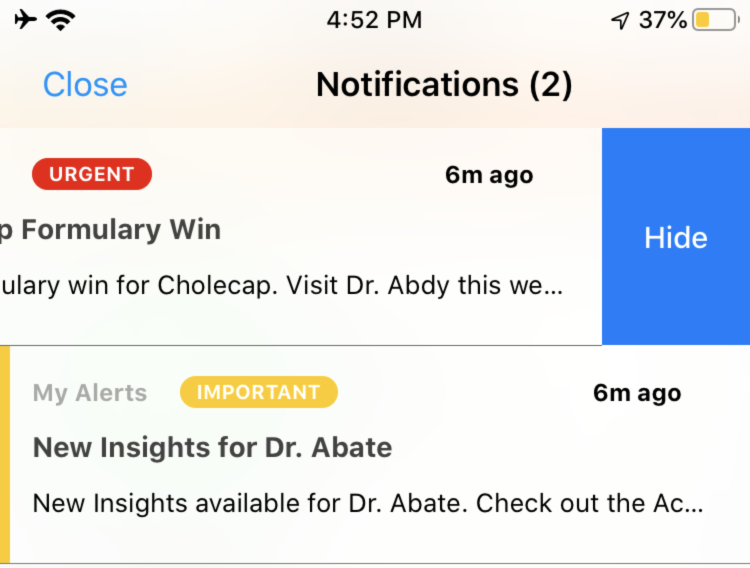
To hide a notification, swipe the specific notification from right to left and select Hide.
Users can select a specific notification to view alert record details. After viewing a specific notification, the red dot next to the received time stops displaying, indicating the user selected and viewed the notification.
If users open and close the Notification Center in quick succession, the badge count on the bell button and the app icon may not immediately reset on any device where the user is logged in. Additionally, after reinstalling the Veeva CRM app, the badge count does not reset immediately; users will not see any notifications in the Notification Center.
The received datetime displayed on a notification in the Notification Center is the datetime when the user first opens the Notification Center to view the notification, not when the user receives the notification on the device.
