

Medical Inquiry Lifecycle
Creating a Medical Inquiry
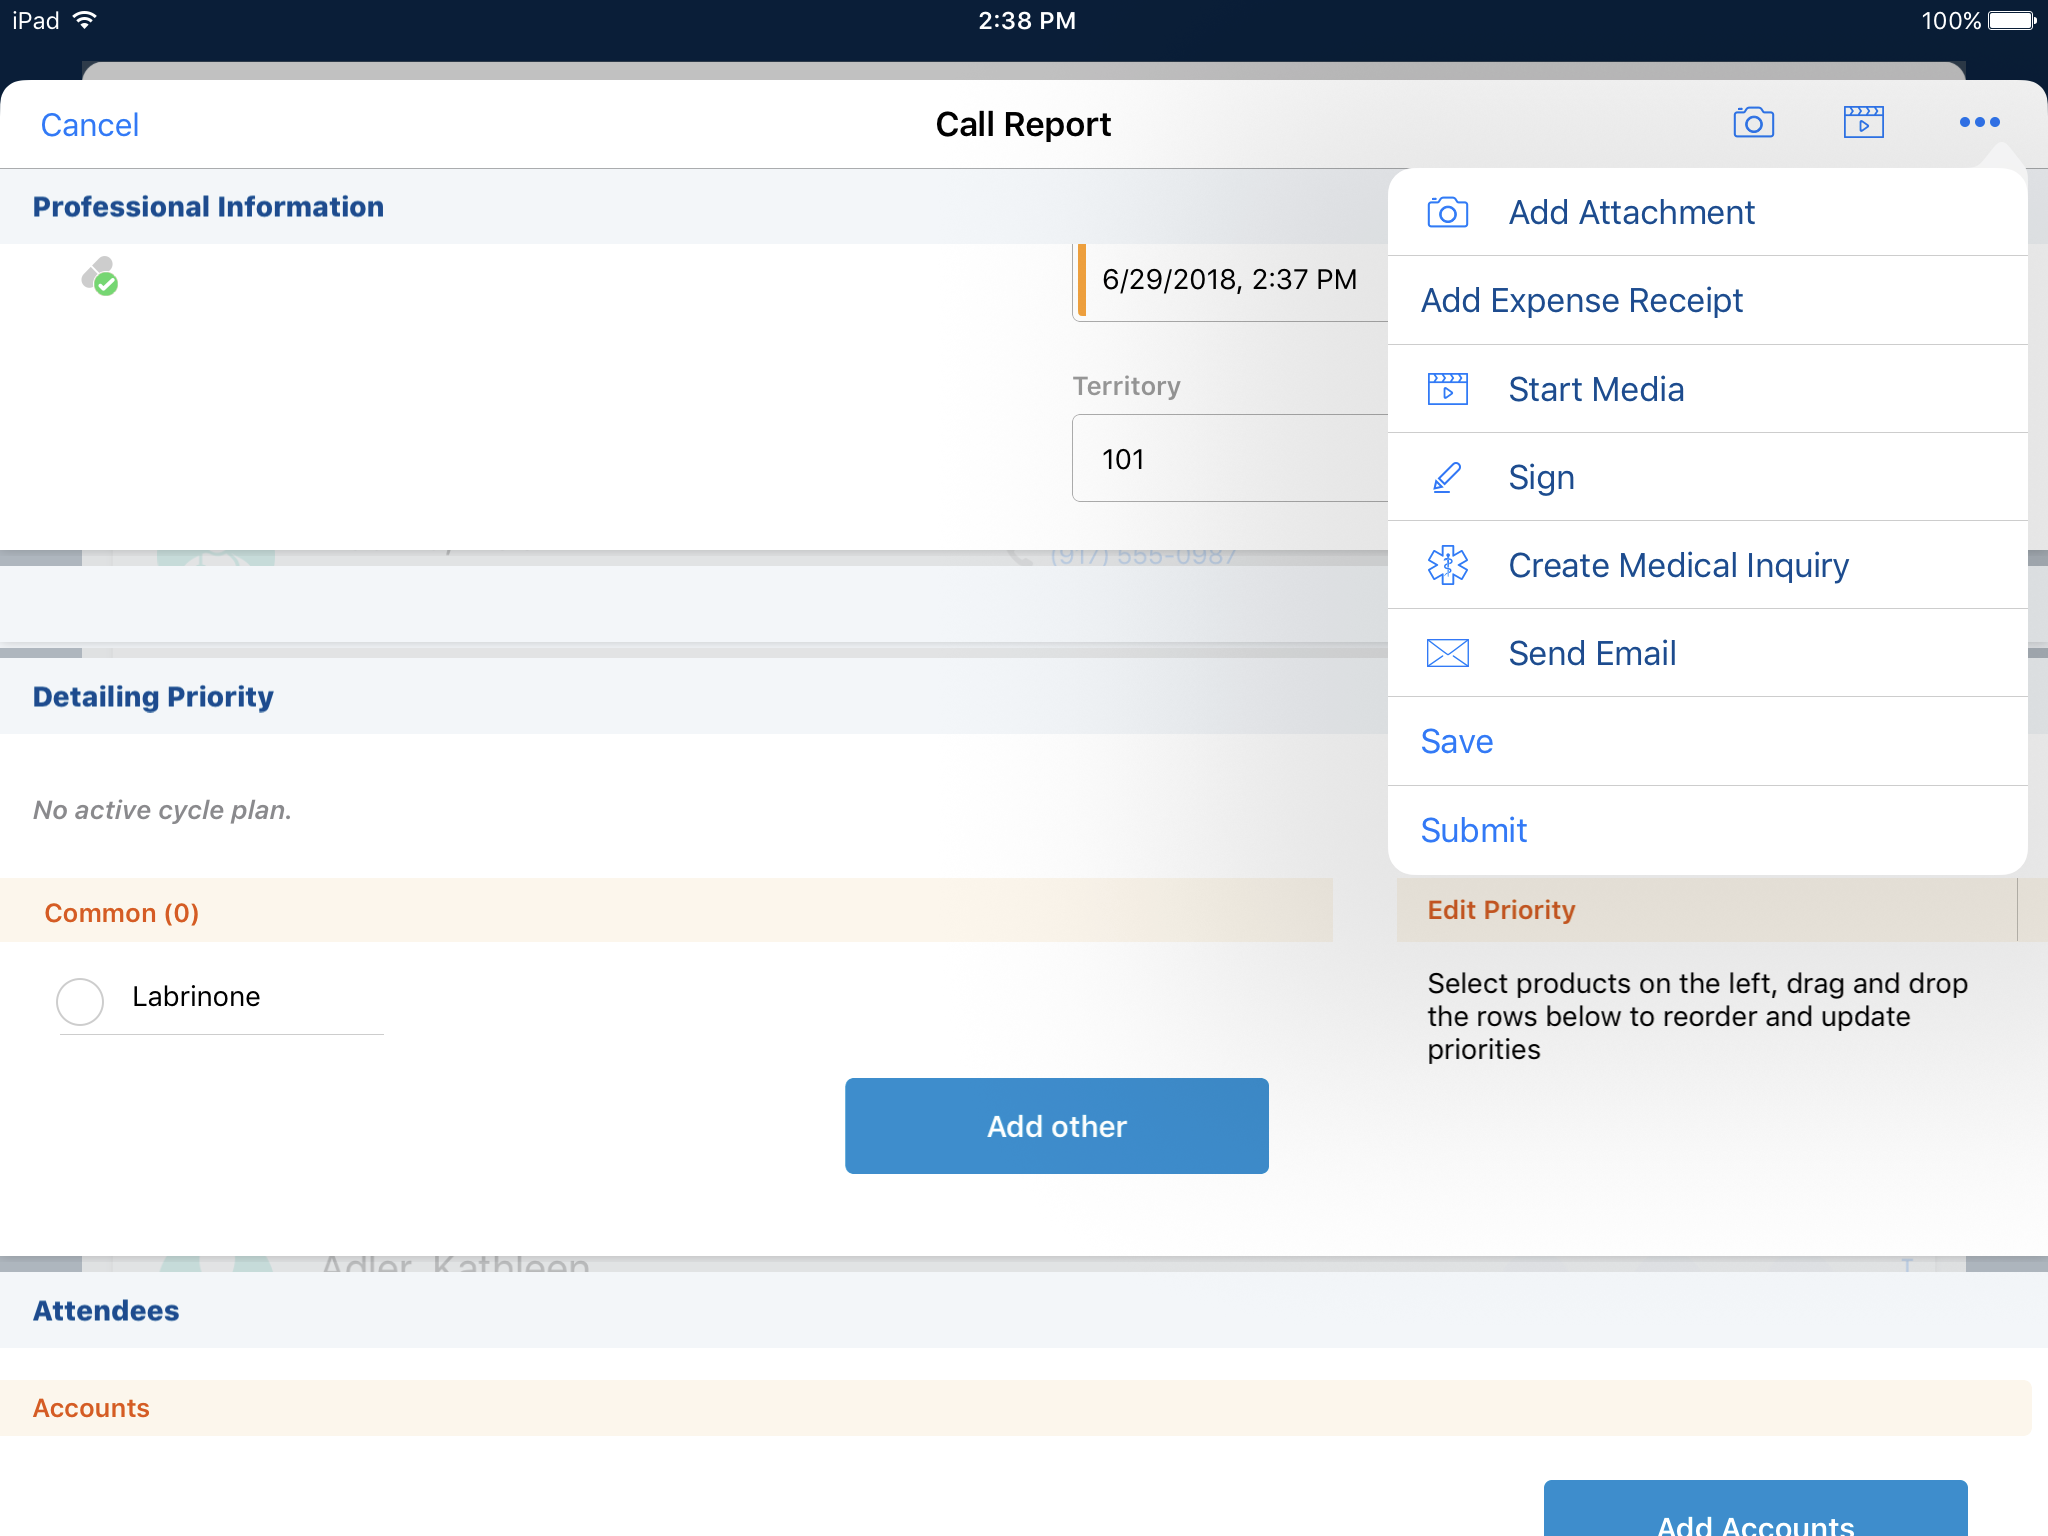
When launching a Medical Inquiry from a Call Report, the call record is saved before the Medical Inquiry screen displays. All required fields on the Call Report must be populated before an inquiry can be created.
The newly created Medical Inquiry has a lookup to the Call it was launched from. If the Call is deleted, the inquiry record remains, but the lookup to the Call record is cleared.
Capturing a Signature
After recording the inquiry details, users can capture a signature from the HCP. Signatures are supported on all offline platforms and are initiated by selecting the Sign button. The inquiry is validated and saved when the Sign button is selected, so all required fields on the inquiry must be populated before capturing a signature.
Select the Lock icon to prevent HCPs from navigating back to CRM for iPad from the signature page. Selecting this button makes the Accept and Cancel buttons and the Lock icon invisible. Once signature is captured, the user selects the location of the invisible Lock icon to display the Accept and Cancel buttons. The user can then accept the signature by selecting the Accept button .
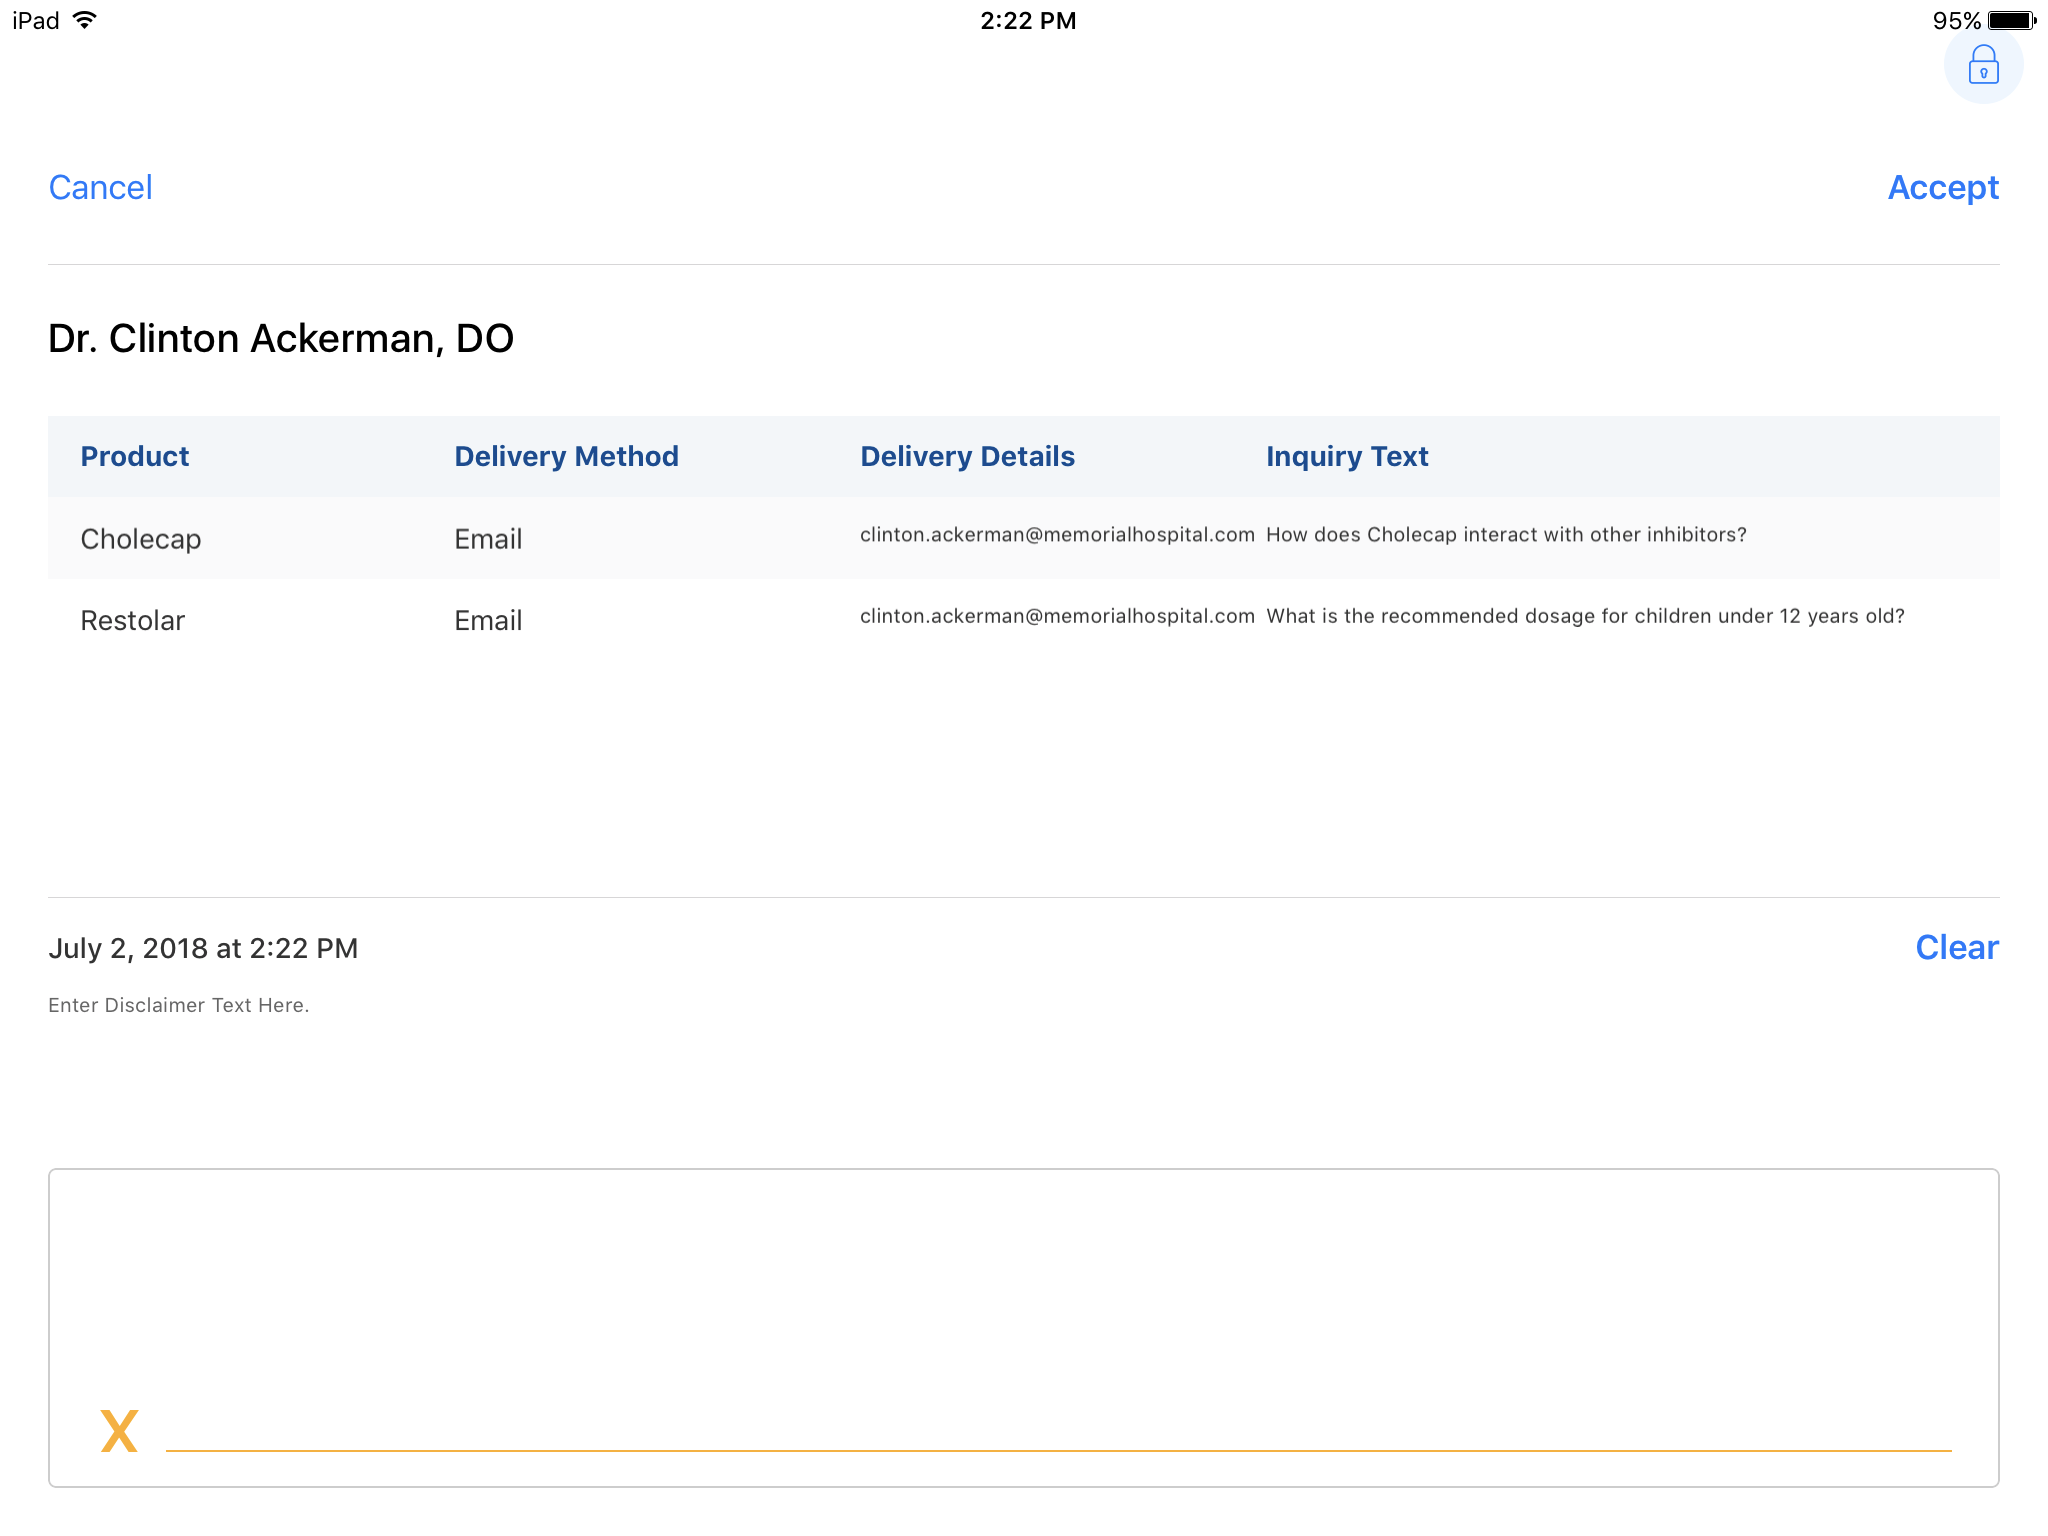
Once a signature is accepted, the data that flows to the signature screen is read-only. This includes the Account_vod, Delivery_Method_vod, Inquiry_Text__c, and delivery details field values. If using multiple-Product inquiries, the Product_vod field is included on the signature page and is also read-only after capturing a signature.
Submitting an Inquiry
Once required components of a Medical Inquiry are captured, the inquiry can be submitted. When the user selects Submit, the Status_vod value changes to Submitted_vod, and the Lock_vod check box is selected. At this point, end users can no longer edit any data on the Medical Inquiry record.
When the user submits a Medical Inquiry on an offline platform, the record is sent to the server and is available to access online immediately. If creating a Medical Inquiry from a Call Report, the Medical Inquiry syncs when the user submits it only if the related Call record already exists on the server. If the Call record does not exist on the server, a submitted Medical Inquiry syncs when the associated Call record is submitted or with the next sync, whichever comes first. If auto-send fails, the Medical Inquiry is sent to the server the next time the user syncs.
Processing Submitted Inquiries
Veeva provides a framework for capturing inquiry details. Typically, replying to inquiries and tracking progress is handled by external systems.
If a user attempts to modify a submitted inquiry, an error message displays indicating the record is locked. However, if the admin user has Modify All privileges on the Medical_Inquiry_vod object, the record's lock status is ignored and the user can update the record. If manually updating records, users can select the Unlock button, modify details, and resubmit the inquiry. More details about unlocking submitted inquiries can be found in the Configuring Unlock Privileges section.
Signature Audit
After signatures are captured offline and synced, they can be audited online.
To view signatures by Account, select the View Signatures button on the Medical Inquiry related list on the Account Detail page. An individual signature can be printed along with inquiry details using a configurable HTML template and the Print Signatures button.
Users can also view signatures by selecting the View Medical Inquiries Signatures button on the Rep Roster page.
More information about configuring signature audits can be found in the Signature Audit sub-section of the Configuring Medical Inquiries topic.
