

Displaying a Marketing Banner
- CRM Desktop (Windows)
- iPad
- iPhone
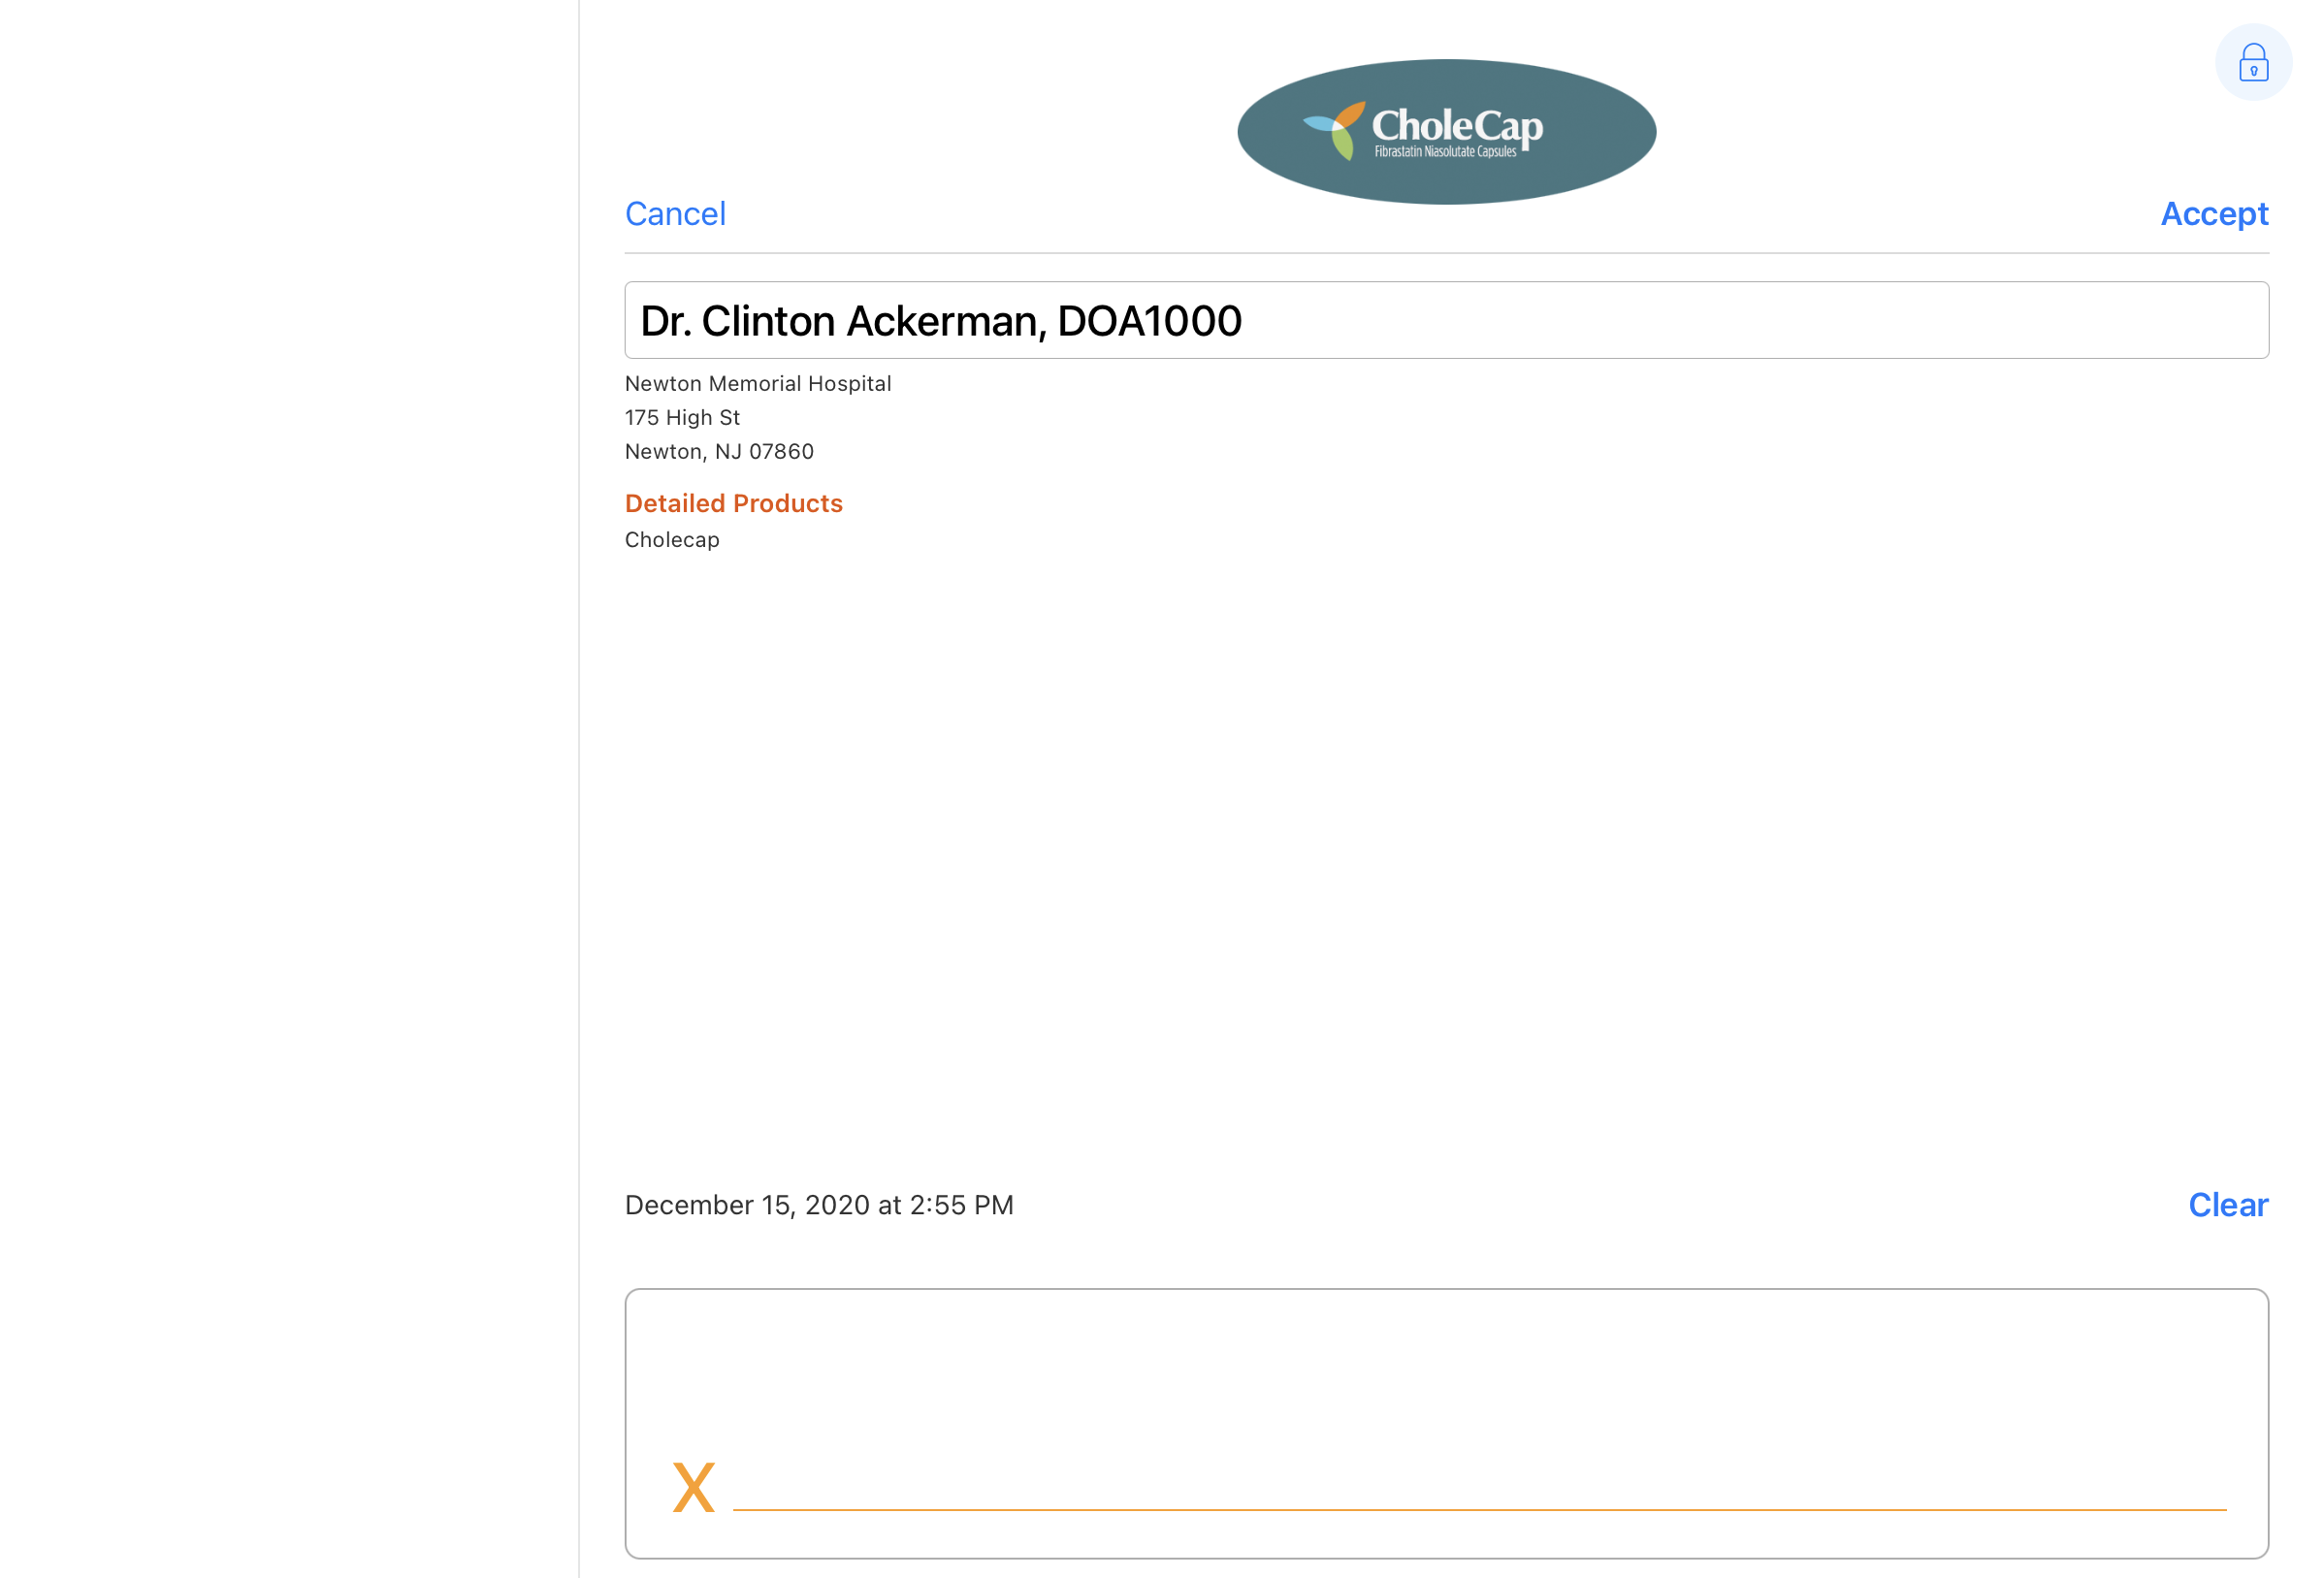
The signature page can display a product-related banner for added visual interest or product placement. This enables users to feature relevant products and promote product recognition when disbursing samples. For example, Sarah Jones disburses a sample of Cholecap to Dr. Ackerman. When Sarah captures Dr. Ackerman’s signature, the Cholecap banner image is prominently displayed on the signature page. Dr. Ackerman recognizes the Cholecap logo and associates the logo with the samples he receives.
Configuring a Marketing Banner on the Signature Page
Ensure initial configuration is complete before enabling this functionality.
To display a marketing banner on the signature page:
- Navigate to a product of type Detail in the Product Catalog.
- Add a new record to the Notes & Attachments related list.
- Name the attachment Signature_Graphic.XXX where XXX is the file extension of the image.
- Activate the appropriate VMOCs for the Attachment object for all desired offline platforms.
Viewing the Marketing Banner
When configured, the marketing banner for the detailed product is automatically displayed on the signature page.
The logic to display the banner is as follows:
- Display the image associated with the first detailed product
- If no products are detailed, use the image associated to the parent of the first sampled product
- If no details or samples are added to the Call, show the acknowledgment image. See Capturing Signatures for Calls Without Samples for more information.
- If images are not associated to any of the products detailed or sampled on the call, and a call acknowledgment image is not configured, the marketing banner does not display
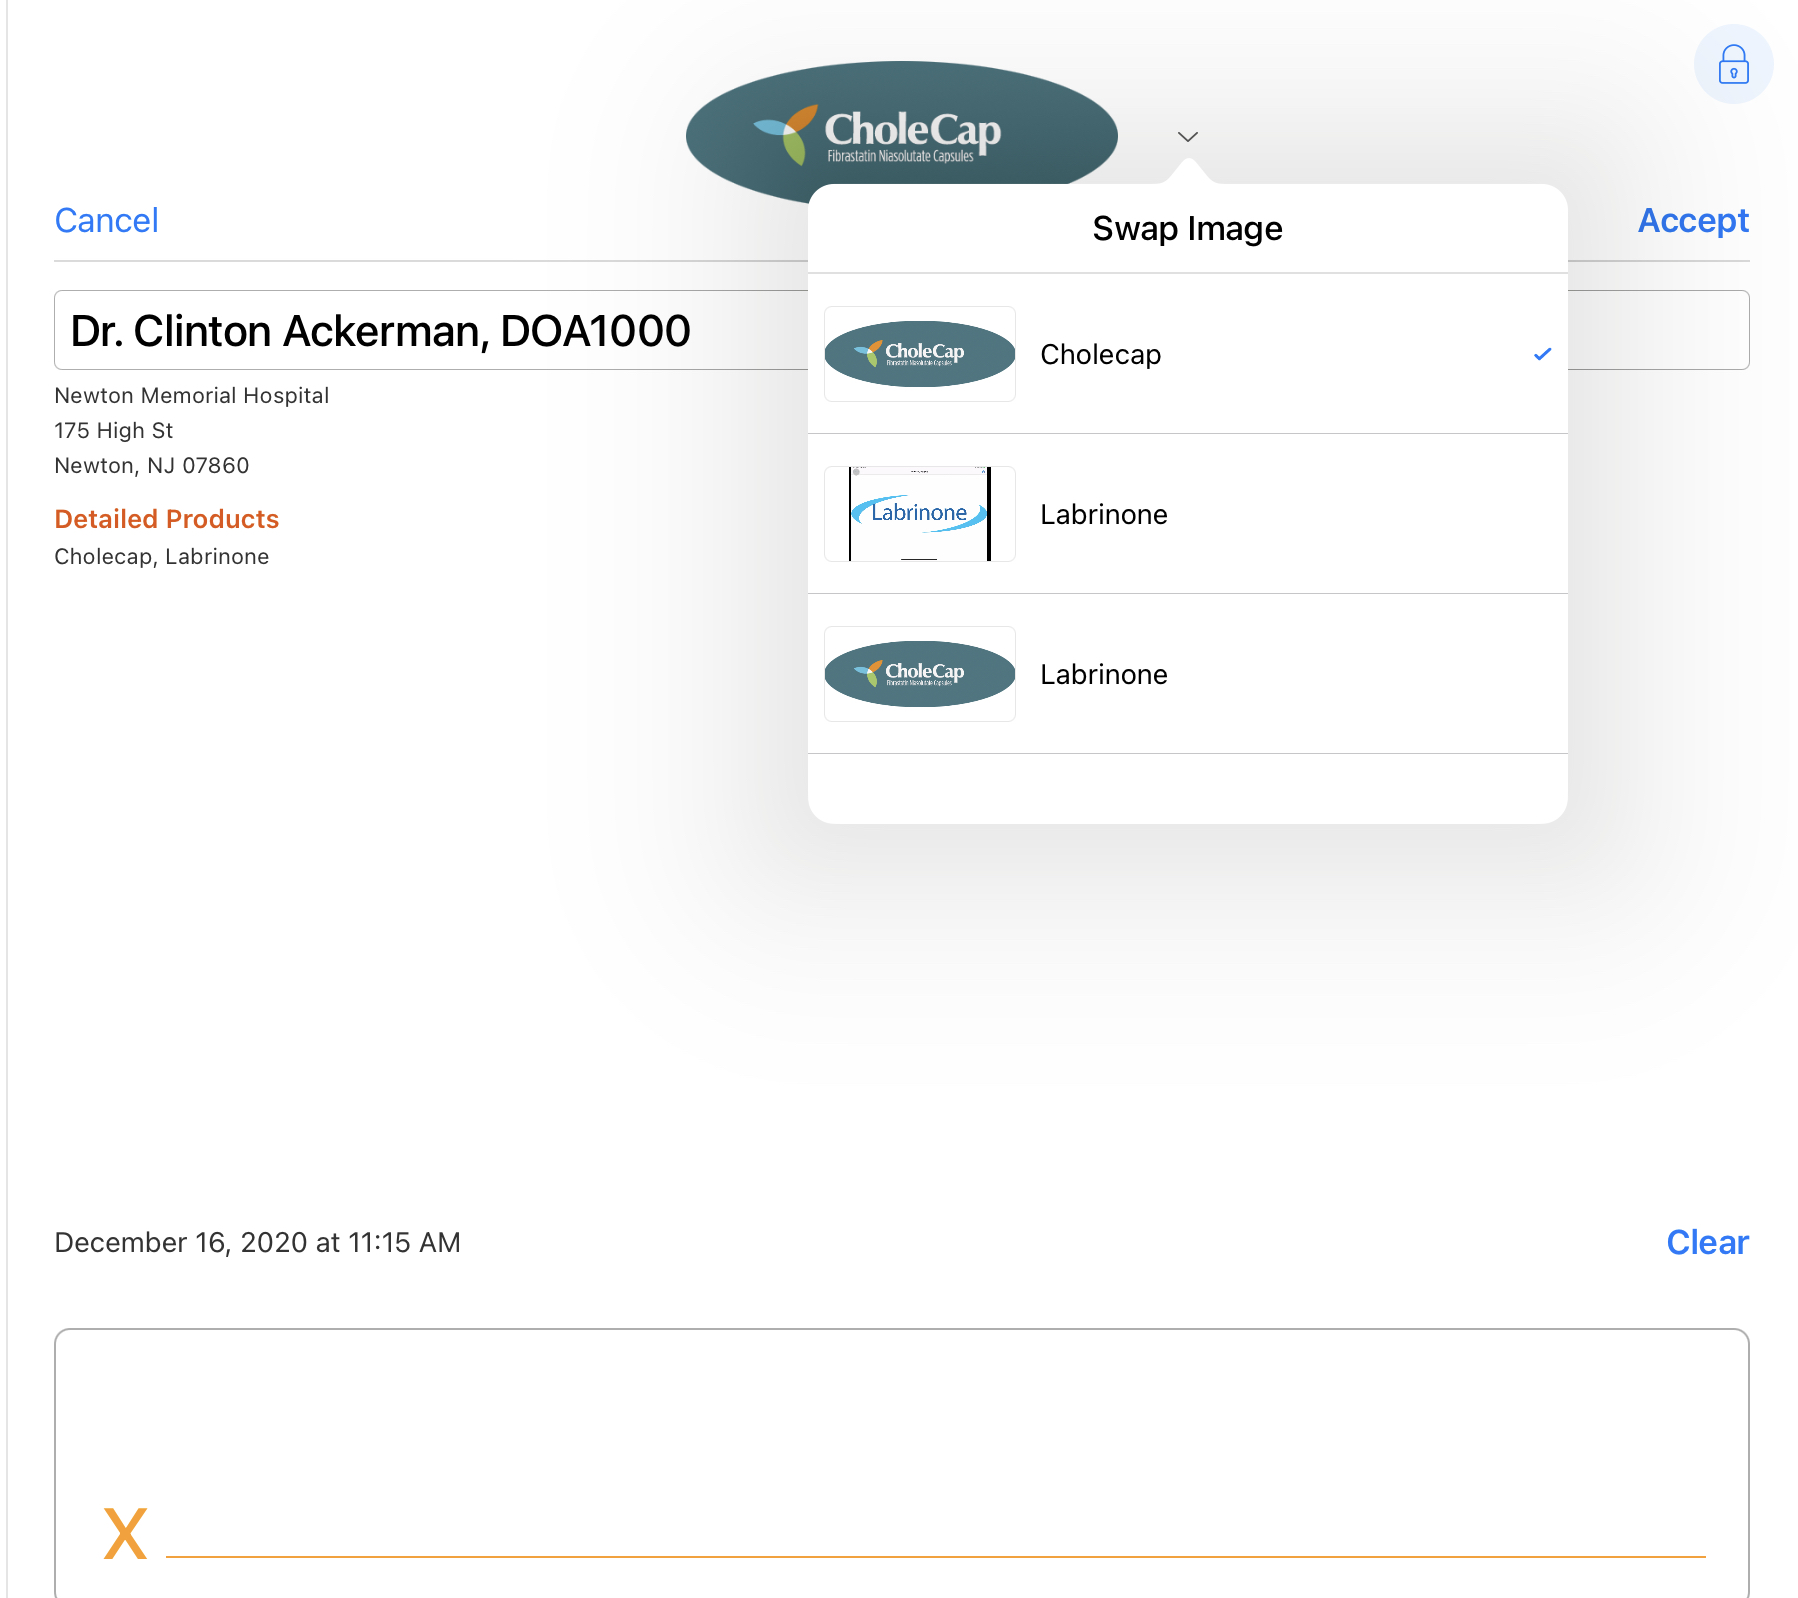
Swapping the Marketing Banner
Users can swap the marketing banner if there are multiple details and/or samples selected on the call, or if there are multiple marketing banners configured for a product.
To enable users to change the marketing banner, select the check box for the Enable_Signature_Graphic_Picklist Veeva setting.
Users can change the marketing banner on the signature page by selecting the icon next to the marketing banner, and then selecting the appropriate graphic from the picklist.
Creating Multiple Marketing Banners Per Product
Users can have multiple images per product by appending an index or keyword to the end of the attachment name. This allows for users to select the most appropriate banner from a list of several pre-loaded images. For example, Sarah Jones uploads a marketing banner image promoting the annual Cholecap summit. When she samples Cholecap to HCPs, she can choose to display the usual Cholecap banner or the banner for the annual Cholecap summit.
Prerequisites
Ensure the check box for the Enable_Signature_Graphic_Picklist Veeva setting is selected.
Configuring Multiple Marketing Banners
To create multiple marketing banners for a product:
- Navigate to a product of type Detail in the Product Catalog.
- Add a new record to the Notes & Attachments related list (optional—the name for an existing image can be edited instead).
- Name the attachment Signature_Graphic_Keyword.XXX where Keyword is the desired index or keyword name and XXX is the file extension of the image. For example, Signature_Graphic_Blue.png
The system uses the most recently created image as the default; both images display in the signature graphic picklist.
Displaying a Platform Specific Marketing Banner
Because screen sizes differ across devices, platform specific marketing banners can be created to optimize the image type and size for the device the banner is displayed on. For example, the Cholecap marketing banner specified for iPad users is a larger image than the Cholecap marketing banner for iPhone users, so that each image fits the device’s screen size without appearing distorted.
Configuring a Platform Specific Marketing Banner
To configure a platform specific marketing banner:
- Navigate to a product of type Detail in the Product Catalog.
- Add a new record to the Notes & Attachments related list (optional—the name for an existing image can be edited instead).
- Name the attachment Signature_Graphic_Platform.XXX where Platform is the platform name and XXX is the file extension of the image. For example, Signature_Graphic_iPad.PNG
- For the appropriate VMOCs on the Attachment object, edit the WHERE clause to include the platform in the file name. For example, WHERE (Name like ‘Signature_Graphic_iPad%’), instead of WHERE (Name like ‘Signature_Graphic%’).
When platform specific marketing banners are configured, the appropriate image for the platform is automatically displayed to users.
Considerations
- Marketing banners can be up to 700 pixels wide and 300 pixels high. For iPad, the optimal image size is 333 pixels wide and 181 pixels high.
- Supported image formats are JPG, PNG and GIF (GIF files do not animate)
- If using the marketing banner for Capturing Remote Signatures for Sampling in Engage Meeting, the file size for the image must be less than 1 MB
