

Managing Veeva CRM on Windows Desktop
Users can install the app, sign in, and manage app updates. Ensure all device and software requirements are satisfied to use the app.
Installing the App
Users can install Veeva CRM on Windows Desktop using one of the following options:
- Select Veeva CRM Desktop Install from the Veeva CRM Desktop homepage component
- Select Start Media from a call report online
- Select Start Meeting from an Engage meeting call report online
- Install manually using Setup.exe
To configure the Veeva CRM Desktop component on the homepage in Lightning:
- Ensure users have access to the Remote_Meeting_Host_App_Install_vod VisualForce page.
- Navigate back to the homepage.
- Select the gear icon.
- Select Edit Page.
- Select and drag the RemoteMeetingHostAppInstall component from the Custom section in the Components sidebar onto the page layout.
- Select Save.
To configure the Veeva CRM Desktop component on the homepage in Classic:
- Navigate to Setup > Customize > Home > Home Page Layouts.
- Edit the Dashboard Home Page Default page layout.
- Select the Veeva CRM Desktop check box in the Select Narrow Components to Show section.
- Select Next.
- Arrange the order of the components as desired.
- Select Save.
Signing In
Users can launch Veeva CRM on Windows Desktop from the desktop icon and sign in with their Veeva CRM credentials.
To sign in:
- Open the Veeva CRM Desktop app.
- Select the gear icon in the top right corner.
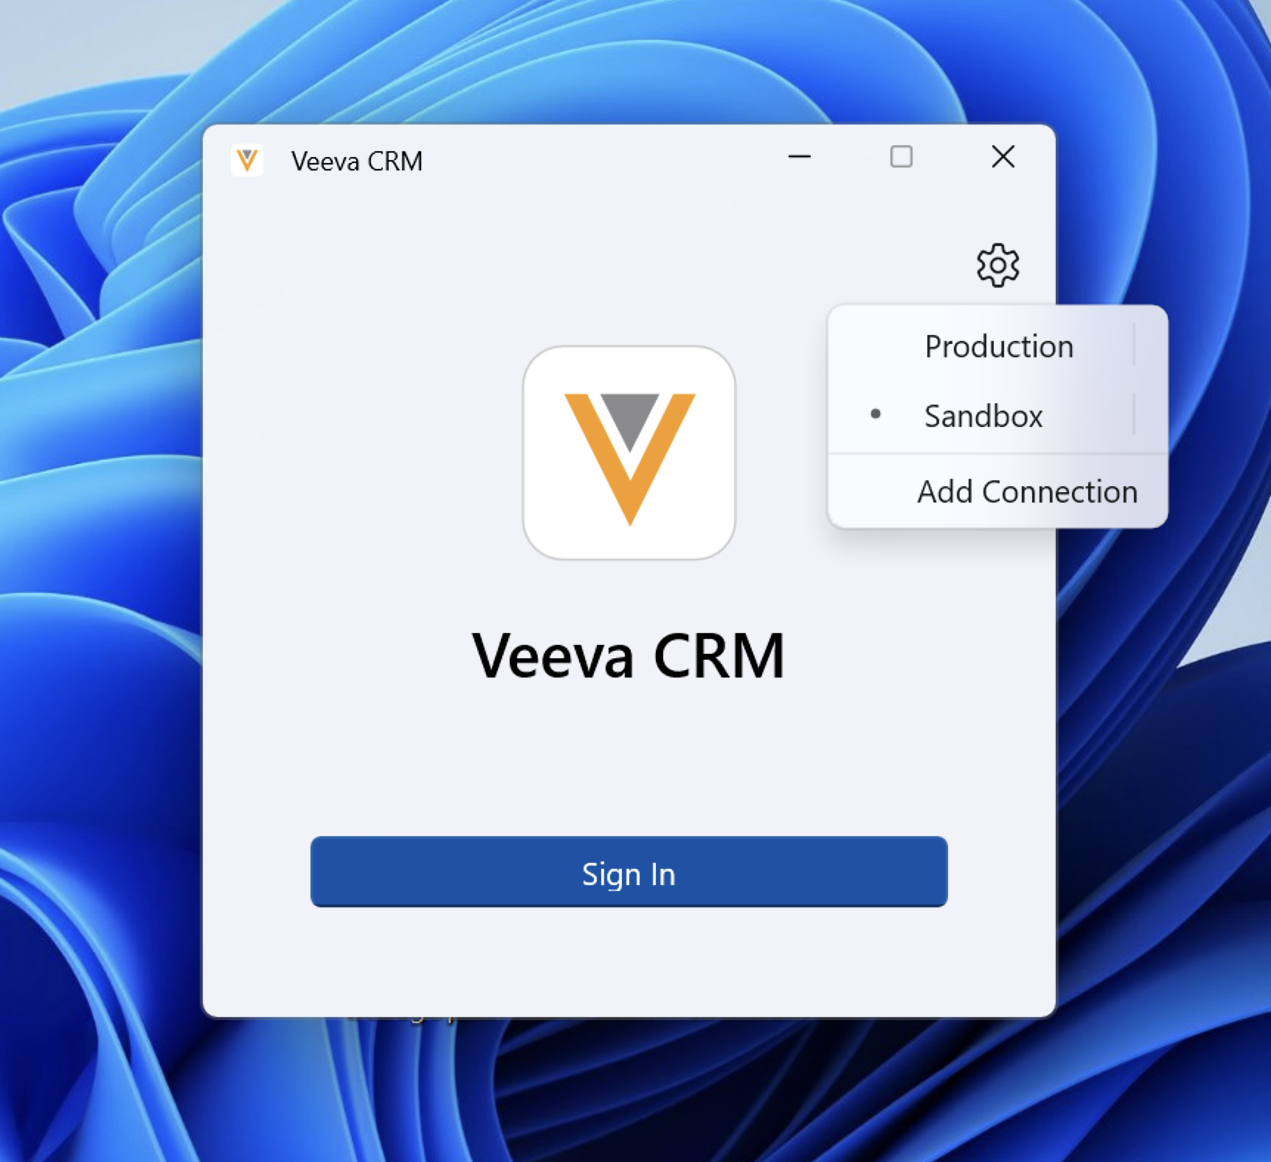
- Select the type of org you are signing into, Production or Sandbox.
- Select Sign In.
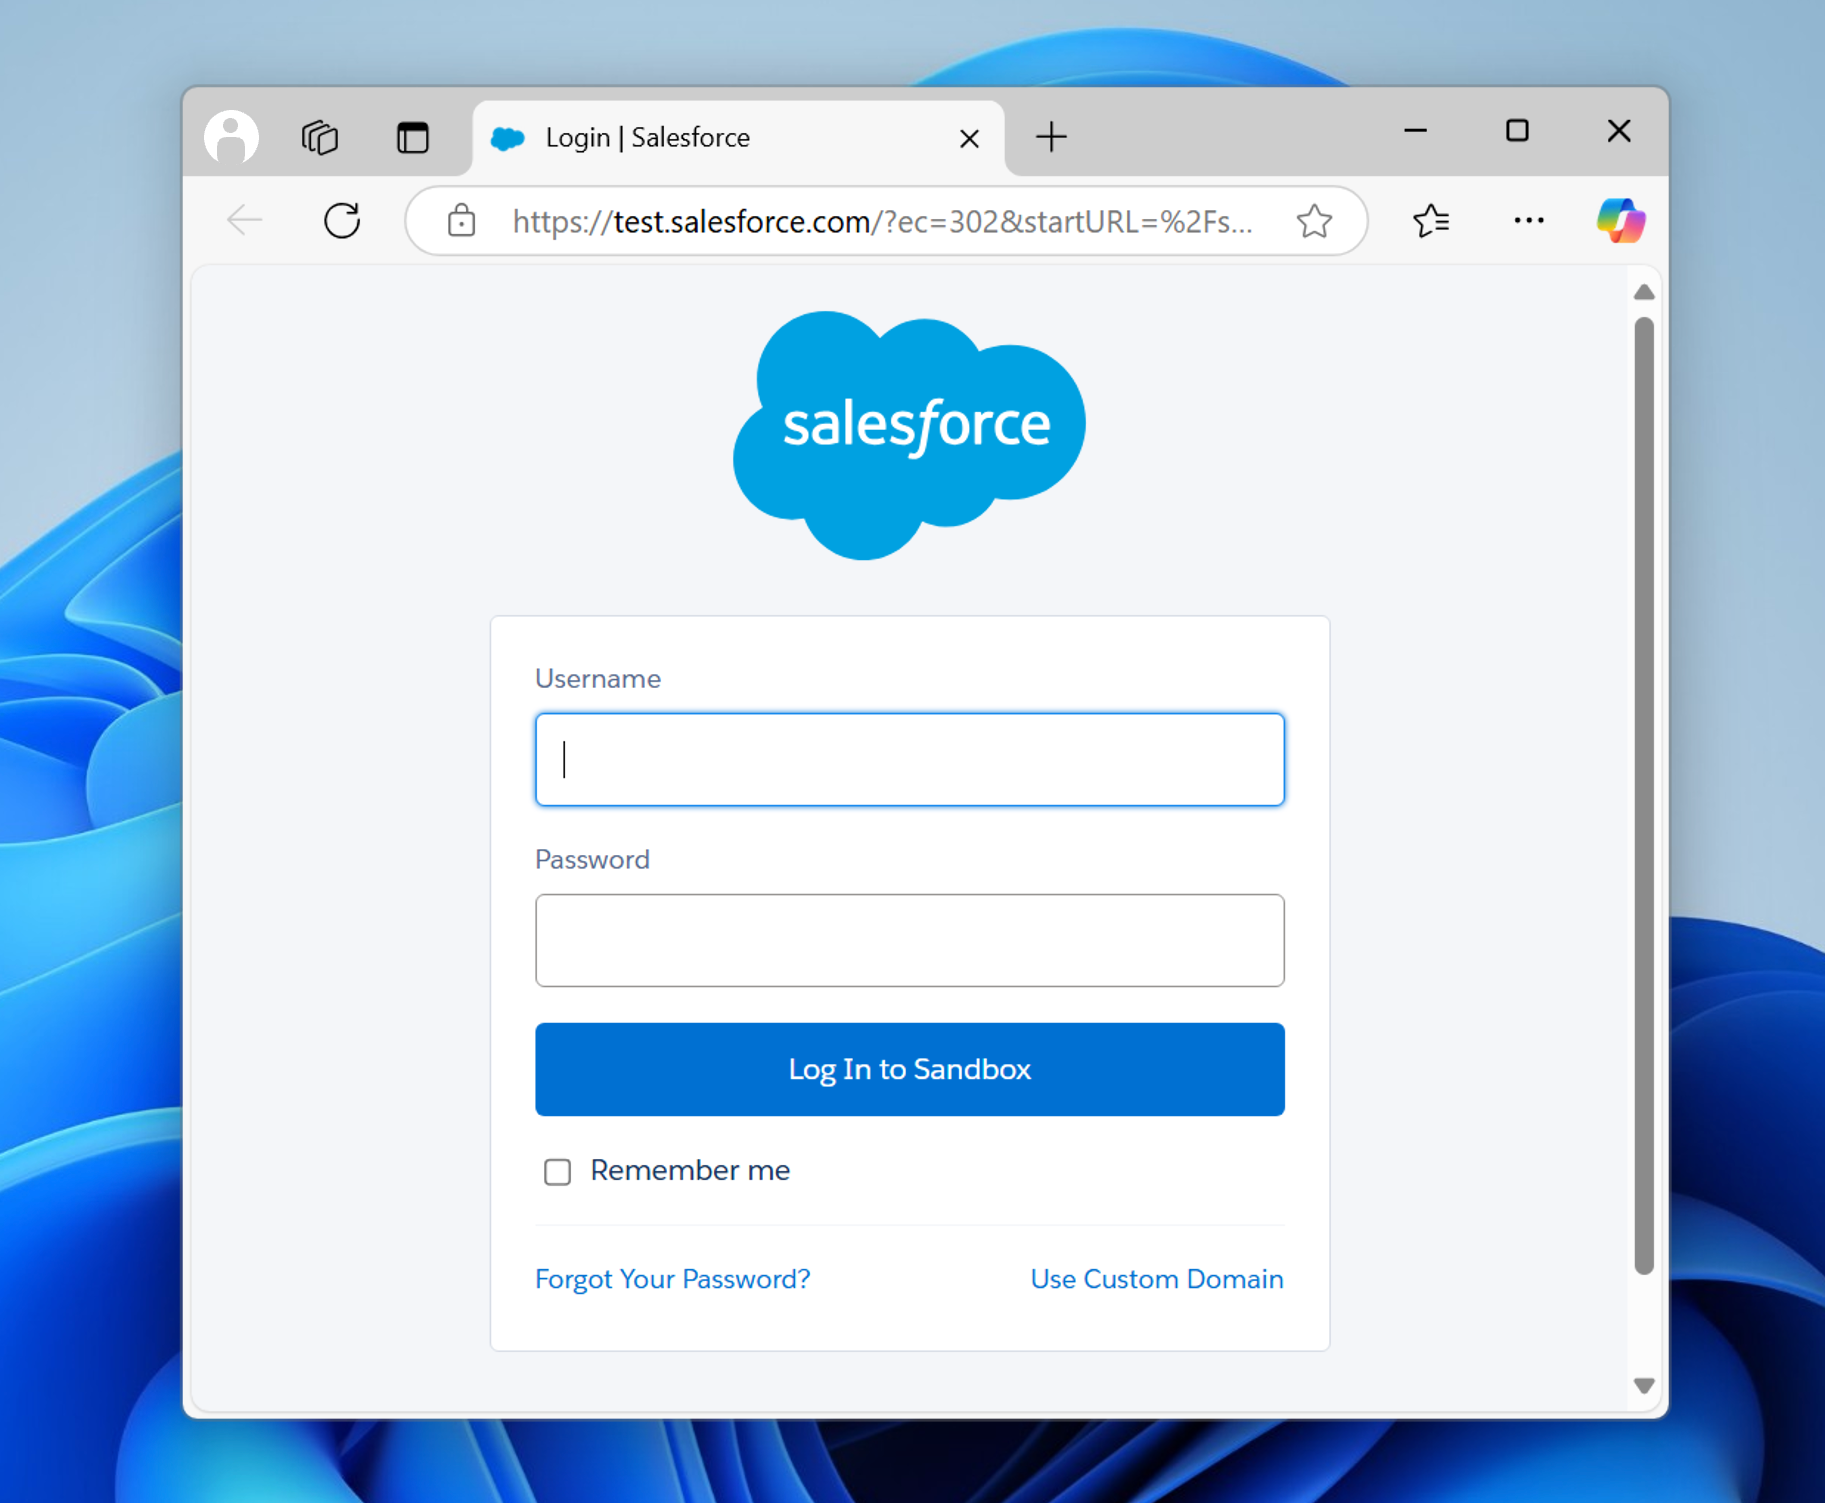
- Authenticate with your Salesforce credentials.
After signing in, the app remains running in the background and accessible from the app icon in the system tray even after ending a call or closing the window, and even if the user did not launch the app from a call. When the app window is closed, double-select the icon to reopen the app.
A one-time performance tuning process occurs after upgrading to Veeva CRM on Windows Desktop 22R1. The process occurs automatically after signing in to the upgraded app for the first time and can take a few minutes.
When switching between users, perform the following best practices to avoid errors:
- Sign out of the app and all Salesforce tabs in open browser windows
- Use the same browser across all users
- Ensure the user displayed on the authentication page matches the user whose credentials were used to sign in
Updating the App
The app checks for version updates every time it is launched, a user successfully signs in, and after every full sync. Full syncs occur:
- Daily
- When a user performs a manual sync
- When updates to records for the following objects are detected online:
- My_Setup_Product_vod
- Product_Group_vod
- Product_vod
App updates can be optional or required.
When users are not in a call or an event, an update alert displays when there is an app version update. If the app window is minimized or closed when there is an update, the window automatically reopens and displays in the foreground.
When users are in a call or an event, app update alerts for optional and required app updates do not display until the call or event ends.
If the update is optional, users can:
- Initiate call mode or join a call to hide the alert until the call ends
- Select Update Now to update the app immediately. The app quits and automatically relaunches after the update completes. Users do not need to sign in again. Any unsynced CLM tracking data is saved and syncs after the app relaunches.
- Select Update Later to update the app at a later time. The Update Now button in the media library menu and tray icon menu becomes available. When users are ready to update the app, select Update from either menu.
If the app update is required, select Update Now to update the app immediately. The app quits and automatically relaunches after the update completes. Users do not need to sign in again. Any unsynced CLM tracking data is saved and syncs after the app relaunches.
Syncing Content Updates
The first time a user signs in to the app, a full sync occurs to sync all of the content in the media library. The app runs an incremental sync for every subsequent signin. An incremental sync updates records for the following objects:
- Call2_Detail_vod – Metadata Only
- Call2_Key_Message_vod – Metadata Only
- Call2_vod – Metadata Only
- Clm_Presentation_Slide_vod
- Clm_Presentation_vod
- Directory_vod
- Key_Message_vod
- Message_vod
- Multichannel_Activity_Line_vod – Metadata Only
- Multichannel_Activity_vod – Metadata Only
- Multichannel_Consent_vod – Metadata Only
- Multichannel_Settings_vod
- My_Setup_Products_vod
- Product_Group_vod
- Product_vod
- Veeva_Settings_vod
- User
Incremental syncs are also triggered by updates to any of the following fields:
|
Object |
Fields |
|---|---|
|
Clm_Presentation_Slide_vod |
|
|
Clm_Presentation_vod |
|
|
Key_Message_vod |
|
The maximum frequency incremental syncs can be run is every five minutes. Users can override the five-minute waiting period by performing a manual full sync.
