

Managing Custom Pages in MyInsights Studio
To simplify the management and deployment of custom MyInsights pages, users can import and deploy all pages using MyInsights Studio, regardless of where the page was created. Custom- and Studio-created pages display in the Pages tab on the MyInsights Studio home page. Each type displays with its own icon type and is listed alphabetically.
You cannot edit custom MyInsights pages using MyInsights Studio, including Veeva-provided custom pages. You can only import and deploy them in MyInsights Studio. Only pages created in MyInsights Studio can be edited with MyInsights Studio.
.png)
Mass Importing Custom Pages in MyInsights Studio
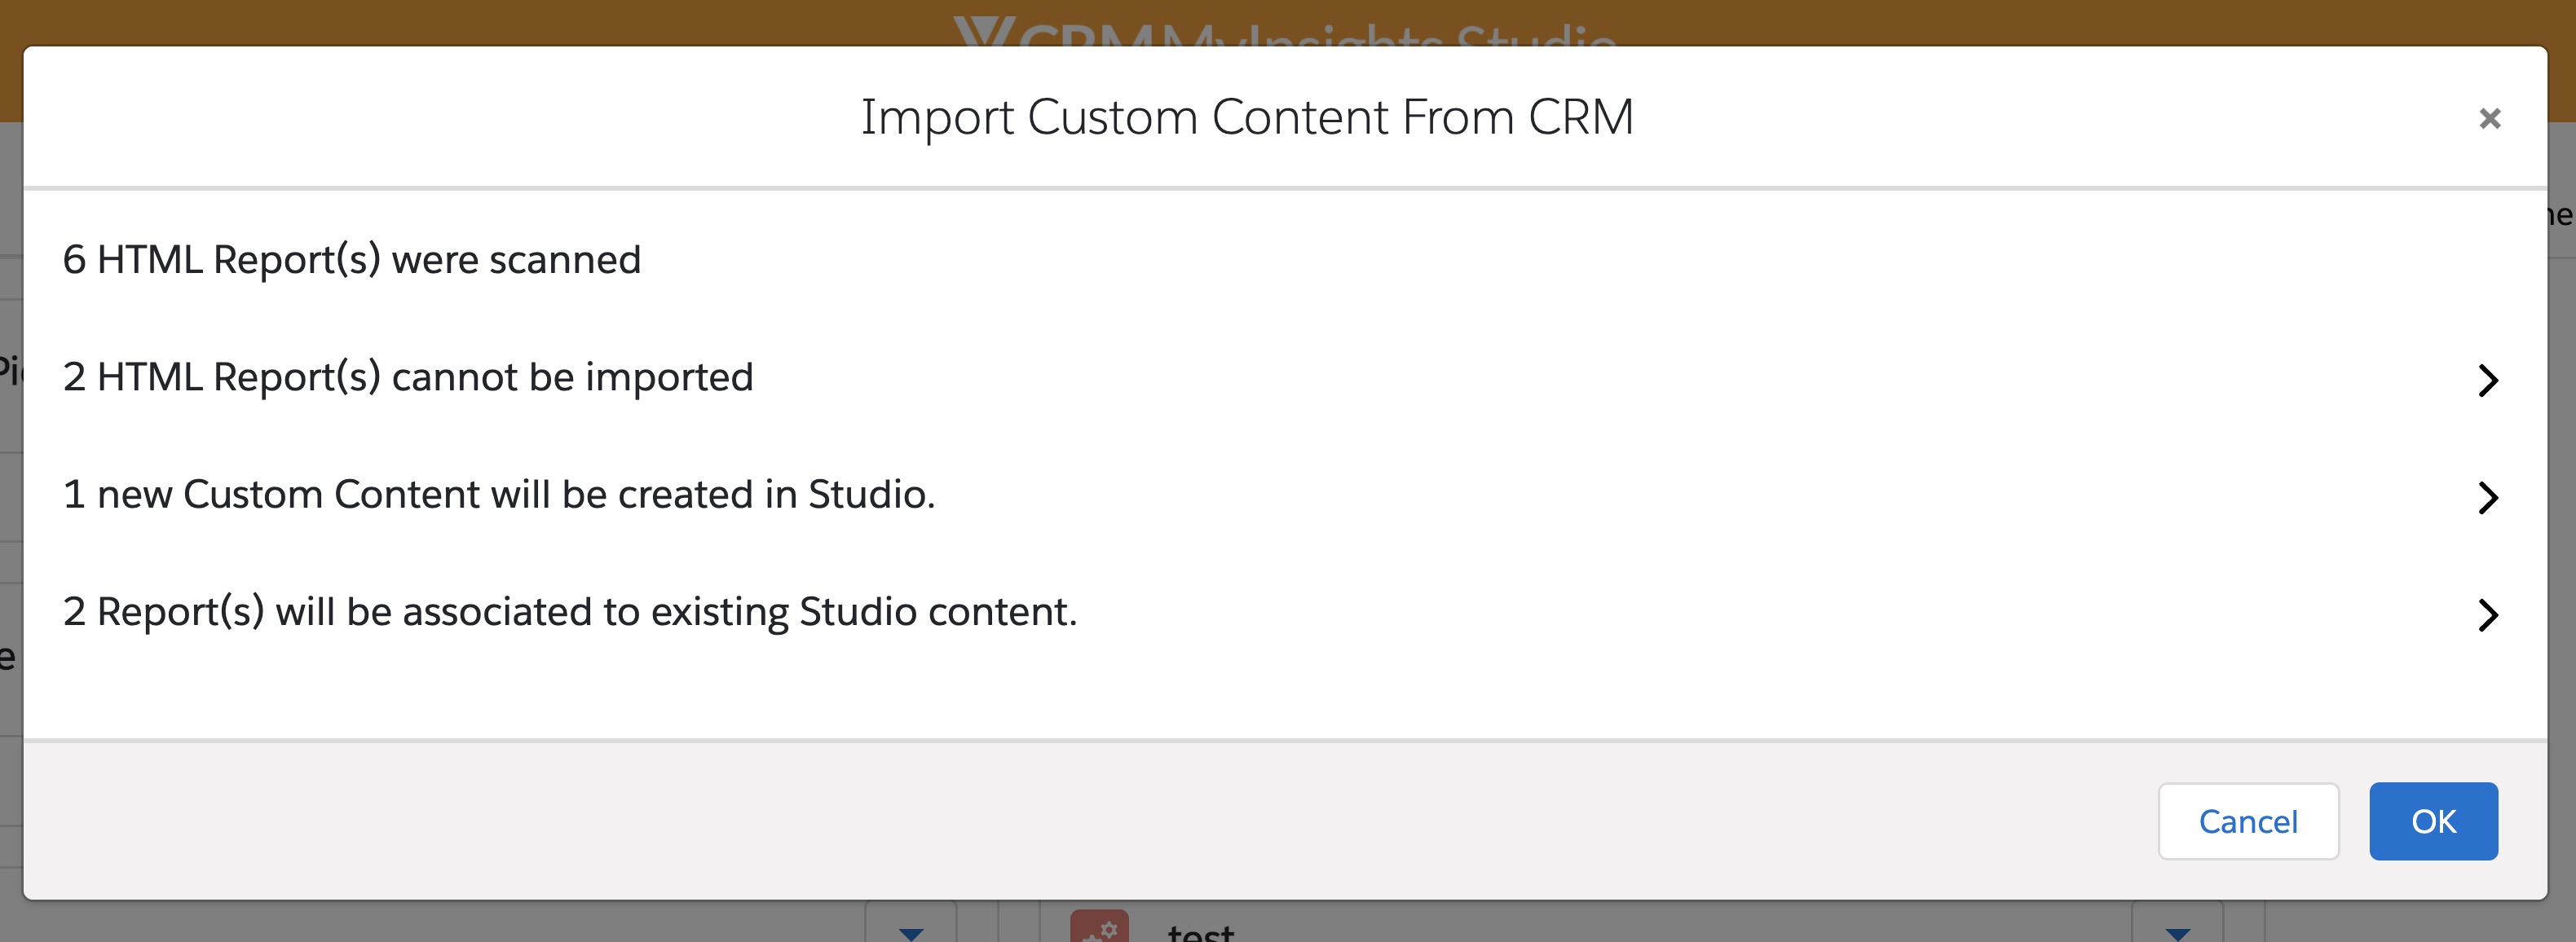
All custom pages are automatically imported when a new org is associated with a Studio domain. Custom pages from existing orgs already associated with MyInsights Studio can also be manually imported. During the import process, unmanaged HTML_Report_vod records in the active org are compared with existing pages in Studio and a summary of HTML pages scanned is generated for review.
To manually import all custom pages from the current org:
-
Select Import Custom Page from CRM from the New Page menu. A summary displays detailing the custom pages to be imported.
-
Select OK.
Uploading and Deploying New Custom Pages in MyInsights Studio
To upload a new custom file to Studio:
-
Select Upload New Custom Page from the More Actions menu.
-
Enter the page Name.
-
Select the compressed file to upload containing the content to be deployed. This file is set as the first version of the custom page.
-
Select OK. The Deploy tab opens.
To upload a new version of a custom file:
-
Select New Version from the More Actions menu.
-
Select the file to upload. Once uploaded, it becomes a new version of the custom page and the version number is incremented by one.
-
Select OK. The Deploy tab opens.
Custom pages are deployed the same way Studio-created pages are deployed. The Studio Version field indicates the version number of the deployed page and its status:
- Green check mark - what is deployed in CRM matches the indicated Studio version
- Red X - the active CRM attachment does not match what is deployed in CRM
.jpg)
