

Integrating CRM and Vault for Approved Email
Approved Email requires an integration with an instance of Veeva Vault in order to deliver approved content to end users.
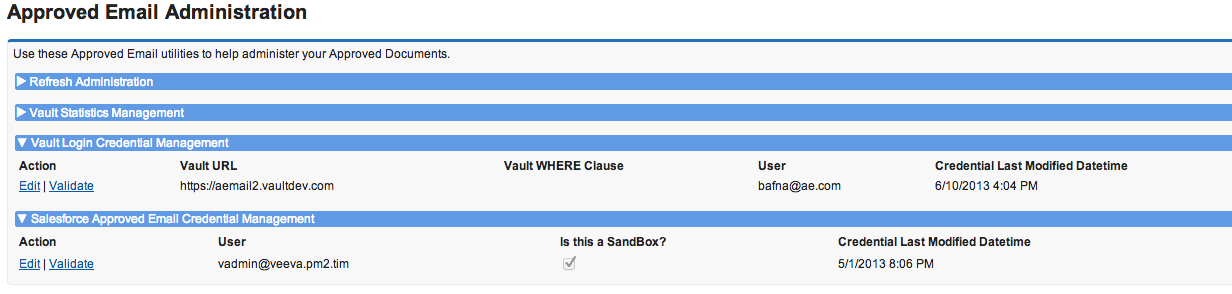
The Approved Email Administration Tab manages this integration and enables admins to manage the integration user, manage and validate Vault credentials, map Vault fields.
Vault API requests sent from CRM are monitored and limited to avoid interrupting integrations. Multichannel functionalities relying on the integration between CRM and Vault, including Approved Email, CLM, and Engage, send API requests to Vault and should not hit Vault API limits.
Approved Email pushes both Staged and Approved Documents into a CRM org. Only Approved Email Administrators can see the Staged Approved Documents.
Vault Login Credential Management
The Vault Login Credential Management section manages the Vault credentials for integration with CRM. Users can connect to multiple Vault instances, with each line representing a single Vault instance from which the integration pulls Vault Document metadata into the Approved_Document_vod object in CRM.
Admin users must supply a Vault username and password for each Vault instance, and this user must have the Vault User Type of System Admin. Select Validate next to the credentials to confirm their authentication and create a connection to Vault.
The Vault integration user must be assigned to a Vault Security Policy (Users->Settings->Security Policy) that has a Password Expiration value of No Expiration. If the password ever expires, the integration will fail. Ensure that the Vault Integration User has access to Events API in Vault.
The Vault URL endpoints and optional Vault WHERE clause display in this section.
The Vault authentication credentials are used for several Approved Email integration processes. All actions are fully audited in the Vault activity logs.
- Query Vault during the Incremental Refresh of Vault metadata into the Approved_Document_vod object
- Query Vault during the Full Refresh of Vault metadata into the Approved_Document_vod object
- Query Vault to validate outbound Email Templates, Email Fragments and all referenced Vault documents are in an approved or steady state prior to sending an email
- Query Vault to pull Vault document events (views and downloads by email recipients) into the Email_Activity_vod object
- Write events related to the Incremental Refresh and Full Refresh processes back to the Vault activity log. This provides an audit trail within Vault that lists all SFDC orgs that reference each Email Template or Email Fragment

Managing the Integration User
The Veeva Approved Email Credential Management section enables admins to define an integration user whose credentials are used to integrate with Vault.
To define the integration user:
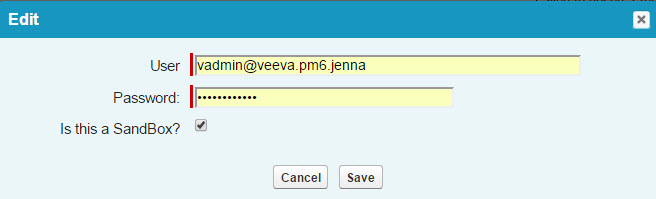
- Select Edit under the Vault Login Credential Management section of the Approved Email Administration tab.
- Enter the credentials for the integration user account.
- Indicate whether the account is a sandbox. (For sandboxes, the SFDC login URL is https://test.salesforce.com).
- Select Submit.
-
Select Validate to confirm the credentials are authenticated against SFDC.
- Verify the User value in the Salesforce Approved Email Credential Management section matches your Veeva CRM user name.
- Verify the Is this a SandBox field is selected if appropriate.
- Select Save.
- Select Full Force Refresh to retrieve documents from Vault.
- Select Pull Vault Statistics to retrieve Document Views and Downloads from Vault.
Mapping Vault Fields to CRM
Users can map custom fields and VOF (Vault Object Framework) records to CRM fields using the CRM-Vault Integration. An example would be mapping a custom field on an Email Template in Vault to a custom text field on Approved Document records in CRM.
Custom mapping is available by default if the integration is configured. Integration users can access the Field Mapping page for each Vault instance by selecting View Map under the Vault Login Credentials section of the Approved Email Administration page. The standard Approved Email fields and optional field mappings display for the Email Template and the Email Fragment.
Integration users can edit optional field mappings by selecting Edit Mapping on this page. A dropdown displays under the Vault API Name column in the Optional Approved Email Fields section that contains a list of available Vault API names. By default, the integration maps fields between CRM and Vault that have matching case insensitive API names (i.e. franchise__c and Franchise__c).
Selecting Do not map from the drop-down prevents the Vault field values from populating into CRM. This should be used when a mapping is no longer relevant to the integration but the fields are still accessible in Vault and CRM. After selecting the desired Vault API names to map to the CRM fields, users should select Save Mapping.
Picklists are matched by comparing the picklist label in Vault to the picklist API name in Veeva CRM.
Defining Vault Endpoints and Where Clauses
To more efficiently define Vault Endpoints and Where Clauses, integration users can manage the information on the Approved Email Admin page. Previously, this information was defined using Veeva Messages referenced in Approved Email Custom Settings.
Admins do not need to make any changes to enable the migration from Veeva Messages to Vault Endpoints and Where Clauses. Once an org has been upgraded to the latest version of Veeva CRM and either an initial process schedule has run or an Admin runs an incremental/full force refresh, the migration takes place automatically if the CRM integration user's credentials are valid. After the migration, the Veeva Messages are no longer used for Approved Email Custom Settings.
To define Vault Endpoints and Where Clauses:
- Access the Approved Email Admin page.
- Navigate to the Vault Login Credential Management section.
-
Select New to add a Vault Endpoint.

-
Define the Vault DNS, the user name, the password, and the Where clause, if any.
Users cannot use the status__v Vault field in the Where clause because status is already filtered by default. Users are already prevented from sending emails that are not in an Approved State, so it is not necessary to create a Where clause for this purpose.
- Select Save. The user name and endpoint display on the user page.
- Select Validate to confirm the credentials have been established.
To remove a Vault Endpoint, select the Delete link next to the vault you want to remove.
The Salesforce integration user's credentials must be valid for the user to add and access Vault endpoints.
Pulling Approved Email Content into CRM
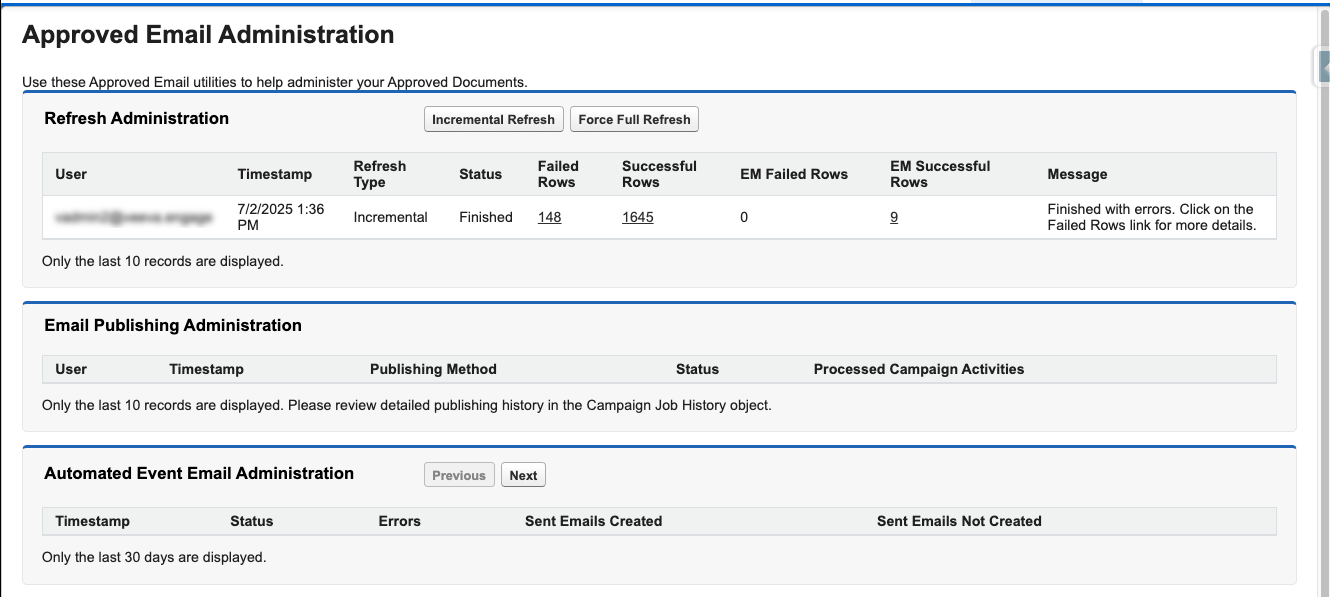
The Refresh Administration section is used to pull content from Vault into Veeva CRM. The content is synced from Vault using the following refresh processes:
- Incremental Refresh - Pulls documents modified since the last refresh from Vault into CRM. This is the same process executed by the scheduled task in the Multichannel Scheduler. It should be used when documents in Vault are in a steady state (i.e., Approved)
- Force Full Refresh - Pulls all documents from Vault into CRM. This is typically used in the early stages of implementation or for troubleshooting.
The Refresh Administration section displays the success and failure of the last ten refresh processes.
Admin users should never manually update or insert content into the Approved_Document_vod object. Users should never have access to a native SFDC tab for this object unless they are Approved Email Administrators who want to validate content synced from Vault.
Error Handling During Sync
If an error occurs during the sync process (Incremental or Force Full Refresh), for example, a mapping issue for a particular document, the error is logged, and the sync process continues to update the remaining documents. This ensures that an error with a single document does not prevent the successful synchronization of other documents. Error messages are available in the log for review.
To download the log, select the Failed Rows link in the Refresh Administration section of the Approved Email Administration page.
Vault Statistics Management
The Vault Statistics Management section allows users to pull email activity records from Vault into CRM. Vault is the system of record for email activities such as opens, views, click throughs, and downloads for all Vault documents referenced within Email Templates and Email Fragments.
For example, when an email recipient selects the Download button on the Vault viewer or an external link, Vault captures the activity. After syncing from Vault, these activity statistics are inserted into the Email_Activity_vod object in CRM.
To run the process, select Pull Vault Statistics. For more information on Veeva Process Scheduler tasks for Approved Email, see Scheduling the Veeva CRM-Vault Integration Process for details).
Only click events and the target URL of the click-through are captured for links that point to documents hosted outside of Vault.
Viewing Email Engine Status
Selecting View Email Engine Status opens an external page that displays the current status of the Mailgun engine and any incidents reported.
See Setting up a Sending Domain for more information on managing the Email Engine.
Viewing Email Domain Status
Customers must create Domain Name Status (DNS) records, for the email domain they use to send Approved Emails. The Email Domain Status section enables Admins to easily check if DNS entries are set up.
For example, Amy Brown notices an email is in Sent status for an unusual amount of time. She consults the Email Domain Status section of the Approved Email Administration tab and notes the DNS record for the email domain has not been created.
Salesforce Credential Management
Approved Email admins should specify a separate integration user that the Approved Email process will run under. There is no limitation on the type of user that can be used for this process as long as the basic CRM and Approved Email Administrator permissions are set and the user has access to the force.com API.
The SFDC integration user Profile must have the Password Never Expires field selected (set to true). If not, the Veeva Multichannel engine integration will fail.
To setup your Approved Email integration user:
- Click on the Approved Email Administration tab.
- Click Edit under the Salesforce Approved Email Credential Management section.
- Enter the SFDC credentials for your SFDC account.
- Select if this is a Sandbox, if you are using a sandbox. (For sandboxes, the SFDC login URL is https://test.salesforce.com).
- Click Submit.
- Click Validate to confirm you can authenticate against SFDC with these credentials.

Frequently Processing Scheduled Emails
Some customers require emails to be processed more frequently. A setting allows Scheduled emails to be processed every 10 minutes.
This option is only available to the production environment, not sandbox environments.
Configuration
- Navigate to the Approved Email Administration page.
- Select the Enable Scheduled Email Processor check box.
If the check box is selected and the Veeva Process Scheduler is configured for Approved Email, the Scheduler processes all sent email records in the Scheduled status every 10 minutes. The frequency of this job is not configurable.
A row does not display in the Approved Email Administration page after this job completes.
Mapping Vault fields to CRM
Configuration
To map Vault fields to CRM:
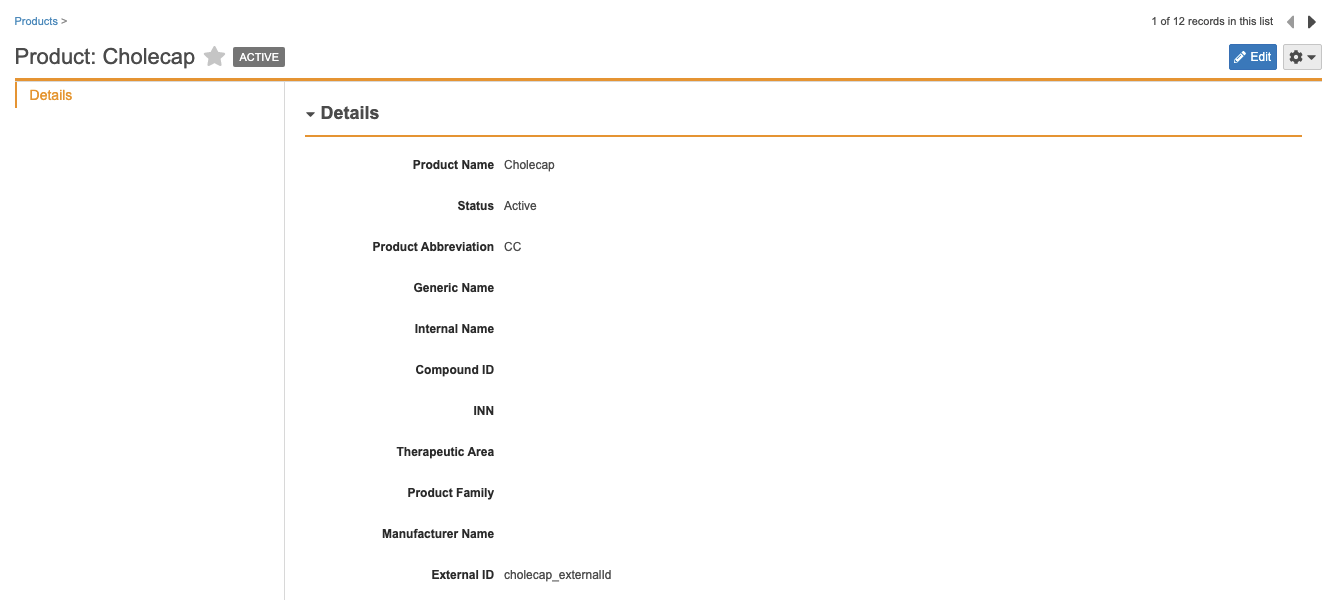
- Navigate to the Product Catalog in Vault: Business Admin > Products.
- For each product in the Vault Product Catalog, populate an External Id corresponding to what you populated in the CRM app for that specific product. This will be used to specify the Product references on the Approved Documents refreshed from Vault.
This custom mapping is available by default if the integration is configured. When integration administrators open the Field Mapping page, which is available for each Vault connected to the CRM org, as a link - 'View Mapping' in the Approved Email Administration page, a new Edit Mapping button displays. Selecting the button opens the Field Mapping in edit mode. In edit mode, mappings can be updated by making a selection from the Vault API Name drop down, and selecting Save Mapping. You need to review and save eligible mappings to ensure they are correct.
Select the desired Vault API Name you want to map to the CRM field. By default, the integration maps fields between CRM and Vault that have matching case insensitive API names (i.e. franchise__c and Franchise__c). Select “do not map” if the API names match between the Vault and CRM fields but you do not want values from the Vault field to be pulled into CRM. “Do not map” should be used when a mapping is no longer relevant to the integration but the fields are still accessible in Vault and CRM. Select the blank entry if you do not want to make any other selection.
Scheduling the Integration Process
Admin users should schedule the incremental refresh process and other Approved Email processes to execute at least once a day. To schedule these processes, navigate to the Veeva Process Scheduler and select Run next to Approved Email Processes. This initiates the following processes:
- Pull Vault Statistics – Displays the email actions (such as views and downloads) of Vault documents referenced in Approved Emails. This process inserts the activity records into the Email_Activity_vod object
-
Retry Email Send – Retries sending email that is not sent. This is typically because of a failed connection to the email engine. Unsent emails in the Sent_Email_vod object are placed into Saved status.
If the Email Template, Template Fragments, or Email Fragments are not in a steady state in Vault, the email is not sent and the status sets to Failed. If any associated Related ISI, PI, Piece or other document in a sent email's Email Template, Template Fragments, or Email Fragments are not in a steady state in Vault, the email is not sent and the Status_Details_vod field stamps with the information needed to address the issue. Every time the job runs for the next four days, the job attempts to resend the emails containing these documents. After four days of unsuccessful trying, the status sets to Failed and no further attempts are made.
- Retry Inserting Email Engine Activities – Retries inserting any email activity into the Email_Activity_vod object
- Fetch Approved Document Changes – Uses the incremental refresh process to send any Vault Document metadata changes that have not synced to Veeva CRM
See Process Scheduler for more information.
