

To configure Contracts:
- Set object level permissions for all three Contract objects.
Contract Administrator should have the following permissions:
|
Object |
Read |
Create |
Edit |
Delete |
|---|---|---|---|---|
|
Contract |
X |
X |
X |
X |
|
Contract Line |
X |
X |
X |
X |
|
Contract Partner |
X |
X |
X |
X |
Contract Administrators must have edit permission to Contract_Line_vod and FLS edit permission to the Lock_vod field on both Contract_vod and Contract_Line_vod to be able to activate Contracts.
In addition to FLS Edit permission to the Status_vod field on the Contract object, the user should have the following permissions:
|
Object |
Read |
Create |
Edit |
Delete |
|---|---|---|---|---|
|
Contract |
X |
|
|
|
|
Contract Line |
X |
|
|
|
|
Contract Partner |
X |
Optional |
X |
Optional |
- Grant FLS to the Agreement_vod field on the Contract_vod object to display the New Contract button on the Account Detail page.
- Set record type permissions.
- Contract Administrator – All record types on all three objects for the desired create permissions (Listing_vod for listing contracts and Sales_vod for sales contracts)
- Rep – Record type access on Contract Partner object (Listing_vod for listing contracts and Sales_vod for sales contracts)
- Map page layouts to record types on all 3 objects:
- For Contracts, Contract Lines, and Contract Partners, there are out-of-the-box page layouts that correspond to Sales and Listing contracts
- If it is not already configured in your org, set page layout assignments so that Sales_vod record types use the Sales_vod page layouts and Listing_vod record types use the Listing_vod page layout
- Populate the DISCLAIMER Veeva Message in the Contracts category with a default contracts disclaimer message.
- Select the Active check box for the Contract_vod, Contract_Line_vod, and Contract_Partner_vod VMobile Object Configuration records.
- Provide FLS Edit privileges to Contract Admin and Rep users to the Contract lookups on Order_vod and Inventory_Monitoring_vod.
- Provide FLS Edit privileges to Contract Admin users to the Contracts lookup on Pricing_Rule_vod (if associating contracts with pricing rules).
- Provide FLS visibility to Reps to the Contracts lookup on Pricing_Rule_vod (if associating contracts with pricing rules).
- Add the Contracts lookup to the relevant page layouts in the Order_vod, Inventory_Monitoring_vod, and Pricing_Rule_vod objects.
- Schedule the VEEVA_OM_CONTRACT_BATCH process to run at the appropriate time.
- Add the Contract_Partner_vod related list to the desired Account page layouts to enable certain users to see and create Contract Partner records from an Account detail page. The Contract related list is not intended to be added to Account page layouts. You may need to create profile-specific page layouts.
- Enable Visualforce page access to the following pages:
- Contract_View_vod
- Contract_Line_View_vod
- Contract_Partner_View_vod
- Contract_Partner_Edit_vod
Contract_Template_Selector_vod
- Remove the Activate buttons from the Contract and Contract Partner page layouts for users who do not have permission.
- Add the Unlock button to the Contract and Contract Partner page layouts for users who have permission.
Signature Page Configuration
- If you would like to require doctors to select "I have read and understood" before signing, add the Acknowledgement_vod field to the contract partner layout
- You can block sections on the page layout from showing up on the signature screen by using the --np section signal in the Section Name
The --np section signal is visible on Contract and Contract Line edit pages.
-
An image can be added to the signature screen. Under the Documents tab, upload an image to the images folder using the name order_logo.XXX, where XXX is the file extension (.gif, .jpg, and .png are supported). In the keyword field, add the text Offline.
GIF files do not animate.
- Company identification fields can be configured to display on the signature page. The COMPANY_FIELDS_FOR_PRINT Veeva Setting points to a Veeva Message where the company information to display on the signature page is defined. By default, this setting points to the COMPANY_FIELDS_FOR_PRINT;;ORDER_MANAGEMENT Veeva Message.
The COMPANY_FIELDS_FOR_PRINT;;ORDER_MANAGEMENT Veeva Message renders HTML only. Pull-in field values cannot be used.
Custom z-vod Fields
Fields from a contract header can be pulled in to an order header. This is useful if you want to display and store information from the contract directly on the order.
Using z-vod fields:
- Create a new field with the desired name on the Contract_vod object.
- Create another field of the same type with the same name, prefixed by the text "zvod_C_" on the Order_vod object. For example, if you create a text field with the API name Customer_Group_c on the Contract object, you would create a text field with the API name zvod_C_Customer_Group_c on the Order.
When the contract lookup is populated on the order, the value from the contract is be stamped into the zvod field on the order.
Mapping fields from Listing Contract Lines to Inventory Monitoring Lines
To create contract values for inventory attributes and display the contract targets on inventory monitoring lines, fields must be properly mapped between the two objects.
The proper naming convention is to create a custom field on the Inventory_Monitoring_Line_vod object and then create a custom field on the Contract_Line_vod object with the same API name prefixed by "IM_".
For example, if the contract includes a 10% discount on a pharmacy shelf, create a percentage field with the API name Discount_Percent_c on the Inventory Monitoring Line object, and create another percentage field with the API Name IM_Discount_Percent_c on the Contract Line object.
When the user enters an inventory monitoring for the product from the contract line, this target value displays in the UI.
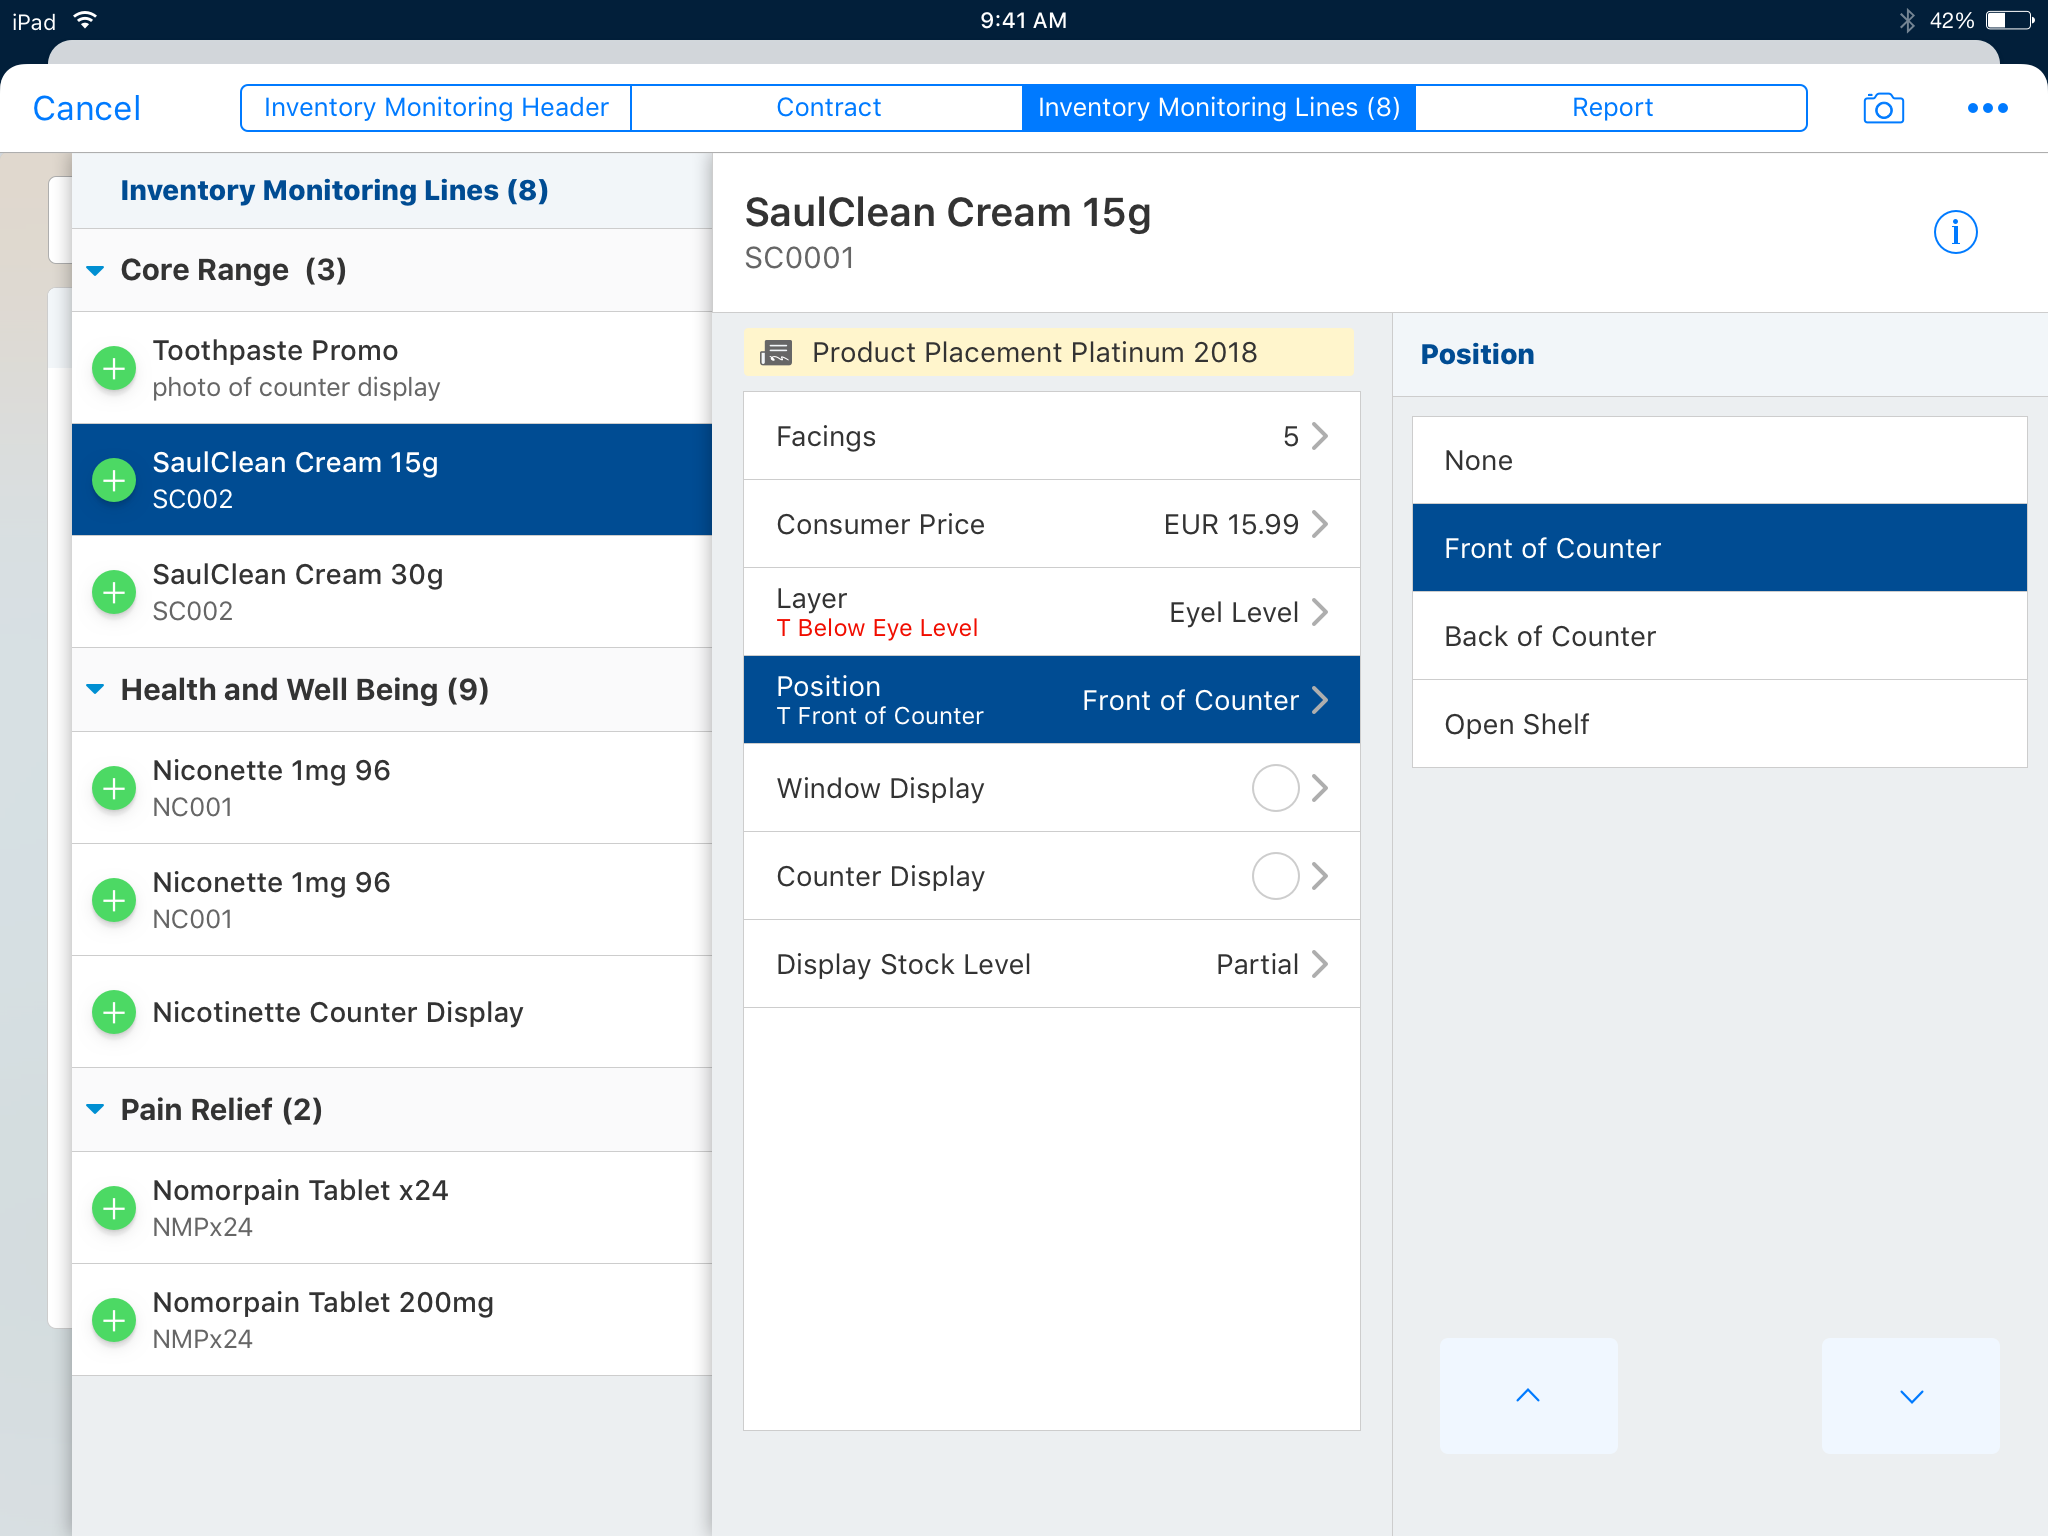
The "T" label stands for target and can be changed by modifying the INVENTORY_CONTRACT_TARGET Veeva Message.
The target is red unless the entered value matches the target value. If creating picklist custom fields, ensure the picklist values also match between the two custom fields or the target will continue to display in red.
